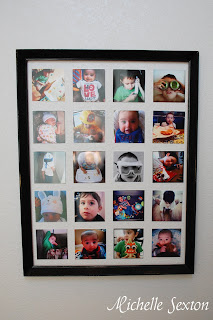
So many photos and not enough ways to display them? Wait no more, friends. Behold, I bring you another Instagram project! Rejoice.
This photo grid is a fun take on those classic framed photo collages that everyone seemed to have in their house when they were growing up. You know the kind with matte cut-outs in circles, squares, and rectangles? That was so 20 years ago..oh wait...you didn't have one in your house? Never mind. Apparently it was just my house. ;)
Anyway, lets just skip the awkward matte cut out shapes and tape them straight to the wall. Why not?
Supplies Needed:
- Instagram Photos (I used 20 photos, 4x4 size)
- empty frame (without backing or glass)
- masking tape
- nail
- hammer
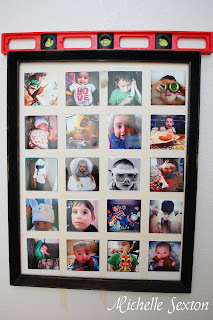
- bubble level
I made this collage by starting at the top left corner, working my way across from left to right and then moving down.
Choose a spot on the wall to begin your collage and mark it with a pencil
Add masking tape to the back of the first picture and place it over the marked spot on the wall.
Using a bubble level, check to see that the photo is straight, vertically and horizontally. (This step is important - an empty frame will not hang properly over a crooked photo grid.)
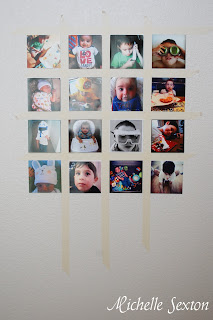
Once the photo is straight, tear two long strips of masking tape. Place one strip above the photo, and the other strip to the right side of the photo, making a "T" shape. The edges of the tape should fit snugly against the photo. Check each tape strip with a leveler to assure straight lines. Adjust tape if necessary. The masking tape creates a temporary border around the photos to assist with even spacing and straight lines.
Place another photo against the edge of right side of the vertical tape strip, as pictured above. Be sure that the top edge of the photo lines up with the horizontal tape strip above as well. Add another strip of tape against the right edge of the second photo. Be sure that tape strips are straight. Place another photo.
Repeat the photo/tape strips until you have completed the first row of photos.
To begin a new row, place a long strip of tape below the first row of photos. Add a photo below each photo in the first row.
Every so often, use the level to double-check the straightness of the grid. Make adjustments, if necessary.
As the grid progresses, the photos will be easier to place without double checking the straightness.
Once you finish, depending on the number of photos used, the photo grid will look something like this:
At this point I know you are super-anxious to rip off those tape strips, but there's a couple more important steps to do.
Hammer a nail into the wall above the photo grid at the center. (check your frame to see how your frame hangs. I didn't use any measurements here. I just "eyeballed" it.)
Hang the frame over the taped photo grid and place the leveler on top of the frame. Adjust the frame so that it hangs evenly over your photo grid. If the frame is level and the grid somehow isn't, pull off the frame, and adjust pictures until level. Re-hang the frame and check again. (If you checked the straightness of the photos throughout the taping process, the grid should come out even.)
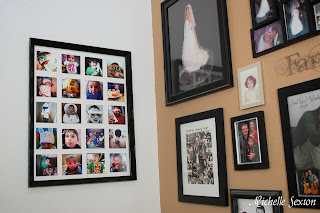
Once you are happy with frame over the photo grid, pull off that tape, and stand back to admire your handiwork.
Not too hard, right?
Here's a couple of tips -
- I would recommend trying a shaped grid inside of the frame, like maybe an "x" or even a heart. However, since I literally ordered 87 Instagram photos, I wanted to use as many photos in this grid as possible, which is why I chose the ever-so-standard rectangle shape.
- This project takes a small amount of patience, but not too much. The best way to get straight and even photos is to start with the first photo you place. Make sure it's level, both vertically and horizontally. If this photo is not straight, the rest of the grid will come out crooked.
I have one more fun Instagram project coming soon. Pretty sure this next one is one of my favorites.
So Here's My Life
The things we make,
the food we eat and
the shenanigans in between.
A blog about making things by
MICHELLE SEXTON


3 comments:
Stopping by from What I Whipped Up. Love the frame idea! That's cool, to be able to make any layout you want!
Loved it! My comment would have been longer but I have been fighting with the captcha!
Congratulations! You've been featured on Wicked Awesome Wednesday! Your framed piece looks professionally produced! Thank you for sharing and feel free to stop by the website and pick up your "I've Been Featured!" button.
Post a Comment