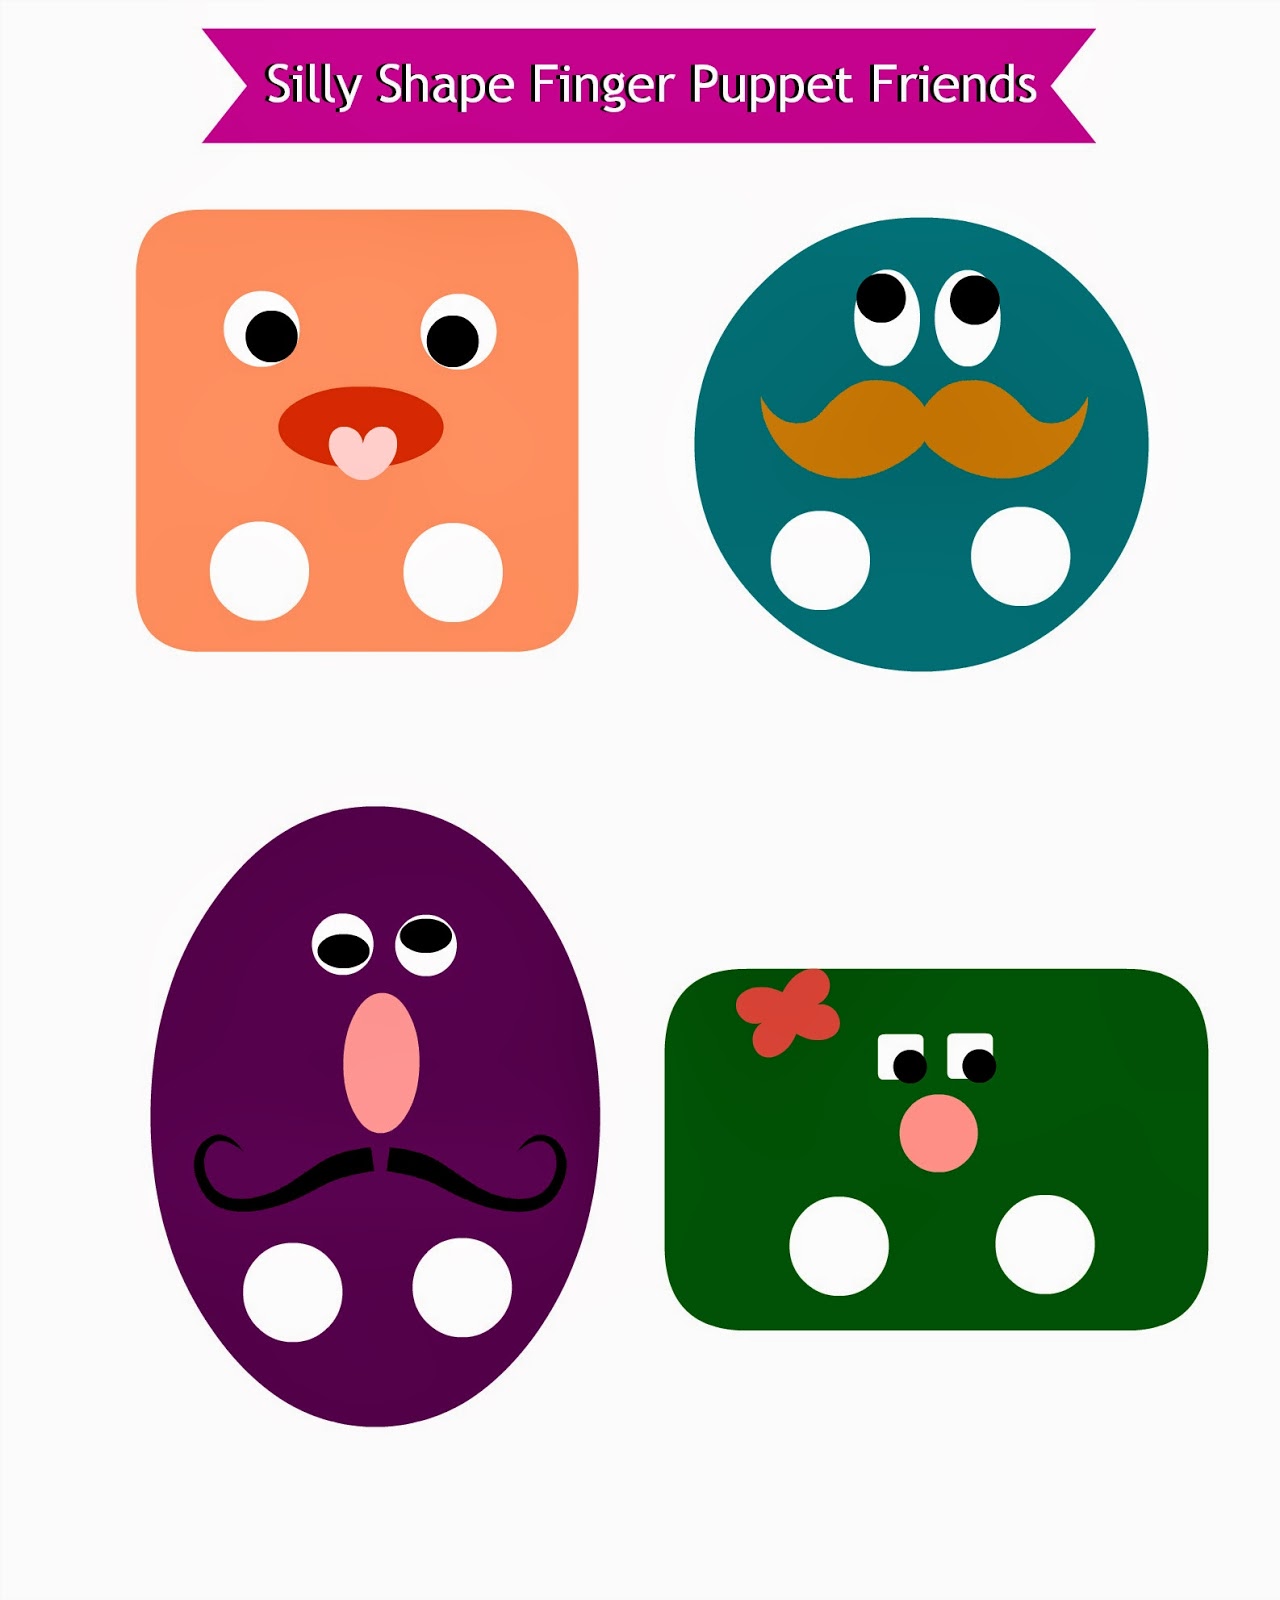
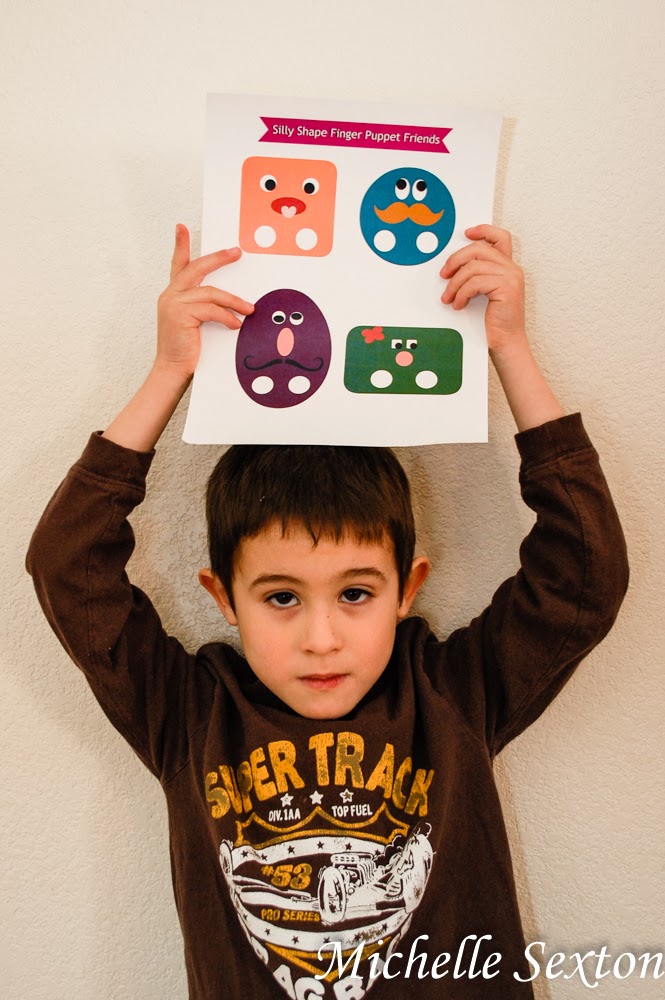
"I hate free stuff." Said no one, ever. Yeah, that's right. Why? Because everyone loves free stuff. I know you do, too....so, go ahead, raise your hand and admit it. You know what I love even more than free stuff? Free stuff for kids. What? Seriously? Oh yes, and here's why - every now and then, we're all prone to a bad day with our kids. Maybe everyone is going a little stir crazy after being locked in the house for a couple of days due to illness or bad weather. Or, perhaps you just need a little peace and quiet so you can finish fixing dinner before 9 pm. Whatever the circumstance, it's always nice to pull out a printable activity to keep the munchkins entertained. Yeah, it is. Actually, I've decided I like free stuff so much, I dedicated a whole entire pin board to collect Free Printables. (It's still new, so don't judge me for not having 4,531 pins on it yet.) So, ANYWAY, in order to feed my printable obsession (and, of course, to keep my kids entertained), I made this fun little finger puppet printable. The finger puppet printable was a huge hut in this house. Even Cheese got involved in the finger puppet playtime. (So incredibly adorable). I highly recommend printing these out for your household, too.
By the way, print the finger puppets onto card stock for the best results.
Hand out this cute printable to the munchkins.
And enjoy a little peace and quiet :)
Thursday, January 30, 2014
Tuesday, January 28, 2014
Safety Pin Bib Necklace Tutorial
Do you remember the grunge phase of the 90's? I do. I was in high school back then. And, I was on top of the world...or so I thought. I rocked flannel shirts and combat boots...but my mom didn't let me wear torn jeans...so, I guess I wasn't that hardcore. Yeah...uhh...so, I have a craft to share. It's a safety pin bib necklace- with a hint of 90's grunge...but with a more grown-up taste. Hopefully. Wait! Don't leave yet! I know you're not ready to repeat the 90's grunge quite, yet (even though I've seen a recent appearance of combat boots and overalls), but stick around for a couple more minutes so I can show you how fly this bib necklace came out. (Did you pick up on that 90's slang I just used there?) Just don't tell anyone you're going for the 90's grunge, instead you're really more about rockin' the whole artistic appearance. They will definitely believe you.
Ok, so back to the safety pin bib necklace. Here's what you're going to need:
Supplies:
- a box of safety pins, 100 count or more (I found gold ones in the craft section of Walmart)
- about 12 inches of black satin ribbon (1/4 wide)
- scissors
To start the necklace, create a safety pin "chain" by connecting several pins (about 15 - more or less) together. Link each pin together through the "eye" at the top of the pin or the "loop" at the bottom of the safety pin.
Next, thread the strand of ribbon through the middle of each safety pin link and center the "chain" on the ribbon strand. Be sure that the ribbon lays flat (not twisted) after threading through the chain. The threaded chain serves as the base of the necklace.
Tie a knot with the ribbon around both safety pins on the ends of the chain to keep the chain extended (not pictured).
Fasten safety pins beneath the threaded chain until you have the desired shape. For the best results, each pin should be fastened either through the "eye" or the "loop" of the safety pin. This isn't required, but I've found that this is the easiest way to maintain the shape of the bib. Work towards an even and balanced bib shape.
I recommend tying off the ends of the necklace and draping the necklace over your knee as you fasten the pins in order to keep the necklace still.
There's a little bit of trial and error and removing and refastening pins that goes with this project as you determine the desired shape. This is an easy project, but it takes a small amount of patience (but just a small amount) as you construct the bib.
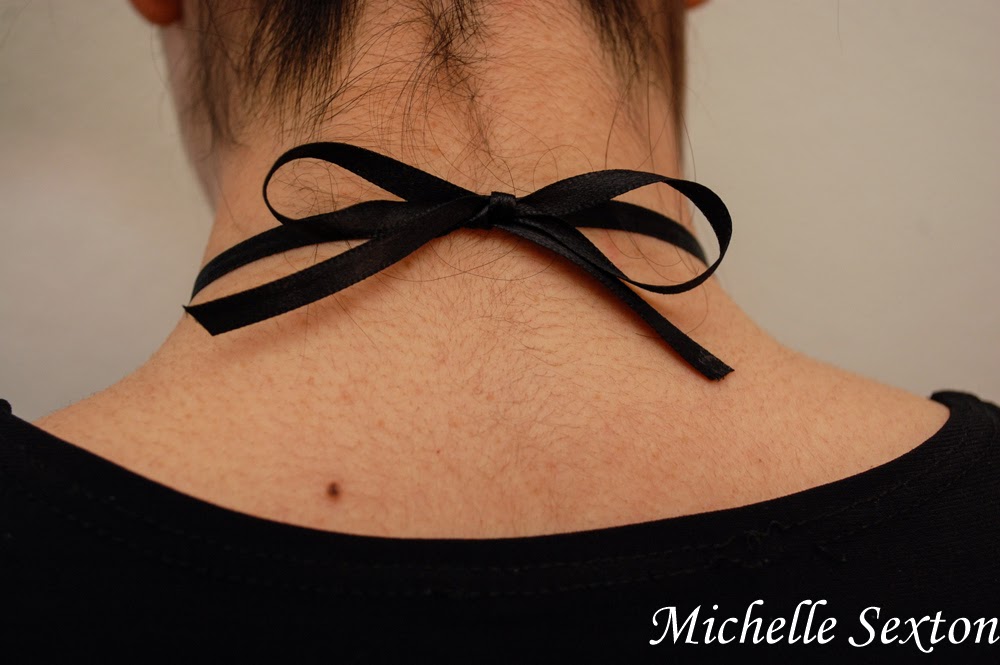
To wear this necklace, tie the ends of the ribbon into a bow in the back.
Once completed, wear this amazing necklace with pride. Each time you receive a compliment, reply, "Thanks, I made it." :)
Ok, so back to the safety pin bib necklace. Here's what you're going to need:
Supplies:
- a box of safety pins, 100 count or more (I found gold ones in the craft section of Walmart)
- about 12 inches of black satin ribbon (1/4 wide)
- scissors
To start the necklace, create a safety pin "chain" by connecting several pins (about 15 - more or less) together. Link each pin together through the "eye" at the top of the pin or the "loop" at the bottom of the safety pin.
Next, thread the strand of ribbon through the middle of each safety pin link and center the "chain" on the ribbon strand. Be sure that the ribbon lays flat (not twisted) after threading through the chain. The threaded chain serves as the base of the necklace.
Tie a knot with the ribbon around both safety pins on the ends of the chain to keep the chain extended (not pictured).
 |
| starting to take shape... |
 |
| progression - still adding safety pins |
Fasten safety pins beneath the threaded chain until you have the desired shape. For the best results, each pin should be fastened either through the "eye" or the "loop" of the safety pin. This isn't required, but I've found that this is the easiest way to maintain the shape of the bib. Work towards an even and balanced bib shape.
I recommend tying off the ends of the necklace and draping the necklace over your knee as you fasten the pins in order to keep the necklace still.
There's a little bit of trial and error and removing and refastening pins that goes with this project as you determine the desired shape. This is an easy project, but it takes a small amount of patience (but just a small amount) as you construct the bib.
To wear this necklace, tie the ends of the ribbon into a bow in the back.
Once completed, wear this amazing necklace with pride. Each time you receive a compliment, reply, "Thanks, I made it." :)
Thursday, January 23, 2014
The Toy Purge of 2013
I want to do something a little different today. As it turned out, I need a couple more days to refine the projects I had originally planned on posting. It's been a while since I've written a post about everyday life around here. I've had this subject on my mind for a several months. It hasn't been until now that I've taken the time to sit down and share it with you guys.
I went on a trip to Kenya when I was still single and in my early 20's. While I was in Kenya, my team and I visited Kibera, the largest slum on the continent of Africa. We had to walk in and out of the area on foot, and were not allowed to bring bags, or anything of value. The people were dressed in dirty rags. Sewage and trash filled the streets and the smell was terrible. It was a memorable experience, to say the least.
Twelve years later, I still reflect back on that experience from time to time. My husband and I own our home (well...as long as we pay our mortgage!), we have two cars, and plenty of furniture, clothes, kitchen gadgets, appliances, and a multitude of miscellaneous possessions. Society tells us that we can never have enough possessions. There is always something you need to make your life better. Happiness can be found with every new item you purchase. This is false. True happiness is not found in possessions, but in God. Nothing else. Living in our society is truly a blessing, but I've found that it's important to keep our consuming desires in check, especially when you consider the living conditions in poverty-stricken parts of the world.
A couple of months ago, Joel and I had a difficult time getting Mac to put away his toys on a regular basis. Regardless of the fact that I rotated out his toys, and sifted through them on a regular basis to get rid of the junk, the conflict never seemed to subside. The toy situation consistently escalated into a tense conflict. During these moments, I would remember the Kiberian slum that I walked through as a young adult, and would feel a terrible sense of guilt. The people inside that slum struggled on a daily basis to find enough food, shelter, and clean water, and yet my son had so many toys, that he was overwhelmed with the task of taking care of them. I finally realized that both of my boys had too many toys.
After this realization, Joel and I came up with a game plan, also known as The Toy Purge of 2013. (Just kidding...well, sort of. We really do call it that when we joke about it.) I sat Mac down and explained to him that since he gave us such a hard time each time he had to put away his toys, it meant that he had too many. I told him that we had to get rid of some of them. So, we set aside a day and sorted through all of the toys. Mac picked out his favorite toys to keep, and we got rid of the others, including the broken toys. It was a hard day for both Mac and I and there were plenty of tears, but after it was over, we had a smaller, manageable stash of toys.
We ended up giving away 3 trash bags of toys to a local charity and since that day, both of them have forgotten about the donated toys. The boys seem to have a better appreciation of the toys they kept. Since The Toy Purge, the conflict surrounding the toys has significantly decreased and both boys no longer seem overwhelmed by the sheer volume of the toys in their possession. It was definitely a difficult thing to go through, but it was a good reminder of what is truly important.
The Toy Purge of 2013 provided several life lessons for Mac, but this experience taught me a couple of things as well:
1. We live in an incredibly wealthy society and, as parents, we always want the absolute best for our children. This often includes material possessions - toys, clothes, a matching furniture set for their bedroom, perfectly decorated rooms, etc. None of this is bad, but it's important for us to know when to draw the line. We have to remember what is truly important - material possessions are not.
2. As Mac and I sorted through his toys that day, he would often tear up when I made him choose toys. Those were horrible moments for me. As my son mourned over choosing between his toys, I felt like someone was ripping my heart out of my chest. I wanted to cry too. I want my children to have an enriched and full life and to be a part of every blessing possible - toys included. I felt like I was robbing him of these blessings when he was forced to choose between his toys. I felt like the meanest mom in the world. During those heart-wrenching moments, I had to remind myself that my children will not have a less-enriched life if they only have one toy fire truck instead of three. Providing an enriched life does not mean providing more possessions for our children, but instead teaching them to appreciate what they do have.
The Toy Purge of 2013 was a difficult experience, but an important one for our family. What we learned from The Purge continues to effect our family's perspective on a daily basis. Last night, Joel and I were sorting through several boxes in our office to donate to a local charity. It wasn't easy, and we had some difficult moments. We had to remind each other of what is truly import. This morning, Mac gave me a hard time when I made him clean his room before school until I turned on the timer and told him I would donate every thing left on the floor when it went off. His toys were picked up with five minutes to spare. (We've made a lot of progress.) Life lessons aren't always easy to go through, but we always come away with renewed perspective about true value.
I went on a trip to Kenya when I was still single and in my early 20's. While I was in Kenya, my team and I visited Kibera, the largest slum on the continent of Africa. We had to walk in and out of the area on foot, and were not allowed to bring bags, or anything of value. The people were dressed in dirty rags. Sewage and trash filled the streets and the smell was terrible. It was a memorable experience, to say the least.
Twelve years later, I still reflect back on that experience from time to time. My husband and I own our home (well...as long as we pay our mortgage!), we have two cars, and plenty of furniture, clothes, kitchen gadgets, appliances, and a multitude of miscellaneous possessions. Society tells us that we can never have enough possessions. There is always something you need to make your life better. Happiness can be found with every new item you purchase. This is false. True happiness is not found in possessions, but in God. Nothing else. Living in our society is truly a blessing, but I've found that it's important to keep our consuming desires in check, especially when you consider the living conditions in poverty-stricken parts of the world.
A couple of months ago, Joel and I had a difficult time getting Mac to put away his toys on a regular basis. Regardless of the fact that I rotated out his toys, and sifted through them on a regular basis to get rid of the junk, the conflict never seemed to subside. The toy situation consistently escalated into a tense conflict. During these moments, I would remember the Kiberian slum that I walked through as a young adult, and would feel a terrible sense of guilt. The people inside that slum struggled on a daily basis to find enough food, shelter, and clean water, and yet my son had so many toys, that he was overwhelmed with the task of taking care of them. I finally realized that both of my boys had too many toys.
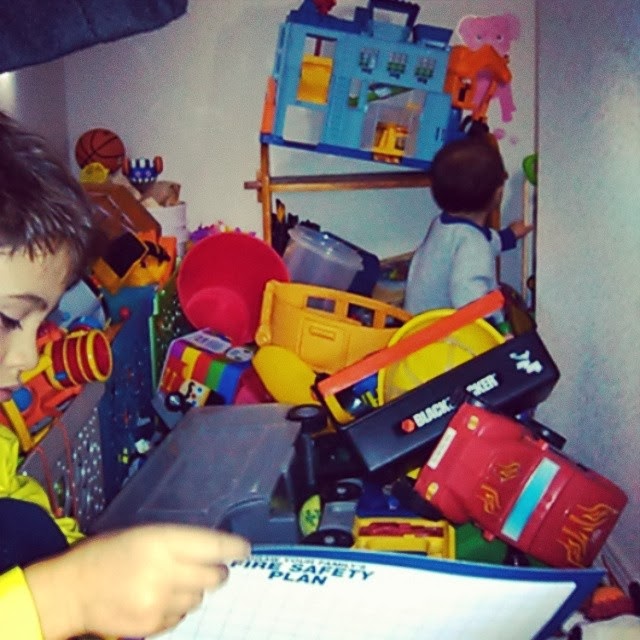 |
| This is the closet where the boys store their toys. It's actually worse than it looks. The floor was completely covered in toys. The ironic part is that Mac was looking at the Fire Safety plan. |
After this realization, Joel and I came up with a game plan, also known as The Toy Purge of 2013. (Just kidding...well, sort of. We really do call it that when we joke about it.) I sat Mac down and explained to him that since he gave us such a hard time each time he had to put away his toys, it meant that he had too many. I told him that we had to get rid of some of them. So, we set aside a day and sorted through all of the toys. Mac picked out his favorite toys to keep, and we got rid of the others, including the broken toys. It was a hard day for both Mac and I and there were plenty of tears, but after it was over, we had a smaller, manageable stash of toys.
 |
| These are the toys we chose to donate. Part of me still feels bad that we had to get rid of these great toys. |
 |
| This is the closet after The Toy Purge. Still plenty of toys, but so much more manageable. |
We ended up giving away 3 trash bags of toys to a local charity and since that day, both of them have forgotten about the donated toys. The boys seem to have a better appreciation of the toys they kept. Since The Toy Purge, the conflict surrounding the toys has significantly decreased and both boys no longer seem overwhelmed by the sheer volume of the toys in their possession. It was definitely a difficult thing to go through, but it was a good reminder of what is truly important.
The Toy Purge of 2013 provided several life lessons for Mac, but this experience taught me a couple of things as well:
1. We live in an incredibly wealthy society and, as parents, we always want the absolute best for our children. This often includes material possessions - toys, clothes, a matching furniture set for their bedroom, perfectly decorated rooms, etc. None of this is bad, but it's important for us to know when to draw the line. We have to remember what is truly important - material possessions are not.
2. As Mac and I sorted through his toys that day, he would often tear up when I made him choose toys. Those were horrible moments for me. As my son mourned over choosing between his toys, I felt like someone was ripping my heart out of my chest. I wanted to cry too. I want my children to have an enriched and full life and to be a part of every blessing possible - toys included. I felt like I was robbing him of these blessings when he was forced to choose between his toys. I felt like the meanest mom in the world. During those heart-wrenching moments, I had to remind myself that my children will not have a less-enriched life if they only have one toy fire truck instead of three. Providing an enriched life does not mean providing more possessions for our children, but instead teaching them to appreciate what they do have.
The Toy Purge of 2013 was a difficult experience, but an important one for our family. What we learned from The Purge continues to effect our family's perspective on a daily basis. Last night, Joel and I were sorting through several boxes in our office to donate to a local charity. It wasn't easy, and we had some difficult moments. We had to remind each other of what is truly import. This morning, Mac gave me a hard time when I made him clean his room before school until I turned on the timer and told him I would donate every thing left on the floor when it went off. His toys were picked up with five minutes to spare. (We've made a lot of progress.) Life lessons aren't always easy to go through, but we always come away with renewed perspective about true value.
Labels:
children,
conflict,
everyday life,
lessons,
life,
parenting,
possessions,
toys
Tuesday, January 21, 2014
Upcycled Color Block Bracelet
I had a bracelet laying around our house. It wasn't anything special, but it provided a discount if it was worn to a local sports store. Instead of tossing it in the trash after the promotion expired, I decided to upcycle it into something more fun - a Bollywood-like, color blocked bracelet. Boom! Awesome upgrade. The fun colors and sparkly rhinestones provide a sweet uniqueness to this accessory. Project bonus: It's quick and easy to make! (Well...of course it is, because you know, that's really my thing...you never know how long a project will take when you have a couple of munchkins around to provide numerous interruptions.) Plus, this bracelet is so fun, I get complements every time I wear it. What more could you ask for? ;)
Supplies needed:
- embroidery floss (I used three different colors)
- rhinestone chain
- small charm
- a cuff bracelet
- scissors
- super glue or some other type of quick drying glue (optional)
- plastic needle, small crochet hook or some other type of tool to tie off ends
Start out by attaching the rhinestone chain down the center of the bracelet. I lucked out and was able to slip the ends of the rhinestone chain into the plastic tips on the bracelet. If this isn't an option for you (unless the bracelet is similar to the one I used), use super glue to secure both ends of the chain to the bracelet. Trim the ends of the rhinestone chain if needed.
Next, tie a square knot with embroidery floss at one end of the bracelet, on top of the secured end of the chain. Wrap the floss around each link of the chain (between the rhinestones). (This is just to secure the chain to the bracelet as you work on it.)
Once each chain link has been wrapped with the floss, begin wrapping to cover the entire bracelet, working your way from one end to the opposite end. Wrap floss neatly around the bracelet, keeping each strand as flush as possible to the previous strand. Wrap floss as close to each rhinestone as you can.
To change embroidery floss colors, tie both ends of the different colored floss into a square knot, and continue to wrap. Be sure to hide the knot, as you continue to wrap.
Continue wrapping until the entire bracelet is covered, and switching floss colors as often as desired.
There's truly no wrong way to do this.
At some point during the wrapping process (maybe after 1/3 of the bracelet has been wrapped), string the charm onto the floss when changing floss colors and continue wrapping. If you forget to do this (like I did), it can be tied on afterwards, using matching floss, and hiding the knots and trimmed ends.
Once the entire bracelet is wrapped, tie a square knot to secure the floss to the bracelet. Trim and hide the ends underneath the wrapped floss. I used a small crochet hook to tie the final knot and keep it tight.
A couple of tips to keep in mind:
- I had plastic ends on my bracelet that allowed me to wrap the floss onto the bracelet without the floss slipping off the ends. If this is not an option, tie the floss with square knots and secure them to the bracelet using super glue. Once the super glue is dry, wrap over the super-glued sections again to conceal any super glue. Repeat these steps on the opposite end of the bracelet once the entire bracelet has been wrapped.
- Square knots are crucial to prevent the embroidery floss slippage.

Thursday, January 16, 2014
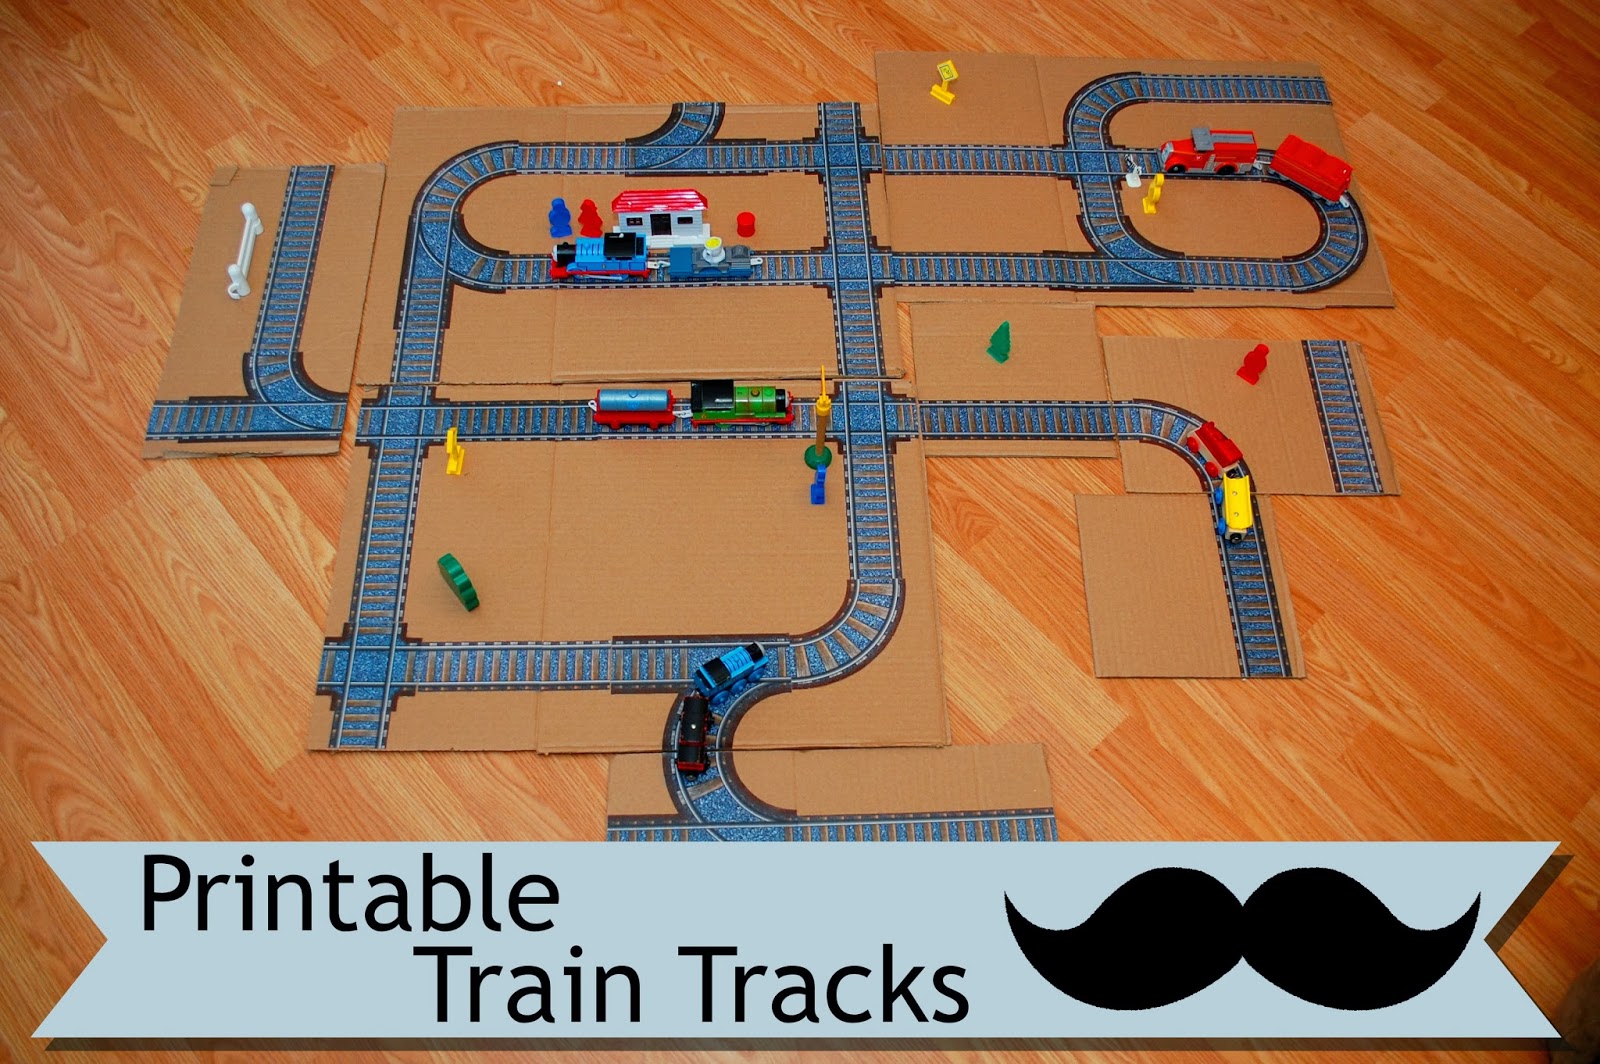
Printable Train Tracks
Today, my husband Joel has a fun activity to share with you for your kids. A while back, he made the Printable Road Maps for Toy Cars craft and it became a reader favorite for several weeks. Because the printable roads were so popular, he created a printable train tracks project. He also has an additional project in the works to add to these. It should make an appearance within the next month or two. Sign up for email notifications on the right side of the page to make sure that you don't miss out on the next printable project!
Toy trains are really fun. I've always enjoyed playing with them, but the sets can be really pricey. Not only that, but different sets are often incompatible and don't offer much variation in the ways that you can set them up. Enter printable train tracks...
With this set, you can create each panel in whatever way seems the most interesting to you and your kiddo. Then, you can arrange the panels in infinitely different arrangements. All it will cost you is a little ink, paper and time. So, here we go!
First, print out this PDF.
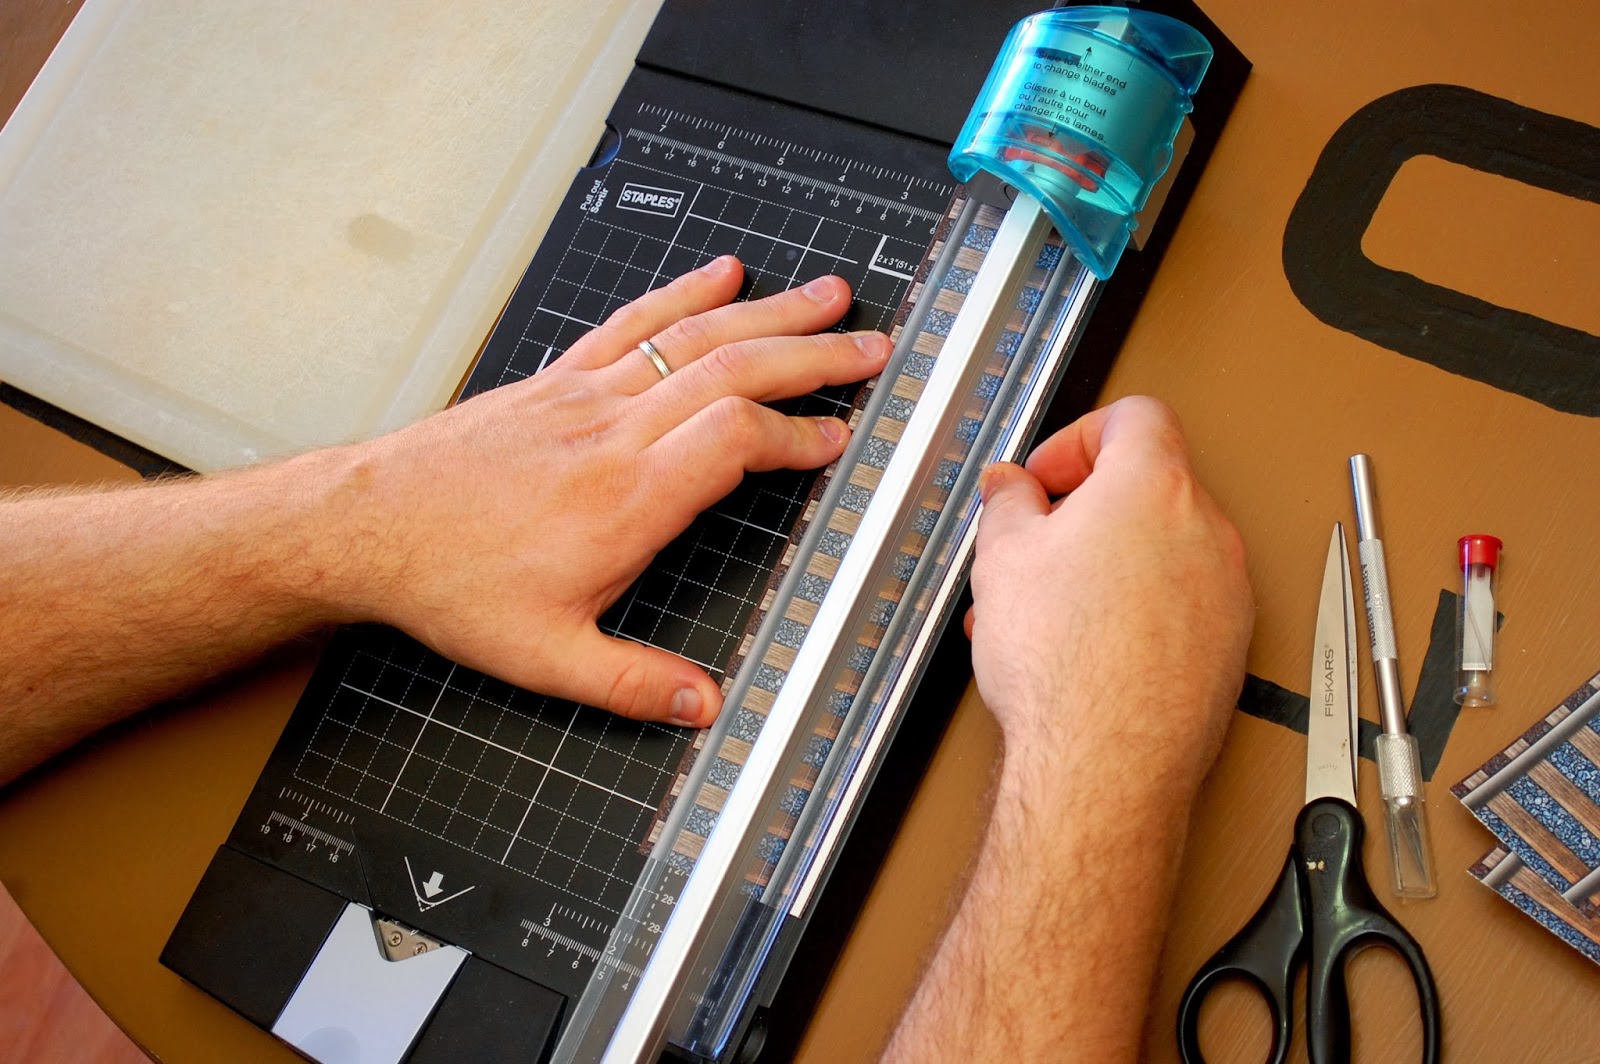
Next, cut each piece out of the printout by trimming around the edges of each piece. You can use any cutting method that works for you. I chose a paper trimmer for the straight cuts, scissors for the long curves and an Exacto knife for the smaller pieces.
After that, take a medium-sized cardboard box and cut it so that you have some large panels and some small panels. I chose to make 4 large and 4 small by leaving the top flap on each side of the box. If a portion of one of the panels is damaged, you can trim that part off. They don't all need to be standard sizes.
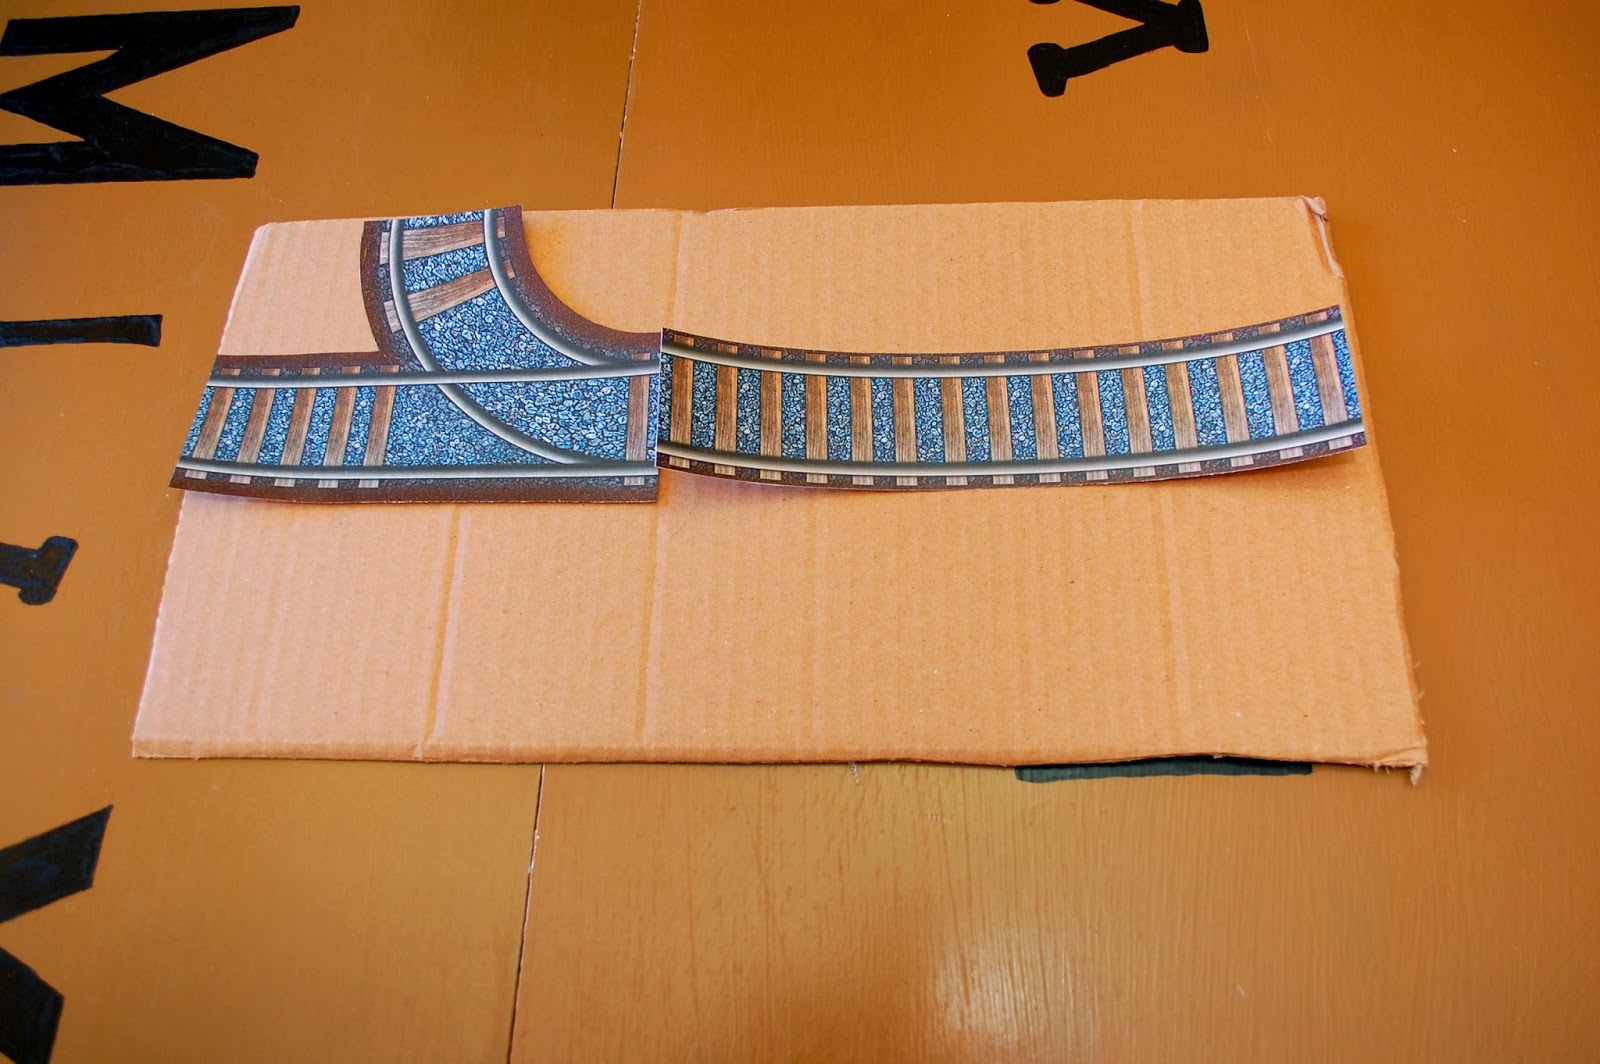
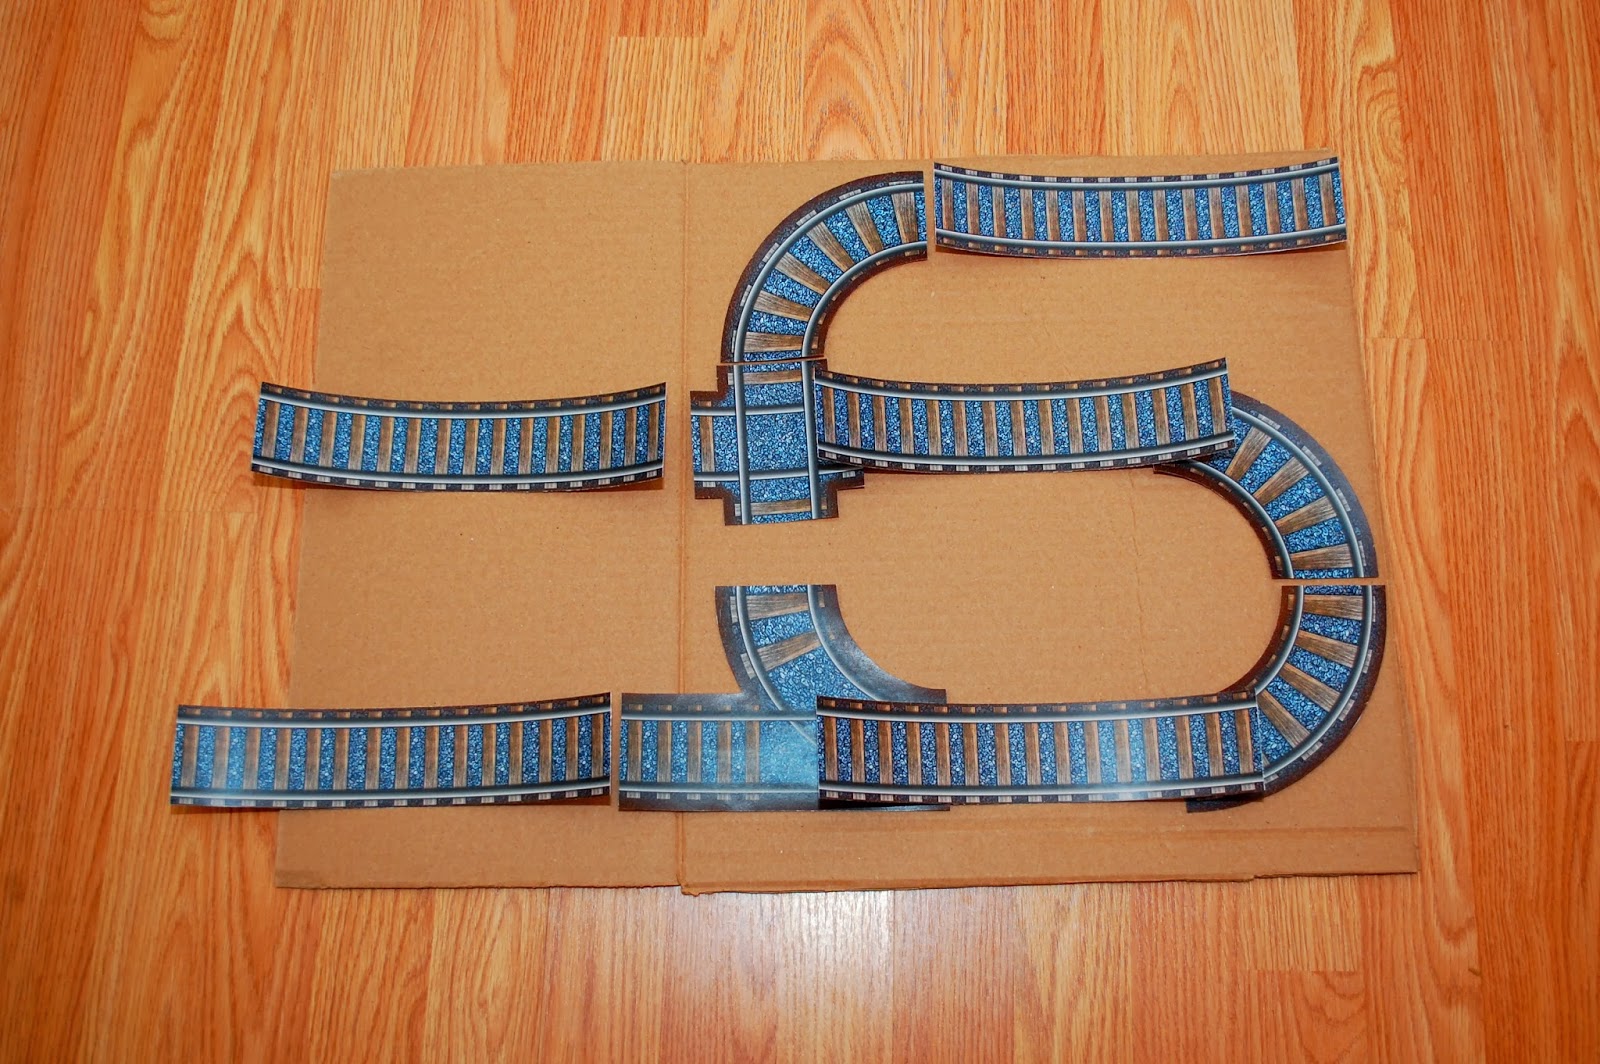
Now, you begin the coolest part. Arrange the pieces on the panels in whatever arrangement looks the most fun. You can always trim the long, straight pieces to whatever length you need.
When you have the arrangement you like, glue it down. You can use a glue stick or brushed school glue, if needed, but spray adhesive is the quickest and cleanest method. I started off with a glue stick, but switched to spray adhesive on the second panel.
Once you have all of the panels created, begin arranging them and start playing. After a while, rearrange and you have a whole new track!
Tip: After I create one panel, I line up the edge pieces on the next panel so that they line up perfectly when placed next to each other. This is especially useful on the large panels.
Another tip: Checking out Printable Road Maps for Toy Cars before you dig into this project will be helpful, as the idea was first developed there. The 2 projects complement each other well and many of my (Joel's) future projects will expand on these ideas. Make sure you sign up for email notifications so that you don't miss them.
Labels:
easy projects,
Kids activities,
kids fun,
printable,
printables,
train track
Tuesday, January 14, 2014
Lasagne Roll Ups Recipe
I want to talk about Lasagne today. Do you like lasagne? I know you do. I like lasagne too. Lasagne was one of my favorite things to eat when I was growing up, but who doesn't like Lasagne?? That's right, nobody. Lasagne is terrific - giant noodles, cheese, marinara sauce..what's not to love? When I was growing up, my mom would make our favorite meal on our birthday. I chose lasagne several times.
So we've established that Lasagne is great, (but I really didn't need to convince you, because you already knew it was), but the real question is, "Can it get any better?" The answer is YES! It absolutely can be upgraded. How? Roll it up! What? People do that? Yes! And it's great! Here's why:
- It's kid friendly
- It's less messy and easier to serve than regular Lasagne.
- It's easier and quicker to prepare!!
How easy is it? Scroll down and find out.
Lasagne Roll Ups
Ingredients:
- 12 lasagne noodles (about 13 ounces)
- 2 cloves garlic (minced or fed through press)
- 2 teaspoons olive oil
- 15 ounces of part skim ricotta
- 1 cup shredded part skim mozzarella
- 1/4 cup grated Parmesan cheese
- 1 large egg, beaten
- 10 ounces frozen (thawed) spinach
- 2 1/2 cups marinara sauce
- 1/4 teaspoon salt and pepper
- non-stick cooking spray
Begin boiling water for the noddles. In the meantime, prepare the lasagna filling. In small skillet, heat the olive oil to medium. Saute garlic for 1 minute, stirring often. Set aside. Thaw and squeeze the spinach very dry. Combine the ricotta with the garlic and stir to combine. Then combine the "dry" spinach in a bowl with the egg, ricotta, mozzarella, parmesan, salt and pepper. Mix until thoroughly combined.
When water reaches a heavy boil, add the noodles and boil according to directions for al dente. Occasionally stir noodles, very gently while they cook to prevent them from sticking to each other and the pot. Preheat oven to 400 degrees. Spray a 9 x 13 glass baking dish with non-sick cookies spray.
Once your noodles are cooked, drain them in colander, cool slightly (just enough to where you can handle them) and then lay them out on a cutting board or clean surface. Spread 4 tablespoons of filling over each noodle (filling should spread edge to edge). Roll from end to end (as pictured in photo below).
Spread 1/4 cup of marinara sauce in the bottom of the dish. Place rolled/filled noodles seam side down in dish. Pour the remaining marinara sauce over the tops of the lasange roll ups, taking care to fully cover the noodles. Cover the dish with aluminum foil and bake for 30 minutes at 400 degrees.
***A couple of tips to keep in mind***
- Cook a couple of extra noodles just in case some of them get torn. Torn noodles do not work well with this recipe
- It's best to cook the noodles to al dente due to the fact that the noodles continue to cook in the oven.
- Squeeze the spinach until its very dry.
- Be sure to cover with foil while baking to prevent the noodles form drying out.
I found this recipe on the Shrinking On a Budget website. If you haven't checked out this meal plan service, I highly recommend that you do. This meal plan service has made my life so much easier when it comes to meals. :)
Thursday, January 9, 2014
Easy No-Sew Headband DIY
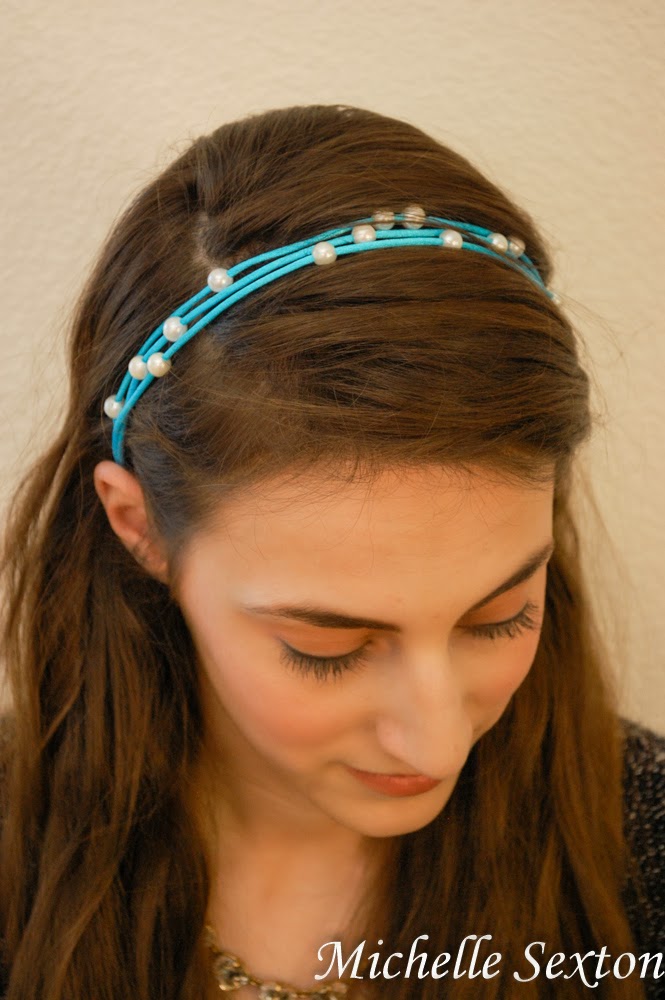
It's been a while since we've actually made something that doesn't include a printable - not that I'm complaining or anything. I LOVE printables, but I think it's time to make something crafty that we can wear. So, here's what I've got - a No-Sew Headband. I've had this project in my head for a couple of months, but didn't take the time to work on it until recently. What I love about this headband is that it's cute, it's an easy way to dress up an outfit, and it's super quick to make. There's no sewing involved and it takes 15 minutes to make or less...depending on how many times you get distracted during this project. ;)
My crafty friend, Sarah, is the one in the pictures. I had her wear the headband so I could do the photos. (Have I ever told you how bad I am at taking selfies? Really bad. It takes FOREVER to get a good photo. It's much easier to have someone else be in the picture. And then, I don't have to make the effort to NOT look frumpy for a photo. Ha, ha!) If you want to find out more about Sarah, you can find her on Undiscovered Virtues.
Supplies Needed:
-satin cord (around 75 inches - depending on the size of your head)
-faux pearl beads
-scissors
-small strip of elastic (about 5 inches)
-lighter
To start out, you need enough satin cord to wrap around your head three times (from the base of your head to the top of your head) plus an additional foot just to be safe. Then, thread the beads onto the cord. (I used 18 beads, 6 for each section.)
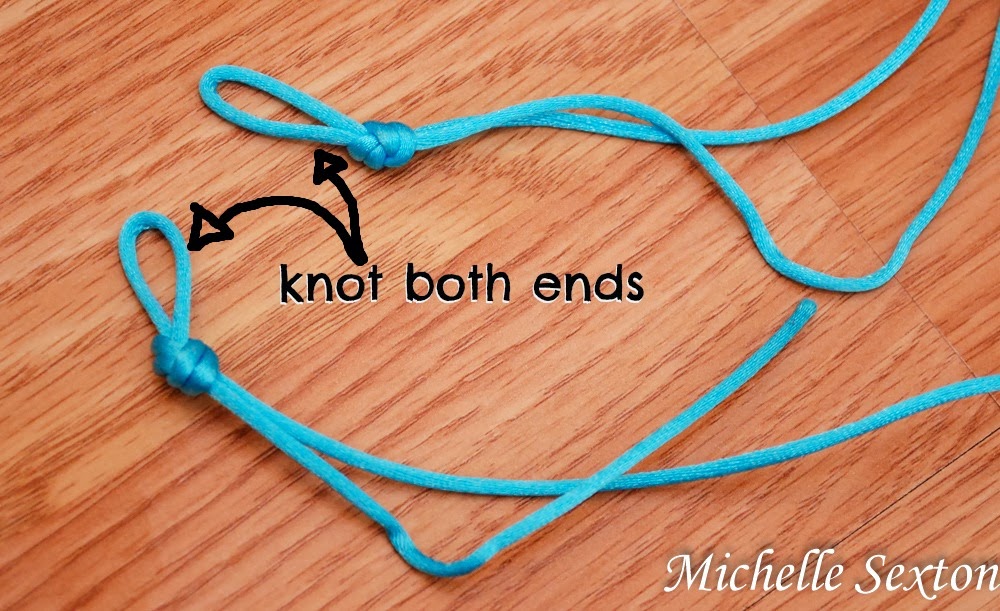
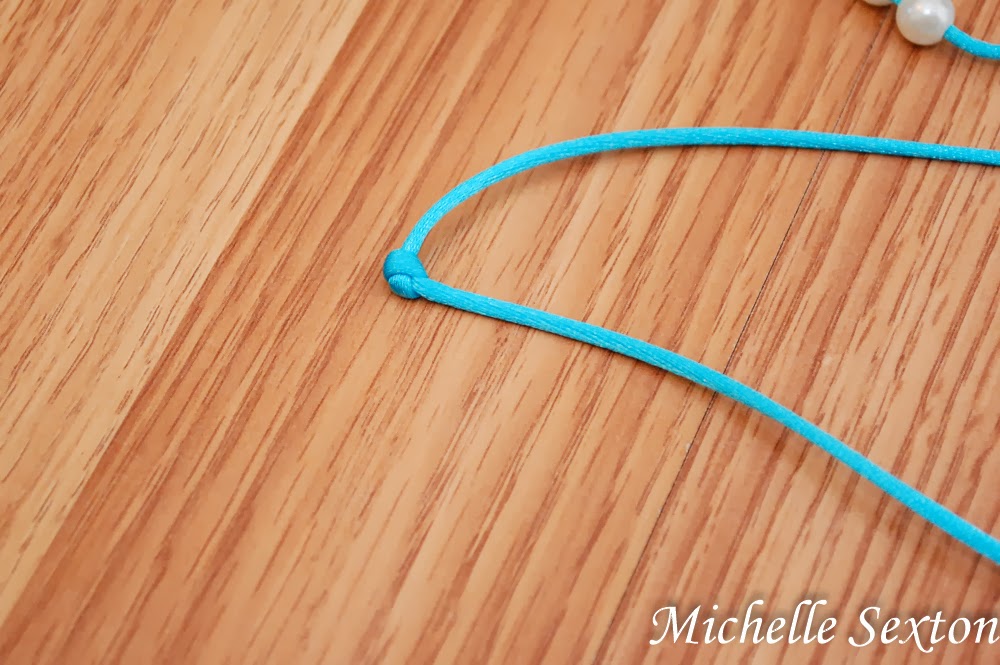
At each end of the cord, form a loop and tie a knot.
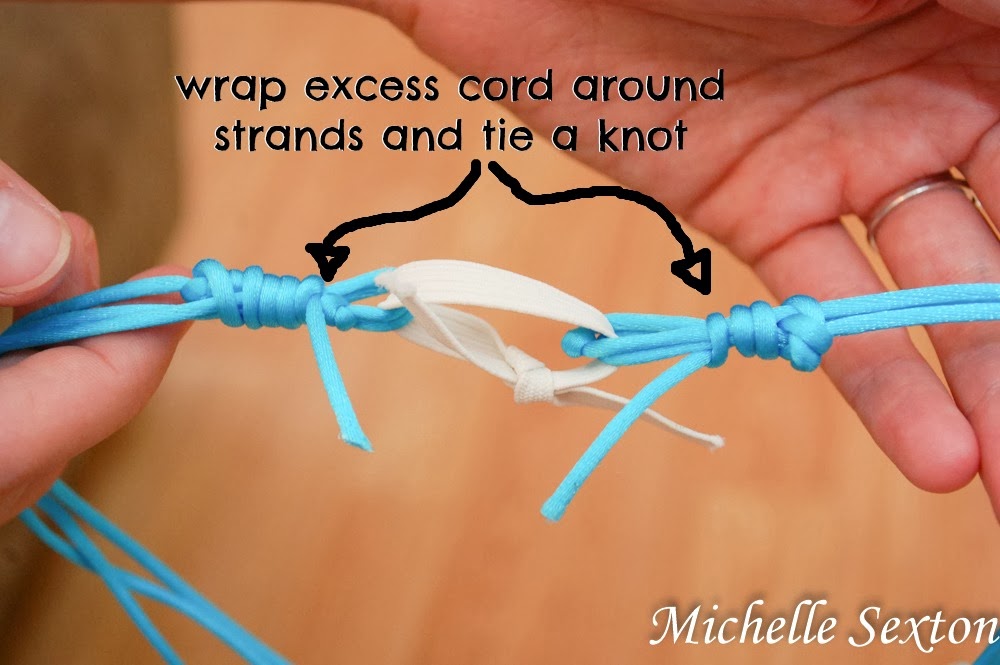
Using the excess cord leftover from the looped end, wrap the cord around the strands and tie a knot. Pull as tight as possible.
Wear and enjoy the accessory that you created!
My crafty friend, Sarah, is the one in the pictures. I had her wear the headband so I could do the photos. (Have I ever told you how bad I am at taking selfies? Really bad. It takes FOREVER to get a good photo. It's much easier to have someone else be in the picture. And then, I don't have to make the effort to NOT look frumpy for a photo. Ha, ha!) If you want to find out more about Sarah, you can find her on Undiscovered Virtues.
Supplies Needed:
-satin cord (around 75 inches - depending on the size of your head)
-faux pearl beads
-scissors
-small strip of elastic (about 5 inches)
-lighter
To start out, you need enough satin cord to wrap around your head three times (from the base of your head to the top of your head) plus an additional foot just to be safe. Then, thread the beads onto the cord. (I used 18 beads, 6 for each section.)
At each end of the cord, form a loop and tie a knot.
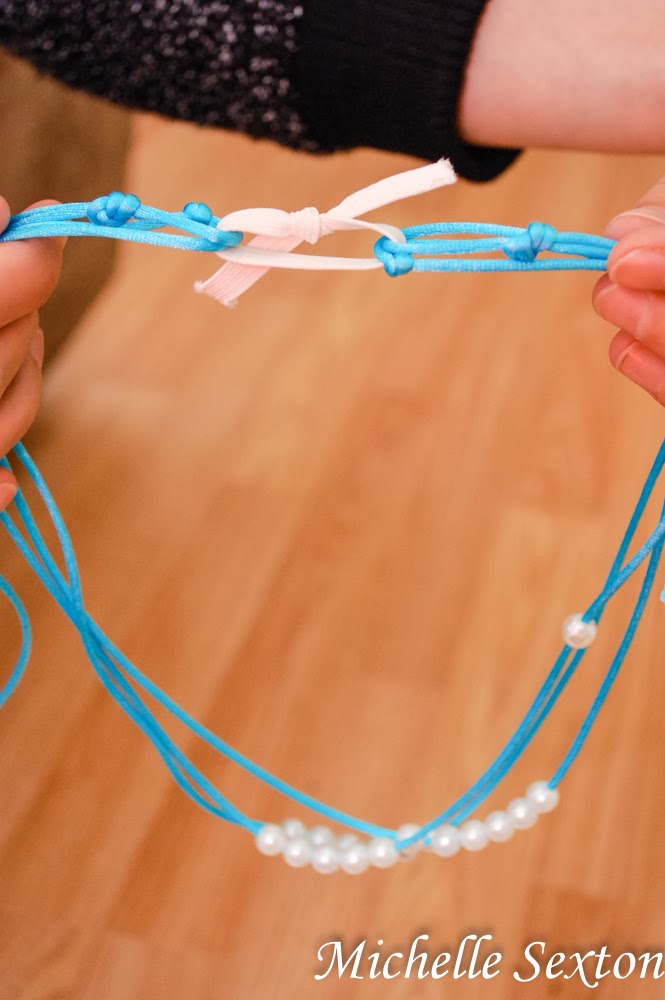
Next, fold the cord into 3 sections, (creating an "S" Shape) making sure to distribute an even amount of beads in each section (6 beads per section).
Tie a knot at the end of each section to create a knotted "corner". Keeping the sections in the "S" shape (as shown in the photo above), gather the sections together, adding a knotted "corner" to the closest looped end. Repeat these steps on the opposite side.
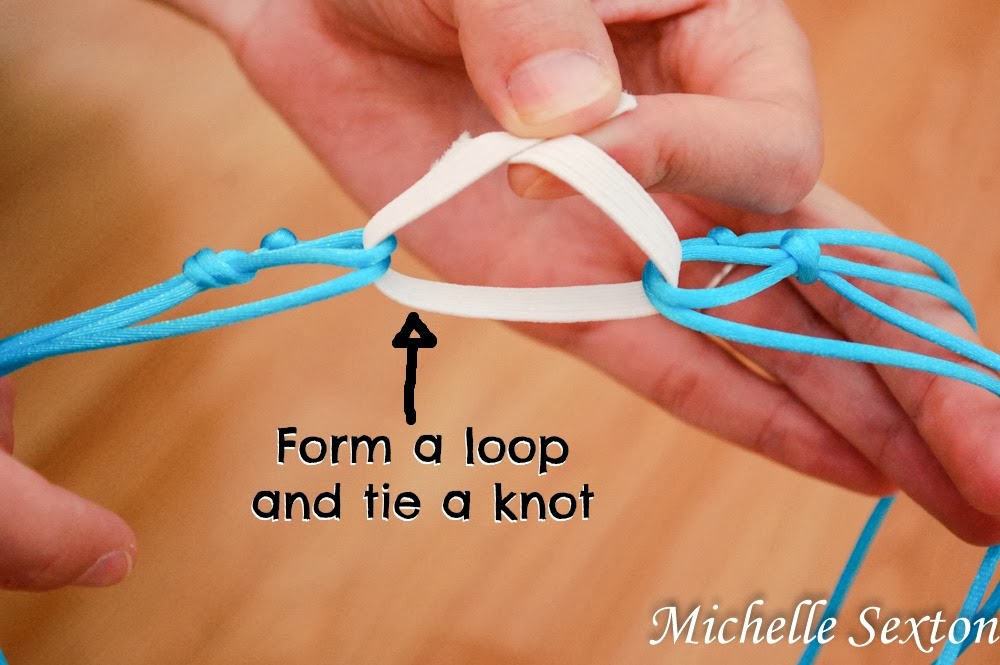
Thread the strip of elastic through each gathered end (each gathered end should have a knotted corner and a looped end) to form a loop, then tie a knot in the elastic to secure it.
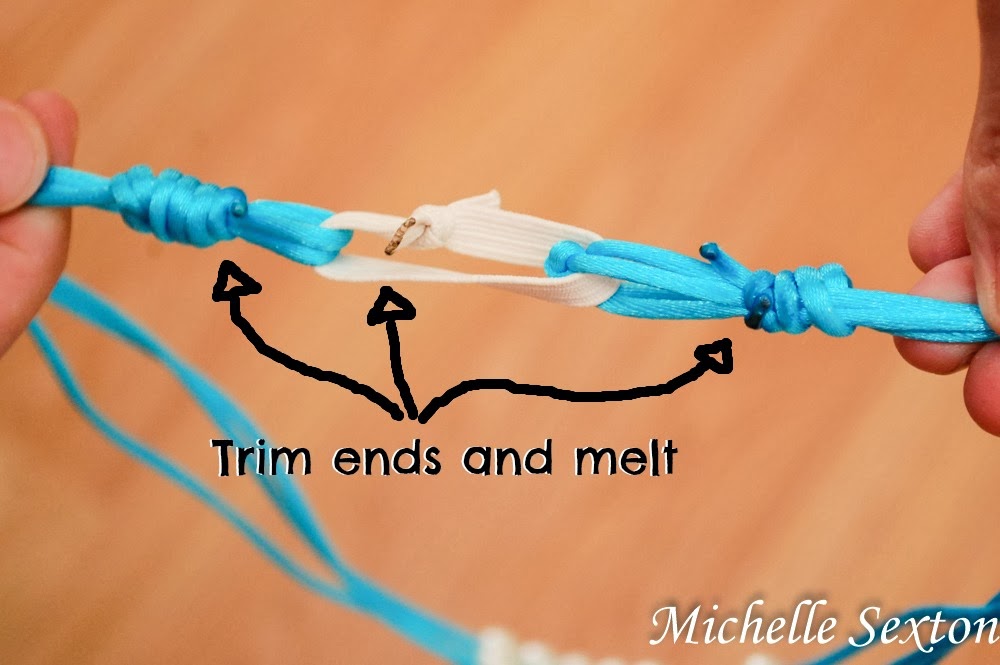
Trim the ends of the elastic, as well as the cord. Using the lighter, carefully melt the trimmed end of the elastic and cord, including the knot from the wrapped ends of the cord, to ensure nothing comes unraveled.
Wear and enjoy the accessory that you created!
Subscribe to:
Posts (Atom)






.jpg)


