So Here's My Life

The things we make,
the food we eat and
the shenanigans in between.

A blog about making things by
MICHELLE SEXTON

Showing posts with label create. Show all posts

Wednesday, April 16, 2014

DIY Coffee Table Tic Tac Toe Board

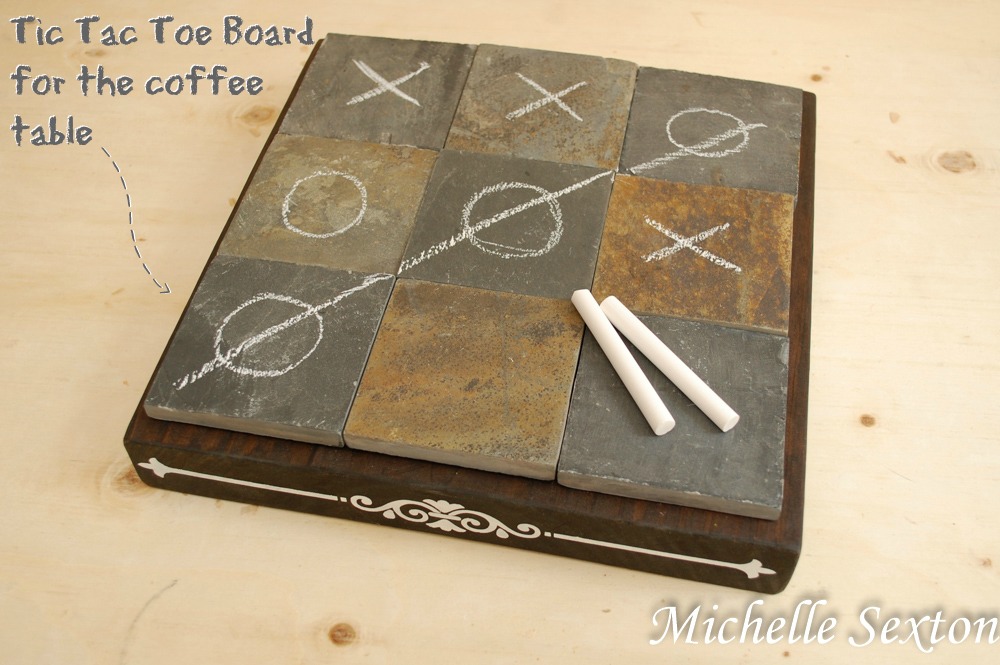
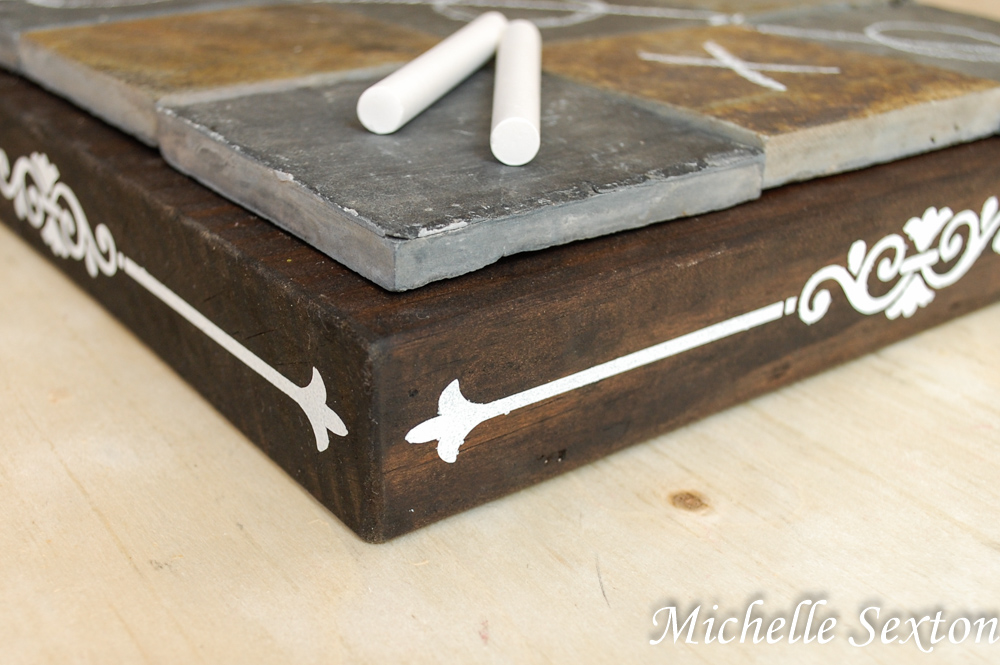
Ready to make something for your home? Yes? Good. A couple weeks ago, I mentioned that we went Geocaching in this post. While we were driving through the desert near our house, we spotted a pile of discarded slate tiles. (Yeah, people dump their junk in the desert sometimes. Beyond aggravating.) So we stopped, I sifted through them, and brought several of them home for a project - A Tic Tac Toe Board to be exact. Not just any old Tic Tac Toe board, but a Coffee Table Tic Tac Toe Board. So much fun, right? Why didn't we think to do this sooner??

DIY Coffee Table Tic Tac Toe Board @ SoHeresMyLife.com

Here's what you need:
- 9 slate tiles 3 1/2 x 3 1/2 inches
- 11 1/2 x 11 1/2 x 1 1/2 board  (we used a 2x12x8 ft board. planks are always 1/2 inch smaller than advertised)
- liquid nails (we used Loctite Pro Line)
- dark walnut wood stain
- sand paper
- 1 sheet of adhesive vinyl
- white acrylic paint
- craft sponge brush
- this Silhouette file (optional)

DIY Coffee Table Tic Tac Toe Board - click through and learn how to make this

Here's how to make this Tic Tac Toe Board:

wood board

Use the sandpaper to smooth down all the corners, and any rough spots.

stained wood board

Seal the wood using the wood stain. Be sure to follow the directions on the wood stain and allow for the proper drying time.

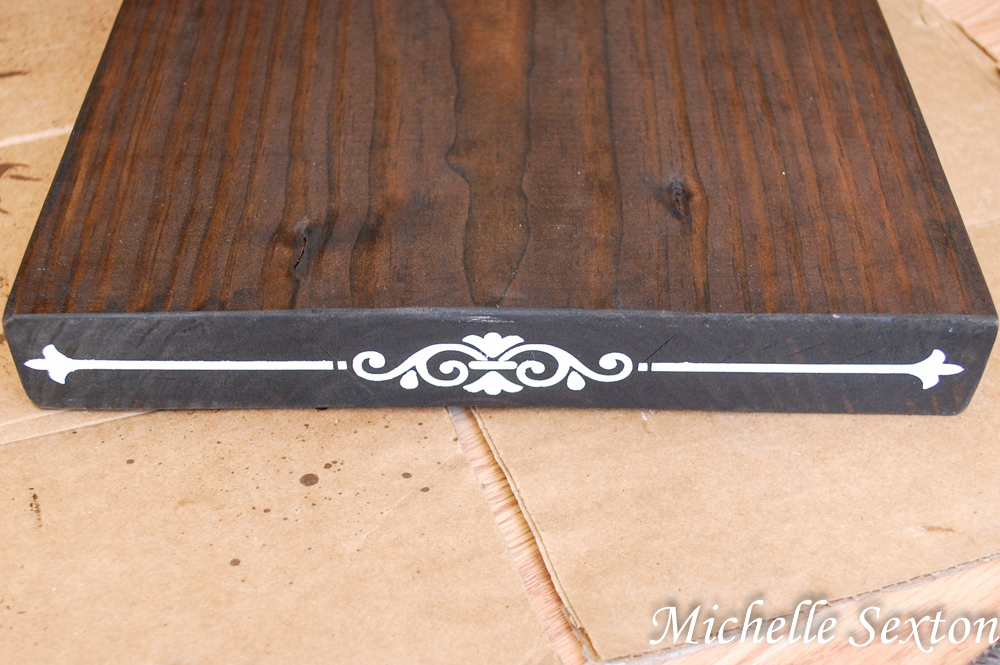
cut out a vinyl stencil and place on board

Use the Silhoutte to cut out this file onto adhesive vinyl to create a stencil. (If you don't have a Silhoutte, then skip this step or decorate the sides in your own way.)

paint over stecil

Peel off stencil

Place each stencil on the sides of the board. Paint each side using the craft sponge brush. Gently peel the stencil off the wood.

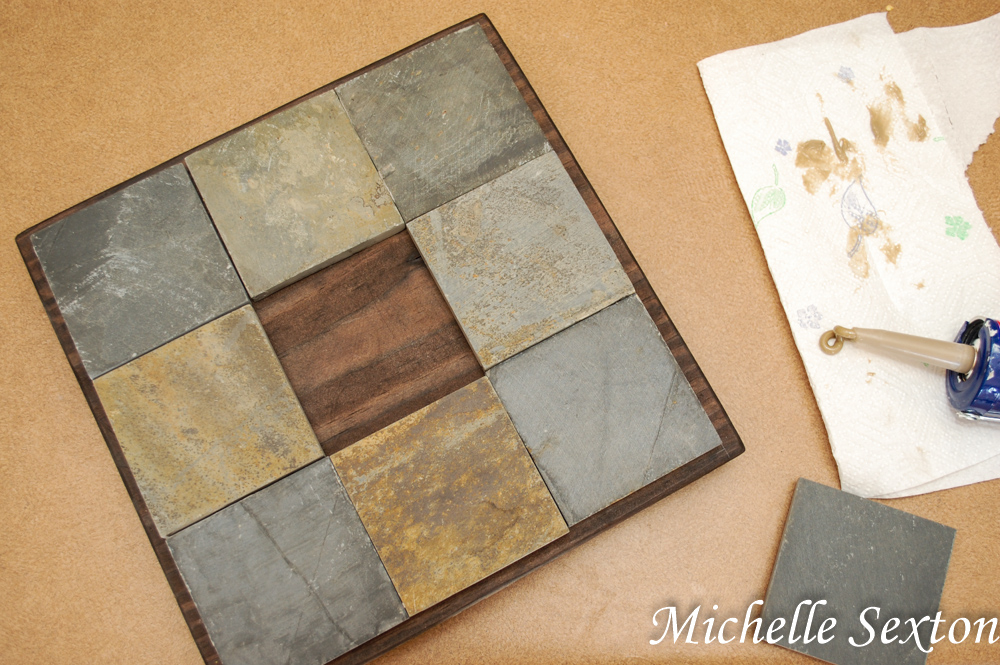
arrange tiles and adhere with liquid nails

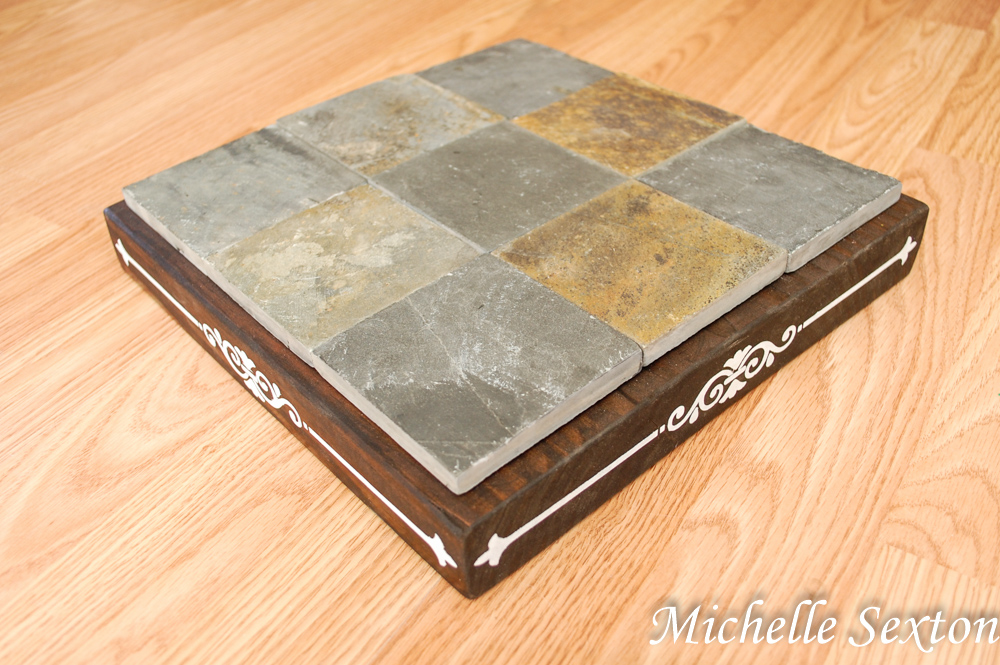
allow to dry before use

Once the paint has dried, arrange the tiles until you are satisfied. Glue one tile on at a time, making sure to place each tile in the exact position as previously arranged. Allow to dry over night before use.

Coffee Table Tic Tac Toe Board - learn how at SoHeresMyLife.com


That's it. It's definitely not a difficult project, but you do you have to allow drying time...always a little challenging for us impatient people! ;) Totally worth the wait, though.

Enjoy!


Friday, April 11, 2014

Printable Spring Flower Banner

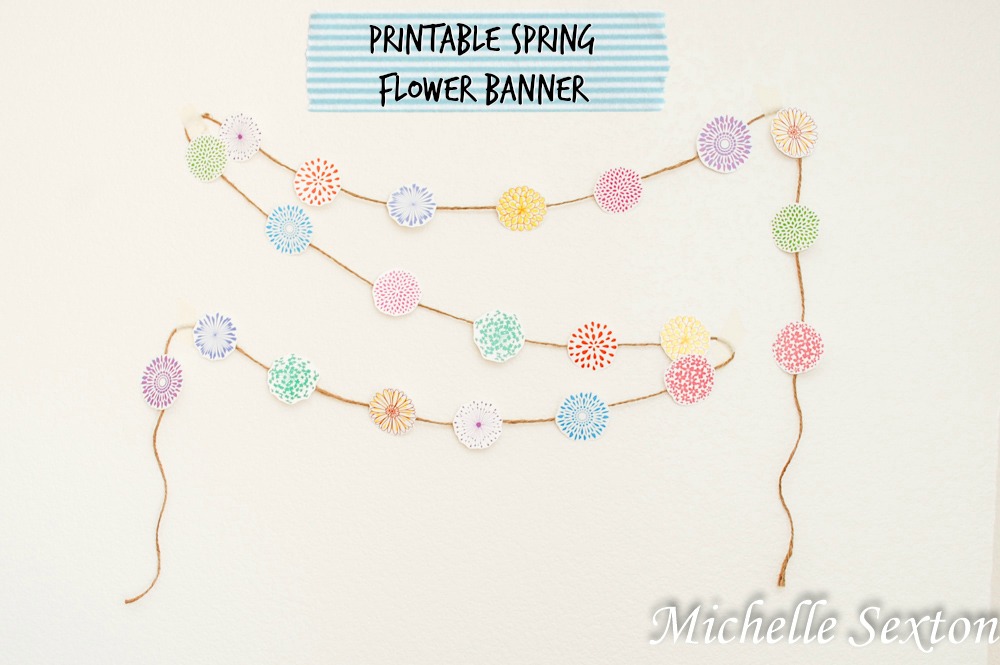
Can I just tell you guys that I've had a hectic week? Over the weekend, Joel and I ran a 5k and I managed to resprain my ankle...you guys probably didn't know that I sprained my ankle in February, did you? I did. I forgot to mention that previously. Yeah, well apparently I ran a little too much, a little too soon...and it's resprained. There's no walking going on here. Only crutches. Bleh. A couple days later I managed to get the cold that Cheese had. So then I had to take care of two kids in the midst of my sickness and sprained ankle. This week has been trialing, to say the least. Bah! However, I get my camera back! Hooray! (A Small beautiful moment in the midst of many chaotic ones this week.) So to celebrate, I have a fun Printable Spring Flower Banner to share with you guys! (And also because I'm dying to do creative things). Here's a sweet, colorful and festive way to celebrate the arrival of Spring!

Free Printable Spring Flower Banner @ SoHeresMyLife.com click through and get it!

You will need:
-This Printable Spring Flower Banner
- Twine
- Scissors
- Masking Tape

Decorate for Spring with this Free Spring Flower Printable from SoHeresMyLife.com

This banner is easy to make. Simply print out the Spring Flower Banner onto card stock, cut out the flowers, and tape the backs to a string of twine. Use this banner and decorate to your heart's desire.

Get this Free Spring Flower Printable Banner from SoHeresMyLife.com

Pretty, pretty, pretty.


Bonus idea: These flowers would also make an adorable flower crown. (I chose not to go this route, simply because I have boys, not girls.) :)

Thursday, April 3, 2014

Quick and Easy Temporary Hair Dye Using Chalk

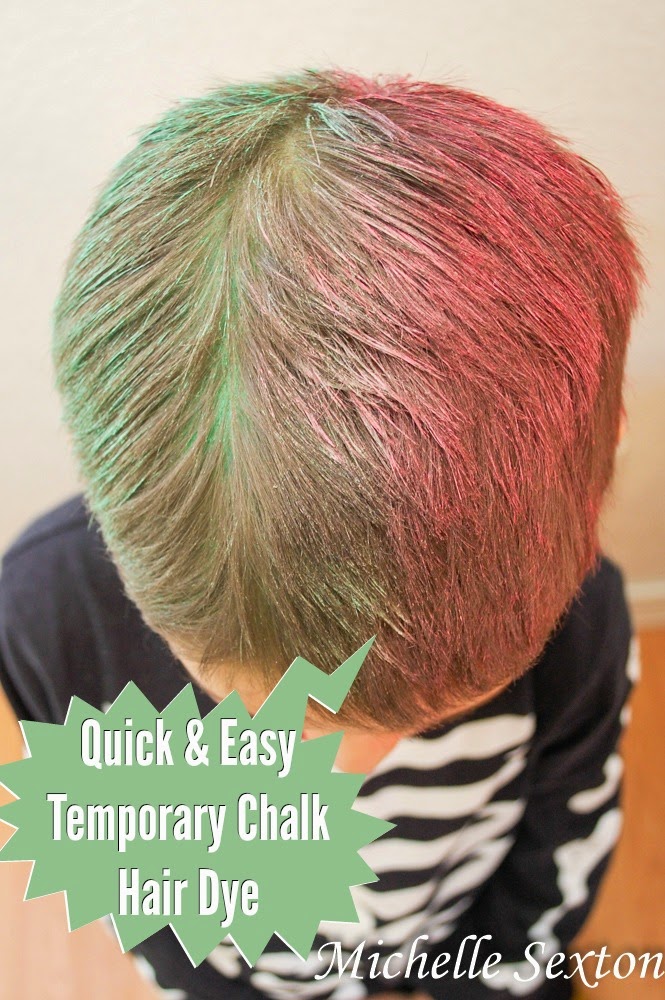
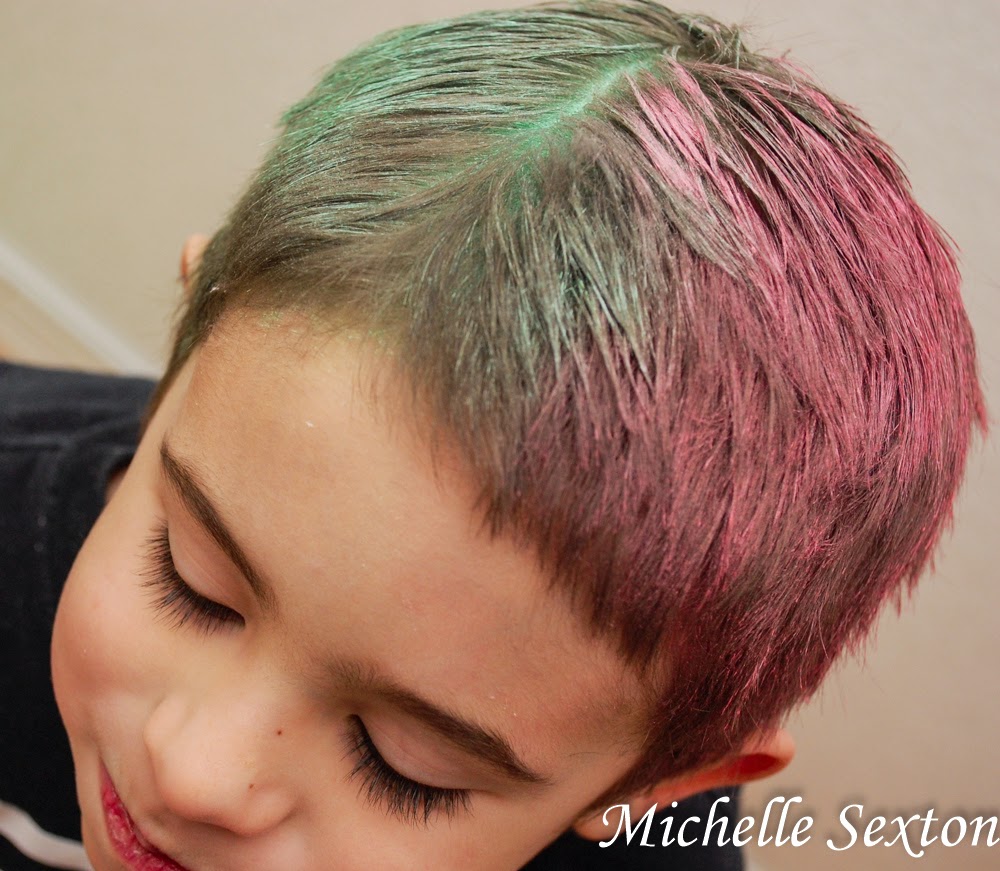
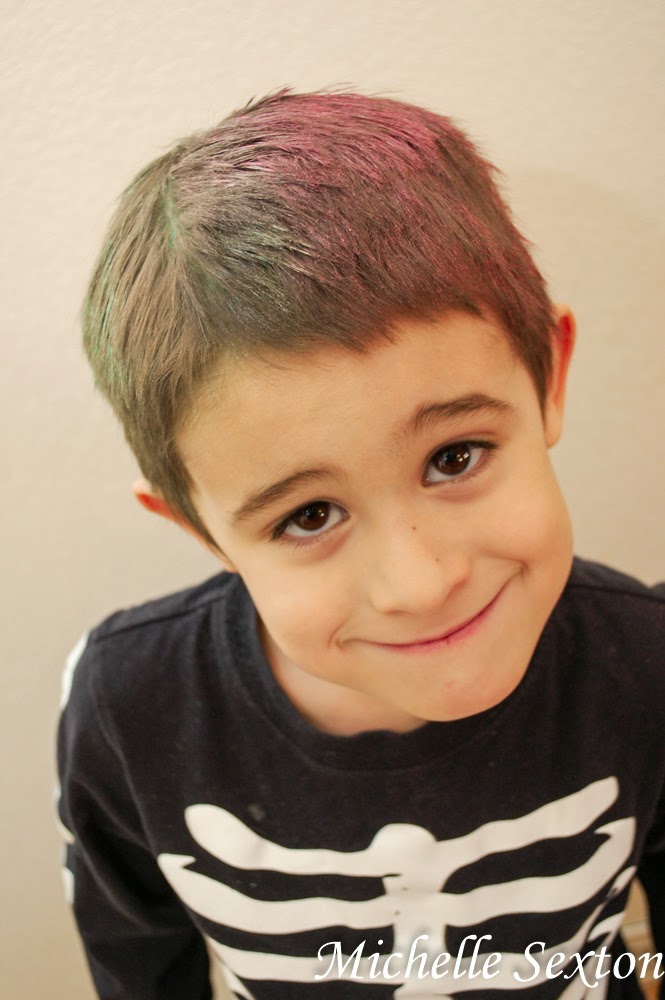
My camera is still in the repair shop, due to Mac's little shenanigan, but I've been told that it should be ready within the next couple of days. Hopefully. Geez. Children. Bah! Anyway, regardless of the fact that I am camera-less at the moment, I do have one simple project set to share. Apparently this is the perfect opportunity too, since I can't take pictures of any of my other projects! A while back Mac's school had a "Crazy Day." The kid were encouraged to dress in crazy attire for that day - backwards clothes, inside out, mis-matching shoes, you get the idea. It was truly a hysterical sight to see. Mac desperately wanted to have crazy colored hair on that day. So the night before, Joel and I searched online for a simple way to create temporary hair dye. There were plenty of ways, mostly with Kool-Aid, but after reading through a couple of tutorials, we came up with our own easier way to put temporary hair dye in Mac's hair  - using chalk & hair spray.

Quick and Easy Temporary Hair Dye Using Chalk - click through and see more @ SoHeresMyLife.com

You will need:
- Colored Chalk (we used sidewalk chalk, but colored chalkboard chalk is great too)
- Hair Spray
- Hair Dryer
- Spray bottle filled with water (recommended but not necessary)

1.Start off with lightly damp hair. (Mac's hair was dry, so we misted it with a spray bottle filled with water.)

2. Using the long side, rub the chalk over the damp hair until you are satisfied with the color saturation. (More than one coat may be needed, depending on the color.)

3. Spray an even coat of hair spray over the damp, colored hair.

4. Gently dry with a hair dryer.

Easy Temporary Hair Dye using Chalk - only takes 5 minutes. @ SoHeresMyLife.com

That's it! Unbelievably easy. The color lasted on Mac's hair the entire day, as long as he didn't touch it. However, it is chalk, so a small amount of flaking is possible. Either way, it was pretty awesome for about 5 minutes of extra work. I was definitely satisfied. :)

Quick and Easy Way to Make Temporary Hair Dye with Chalk in 5 minutes @ SoHeresMyLife.com

This would have been awesome to do for April Fools! I should have thought of that sooner. Darn it! Next year...

Tuesday, March 25, 2014

Swallow Stenciled Denim Jacket

This post is sponsored by Plaid Crafts via Blueprint Social. I received materials for this project and compensation for my time - all opinions are my own!

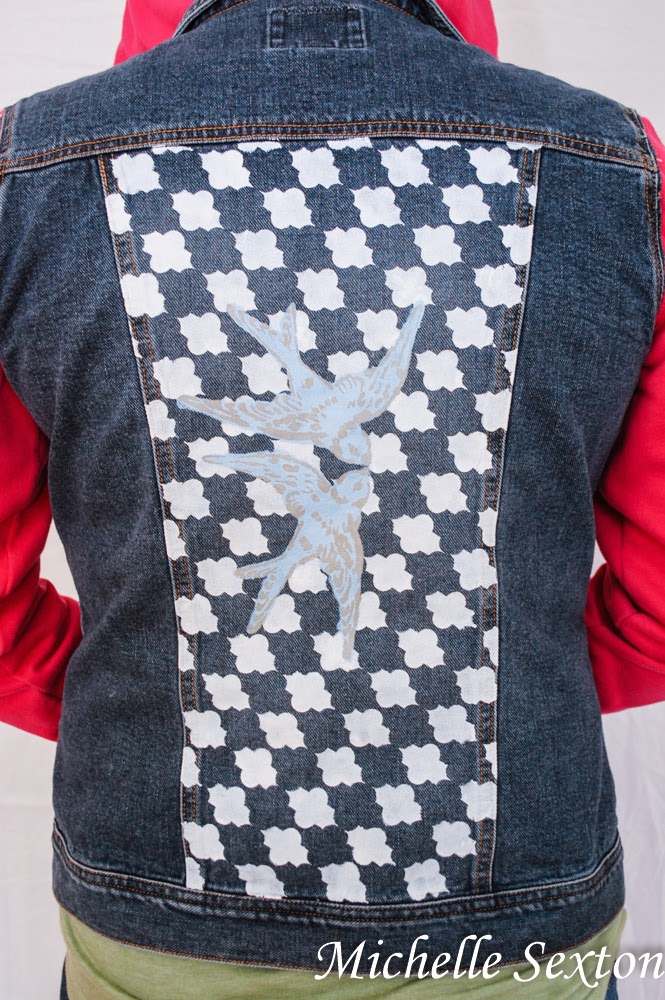
Hey! So, did you see last week's Hooded Denim Jacket DIY? If you missed it, you can find it here. I came up with an amazingly easy way to create a hooded denim jacket, without taking apart the hoodie or denim jacket and restitching it back together. Quick, go and see it. You do not want to miss out! Anyway, at the end of that post I told you I had one more amazing upgrade. Remember that? Have you been on edge for the last five days, waiting in great anticipation to see the awesome upgrade? I'm going to pretend like you said yes. So, today the icing on the cake is revealed with help from Stencil1 and FolkArt Multi-Surface Paints. I used a fantastic set of layered swallow stencils to create the finishing touches for my hooded denim jacket project. Are you ready to see it? (Because I'm dying to show you!)

Stencil the back of a denim jacket and create a unique look - click through and learn how at SoHeresMyLife.com

Amazing Layered Swallow Set Stencils from Stencil1 available at Jo-Ann's Fabric & Craft Store

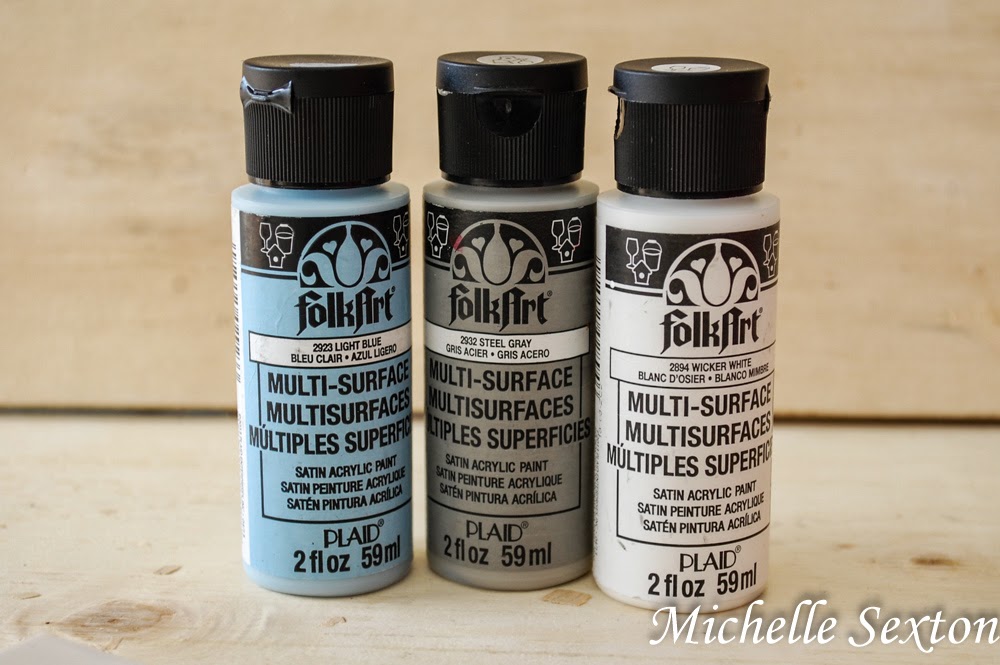
FolkArt Multi-Surface Paint - perfect for a variety of different surfaces. It's even dishwasher safe!

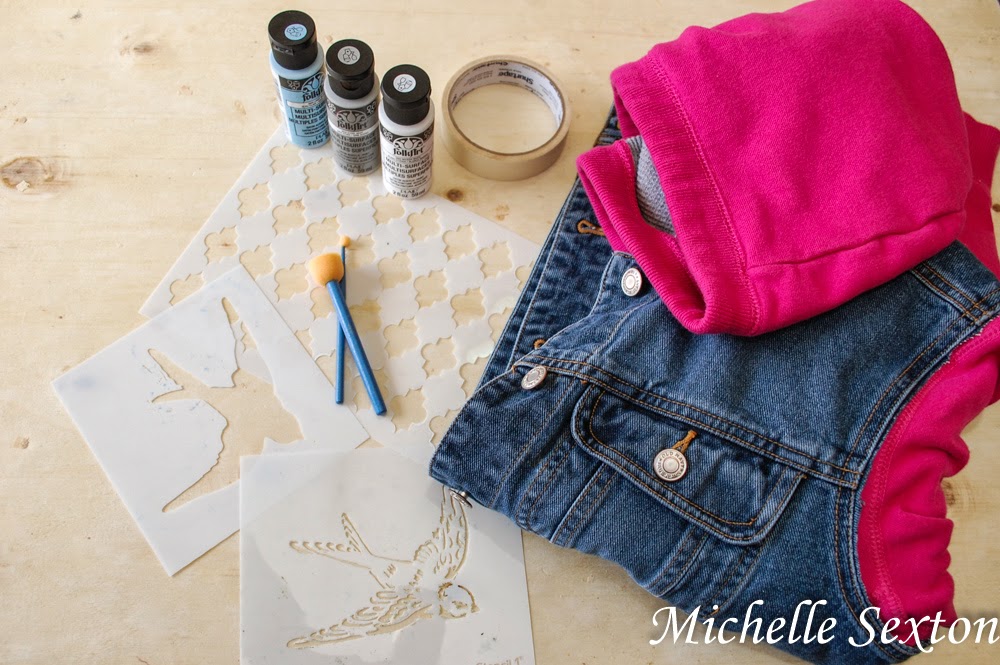
Supplies needed for stenciling

Here's what you need:
- Awesome Hooded Denim Jacket
- Multi-Surface Paint like FolkArt
- Sponge Brushes
- Swallow Set Sencils
- Masking Tape

Here's how I made it:

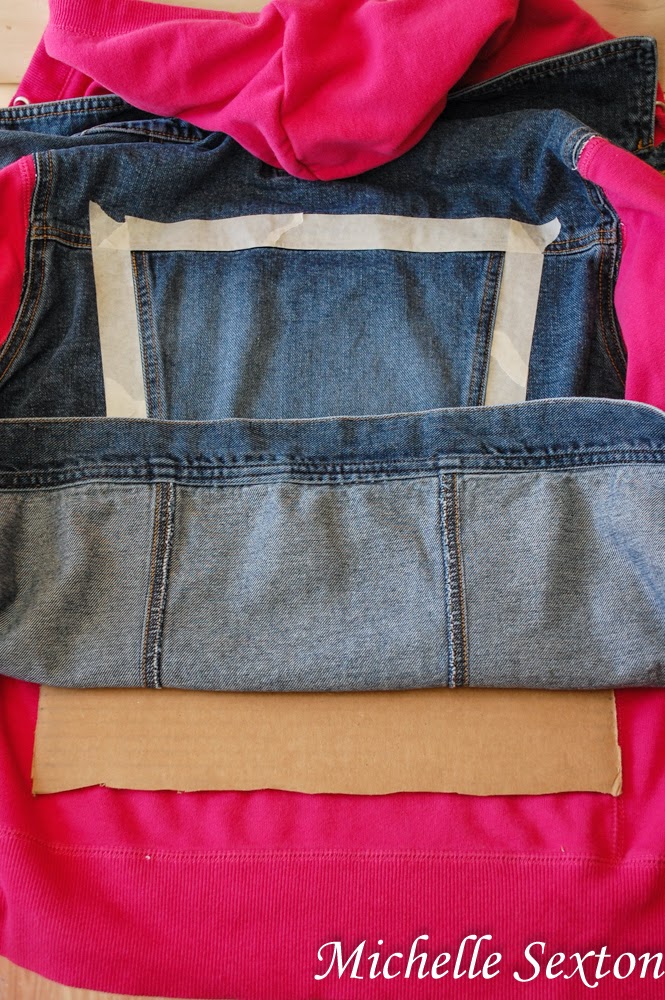
Tape off rectangular section be painted

Slide a piece of unfolded cardboard underneath the denim

Before starting, make sure the surface of the jacket is clean and wrinkle-free. Open up the jacket so it lays on a flat surface. I recommend sliping an unfolded piece of cardboard underneath the denim. It provides a flat surface to work on and also prevents any chance of paint bleeding onto the fabric underneath the denim. Tape around the edges of the rectangle on the back of the jacket.

position stencil and tape it to hold in place

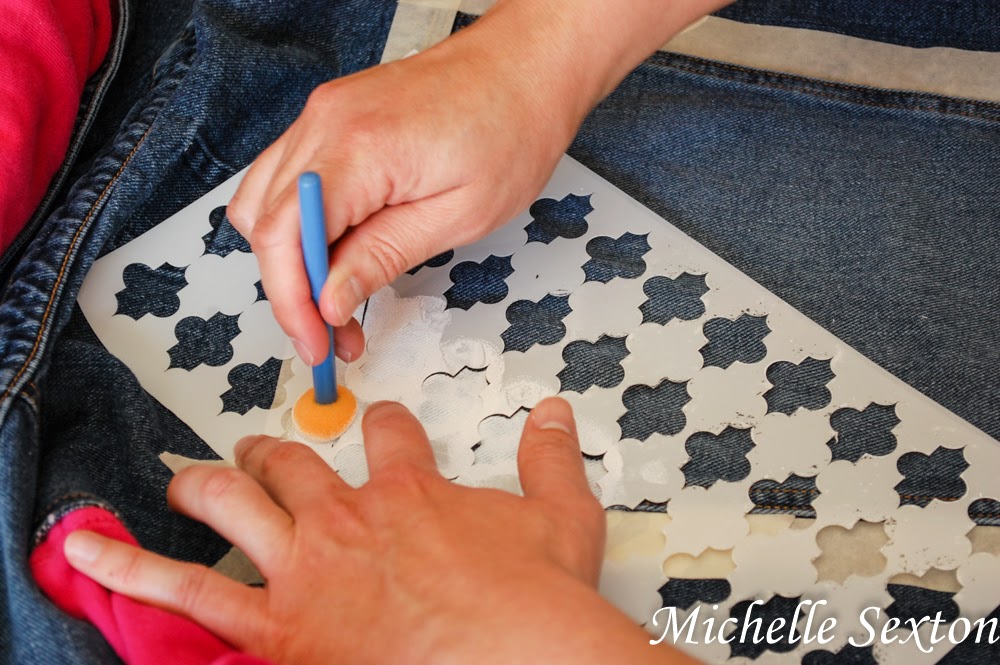
Stencil inside the taped off area

Dab in an up and down motion

Place the patterned stencil at a 45 degree angle, making sure the shape starts at the top left corner of the rectangle. Place one small strip of masking tape on the edge of the stencil, just to keep it in place as you work. Using a sponge brush, gently dab the fabric overlaid by the stencil in an up and down motion. 

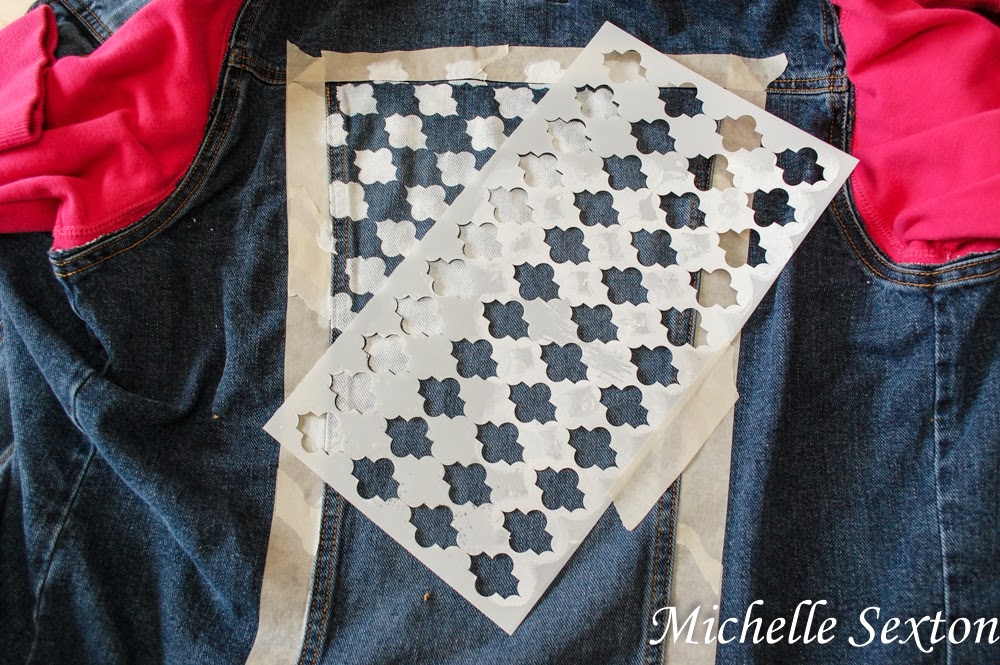
Line up the patterned stencil with the shapes

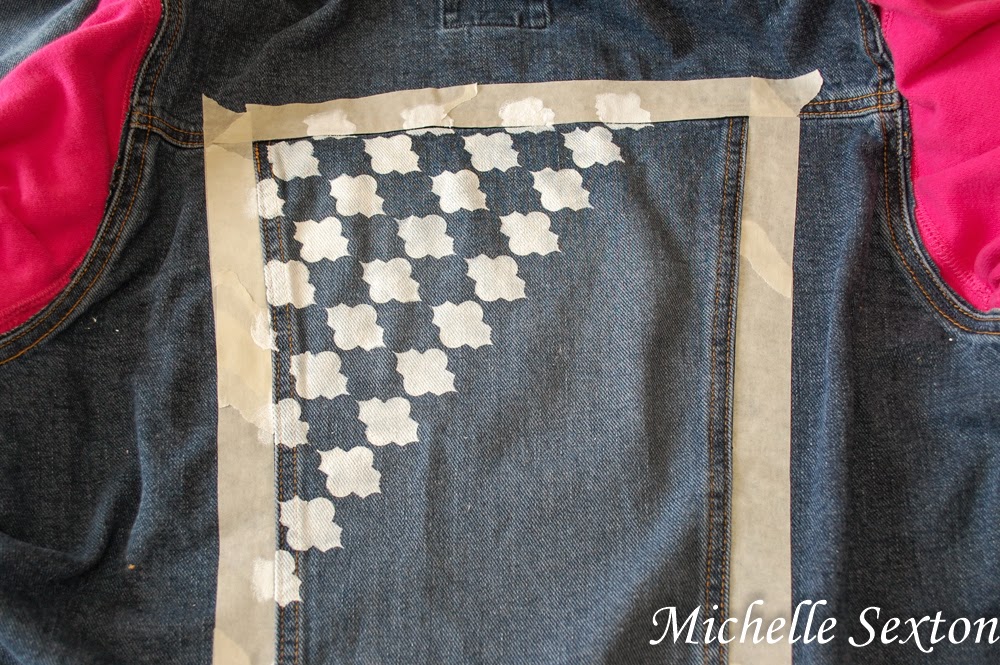
Continue filling in the taped off area with the pattern

Allow to dry completely before moving to the next layer

Once all shapes inside the patterned section of the stencil have been used, peel the stencil in a gentle, upward motion. Allow paint to dry for at least 15 minutes, depending on how much paint was applied. Once painted fabric is dry, line up the patterned stencil with the a portion of the dried section, and apply paint, creating additional shapes and extending the pattern coverage. Repeat this process until the entire rectangle section is covered in the stencil pattern. (Don't forget to wash off the stencils afterward so you can re-use them later. These mylar stencils are durable and easy to clean.)

position the bird silhouette and blot paint in an up and down motion

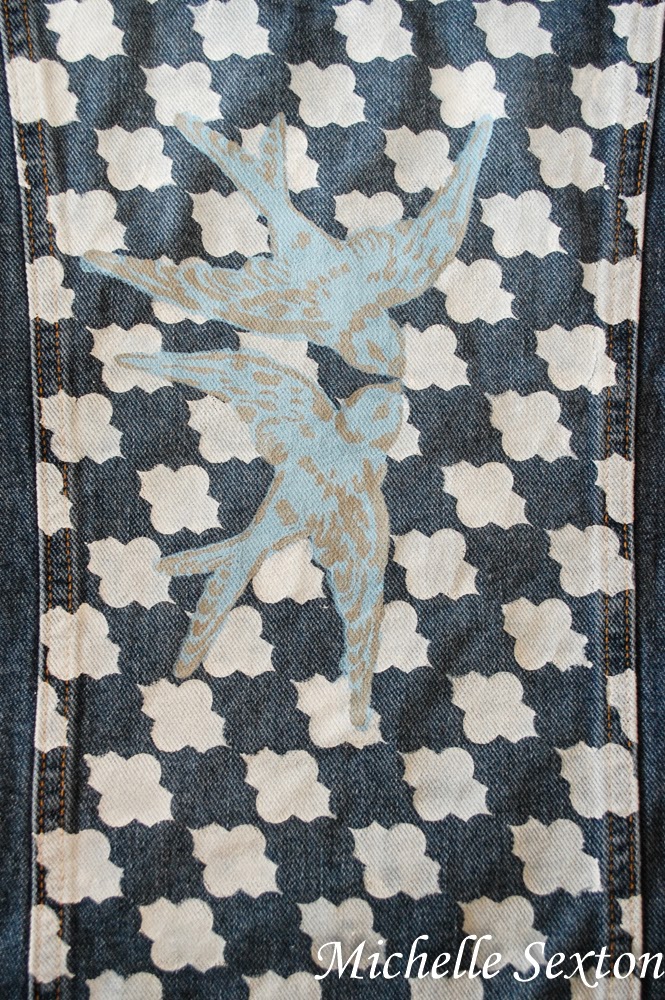
Once the patterned section is completely dry, position the bird silhouette stencil over the painted pattern section, and dab paint. Allow to dry completely. (I found that the bird silhouette needed an additional coat of paint. However, make sure to allow paint to dry completely before applying an additional coat.)

Add the next bird silhouette stencil

Once the silhouette has dried, paint an additional silhouette below the first bird. 

Once the silhouette is completely dry, position the bird's detail stencil over and paint

Upgrade a denim jacket with a layered set of swallow stencils from Stencil1

Finally place the bird detail stencil over the silhouette and dab. Allow to fully dry before adorning. (It's hard to wait, I know!)

Stencils are the perfect way to add character to a denim jacket - click through and learn more at SoHeresMyLife.com

Add flair to your denim jacket with a set of layered swallow stencils from Stencil1 - click through and learn more at SoHeresMyLife.com

Are you feeling the inspiration yet? Go make one for yourself! This stencil set and the rest of the collection can be found at Jo-Ann Fabric & Craft stores. 

P.S. The FolkArt Multi-Surface Paint can be used on just about anything AND are even dishwasher safe! (gasp) I seriously love this paint.

Like what you see? Find more awesome stuff from Plaid Crafts here:

Thursday, March 20, 2014

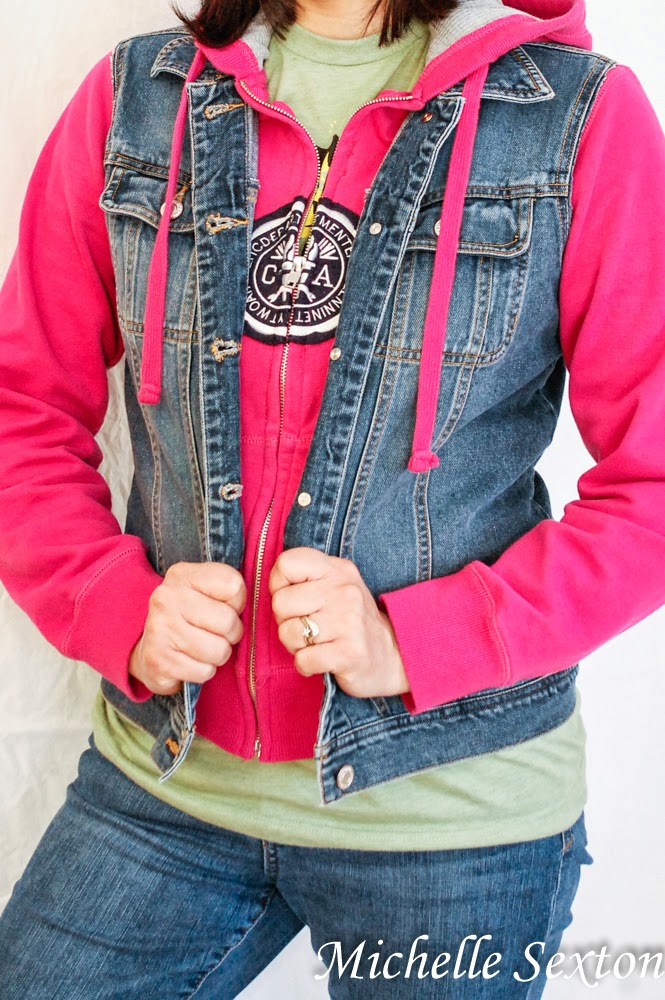
Hooded Denim Jacket DIY

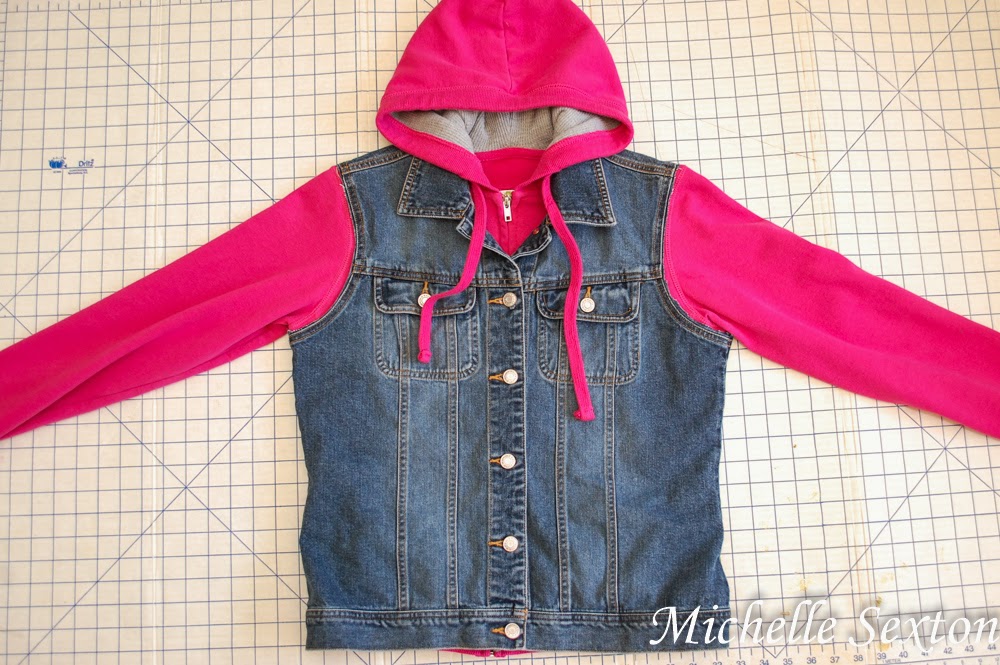
My husband has nicknamed me the "Lazy Seamstress." Maybe I should be horrified, but when he first called me that, it made me laugh for about 2 minutes straight. Why? Because it's true. So. Terribly. True. I'm not in love with sewing or anything, but it's definitely a very necessary means to an end. I tend to avoid any sewing projects that do not involve sewing in a straight line. Why am I telling you this? I'm telling you this because I made something amazing. Something that I've had on my list of Things to Make for years. It sat on my list for years, because I wasn't sure how I was going to make it. I just knew I wanted a hooded denim vest jacket. I found plenty of tutorials, but none of them were quite what I was looking for - an easy, minimal-sewing tutorial that didn't involve taking apart the jacket. All I wanted to do was cut off the denim sleeves leaving vest portion, insert a zip-up hoodie, and then find a way to attach them. In my head it seemed easy enough, but I just couldn't figure out how to make this without over-complicating it (I'm really good at this) until I talked it over with my mom, Aka Seamstress Ninja. Guess what? It was waaay easier than I realized! Major win for the Lazy Seamstress! ;)

Hooded Denim Jacket DIY - this tutorial provides an easy way to make a hooded denim jacket with a minimal amount of sewing @ SoHeresMyLife.com - click through and learn how

Supplies needed:
- zip-up hoodie
- denim jacket
- basic sewing supplies (sewing machine, scissors, thread, and pins)

Let me first give you one quick note about matching a denim jacket with a hoodie. For the best rest results, it's important to find a hoodie and denim jacket that are close in size as well as the same sized sleeve openings, near the armpit, since you have to slip the hoodie into the arm hole openings of the denim jacket. Also, make sure both the denim jacket and the hoodie are freshly washed and wrinkle free. Got it? Good.

cut off the sleeves, leaving the seams intact

Start out by cutting off the sleeves of the denim jacket below the seam that attaches the sleeves to the vest. Trim as close to the seams as desired, but be sure to leave the arm hole seam intact.

remove any unwanted decorations from the hoodie

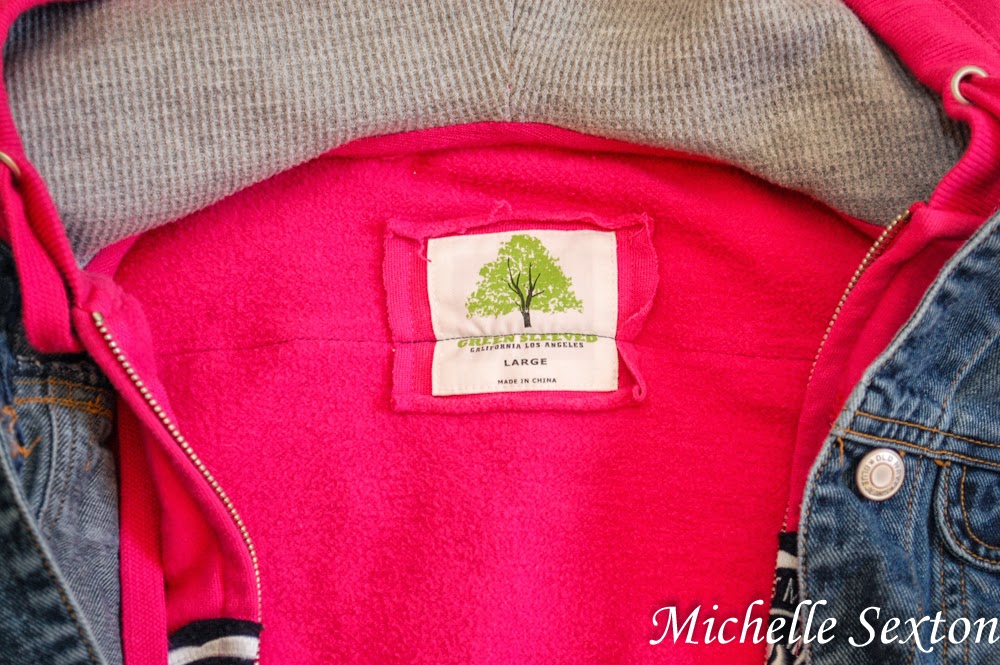
The hoodie that I used in this project had a bunch of stuff sewn onto the front. I felt like most of it detracted from the jacket as a whole, so I ripped out the letter seams and removed the letters from the front.
Line up the seams from both articles of clothing as best as possible
Line up the seams as best as possible

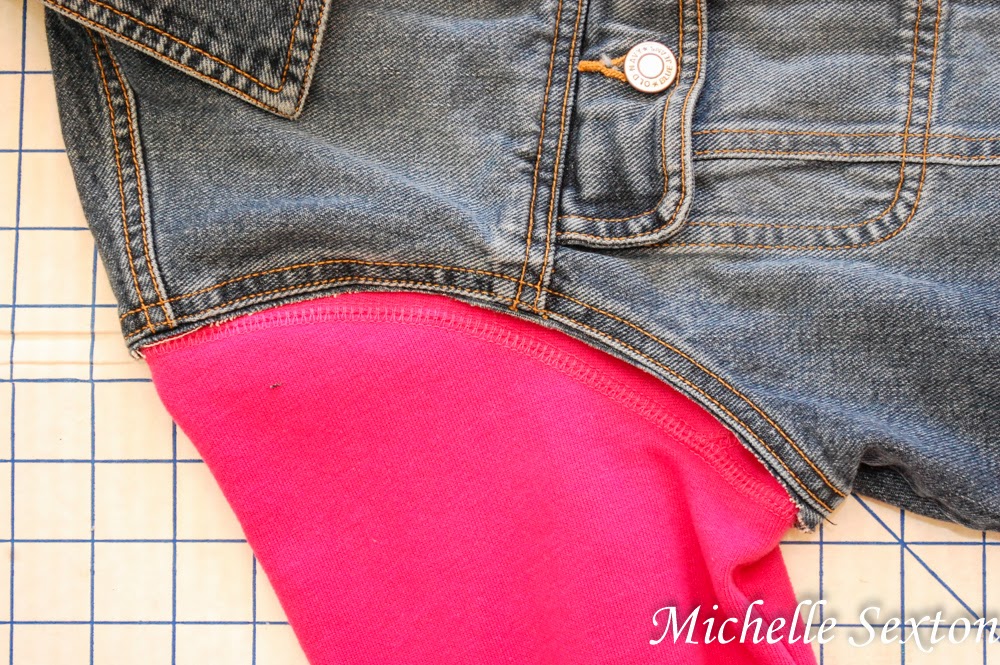
Next, insert the hoodie inside the denim vest. For best results, work on a flat surface. Button each button and zip up the hoodie. Smooth out all the wrinkles and folds and line up the side and shoulder seams of the hoodie with the seams of the vest as close as possible.

pin and sew along seams of the arm holes

sew along seams of arm holes after pinned

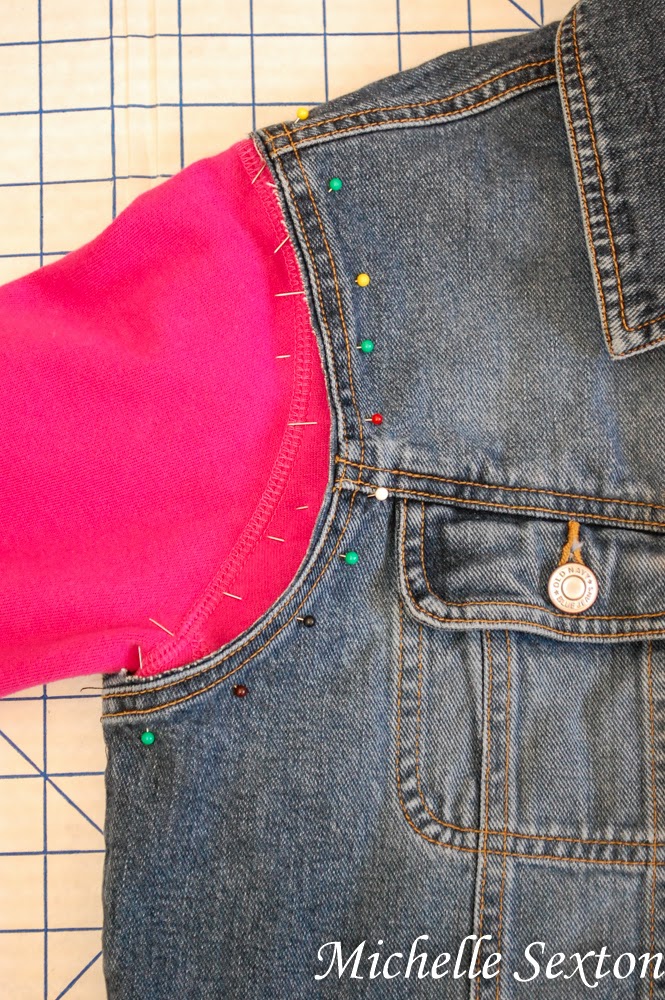
Carefully, pin the hoodie to the vest at both arm openings. This portion is not hard, but takes a little patience. Be sure that the seams from the vest and hoodie line up as closely as possible while pinning. This is truly the most important step of this project.

Once the pins have been placed on both the left and right sides of the sleeve openings, sew the vest and jacket together at the sleeve openings along the seam of the denim jacket or in between the two seams of the arm holes. I began sewing at the armpit of the vest on the backside and worked my way over the backside towards the front. Repeat the same process on the opposite arm hole.
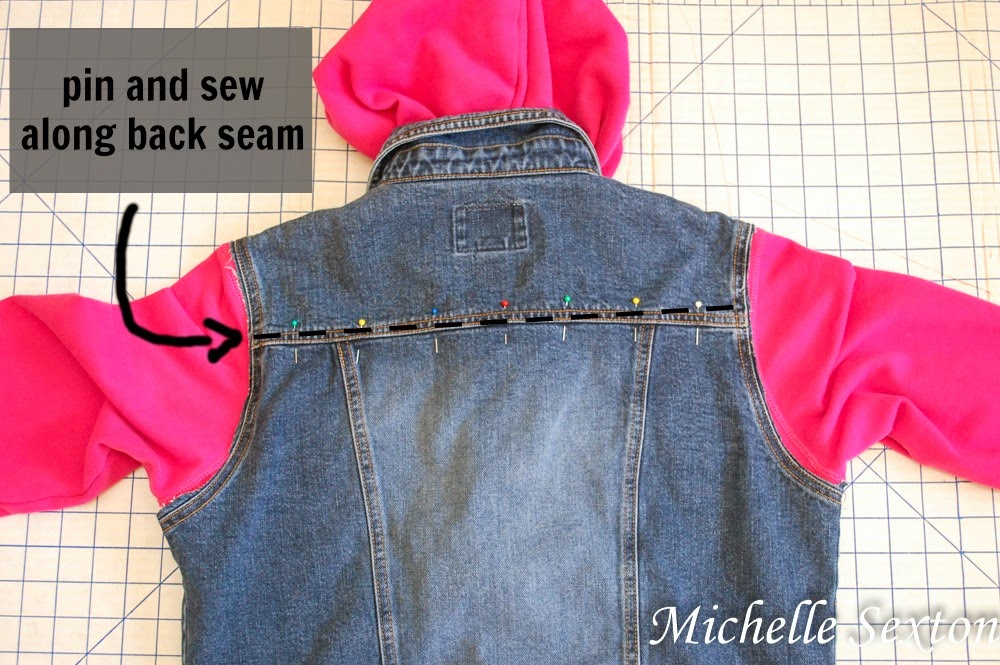
pin and sew along back seam for added security

seam across backside provides extra security
Additional seam sewn across back for added security
Once both arm holes have be sewn, lay the hoodie/vest on a flat surface again, front facing down. Pin the backside of the vest to the hoodie along the back seam that runs across the shoulder blades. Run the pinned portion through the sewing machine for a little added security, to keep both layers together.

Hooded Denim Jacket DIY @ SoHeresMyLife.com click through and learn how easy it is to make this

BAM! That's it! After I finished, I just sat there, amazed and speechless over how easy and awesome this jacket turned out. I didn't even mess up!!! (I usually end up ripping out a couple of seams on each sewing project). Ha!

Hooded Denim Jacket DIY - minimal sewing and easy to make @SoHeresMyLife.com

Hooded Denim Jacket DIY - minimal sewing and easy to make - click through and learn how @SoHeresMyLife.com

Love it? Guess what? Just when you thought this project couldn't get any cooler, it does. I have one more amazing upgrade for this jacket. Click here to see how I stenciled the back. I promise you won't be disappointed :)


Thursday, March 13, 2014

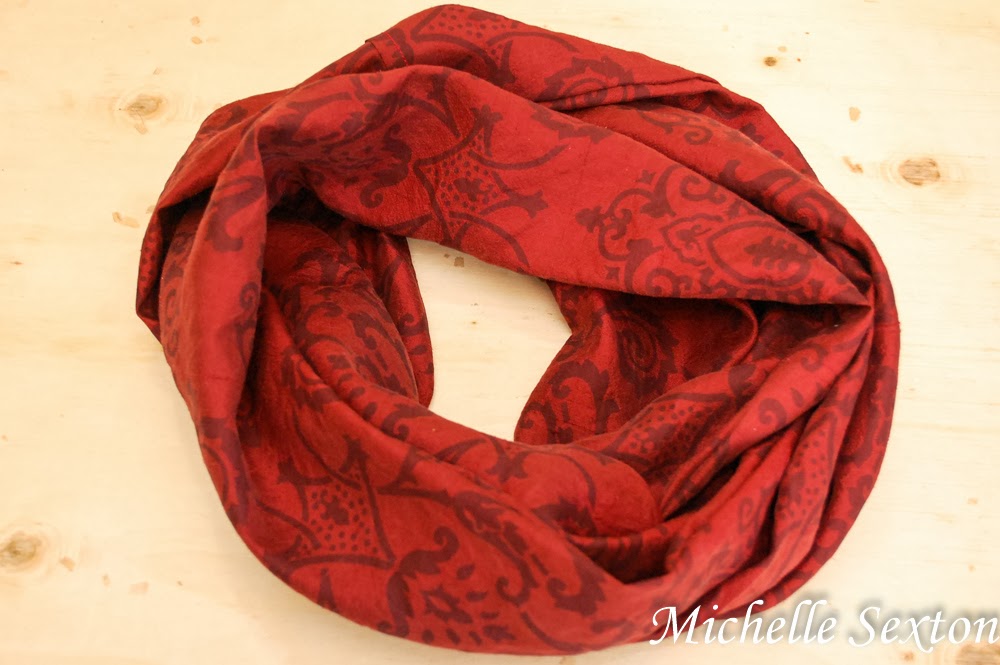
How to Make an Infinity Scarf

Have you ever seen The Sound of Music? Remember the part when Maria von Trapp sewed play clothes for the children out of the drapes?  The idea of turning window dressings into clothes, has always amused me. One day, while rummaging through some fabric scraps, I found a forgotten set of curtains that were given to me several years ago. The problem was that they didn't match anything, so I never hung them up. So guess what I did with them? Did you guess, "Make play clothes for your children?"  Ha! Fooled you! Well, I didn't make clothes play clothes for my boys out of drapes (that would be weird), but I did upcycle an infinity scarf from a curtain.

how to make an infinity scarf - click through and learn how - www.sohersmylife.com

After I came up with this idea, I planned out each step in my head and then proceeded with the project. Little did I know that my plan was unbelievably flawed! Really and truly this shouldn't have been a difficult project, but somehow I managed to over-complicate this project by leaps and bounds. So, after ripping out the seam (probably about 10 times), several phone calls and Skype sessions with my mom (I had to ask her for help. She's like the Sewing Master), I finally figured out how to make an infinity scarf. Now, I have good news for you - it's not hard, but I had to make 934,283 mistakes before I realized this. So, now that I know the right way as well as the easy way to make this, I'll show you how to make an infinity scarf.

You will need:
- fabric (mine was 24 inches x 70 inches)
- sewing machine
- matching thread
- scissors

make an infinity scarf with a curtain - sohersmylife.com

If you plan to use a curtain like I did, make sure to remove the back panel of the curtain.

fold lengthwise and pin - make an infinity scarft

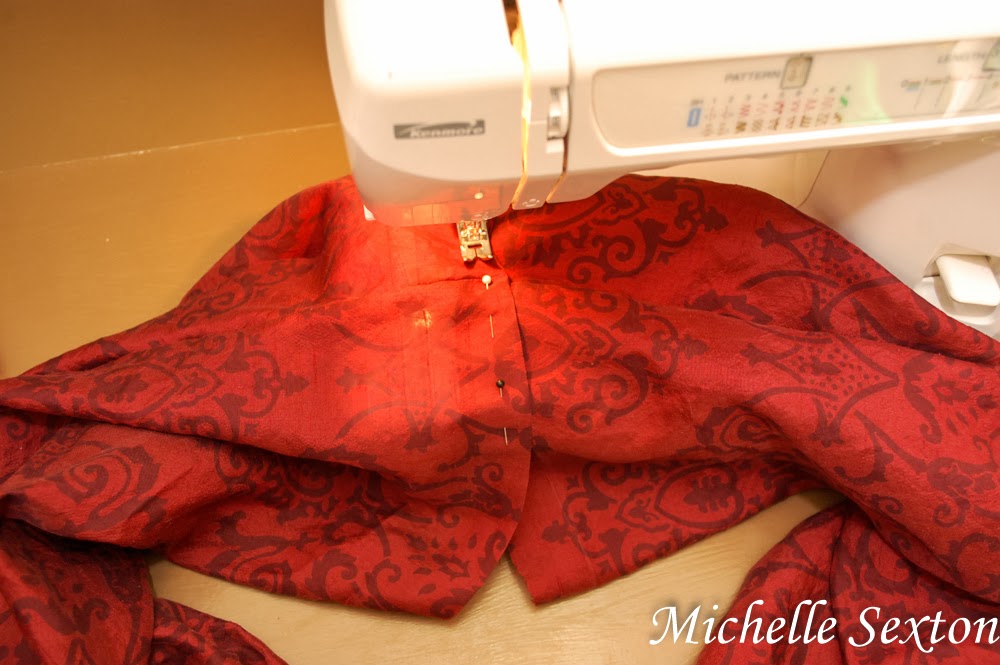
Fold the fabric in half lengthwise (the longer side) so that the backside of the fabric faces outwards. Pin and sew the long sides closed using a straight stitch to create a long "tube". Pull the fabric tube right-side-out.

sew both ends together - how to make an infinity scarf - www.soheresmy.life

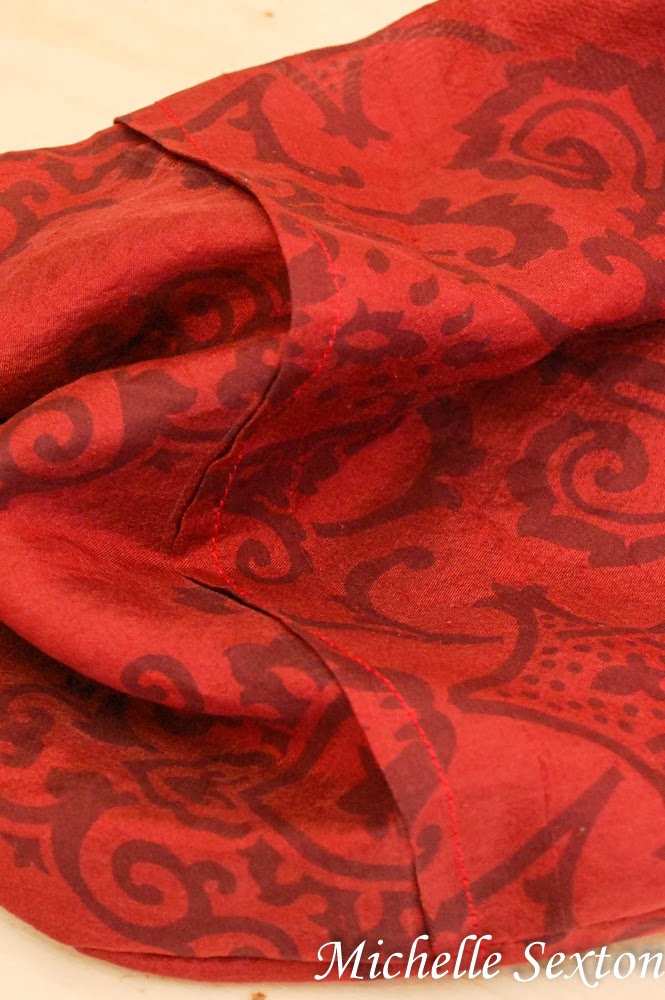
Bring the two un-sewn ends together, making sure that the seam from both ends line up. Fold approximately 2 inches of the edge of Side B inside the tube. (tip - I had to iron the fold to keep the fabric in place). Slip the end of Side A (unfolded) into Side B and pin together, leaving an opening of approximately 5 inches (or more, if needed.)

make an infinity scarf - soheresmy.life

Sew the ends together as far as possible. You won't be able to connect the entire circle using a sewing machine. Hand stitch the remainder to close the opening.

sew an infinity scarf - soheresmy.life

How to make an infinity scarf - soheresmy.life

Learn how to make an infinity scarf  - click through and learn how - soheresmy.life

That's it friends! Now, go and make one!