Boys love cars. I still like playing with Hot Wheels. I'm not sure if that makes me wierd, but if it does, I'm cool with it. Both Mac and Cheese like to play with cars. It really does start young.
Those cool car playsets make it even more fun by giving the play context and allowing for more imaginative interaction. I love those things, but they are so expensive and they get old quickly.
Another (slightly wierd and nerdy) thing that I'm into is "print-and-play games". These are board/card/miniature games that you just download in PDF form, print it, cut it and start playing!
So, I decided to merge these ideas to make a fun, flexible and inexpensive (^_^) way to get your car on, do a fun craft with your kiddos and save some $$$!
Supplies:
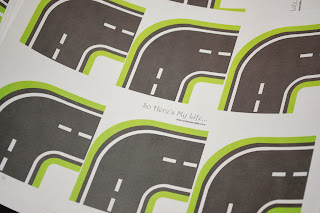
- our custom PDF: SoHeresMyLife.com Printable car town
- cardstock to print it on (regular paper works, but not as well)
- scissors (an Exacto knife and a cutting board are handy, too)
- some sort of glue (glue sticks or spray glue work best)
- medium to large cardboard box
Once you have the PDF printed out on cardstock, cut the road pieces out. Don't leave any white around the edges.
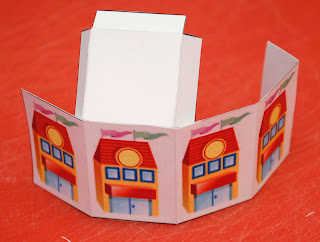
With the buildings cut out, fold along those gray dotted lines. Lightly dragging an Exacto knife along the dotted line to score it will help your folds be easier and straighter, but it's not required.
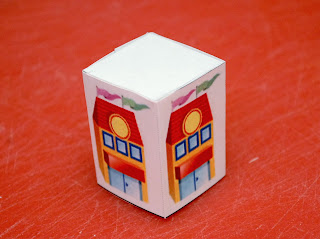
Apply a light amount of glue to each of the 4 smaller blank panels, then fold the building together. Each should take less than a minute to dry and be pretty solid.
Next, we need to make panels out of the cardboard box to glue our roads to. It's not necessary to cut every panel of your box off. What I did is separate each side of my box, then cut the top panel off of each side, leaving the bottom one. This allows you to have some larger panels for bigger pieces and smaller panels for interconnecting pieces.
Take your road pieces and arrange them on one of the big panels. Try to make a fun looking arrangement that has road pieces ending along the edges so that you can connect various panels together to make a larger city map. You can trim down the straight road pieces as needed to make them fit well. I recommend only cutting straight roads that end along the edges. If you keep to this, it will help your panels to line up a little better.
Once you have planned your arrangement, it's time to glue the pieces on-by-one. Make sure that the glue on the bottom of each piece goes all the way to the edges so that they won't peel up and get dog-eared. Be careful to place each road piece so that there aren't gaps between them and line up the white lines just to keep things tidy and lined up. Repeat with each of the large and small panels.
You could also add a set of plastic road signs & various city props. We picked up a small set of these from a dollar store near our house. This adds to the immersive experience. With the town all set up, this should keep your kiddo entertained for quite a while. Show them how to rearrange the panels and change the layout, also.
With a modular playset like this, it's easy to pick up quickly and doesn't take up much room when stored. Now that I have this all set up, though, I'm going to go play with it for a while before Mac gets back from hanging out with his grandpa. :)
One more link for the Printable Road Maps, in case you missed it earlier.
Liked the post? Let me notify you of new posts. Don't worry, I hate SPAM and won't abuse your email address. :)


7 comments:
What a fabulous idea, thank you! I love that the kids can help make and design these roads.
Thank you for making this available! I put it together today while the kids were napping and my 4 year old got to play with it as soon as he got up...we have lots of cars and a zoo too!
Elaine and Leslie,
Thanks so much. I'm really glad you're enjoying them! Our 4 year old loves playing with them, too.
What a fun after-nap surprise, too!
My 3 1/2 year old would love this. Is it possible to get a copy of the PDF with the roads on it?
VERY cute!!! I tried to click the link for the pdf though and it says that account is suspended... is there any place else that the pdf can be found?
Ok Stephanie and Krystal - we got it fixed. We had some kind of weird issue with the web hosting people. Thanks for letting me know about it. You should be good to do download the PDF. :)
thanks a looot for sharing wornderful idea and PDF.
Post a Comment