So Here's My Life

The things we make,
the food we eat and
the shenanigans in between.

A blog about making things by
MICHELLE SEXTON

Showing posts with label recipe. Show all posts

Thursday, April 24, 2014

Sidewalk Chalk Paint & Plastic Easter Egg Play

Do you still have a multitude of leftover plastic Easter eggs? We do over here, too. Earlier this week, I shared 15 ways to reuse plastic Easter Eggs. You should definitely check it out. We are still coming up with new ways to reuse all of these eggs. A couple of days ago, we spent a good hour painting on the sidewalk with plastic Easter eggs and sidewalk chalk paint. (BTW, I have the Sidewalk Chalk Paint Recipe, too!) The boys had a blast. Here's how it went down:


You will need:
- 2 cups of water
- 2 cups of cornstarch
- empty squirt bottles (like dish soap bottles)
- food color
- plastic Easter eggs


How to make the Sidewalk Chalk Paint:
Add the cornstarch into the water, in small increments, whisking as you add the cornstarch, until thoroughly combined. It should produce approximately 3 cups of sidewalk chalk paint. Add equal amounts of the cornstarch mixture to each squirt bottle and add about 5 drops of food color (or more if you like) and shake each bottle to combine the paint.

There are so many ways to play with the sidewalk chalk pain and plastic Easter eggs:
- Pour the paint into the eggs and drizzle it out
- Crack the paint filled eggs open onto the cement
- Shake paint filled eggs (with the holes) to drip onto the cement
- use the egg shell halves to stamp with paint or to create impressions into partially dried paint
- lay the shells down and paint over the top of the shells
- use a paint brush (or basting brush) to paint directly onto the cement.

 Mac enjoyed pouring the paint inside the Easter Eggs

Mixing the paint colors was a fun experiment 

 Pouring the paint from the eggs onto the concrete.


 Cheese scraped the paint with the plastic egg shells.

 Cheese's favorite activity was pouring the paint directly onto the concrete. (Typical toddler) 


 At this point, Cheese claimed ownership over the bottle of green paint, and became angry when he was forced to share with his brother. So, to protest, he decided to lay face-down on the painted concrete. Oh, toddlers. ;)

This was the result of his protest. The funny thing was that it never seemed to bother him to have wet chalk paint on his face. He was crying because he was angry. 


Scraping patterns into the paint. 


Super easy, potentially messy (completely washable), but plenty of fun.  

Tuesday, February 25, 2014

Canadian Bacon and Egg Muffins Recipe

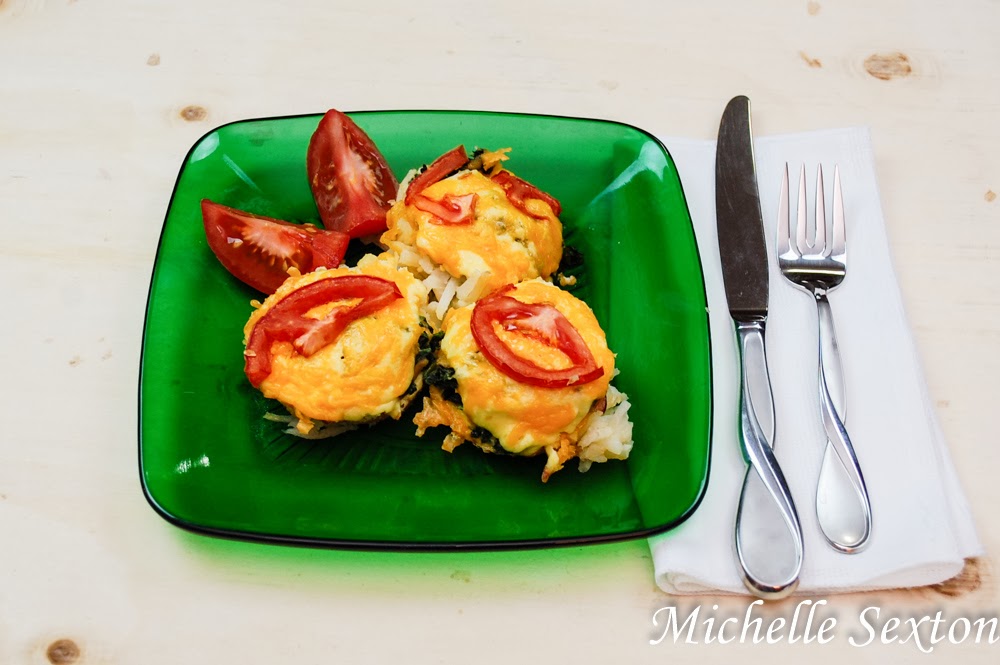
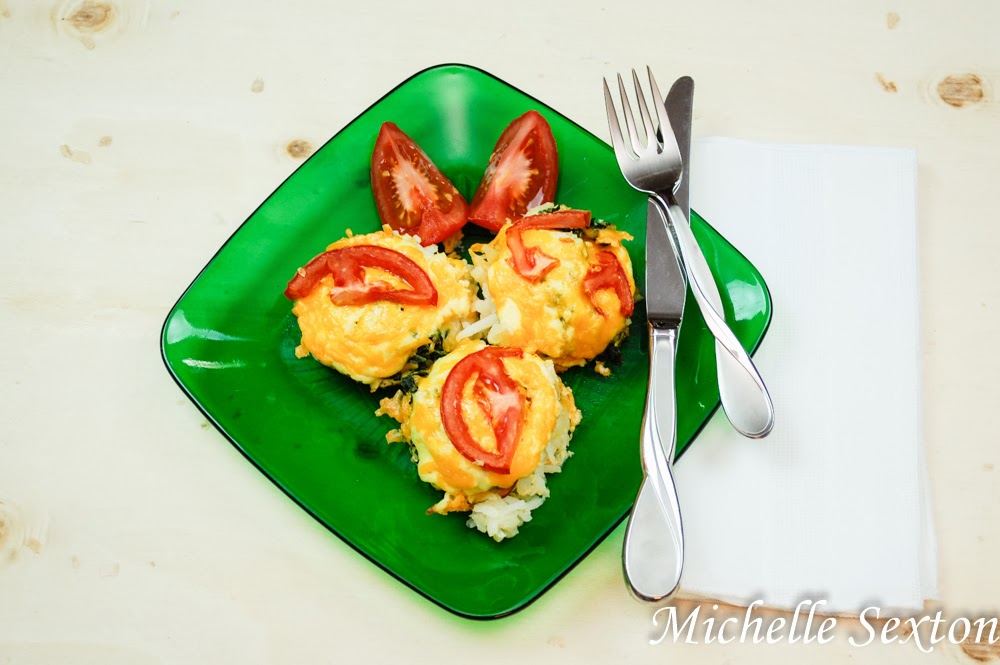
Recipe Alert! I have a good one for you guys today. In fact, the last time I made this everyone at the dinner table was completely silent - not because like my food poisoned them or anything, but because it was AWESOME. Oh, yes it was. All four of us were so consumed by the amazing flavor combinations of this dish, that nobody was willing to speak, not even for a moment (even Mac, which never happens, because he will do anything to get out of eating his food - usually by talking). None of us could bear the thought of sacrificing a even a moment for words. What is this recipe, you ask? Well, let me tell you, Canadian Bacon and Egg Muffins. Although, it's no much of a muffin, but maybe more like a cup. There is no bread in this recipe, we use hash browns instead...and they are awesome.

Canadian Bacon & Egg Muffins with Hash Browns Recipe - click through and get this recipe

Are you ready to make it? Here's how I did it -

Ingredients:
- 5 cups country style hash browns, thawed
- 1 1/2 cups frozen chopped spinach, thawed
- 3/4 cup part-skim ricotta cheese
- 3 large eggs, beaten
- 2 Tbsp green onions, chopped
- 6 slices uncooked Canadian-style bacon, quartered
- 1 cup of 2% shredded sharp cheddar cheese
- 2 sliced plum tomatoes, seeded

Canadian Bacon & Egg Muffins with hash browns - don't miss out on this recipe!

In a microwave safe bowl, combine thawed hash browns and green onions. Cover bowl with plastic wrap and microwave for 2 minutes or until potatoes are tender. Put in colander to drain. While potatoes are cooking, squeeze spinach dry. In a small bowl, combine ricotta cheese and eggs.

Spray a 12 muffin tin with cooking spray. Distribute potatoes evenly in the bottom of each tin (start with 1/4 cup per tin). Top with a quarter-slice of bacon, 1 heaping teaspoon of ricotta cheese mixture, 2 tablespoons of spinach, a table spoon of cheddar cheese, another bacon quarter, and another heaping teaspoon of ricotta mixture. Sprinkle tops with a few remaining shreds of cheese and 2 tablespoons of the seeded, sliced tomatoes.

Bake muffins until fully set and ricotta is cooked through, about 25-30 minutes. Cool in muffin tins for about 10 to 15 minutes before removing. Makes 12 muffins.

Serve, eat, and enjoy the silence while your family consumes this tasty meal.

Canadian Bacon & Egg Muffins with Hash Browns - get this recipe!

Can't get enough hash browns? Try these Baked Hash Brown Patties too!

I came across this recipe at Shrinking on a Budget. If you haven't checked out this site, I highly recommend it.

Thursday, February 6, 2014

Baked Hash Brown Patties

If I were to ask you what your favorite breakfast side is, would the answer be hash browns? Yes? I knew it! Hash browns are pretty high on my list of favorite breakfast sides...in fact, I'm pretty sure they ARE my favorite side to eat for breakfast. Yes, yes they are, and now I know that you like them, too. So, do you want to make some? (Pshhh...like I really have to ask! I KNOW you do.) I found an awesome upgraded recipe for hash browns to share with you. These aren't your typical hash browns. Instead of frying the life out of those grated potatoes (and adding waaay too much grease), we bake them! They're not as crispy as the fried version, but these hash browns are still firm, non-soggy, and extremely satisfying, you won't even miss the crispies.  They have several bonus ingredients in them: onions, garlic, cheddar cheese, and even eggs! What? Oh, yes they do. But wait, there's more - the coup d'etat of this dish is a hint of sour cream and bacon to top off these baked hash brown patties. What more could you ask for? Nothing, really.


Ready to make them? Great! Let's get started:

Ingredients:
- 2 pre-cooked hickory-smoked bacon slices
- 2 teaspoons of olive oil, divided
- 3 cups of chopped frozen (thawed) onion
- 3 garlic cloves, minced or put through a garlic press
- 1 1/2 pounds of shredded peeled baking potato (about 2 large ones)
- 1/3 (1 1/2 ounces) reduced fat shredded sharp cheddar cheese
- 3/4 teaspoon salt
- 1/2 teaspoon freshly ground black pepper
- 2 large eggs
- cooking spray
- 1/2 cup reduced-fat sour cream


Make it like this:
Preheat oven to 425 degrees. Peel and grate potatoes. Then, put potatoes in a clean dish towel and gently squeeze out the excess moisture. (super important step to avoid soggy hash browns)

Heat olive oil in a medium non-stick skillet. Add onion and cook over medium high heat for 5 minutes, stirring occasionally. Add garlic and cook for 2 minutes, stirring frequently. Remove from heat and allow onion mixture to cool for 5 minutes. Combine onion mixture, grated potato, cheddar cheese, salt, black pepper, and eggs in a medium bowl, stirring well. Put pre-cooked bacon on a plate lined with paper towels and heat for 40 seconds or until crisp (assuming the bacon needs to be reheated). Set aside.

Divide the potato mixture into 8 equal portions and shape each portion into a 1/2 inch thick patty. Place the patties on a baking sheet coated with cooking spray. Coat tops of patties lightly with cooking spray. Bake at 425 degrees for 15 minutes. Flip and cook another 10-15 minutes on the other side (or until patties are dark golden and set). Top with crumbled bacon and sour cream.


Eat and enjoy these baked hash brown patties and then repeat again the next day. :)

By the way, I found this recipe on the Shrinking On a Budget website.

Tuesday, January 14, 2014

Lasagne Roll Ups Recipe

I want to talk about Lasagne today. Do you like lasagne? I know you do. I like lasagne too. Lasagne was one of my favorite things to eat when I was growing up, but who doesn't like Lasagne?? That's right, nobody. Lasagne is terrific - giant noodles, cheese, marinara sauce..what's not to love? When I was growing up, my mom would make our favorite meal on our birthday. I chose lasagne several times.

So we've established that Lasagne is great, (but I really didn't need to convince you, because you already knew it was), but the real question is, "Can it get any better?" The answer is YES! It absolutely can be upgraded. How? Roll it up! What? People do that? Yes! And it's great! Here's why:
- It's kid friendly
- It's less messy and easier to serve than regular Lasagne.
- It's easier and quicker to prepare!!

The Lasagne Roll Ups Recipe is an easier alternative to regular recipe - click through and see how quickly you can make this

How easy is it? Scroll down and find out.

Lasagne Roll Ups

Ingredients:
- 12 lasagne noodles (about 13 ounces)
- 2 cloves garlic (minced or fed through press)
- 2 teaspoons olive oil
- 15 ounces of part skim ricotta
- 1 cup shredded part skim mozzarella
- 1/4 cup grated Parmesan cheese
- 1 large egg, beaten
- 10 ounces frozen (thawed) spinach
- 2 1/2 cups marinara sauce
- 1/4 teaspoon salt and pepper
- non-stick cooking spray

Begin boiling water for the noddles. In the meantime, prepare the lasagna filling. In small skillet, heat the olive oil to medium. Saute garlic for 1 minute, stirring often. Set aside. Thaw and squeeze the spinach very dry. Combine the ricotta with the garlic and stir to combine. Then combine the "dry" spinach in a bowl with the egg, ricotta, mozzarella, parmesan, salt and pepper. Mix until thoroughly combined.

When water reaches a heavy boil, add the noodles and boil according to directions for al dente. Occasionally stir noodles, very gently while they cook to prevent them from sticking to each other and the pot. Preheat oven to 400 degrees. Spray a 9 x 13 glass baking dish with non-sick cookies spray.

Once your noodles are cooked, drain them in colander, cool slightly (just enough to where you can handle them) and then lay them out on a cutting board or clean surface. Spread 4 tablespoons of filling over each noodle (filling should spread edge to edge). Roll from end to end (as pictured in photo below).

Spread 1/4 cup of marinara sauce in the bottom of the dish. Place rolled/filled noodles seam side down in dish. Pour the remaining marinara sauce over the tops of the lasange roll ups, taking care to fully cover the noodles. Cover the dish with aluminum foil and bake for 30 minutes at 400 degrees.

Lasagne Roll Ups Recipe - Quick, easy, and kid friendly!

***A couple of tips to keep in mind***
- Cook a couple of extra noodles just in case some of them get torn. Torn noodles do not work well with this recipe
- It's best to cook the noodles to al dente due to the fact that the noodles continue to cook in the oven.
- Squeeze the spinach until its very dry.
- Be sure to cover with foil while baking to prevent the noodles form drying out.

I found this recipe on the Shrinking On a Budget website. If you haven't checked out this meal plan service, I highly recommend that you do. This meal plan service has made my life so much easier when it comes to meals. :)

Tuesday, January 7, 2014

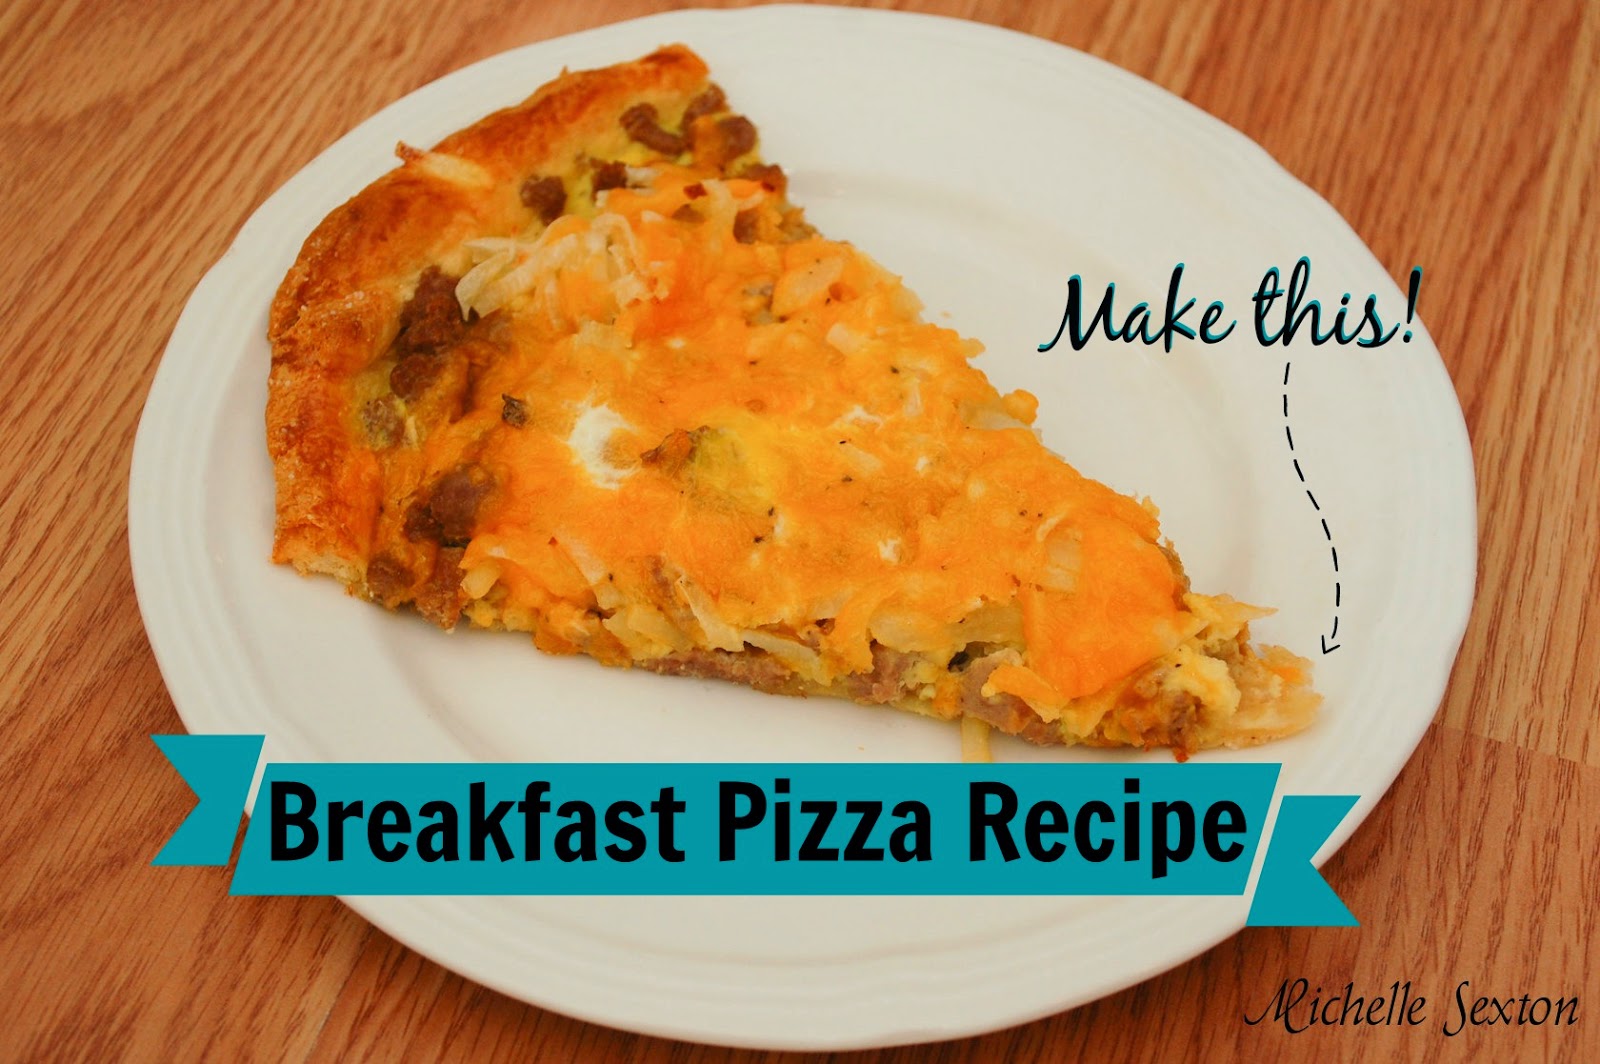
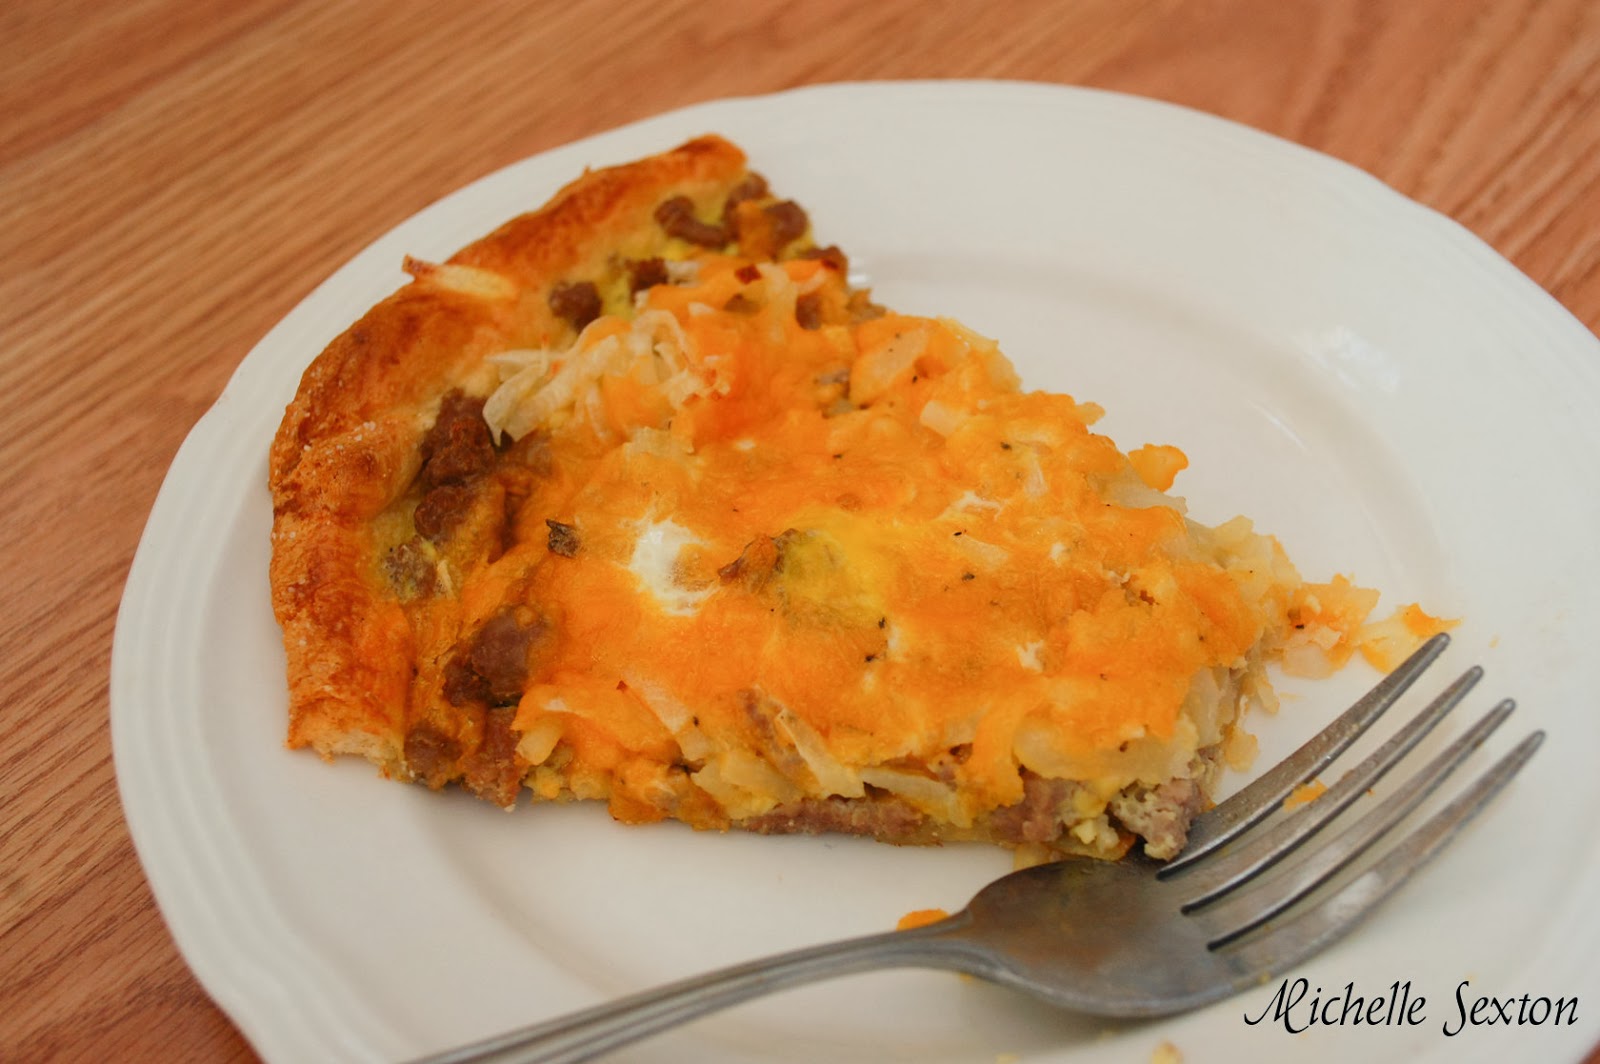
Breakfast Pizza Recipe

Hey friends. It's been a while...ok actually about 2 weeks. I had plans to post some fun stuff last week...and then my kids decided to get me sick. I decided this would be a very appropriate time to take a break, especially since it was the Holidays and all. So basically I spent the Holidays sick. Good times. Or not. But there's always next year, right? So let's change the subject because I'm starting to feel sorry for myself...and that's never a good thing. ;) Let's talk about breakfast instead! Breakfast is really my thing. I know I've said it before, but I LOVE BREAKFAST. I don't know why, I just do. So I want to share this Breakfast Pizza Recipe that I came across on the Shrinking On A Budget Meal Plans a while back. We actually ate this for dinner, but this is totally appropriate for breakfast too. I will leave it up to you as to which meal you prefer to eat this at. Are you a breakfast fiend like I am? Yes? I also recommend Breakfast Cookies. You won't be disappointed.

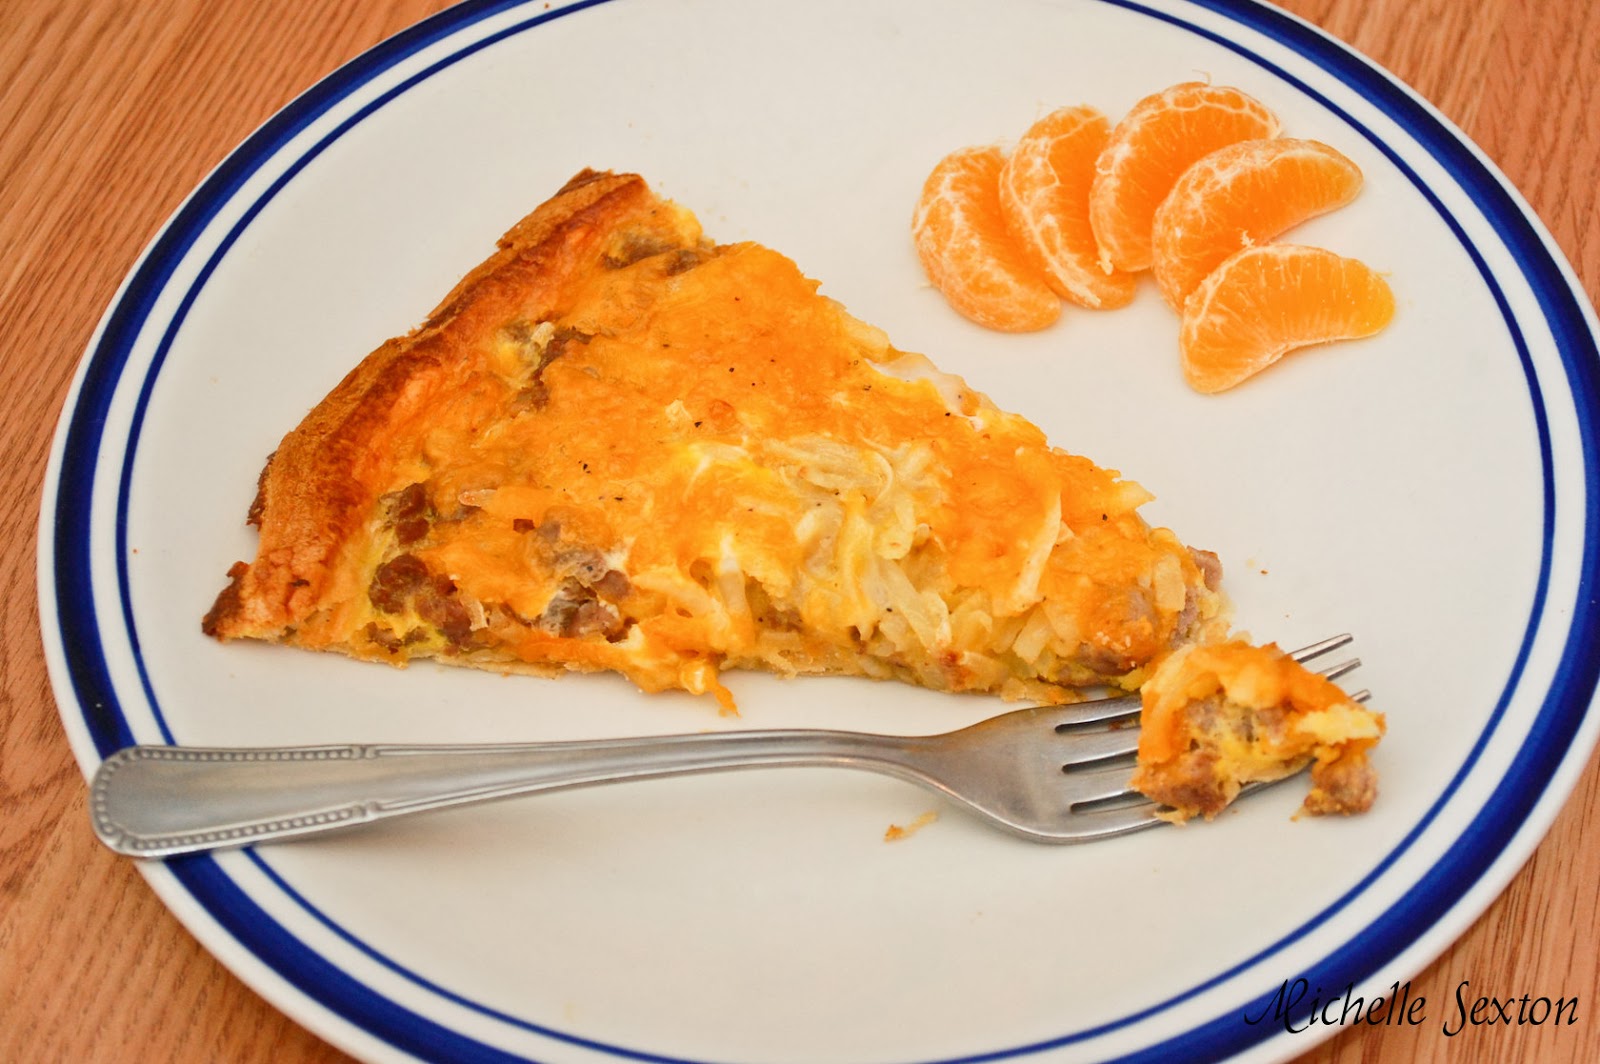
This Breakfast Pizza Recipe is the perfect thing to make for any meal, regardless of the time of day. Click through to learn how to make this.

Ingredients:
- 1 (8 ounce) can reduced-fat refrigerated crescent dinner roll dough
- cooking spray
- 12 ounces turkey breakfast sausage
- 1 cup frozen shredded hash brown potatoes, thawed
- 1 1/2 cup (5 ounces) shredded 2% sharp cheddar cheese
- 1/4 cup 1% milk
- 1/2 teaspoon salt
- 1/8 teaspoon black pepper
- (8 ounce) carton egg substitute

The perfect meal to make for any time of day- Breakfast Pizza. Click through to learn how to make this.

To make this awesome pizza:
Preheat oven to 375 degrees. Line a cookie sheet with foil and spray with non-stick cooking spray.

Cook sausage in a large non-stick skillet over medium heat until browned, stirring to crumble. Drain

Separate dough into triangles. Arrange triangles to form a single round crust on a cookie sheet (arrange into circle). Press triangles together. The crescent crust will go all the way to the sides on the narrow ends of the cookie sheet. Crimp edges of dough with fingers to form a 1/2 inch - 3/4 inch high rim (this will hold in eggs). Top prepared dough with sausage, potatoes, and cheese. Combine milk, salt, pepper, and egg substitute, stirring with a whisk. Carefully pour milk mixture over sausage mixture. Bake at 375 degrees for 25 minutes or until crust is browned.

Breakfast Pizza Recipe - Don't miss it. Click through to learn how to make it.

Tuesday, November 19, 2013

Pumpkin Oat Pancakes Recipe

Have you had your fill of pumpkin yet? No? Guess what? You're in luck! I have an awesome recipe to share with you guys today. Pumpkin Oat Pancakes. Wait - what? Pumpkin flavored pancakes? That's a thing? Yes! Yes it is. Pumpkin. I adore this flavor. In fact, I keep a can of pumpkin and bottle of pumpkin spice in my cupboard all year round. I always look forward to the Fall season because of the pumpkin recipes that surface. I highly recommend serving these pancakes for breakfast on Thanksgiving morning.

Pumpkin Oat Pancakes with Bananas on the side

I came across this recipe at Shrinking On A Budget. I've found a decent variety of pancake recipes on this site over the past couple of months. Apparently I have a thing for pancakes. A while back, I shared a recipe for Blueberry Protein Pancakes. I found that recipe on SOAB, too. Good stuff, people, good stuff.

pumpkin oat pancakes close-up

Here's how to make them:

Ingredients:
1 cup regular old fashioned oats
8 egg whites
1/2 cup 1% cottage cheese
1/2 cup pure canned pumpkin
1 1/2 teaspoons pumpkin spice
3 tsp sugar

Combine oats, egg whites, cottage cheese, pumpkin, pumpkin spice, and sugar in a blender and pulse until somewhat smooth (about 10 pulses). 

Spray a non-stick pan with non-stick spray and heat to medium-low. Pour into pan using 1/3 cup
of batter per pancake. Cook on first side until edges look done and a few air bubbles stay at the surface. Flip and cook until the desired color is reached. Top each serving with one sliced banana just before serving.

Pumpkin Oat Pancakes

Pumpkin Oat Pancakes. AH-mazing. Enjoy.

Thursday, October 3, 2013

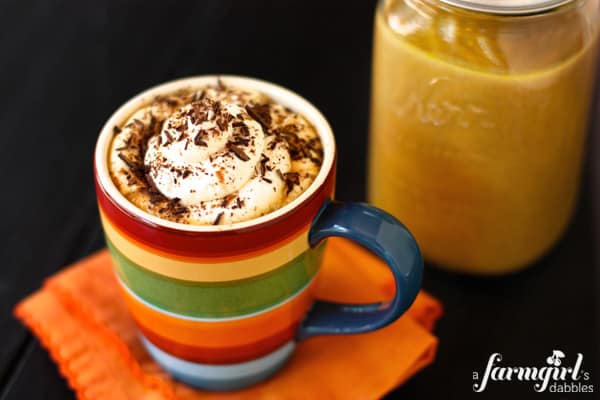
Toasted Marshmallow S'mores Hot Cocoa

Just so you know, after you consume this drink, you may end up on a permanent sugar high. But you need to know that this hot cocoa is amazing. I've noticed that a local coffee shop chain is serving Toasted Marshmallow Hot Cocoa this Fall. Sounds awesome, but I want to make this at home, especially since my outings are planned around nap schedules, you know? So after looking around online, I couldn't find a recipe for Toasted Marshmallow Hot Cocoa that didn't require using Toasted Marshmallow Syrup. I don't know about you guys, but I don't think I want to order a giant bottle of Toasted Marshmallow Syrup. Pantry space is limited in this house. And why can't I use REAL marshmallows? So I decided to make my own. And then I decided to upgrade and included graham crackers. S'mores. Even better.

cup of hot cocoa in a blue cup

So here it is, friends. The next time you feel a longing to eat a s'more but you're missing a campfire, try this instead. Or when that sugar craving sneaks up, satisfy your sweet tooth with this warm drink. This cocoa will make you want to turn down your lights, curl up under a warm blanket, and sit by a fire place. This presents a problem if your house doesn't come with a fire place. Hmmm...I am not responsible for unfulfilled cozy wooden cabin feelings this cocoa may arouse.

This recipe is for one serving (me), but it's easy to double or even quadruple because sometimes we want to enjoy our cocoa with others too, right?

hot cocoa ingredients

Ingredients for one serving:
- 1.2 oz of milk chocolate, chopped (about 1/3 of a 3.5 oz chocolate bar)
- 2/3 cup of milk (I used fat free because that's what was in the fridge)
- 2 jumbo marshmallows (the super huge kind)
- 1 teaspoon of graham cracker crumbs, plus additional squares for garnish and dunking

close up view of a toasted marshmallow in a cup of hot cocoa

Broil one marshmallow in toaster oven (or regular oven) for about 2 minutes or until marshmallow is browned and smells toasty and sweet. (You know the smell - when you roast it over a campfire.) Set aside. Combine milk and chocolate in a small saucepan over medium-low heat. Wisk continuously until well blended. Cut remaining marshmallow into smaller pieces, and add to chocolate mixture. Wisk until completely melted. Remove from heat and pour into a mug. Top with toasted marshmallow and graham cracker crumbs. Enjoy cozy feelings resulted in this drink.

top view of a cup of hot cocoa with graham crackers and marshmallows

Thursday, September 19, 2013

5 Awesome Autumn Hot Drink Recipes

Is anyone in the mood for Fall yet? Maybe we should call it Autumn. Don't you think the word "Autumn" is more inspiring than "Fall"? I do. There are so many things to love about this season - the cooler weather, changing leaves, boots, scarves, the State Fair (ours is in September), the Balloon Fiesta, Pumpkin Patches, and no more bugs (hooray)! There's something about Autumn that makes you feel cozy and nothing helps that more than a warm beverage to sip as the chilly mornings begin.

So, here are 5 Autumn inspired hot beverage recipes to keep you warm.

Salted Caramel Hot Chocolate
1. Salted Caramel Hot Chocolate - A plain cup of hot chocolate really isn't my thing. But salted caramel most definitely is. I haven't been able to shake the Salted Caramel/Chocolate flavor out of my mind lately. It's just so good! This was a huge hit when I made this for a group of my friends. They loved it so much, I had several requests for seconds. 
 
Pumpkin Spice Latte
 2. Pumpkin Spice Latte - Who doesn't like Pumpkin Spice Lattes? My husband and I love making these when the weather is cool. Plus, it's much cheaper than the $5 version you purchase from your coffee shop.

Caramel Apple Spice Cider
 3. Caramel Apple Spice Cider - Caramel + Apples are basically a match made in Heaven. Flavor combinations like this make the perfect Autumn beverage. This is a great mock version of Starbucks' recipe. Why should Starbucks be the only who can make it? 

Mexican Hot Chocolate with Dulce de Leche Spiced Cream
4. Mexican Hot Chocolate with Dulce de Leche Spiced Cream - Are you serious? This is a drink??? Mexican Hot Chocolate and Dulce de Leche??? Two amazing flavors. How did I not know about this sooner? Maybe the rest of you did and I live under a rock. Either way, this drink is definitely worth trying.

Crockpot Pumpkin Chai Tea
 5. Pumpkin Chai Tea  - It's CHAI and it's made in a crockpot! What more is there to love about a recipe when all you need to do is dump the ingredients into a pot, turn it on, and Bam! Like magic, it makes itself. And it has pumpkin! What more could you ask for?

Just looking at these drinks makes me feel warm an cozy. I'm now inspired to get my Fall Craft on. ;) Do you have a favorite Autumn drink?

Thursday, September 5, 2013

Blueberry Protein Pancakes

Does anybody here like breakfast? I LOVE breakfast. If I could, I would eat it all day long for every meal. Well, maybe not. But I would definitely eat it more than once a day if I had the option.

So let's talk about pancakes. Who doesn't love a carb overload stack of warm pancakes, topped with melting butter and sweet syrup? The problem is that it's not so good when weight watching...and you may also feel like you've fallen into a permanent food comma after the pancake stack. Not my favorite feeling.

So here's a great alternative. These pancakes skip the starchy flour and rely mostly on bananas to sweeten. Friends, these are different. These pancakes are much more filling and so not starchy. These pancakes will not leave you hungry an hour after eating them. This. Is. Breakfast.


Blueberry Oatmeal Pancakes

1 1/2 cup Egg Beaters
1 mashed ripe banana
2 cups old fashioned oats dry
2 cups 2% cottage cheese
4 teaspoons sugar
2 teaspoons cinnamon 
2 teaspoons vanilla extract  
1 cup blueberries ( thawed if frozen or fresh if available - I prefer fresh)

In a blender, blend all ingredients except blueberries until smooth. Heat a griddle or large non-stick skillet over medium-low heat. Spray with non-stick cooking spray. For each pancake pour 1/4 cup of batter onto griddle and sprinkle slightly less than 1 tablespoon of blueberries on each pancake. Flip when they start to bubble. Cook until golden brown. Repeat with remaining batches, spraying the griddle as needed.  Makes about 12 pancakes.


Have I convinced you yet? Are you ready to make them? Do it.

P.S. This recipe is from Shrinking on a Budget.

Thursday, August 22, 2013

Breakfast cookies

Let's talk about food. Specifically dinner. Do you like making dinner at the end of the day? I don't know about you guys, but I used to dread making dinner. Dread. Around 3 PM I would start thinking, "Hmm...what am I going to cook tonight?" And then I might start flipping through my recipe books or my Pinterest boards for dinner ideas. 4 PM would roll around and I still wouldn't have a plan (because it's not like I actually had all the ingredients for those recipes I was looking up anyway). Enter feelings of dread. Then between 4:30 to 5:00, I would start rummaging through the fridge and pantry. Shortly after 5 PM my husband would call and let me know that he was on his way home. At this point I would grab some sort of meat from the freezer, toss it in the microwave to defrost, and quickly throw a bunch of ingredients together and call it good.

It's not that I hate cooking, 

...but I hate the planning part. Enter Shrinking on A Budget. It's a weekly recipe planning service that focuses on weight loss, keeps your grocery bill relatively low, and even uses Weight Watchers points. SOAB (aka Shrinking On A Budget) provides recipes for 2 breakfasts, 2 lunches, 2 snacks, 7 dinners, 7 sides to accompany each dinner, and 2 desserts. AND to top it off, a  categorized grocery shopping list is also provided. (!!!)

I love this! It's like SOAB knew what I was thinking before I even realized I was thinking about it! I love that I no longer have the late afternoon dinner-scramble. It's already planned for me! And I really love no longer having to write out a gigantic shopping list of ingredients to purchase. Instant relief.

So here's what I'm getting at...

My family and I have enjoyed some of these recipes so much that I want to share them. Not all of them. Just some of our favorites.

Today I'm sharing a recipe for Breakfast Cookies. These cookies remind me of oatmeal cookies. But more like a giant fluffy, fall flavored hunger-satisfying cookies. After you finish one, you'll be like, "Wow, that was so amazing I want another, but I don't have any more room." Dilemma. But the good kind. The combination of cranberry and pumpkin flavors are the perfect recipe to put you in the mood for the Fall season. So far this has been one of my favorite recipes. It's relatively quick and great to make ahead of time for a busy morning. And it's fun! Who doesn't like to eat cookies for breakfast???

Breakfast Cookies


2 Tbsp Craisins
1/4 cup Fiber One Original Cereal
1/2 cup Old Fashioned Oats (not instant)
6 Tbsp Flour
1/4 cup of Splenda No Calorie Sweetener (granulated)
1/2 tsp Baking Powder
1/2 tsp Cinnamon
1/8 tsp salt
1/3 cup baby pureed peaches (approximately a 4 oz jar)
1/4 cup canned pure pumpkin
1/4 cup Egg Beaters (or 1 egg if you don't have Egg Beaters)

Preheat oven to 375 degrees. Chop Craisins into small pieces. Set aside.

Grind Fiber One Original Cereal into a breadcrumb-like consistency in a blender or food processor.

In a small mixing bowl, add ground Fiber One, old fashioned oats, flour, Splenda, baking powder, cinnamon, and salt. Mix well.

In a separate bowl, add baby puree peaches, canned pumpkin, and Egg Beaters.

Mix well. Add liquid mixture to the dry ingredients, and stir until completely blended. Slowly sprinkle chopped craisins into the batter, making sure they don't all stick together.

Spray a large baking pan with non-stick cooking spray, and spoon batter into 4 evenly spaced circles. Place pan in the oven for 12-14 minutes or until the tops of the cookies are set. Remove from the oven and allow to cool slightly.


Terrific, right? Now go to the kitchen and make them right now!

All of the Shrinking on a Budget meals have been shared with permission and I am not being compensated in any way for promoting the meal plans. I definitely recommend you check out her website. It has made my afternoons so much easier. Do any of you subscribe to Shrinking On A Budget?

Wednesday, February 15, 2012

Pulling out the Big Guns

My son is a picky eater. It drives me crazy. But he's been that way since birth, so I'm used to it. He frequently goes through stages where he refuses to eat certain things. Right now it's dinner. Obnoxious. Tomorrow morning we have an appointment with the feeding clinic to come up with new eating strategies. We've been in contact and/or working with them on and off since The Toddler was 4 months old.

We had a nice little battle at dinner time last night. Afterwards I thought to myself, "You know what? If the Toddler wants to skip dinner every night, then it's time to pull out The Big Guns."

What are the Big Guns? It's my Serious Business Strategy for keeping The Toddler well nourished. I hide vegetables and other nutritious things into the food he is actually willing to eat. Oh yes.

I've done this off and on over the past couple of years, but I usually taper off when he decides he wants to eat again. 

This morning, I came up with a quick and easy way to enhance something he actually loves to eat - muffins.

I used Martha White muffin mix that you can find at any grocery store. You are only required to add milk. The package only make 6 muffins, so I used two packages to make a dozen.


Here's what I did:

After combining the milk to the muffin mix, I added a couple of awesome ingredients:

1 medium carrot (about 3/4 cup), peeled and finely grated.

2 tablespoons of Wheat Germ 

Approximately 1/2 a cup of finely-chopped dried, mixed fruit (I used an electric chopper)

Then, I baked the muffins according to the package directions.


Super easy, and great results.


And look - The Toddler ate them and liked them. Here's proof:


He also requested another muffin for his afternoon snack. Victory.

And by the way - don't worry about us dealing with The Toddler's eating shenanigans. We are pretty familiar with what works and what doesn't with him at this point. We've found that with patience and creative thinking, we are always able to get him to eat again.

But if you are looking for a good resource for getting your child to eat, I would recommend the book, How to Get Your Kid to Eat, But Not Too Much by Ellyn Satter. And you can get it right here:

You're welcome, world :)