One. More. Instagram. Project. This is a fun one. What am I saying? They're
all fun! But I think this one is my favorite. If you haven't seen the other two, you can find them
here and
here.
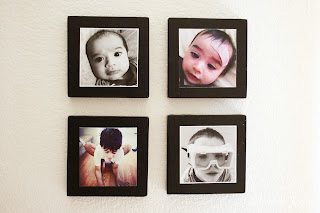
I have a couple of favorite photos. Photos that stand out for one reason or another. A funny moment. A cute expression. A personality trait captured. This project is for the extra-special ones. The ones worth framing. The ones you don't mind seeing day after day. This is the perfect way to preserve those special memories and display them for everyone else to see. Good memories.
Here's the supplies you need:
- 1x6 board
- 4x4 size Instagram photos
-
Mod Podge Matte finish
- black spray paint (Satin finish)
- sponge brush or paint brush
- ruler
- drill (don't be scared. you only need to drill a small hole)
- handheld electric sander or sandpaper
Before we get started, lets talk about lumber. Originally I had the idea to mount an Instagram photo onto a 2x4. Good idea, right? Not so much. When I placed the photo over a 2x4, the photo was actually larger than the plank. So after this, my husband explained that lumber is not actually true to size. A 2x4 is actually 1 1/2 x 3 1/2 inches, so a 2x4 won't work. Instead I chose to use a 1x6 (which is actually measures 3/4 x 5 1/2 inches). Make sense?
So start by cutting the1x6 into four 5 1/2 x 5 1/2 inch squares. (Often times you can ask them to cut them for you at the hardware store when you purchase the lumber). My husband taught me how to work the table saw for this project, so I am proud to say that I cut these blocks myself...but I was terrified as I was running the table saw.
Using sandpaper or electric sander, smooth out the sharp edges and corners to create a softer look.
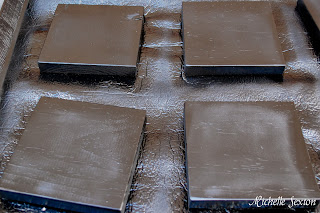
Spray paint the top and each side of the block. (I promise the blocks are actually painted black. The lighting was so weird when I took pictures of them.)
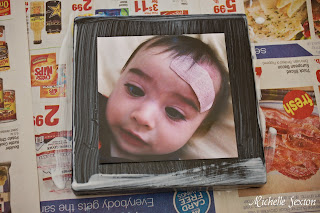
Using Mod Podge, paint both the top and each side of the block and place your photo in the center of the block.
Allow to dry, and paint a couple additional layers of Mod Podge
over the photo to seal and protect it. (This will not destroy the integrity of the photo).
Once it's completely dry, flip the block over to the backside and mark a spot 3/4 of inch below the top edge and centered (2 3/4 inches across). Next paint a layer of Mod Podge over the back side of the block for added protection (and to keep any paint that may of leaked onto the backside from rubbing off on your wall when you hang these up).
Drill a hole (deep enough to hang from a nail) into the mark you made on the back of the block. Be careful to not to drill all the way through. This was my first experience using a drill (for real) so I did a couple of practice drills on a piece of scrap wood before I attempted to drill a nail hole in my Instagram blocks.
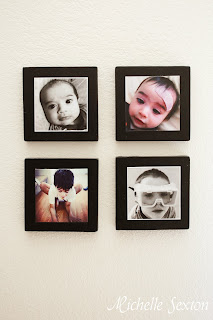
Wa-la! The hardest part of this project is finding the perfect place in your house to display these terrific photos. Well, maybe that's just my dilemma...
Here's a couple of tips:
- After you place the photo on top of the first layer of Mod Podge, I recommend placing some small and weighted on top of the photo around the edges to keep the photo from curling up as it dries.
- The wood block stuck to the newspaper as a result of dripping excess Mod Podge after it dried. Use a knife or box cutter to carefully scrape off the extra Mod Podge.
- After sanding down the edges, I strongly recommend a thorough wipe down of each block to prevent sawdust on your block as the project progresses. The same goes for after your spray paint it.
This was such a fun project for me that I want to do it again. I'm also going to mount the boys' sonogram pictures with their names underneath. I'm also thinking of finding some photos to decorate our downstairs bathroom, which is nothing but an empty white room. There are so many possibilities with this project.
Enjoy, friends!


