So Here's My Life

The things we make,
the food we eat and
the shenanigans in between.

A blog about making things by
MICHELLE SEXTON

Showing posts with label vest. Show all posts

Tuesday, March 25, 2014

Swallow Stenciled Denim Jacket

This post is sponsored by Plaid Crafts via Blueprint Social. I received materials for this project and compensation for my time - all opinions are my own!

Hey! So, did you see last week's Hooded Denim Jacket DIY? If you missed it, you can find it here. I came up with an amazingly easy way to create a hooded denim jacket, without taking apart the hoodie or denim jacket and restitching it back together. Quick, go and see it. You do not want to miss out! Anyway, at the end of that post I told you I had one more amazing upgrade. Remember that? Have you been on edge for the last five days, waiting in great anticipation to see the awesome upgrade? I'm going to pretend like you said yes. So, today the icing on the cake is revealed with help from Stencil1 and FolkArt Multi-Surface Paints. I used a fantastic set of layered swallow stencils to create the finishing touches for my hooded denim jacket project. Are you ready to see it? (Because I'm dying to show you!)

Stencil the back of a denim jacket and create a unique look - click through and learn how at SoHeresMyLife.com

Amazing Layered Swallow Set Stencils from Stencil1 available at Jo-Ann's Fabric & Craft Store

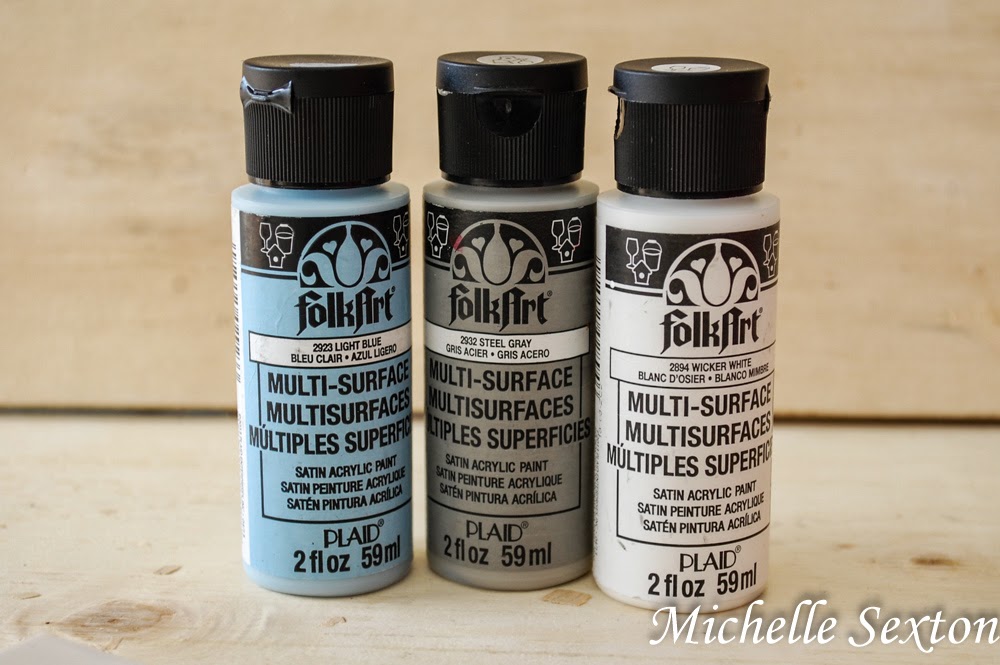
FolkArt Multi-Surface Paint - perfect for a variety of different surfaces. It's even dishwasher safe!

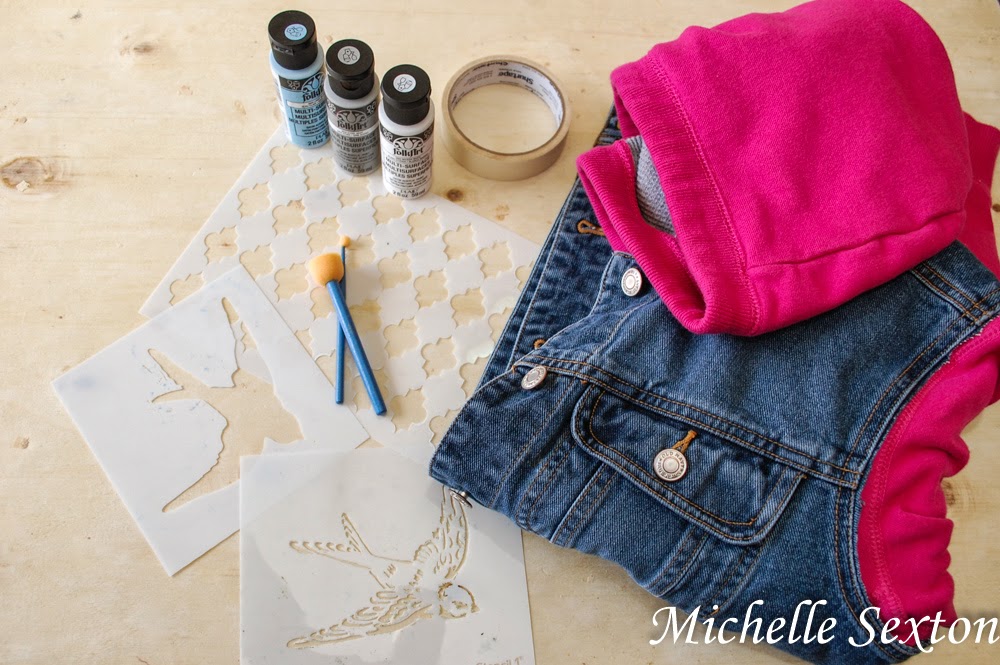
Supplies needed for stenciling

Here's what you need:
- Awesome Hooded Denim Jacket
- Multi-Surface Paint like FolkArt
- Sponge Brushes
- Swallow Set Sencils
- Masking Tape

Here's how I made it:

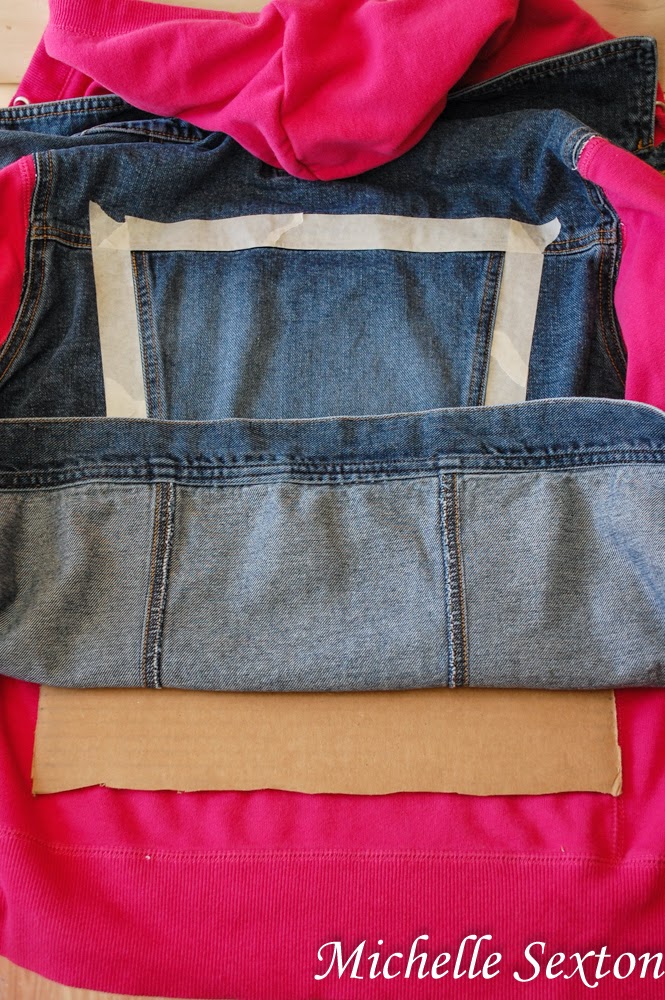
Tape off rectangular section be painted

Slide a piece of unfolded cardboard underneath the denim

Before starting, make sure the surface of the jacket is clean and wrinkle-free. Open up the jacket so it lays on a flat surface. I recommend sliping an unfolded piece of cardboard underneath the denim. It provides a flat surface to work on and also prevents any chance of paint bleeding onto the fabric underneath the denim. Tape around the edges of the rectangle on the back of the jacket.

position stencil and tape it to hold in place

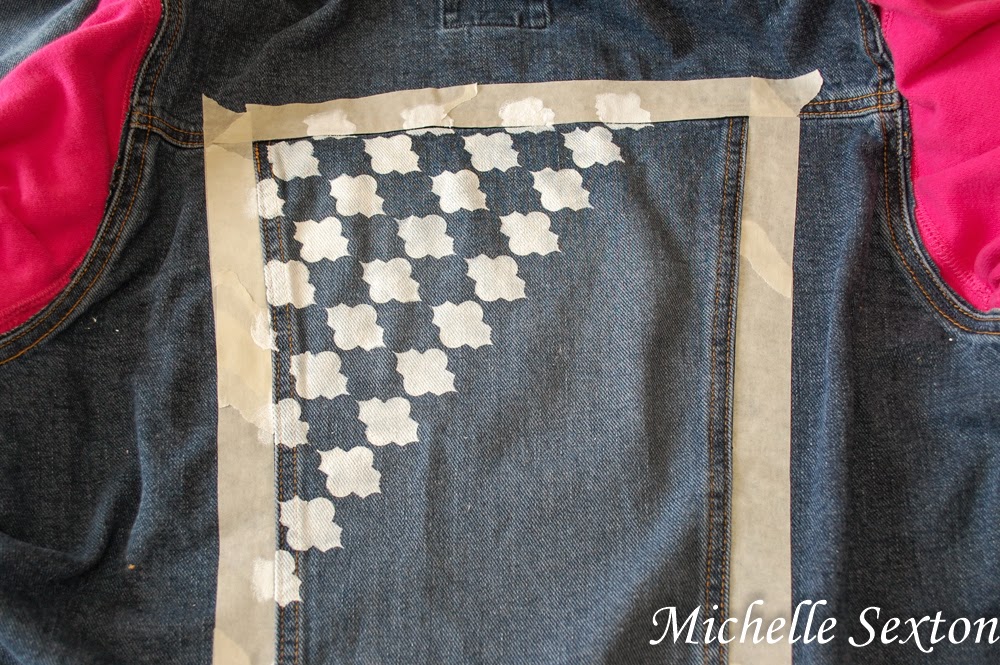
Stencil inside the taped off area

Dab in an up and down motion

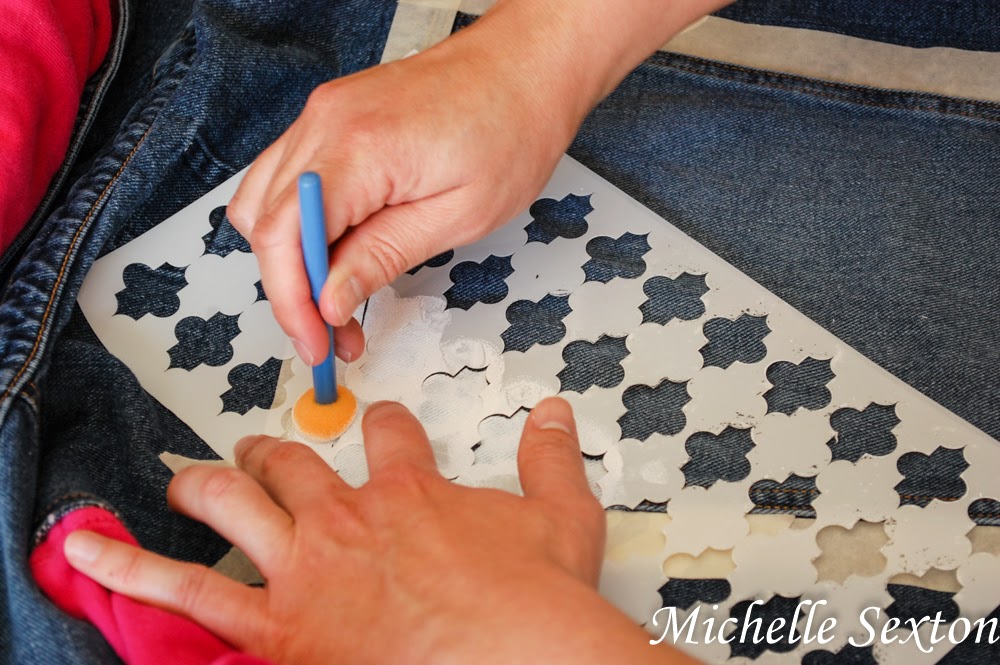
Place the patterned stencil at a 45 degree angle, making sure the shape starts at the top left corner of the rectangle. Place one small strip of masking tape on the edge of the stencil, just to keep it in place as you work. Using a sponge brush, gently dab the fabric overlaid by the stencil in an up and down motion. 
Line up the patterned stencil with the shapes

Continue filling in the taped off area with the pattern

Allow to dry completely before moving to the next layer

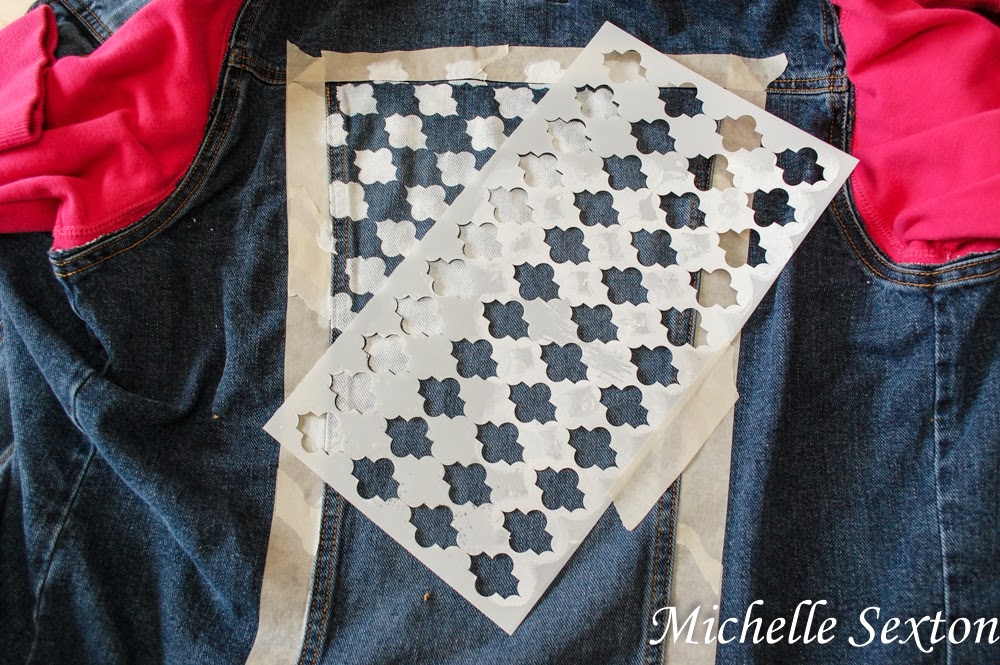
Once all shapes inside the patterned section of the stencil have been used, peel the stencil in a gentle, upward motion. Allow paint to dry for at least 15 minutes, depending on how much paint was applied. Once painted fabric is dry, line up the patterned stencil with the a portion of the dried section, and apply paint, creating additional shapes and extending the pattern coverage. Repeat this process until the entire rectangle section is covered in the stencil pattern. (Don't forget to wash off the stencils afterward so you can re-use them later. These mylar stencils are durable and easy to clean.)

position the bird silhouette and blot paint in an up and down motion

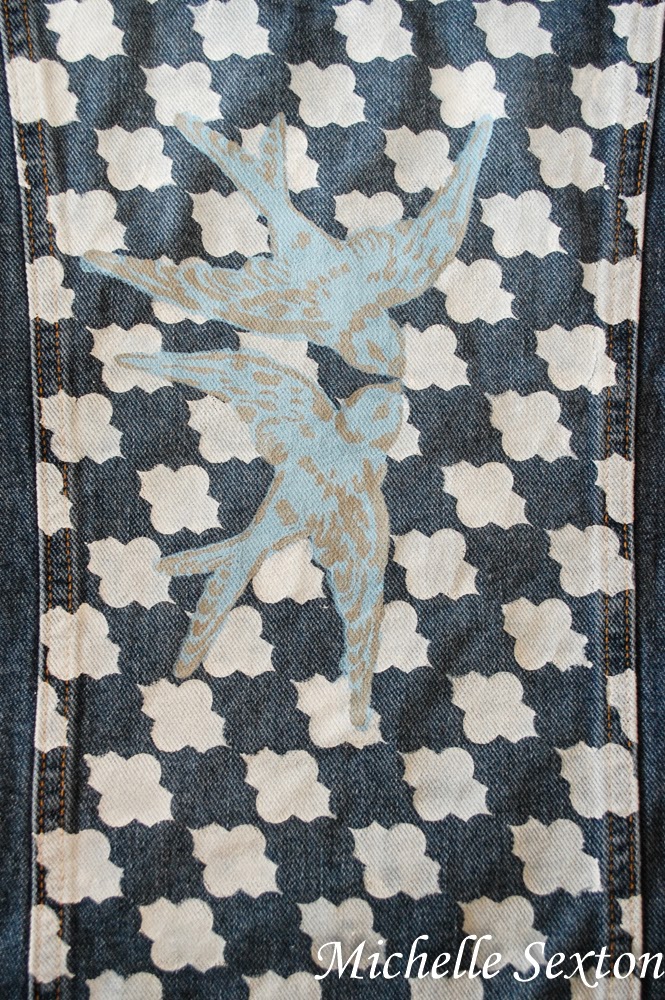
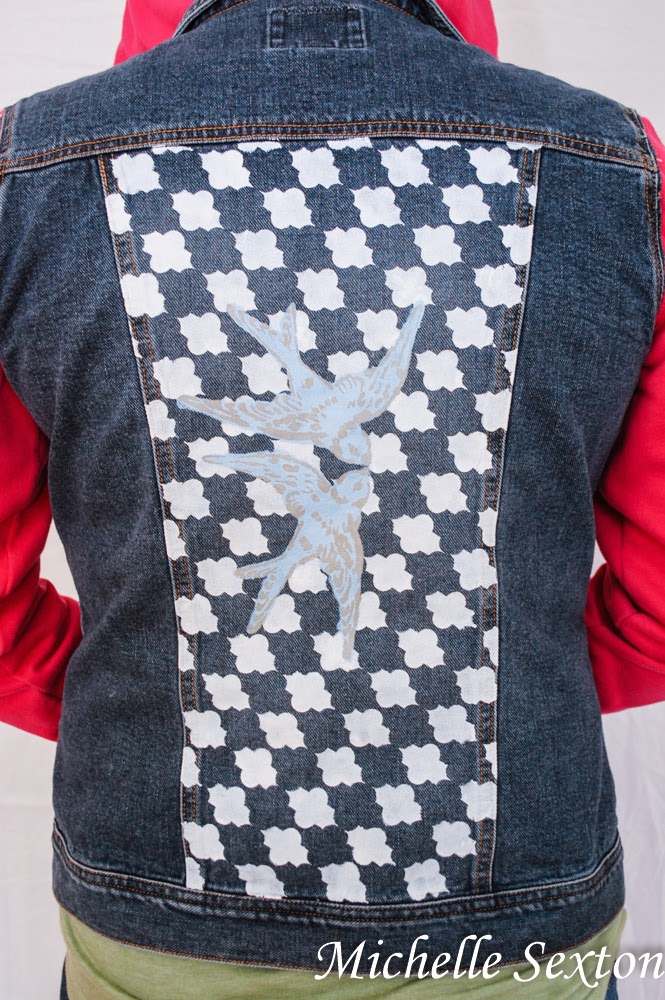
Once the patterned section is completely dry, position the bird silhouette stencil over the painted pattern section, and dab paint. Allow to dry completely. (I found that the bird silhouette needed an additional coat of paint. However, make sure to allow paint to dry completely before applying an additional coat.)

Add the next bird silhouette stencil

Once the silhouette has dried, paint an additional silhouette below the first bird. 

Once the silhouette is completely dry, position the bird's detail stencil over and paint

Upgrade a denim jacket with a layered set of swallow stencils from Stencil1

Finally place the bird detail stencil over the silhouette and dab. Allow to fully dry before adorning. (It's hard to wait, I know!)
Stencils are the perfect way to add character to a denim jacket - click through and learn more at SoHeresMyLife.com

Add flair to your denim jacket with a set of layered swallow stencils from Stencil1 - click through and learn more at SoHeresMyLife.com

Are you feeling the inspiration yet? Go make one for yourself! This stencil set and the rest of the collection can be found at Jo-Ann Fabric & Craft stores. 

P.S. The FolkArt Multi-Surface Paint can be used on just about anything AND are even dishwasher safe! (gasp) I seriously love this paint.

Like what you see? Find more awesome stuff from Plaid Crafts here:

Thursday, March 20, 2014

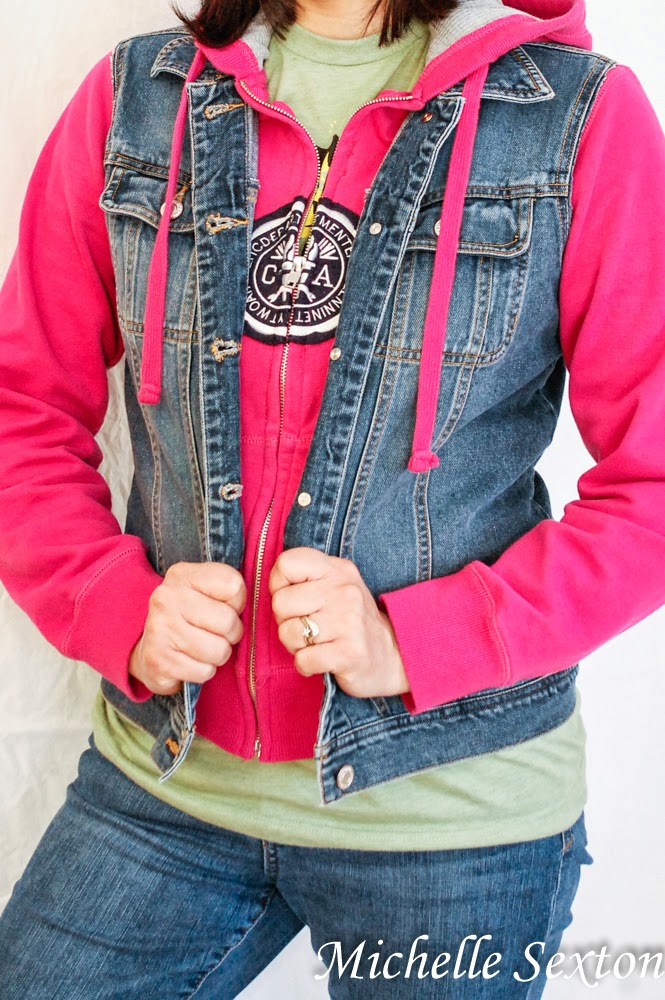
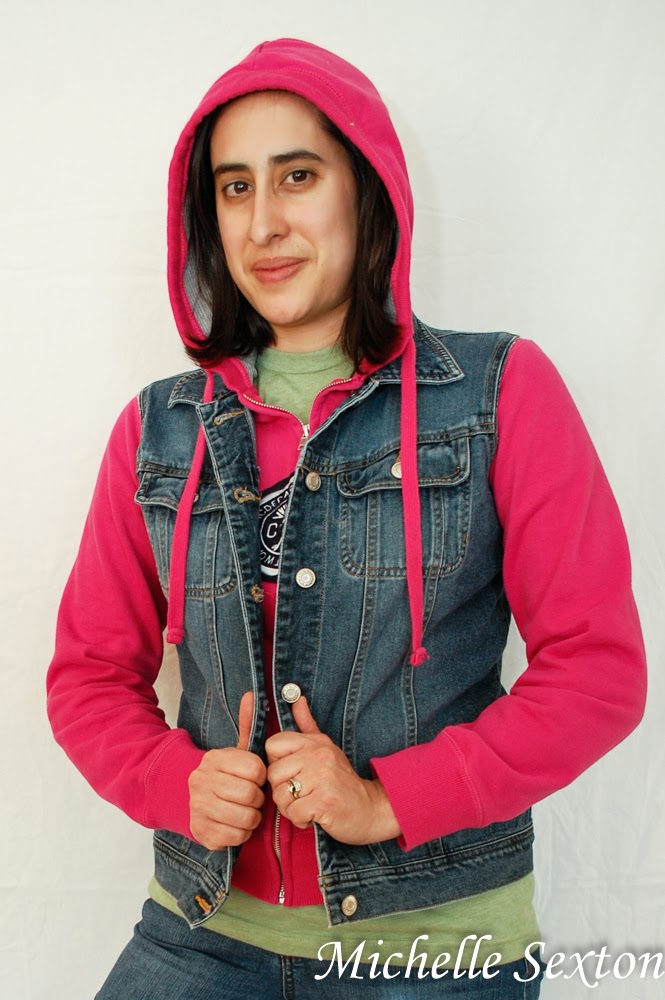
Hooded Denim Jacket DIY

My husband has nicknamed me the "Lazy Seamstress." Maybe I should be horrified, but when he first called me that, it made me laugh for about 2 minutes straight. Why? Because it's true. So. Terribly. True. I'm not in love with sewing or anything, but it's definitely a very necessary means to an end. I tend to avoid any sewing projects that do not involve sewing in a straight line. Why am I telling you this? I'm telling you this because I made something amazing. Something that I've had on my list of Things to Make for years. It sat on my list for years, because I wasn't sure how I was going to make it. I just knew I wanted a hooded denim vest jacket. I found plenty of tutorials, but none of them were quite what I was looking for - an easy, minimal-sewing tutorial that didn't involve taking apart the jacket. All I wanted to do was cut off the denim sleeves leaving vest portion, insert a zip-up hoodie, and then find a way to attach them. In my head it seemed easy enough, but I just couldn't figure out how to make this without over-complicating it (I'm really good at this) until I talked it over with my mom, Aka Seamstress Ninja. Guess what? It was waaay easier than I realized! Major win for the Lazy Seamstress! ;)

Hooded Denim Jacket DIY - this tutorial provides an easy way to make a hooded denim jacket with a minimal amount of sewing @ SoHeresMyLife.com - click through and learn how

Supplies needed:
- zip-up hoodie
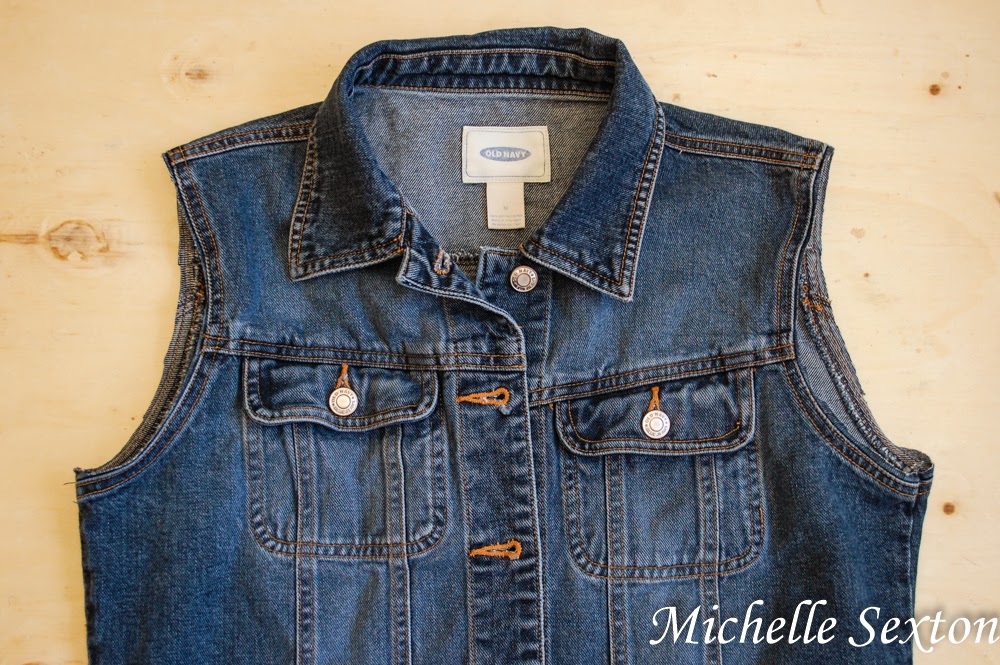
- denim jacket
- basic sewing supplies (sewing machine, scissors, thread, and pins)

Let me first give you one quick note about matching a denim jacket with a hoodie. For the best rest results, it's important to find a hoodie and denim jacket that are close in size as well as the same sized sleeve openings, near the armpit, since you have to slip the hoodie into the arm hole openings of the denim jacket. Also, make sure both the denim jacket and the hoodie are freshly washed and wrinkle free. Got it? Good.

cut off the sleeves, leaving the seams intact

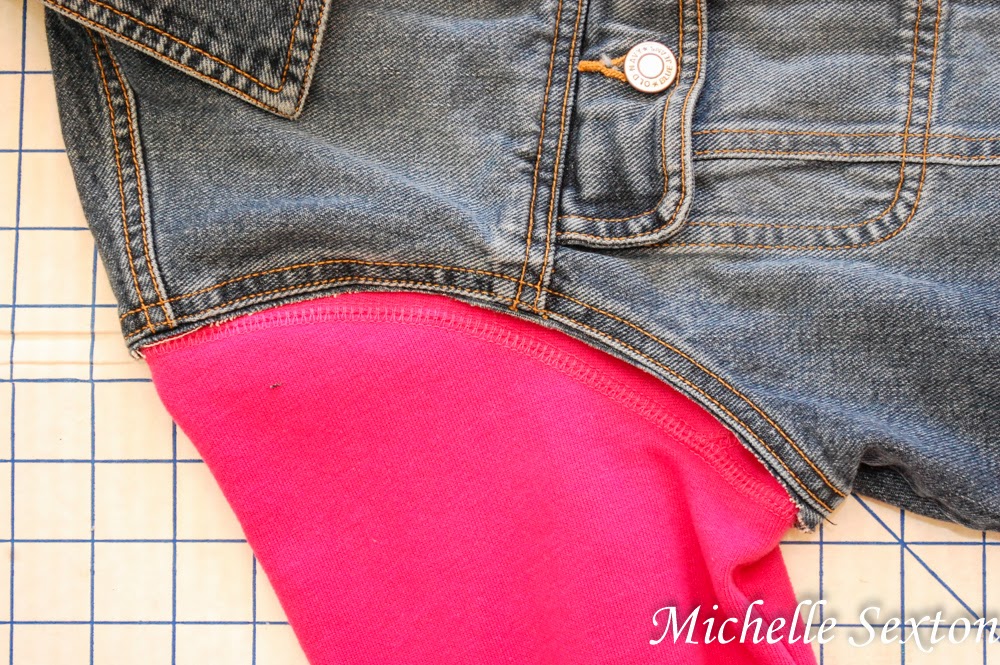
Start out by cutting off the sleeves of the denim jacket below the seam that attaches the sleeves to the vest. Trim as close to the seams as desired, but be sure to leave the arm hole seam intact.

remove any unwanted decorations from the hoodie

The hoodie that I used in this project had a bunch of stuff sewn onto the front. I felt like most of it detracted from the jacket as a whole, so I ripped out the letter seams and removed the letters from the front.

Line up the seams from both articles of clothing as best as possible
Line up the seams as best as possible

Next, insert the hoodie inside the denim vest. For best results, work on a flat surface. Button each button and zip up the hoodie. Smooth out all the wrinkles and folds and line up the side and shoulder seams of the hoodie with the seams of the vest as close as possible.

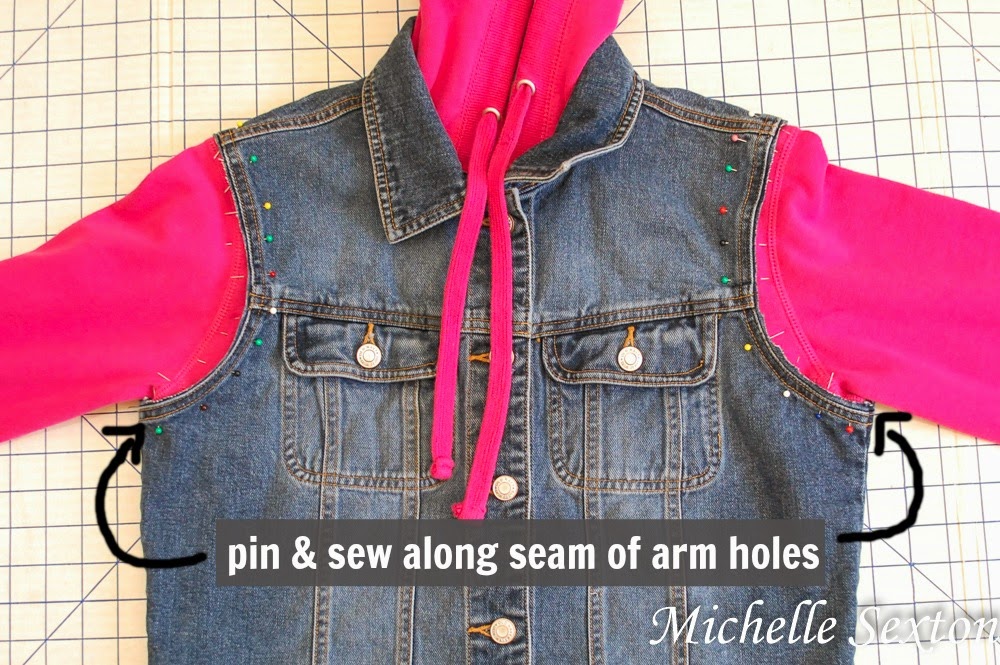
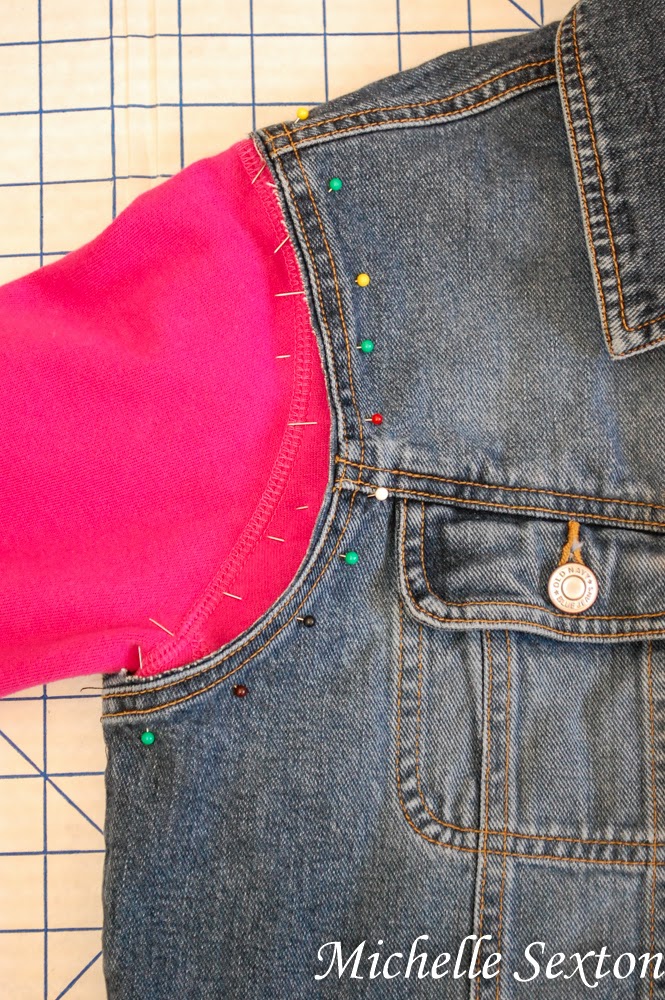
pin and sew along seams of the arm holes

sew along seams of arm holes after pinned

Carefully, pin the hoodie to the vest at both arm openings. This portion is not hard, but takes a little patience. Be sure that the seams from the vest and hoodie line up as closely as possible while pinning. This is truly the most important step of this project.

Once the pins have been placed on both the left and right sides of the sleeve openings, sew the vest and jacket together at the sleeve openings along the seam of the denim jacket or in between the two seams of the arm holes. I began sewing at the armpit of the vest on the backside and worked my way over the backside towards the front. Repeat the same process on the opposite arm hole.

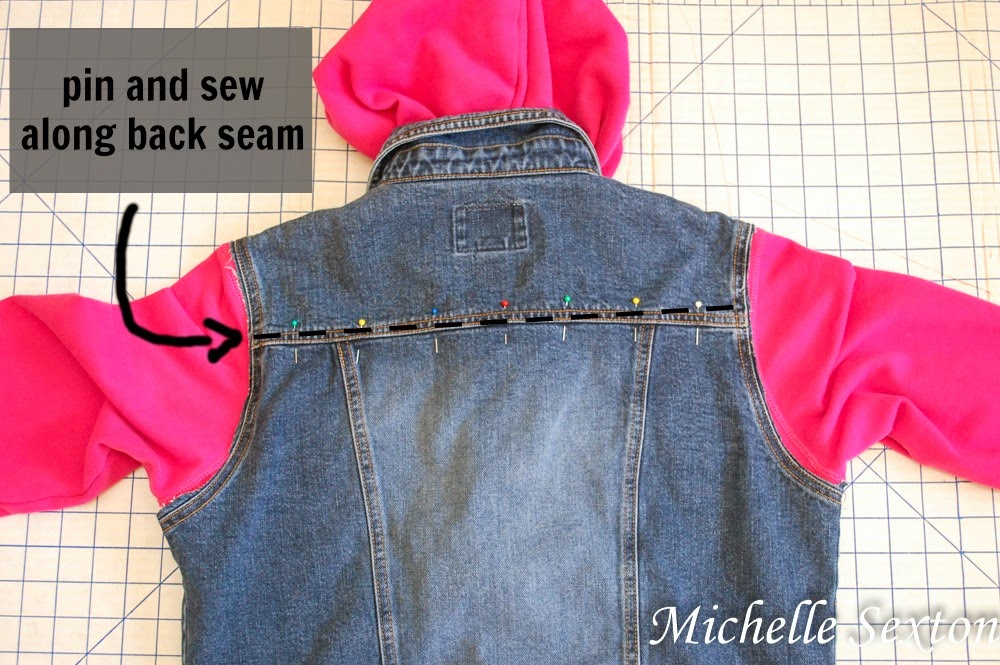
pin and sew along back seam for added security

seam across backside provides extra security
Additional seam sewn across back for added security
Once both arm holes have be sewn, lay the hoodie/vest on a flat surface again, front facing down. Pin the backside of the vest to the hoodie along the back seam that runs across the shoulder blades. Run the pinned portion through the sewing machine for a little added security, to keep both layers together.

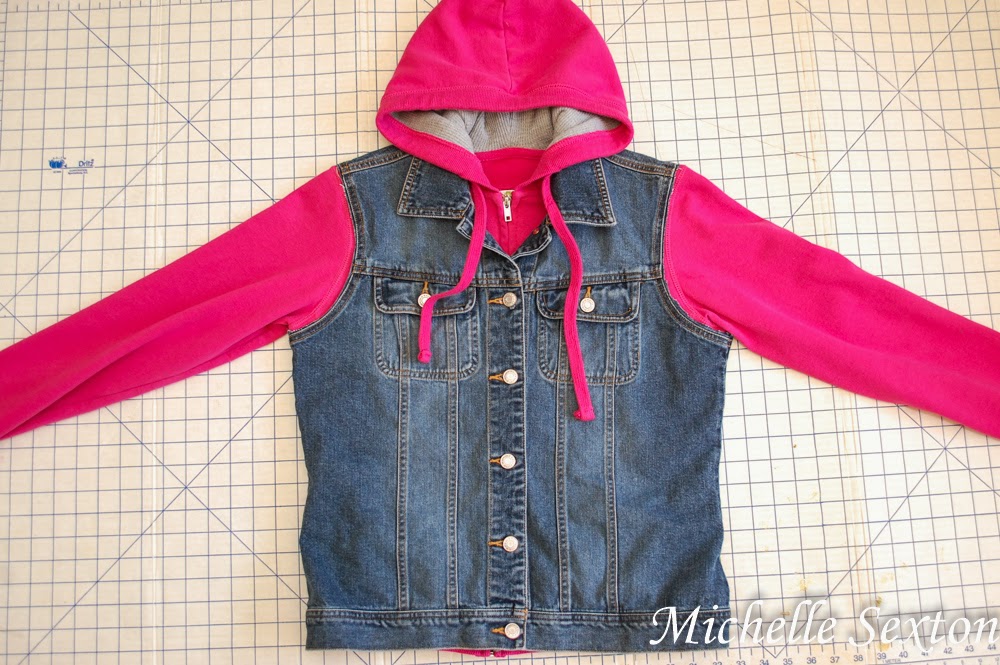
Hooded Denim Jacket DIY @ SoHeresMyLife.com click through and learn how easy it is to make this

BAM! That's it! After I finished, I just sat there, amazed and speechless over how easy and awesome this jacket turned out. I didn't even mess up!!! (I usually end up ripping out a couple of seams on each sewing project). Ha!

Hooded Denim Jacket DIY - minimal sewing and easy to make @SoHeresMyLife.com

Hooded Denim Jacket DIY - minimal sewing and easy to make - click through and learn how @SoHeresMyLife.com

Love it? Guess what? Just when you thought this project couldn't get any cooler, it does. I have one more amazing upgrade for this jacket. Click here to see how I stenciled the back. I promise you won't be disappointed :)


Tuesday, February 4, 2014

Easy Upcycled Sweater Vest Tutorial

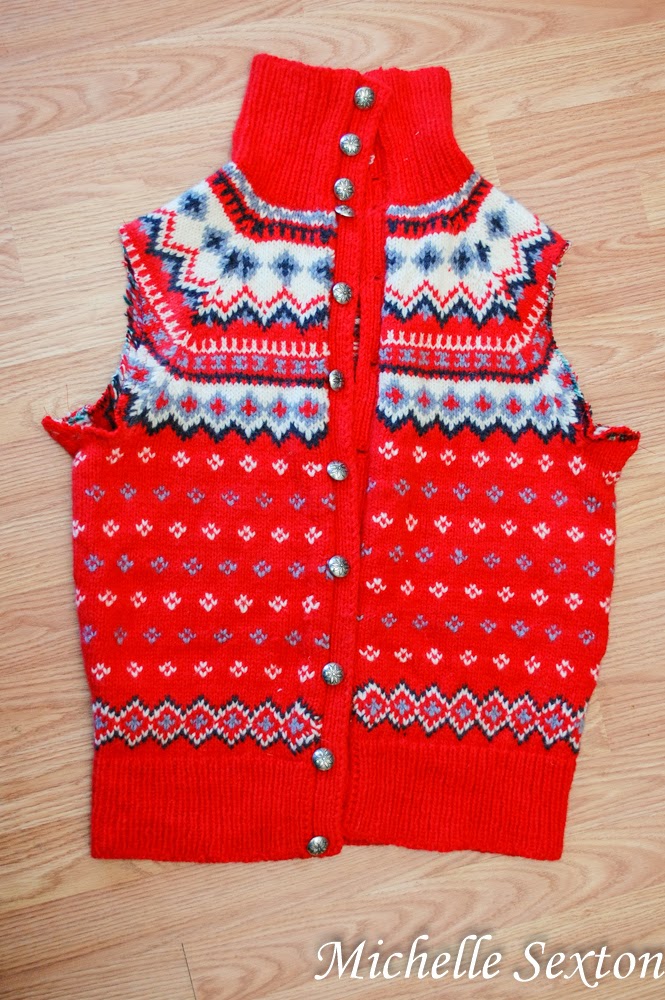
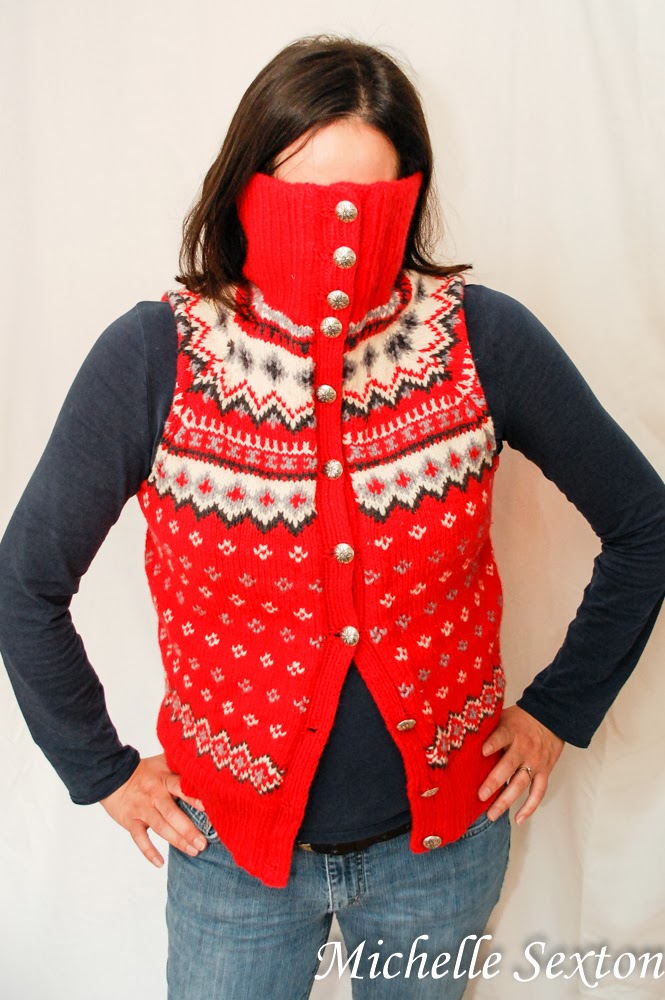
Did you know that upcycling is one of my favorite things to do? You didn't? Well, now you do. I get a great amount of satisfaction in converting an unwanted article of clothing into something new and different. It's just so much fun. I've had this sweater in the back of my closet for a while, begging to be changed into something else. It needed to be upcycled. Rest assured, I never actually wore this sweater until after I upcycled it. (I heard those sighs of relief. Yeah.) This hand-knit sweater from Norway was truly a diamond in the rough with its Fair Isle pattern, beautifully crafted buttons, and amazing fold-over collar, but it was hard to appreciate it's beauty. So, I gave this sweater a small make-over and turned it into a sweet sweater vest. When I wear it now, I pretend I live in Maine...because, somehow, Maine seems exotic to a person who has lived in the desert for most of her life. And in my mind, people in Maine wear sweater vests like this. Don't be offended.

Easy Upcycled Sweater Vest Tutorial - click through and learn how to make one.

A couple of years ago, I bought several clothing articles from a second hand store. It was one of those sales where you stuff as many items into a bag as possible and only pay 25 cents per bag. It was awesome. I found this awesome red sweater at that sale too. When I first found it, I was like, "Oh...wow...that's...loud," and then I put it back and continued sifting through the clothing piles. But, I couldn't get that sweater out of my head. Sure, it was loud, and even a bit eccentric, but the more I thought about it, the more I realized I actually liked this sweater. Not as it was, but I knew it had potential. So, I stuffed it in my bag, purchased it and brought it home. Little did I know, that at that time, I was pregnant with our second kid. (Pregnancy is not kind to me, and I have a very limited amount of creativity during this time. The only desire I have during these moments is to lay face down the couch with a trash can nearby, for puking, until my due date arrives.) A few days later, I found out I was pregnant. All plans to revamp this sweater were forgotten about until recently, when I switched out my seasonal clothes and came across this sweater. After casually considering my options for a month or two, I finally decided this eccentric sweater would be so much more awesome and a lot less crazy if it didn't have those frumpy, baggy sleeves. So, I got rid of them and now it's an awesome sweater vest and, currently, my favorite thing to wear. (I try not to wear it everyday because people might start to think that I don't wash my clothes.) ;)

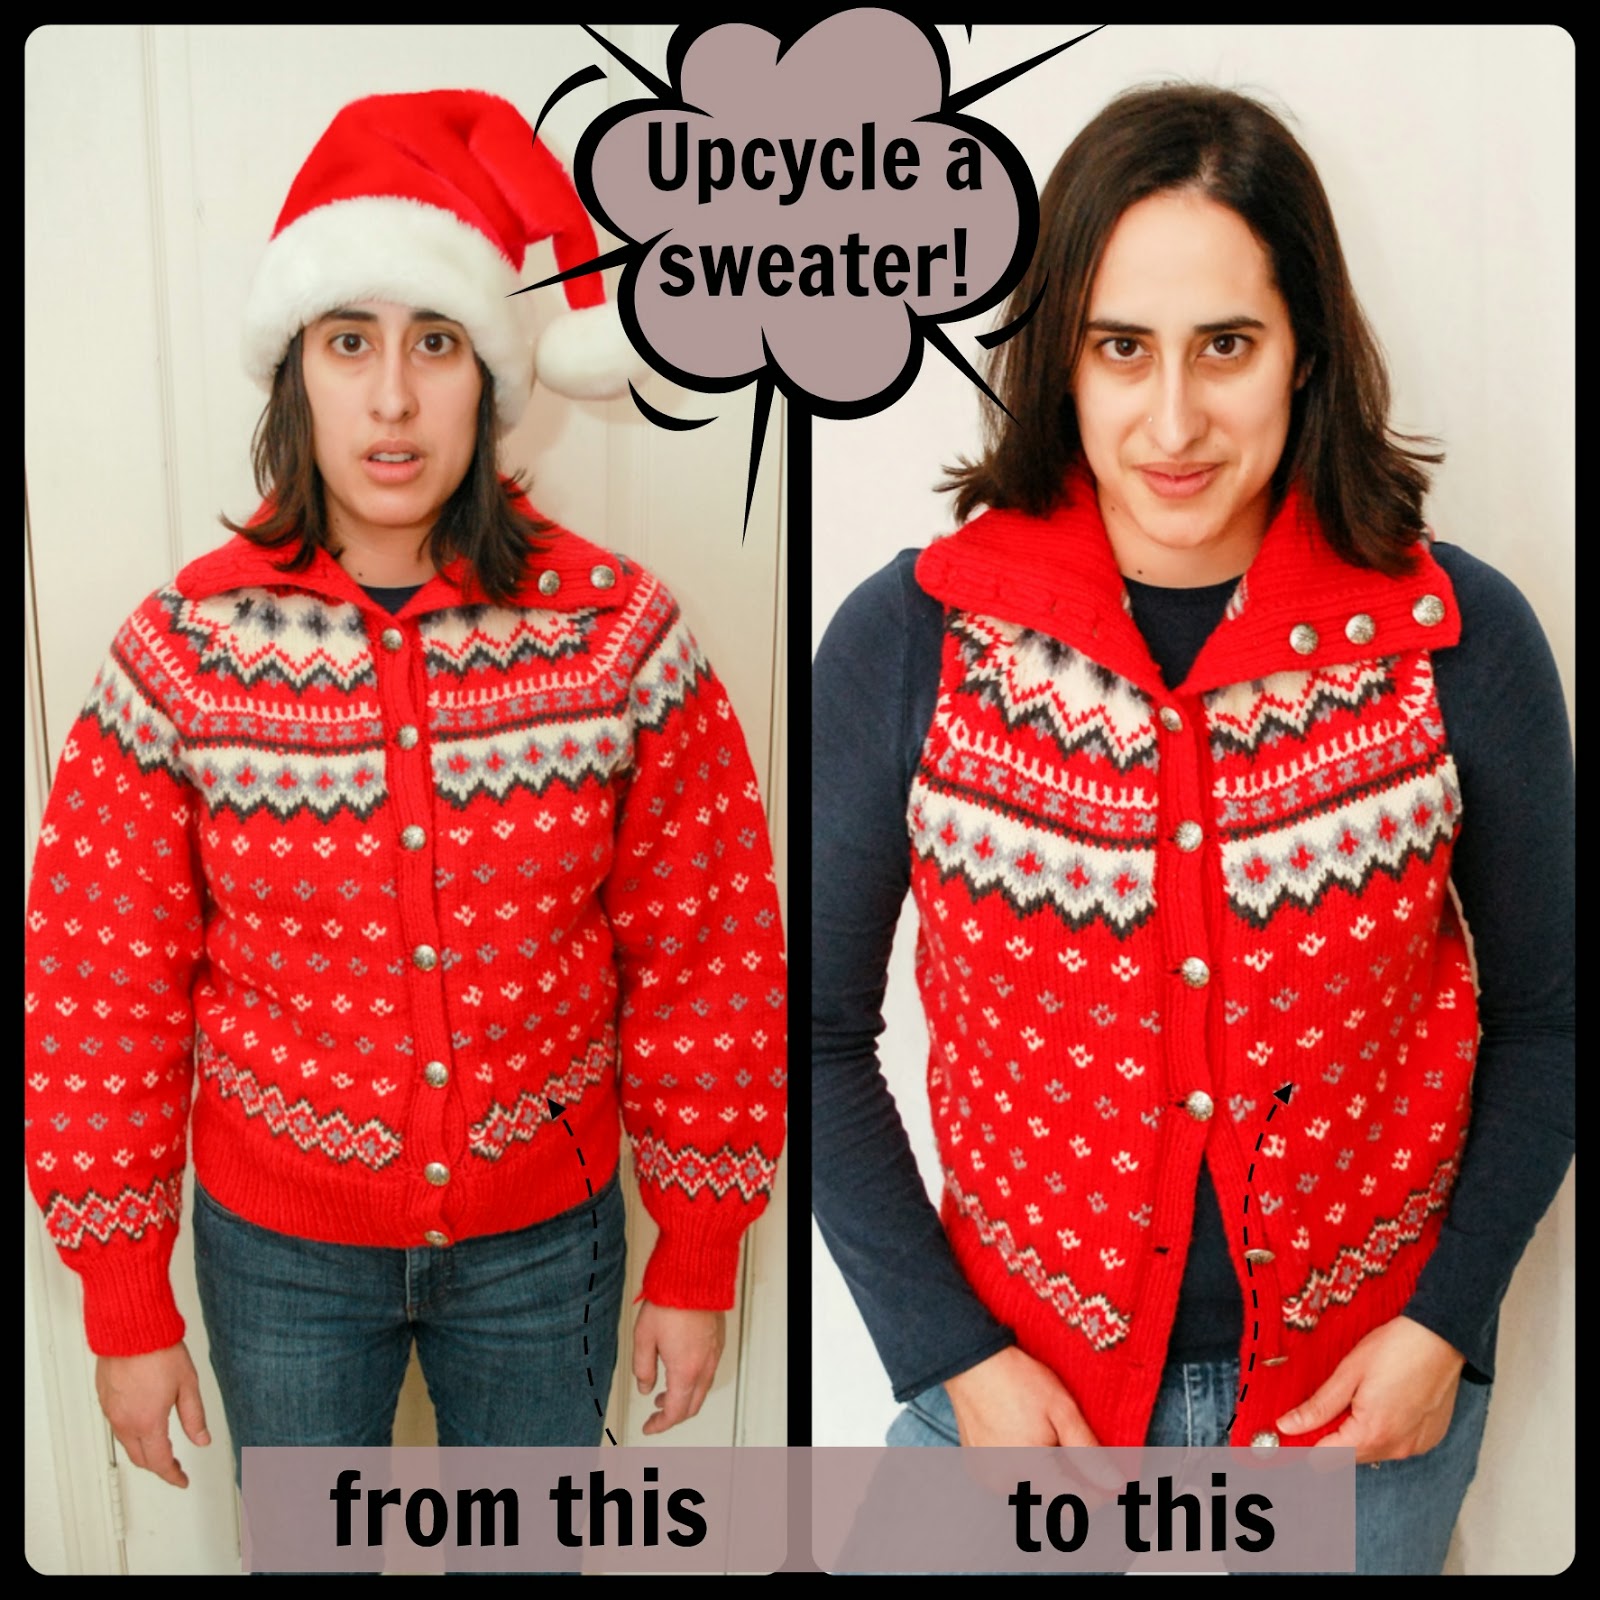
Upcycle a frumpy sweater like this into something better - click through and see how
Before the upcycle

Before I start, let me just tell you, I am not a sewing expert in any way, shape, or form. I know how to work a sewing machine (uhh...mostly...or I can read the manual) and I can sew a straight line, but that's about it. This is an easy project, so don't get intimated if your seamstress skills are lacking. If I can do this project, you can too, provided that you can work a sewing machine...at least a little bit. :)

Ok. Project time.

Serge the sleeves before trimming

serge close up - upcycle a sweater
A closer look at the serged sleeve. Hard to see due to the fact that the thread is also red.

Start out by serging the top and bottom portion of the sleeves in a straight line, just above the armpit (pictured above) to prevent the sweater from unraveling once it's trimmed. Repeat the serge on the opposite sleeve, as well.

trim the sleeves of the sweater - upcycle a sweater

Once you have serged both sleeves, cut off both the sleeves below the serged line. (Side note: I recommend saving the sleeves to upcycle into something else - like maybe these awesome leg warmer/mock boot socks)

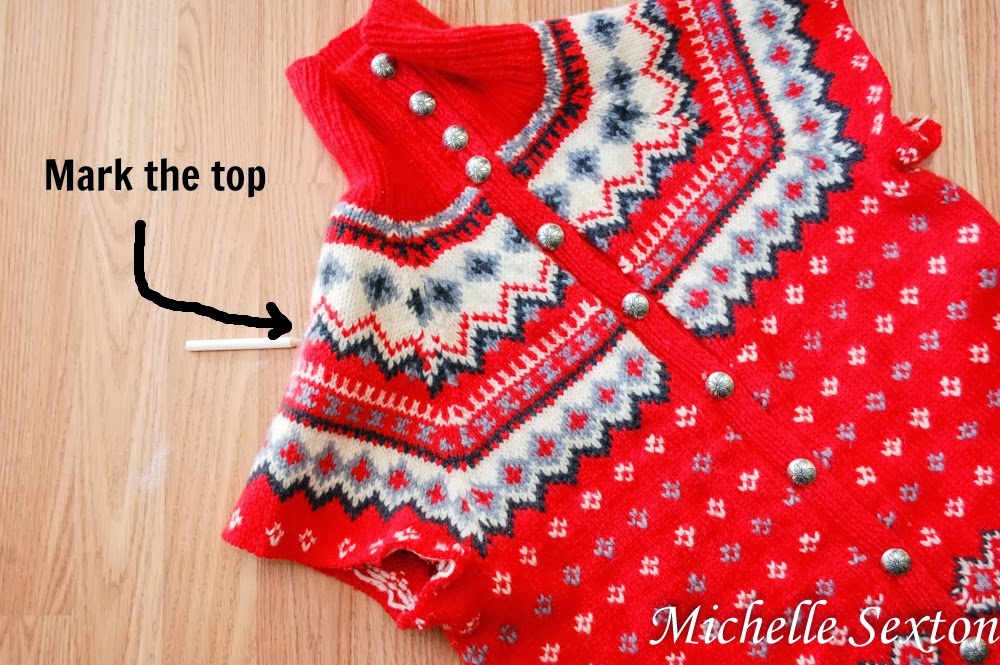
Mark the top of the sweater - upcycle a sweater!

Once the sleeves have been cut off, decide where you would like the top of the vest to end on your shoulder, and mark it.

Draw a path to make the arm cutouts - how to upcycle a sweater

Draw a rounded path on the top portion of the sleeve from the top of the marked shoulder to the bottom near the armpit.

serge along the arm cut out path - how to upcycle a sweater

Serge along the outside of the drawn path on the top portion of the sleeve only. Trim away the top part of the sleeve (after the top has been serged). Using the path made from the top part of the sleeve that has been cut away, trace the sleeve path onto the bottom half of the sleeve, serge, and then trim. (Be sure to connect the serge lines from the top portion to the bottom portion.)

fold the sweater in half to trace the arm cutouts - upcycle a sweater

Once the top and bottom of the first side of the sweater have been serged and trimmed, fold the sweater in half and trace the sleeve path onto the top portion of the opposite side of the sweater. Serge the top portion of the sleeve, cut away the excess, retraced the path onto the bottom portion of the sleeve, serge, and trim again. 

how to upcycle a sweater!

pin and sew the raw edges - upcycle a sweater!

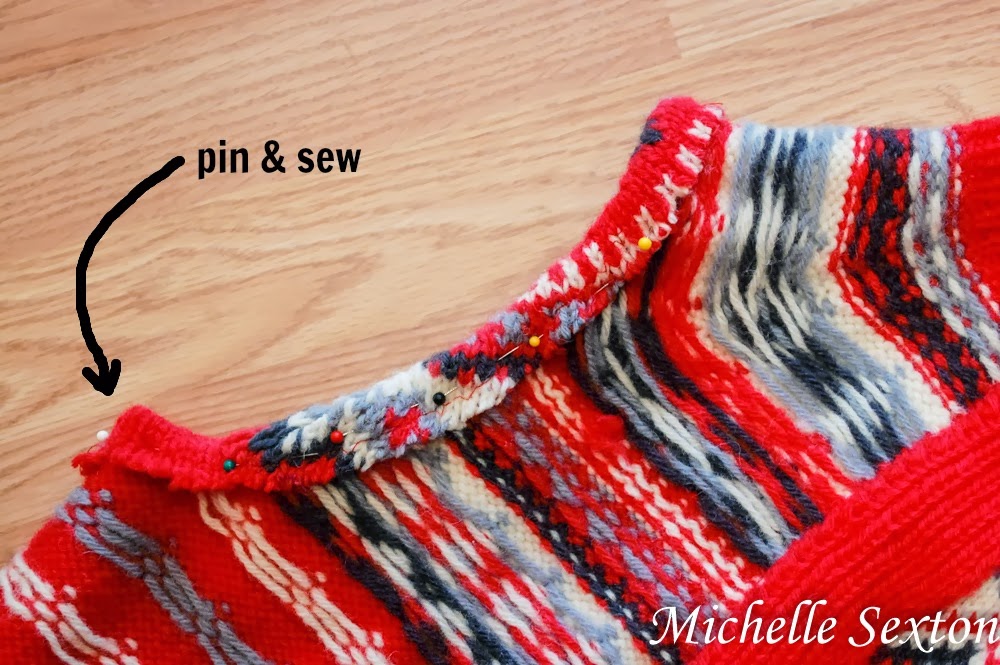
Turn the sweater inside out, pin the raw edges, and sew a straight stitch along the edges. Trim the excess thread, turn inside out, and wear! 

How to Upcycle a Sweater - Click through and learn how

Easy way to upcycle a sweater into a vest - click through and learn how

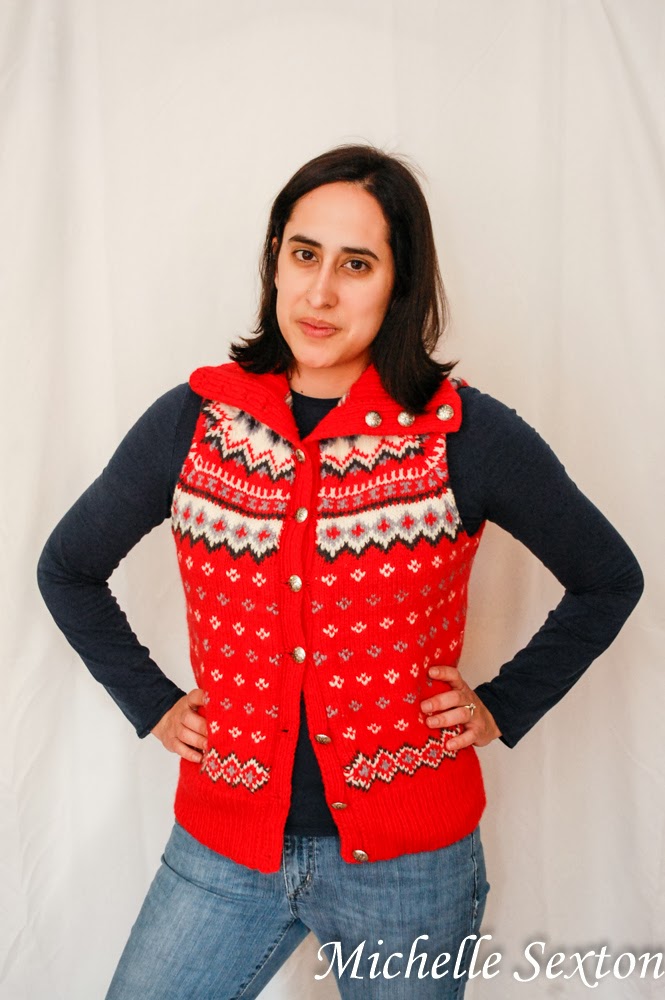
I'm so pleased with how this turned out and it allows me to indulge in my Maine fantasy. Did you know I live on the coast and have a boat dock at the edge of my yard? I like to wear this sweater vest while I sit on the dock, sip the cappuccino in my mug, and watch the fishing boats off in the distance. Well, maybe not, but I can always pretend. (This sweater vest makes it all possible.)

easy upcycled sweater vest tutorial - click through and see how easy it is.

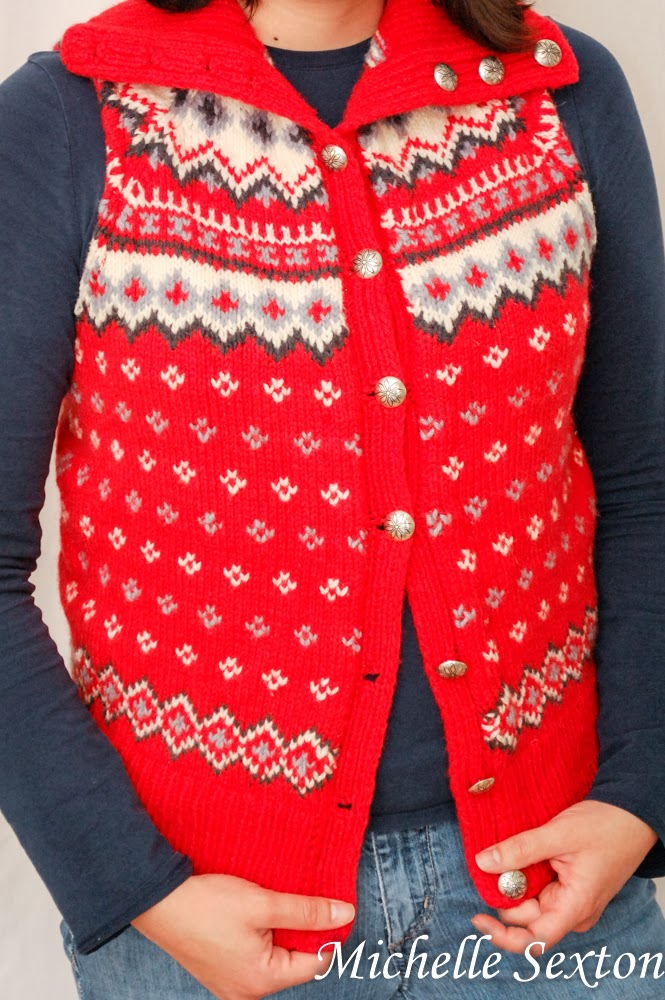
And look - the collar is still just as awesome as it was before. 

how to upcycle a sweater into a vest - click through and learn how

If it gets really cold, I can wear the sweater like this. Will you still be my friend if I wear it like this? ;) Go and make a vest for yourself now!