The real question is, which one do you want to make first???
Tuesday, April 8, 2014
30 Colorful Desserts to Make For Spring.
My camera still isn't ready yet. I'm working hard on staying patient - but I think I am going to explode! I have so many ideas for projects and no camera to document the process. Super antsy right now. So instead I am going to share an awesome collection of colorful desserts to make throughout the Spring season. Or Summer. Or Fall. Or whenever else you may feel inspired to make beautiful food...because seriously, these desserts look so amazing, you aren't going to want to limit yourself to making them during one specific season!
Labels:
food
Thursday, April 3, 2014
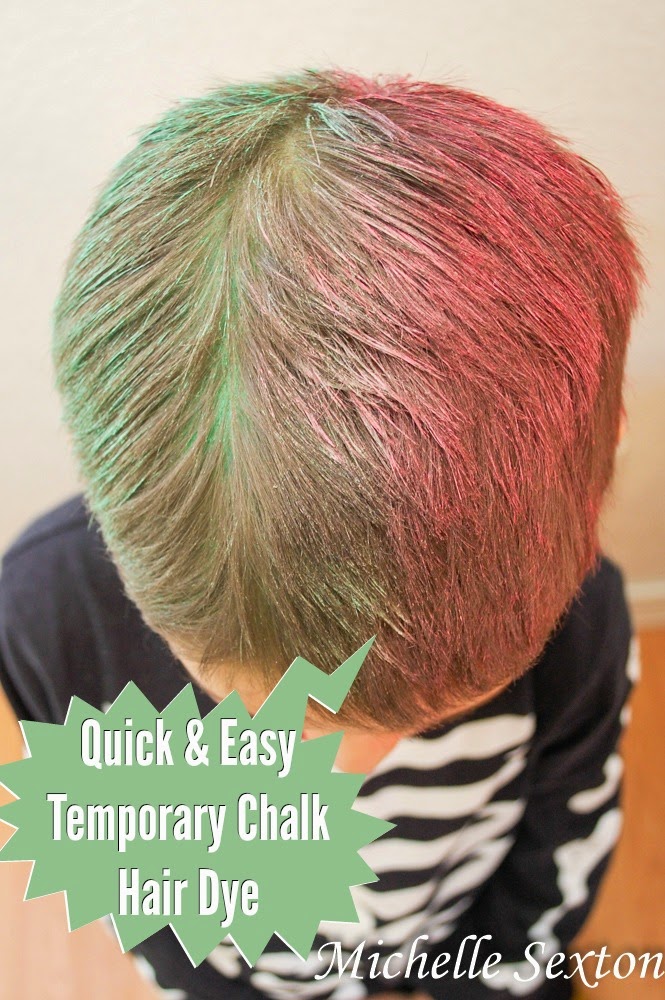
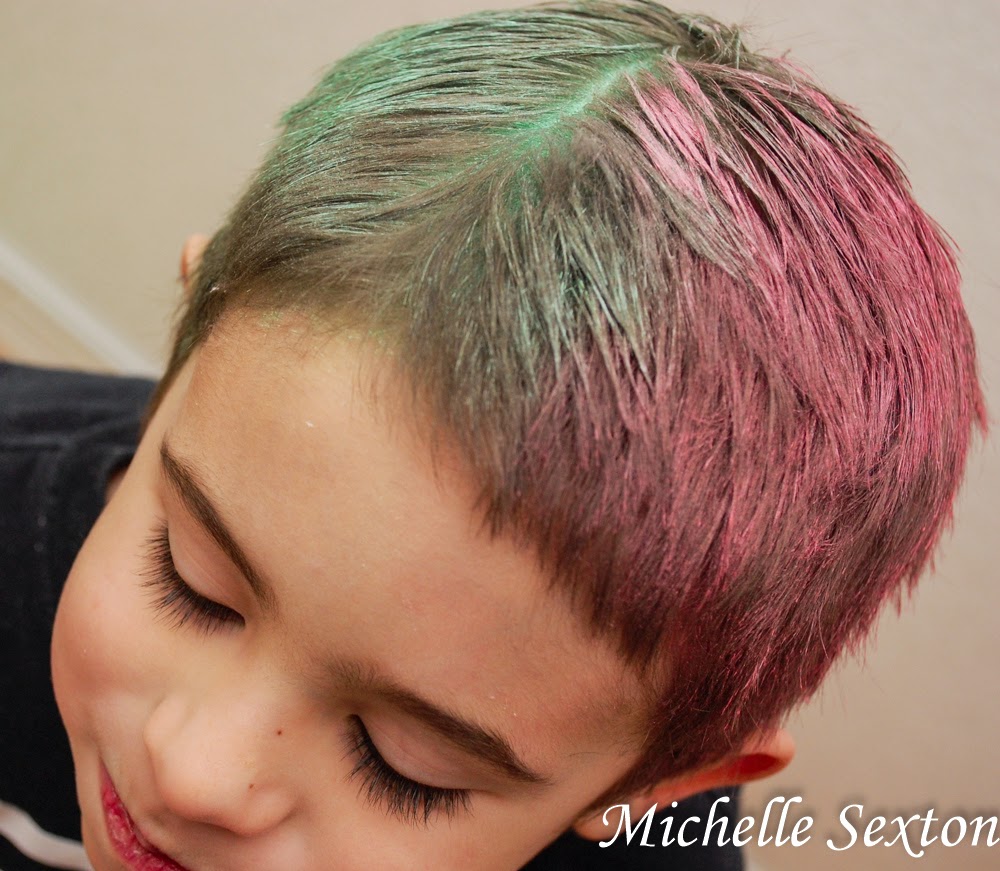
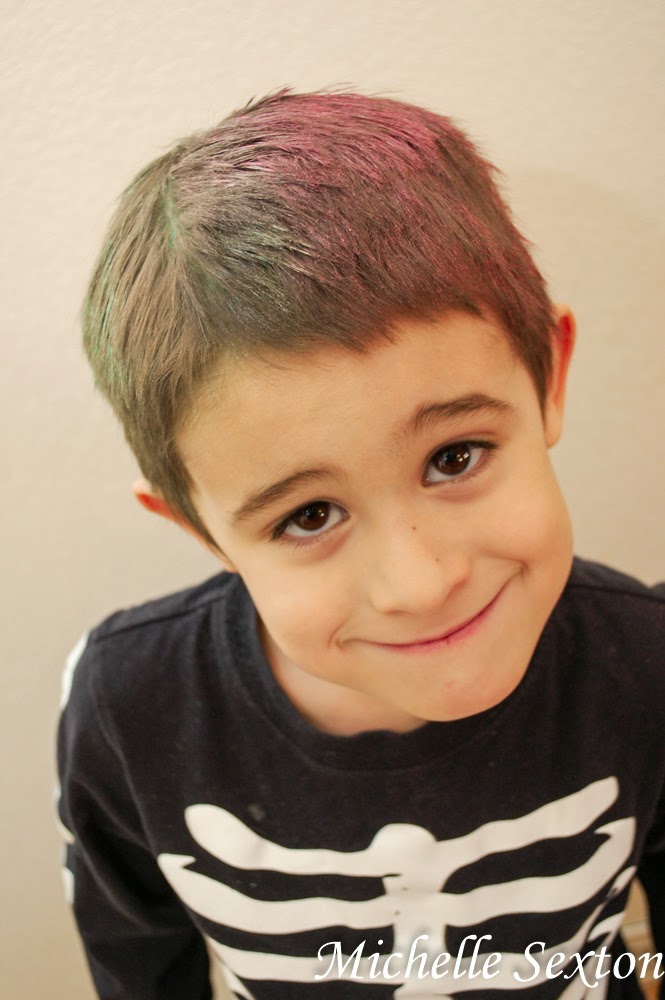
Quick and Easy Temporary Hair Dye Using Chalk
My camera is still in the repair shop, due to Mac's little shenanigan, but I've been told that it should be ready within the next couple of days. Hopefully. Geez. Children. Bah! Anyway, regardless of the fact that I am camera-less at the moment, I do have one simple project set to share. Apparently this is the perfect opportunity too, since I can't take pictures of any of my other projects! A while back Mac's school had a "Crazy Day." The kid were encouraged to dress in crazy attire for that day - backwards clothes, inside out, mis-matching shoes, you get the idea. It was truly a hysterical sight to see. Mac desperately wanted to have crazy colored hair on that day. So the night before, Joel and I searched online for a simple way to create temporary hair dye. There were plenty of ways, mostly with Kool-Aid, but after reading through a couple of tutorials, we came up with our own easier way to put temporary hair dye in Mac's hair - using chalk & hair spray.
You will need:
- Colored Chalk (we used sidewalk chalk, but colored chalkboard chalk is great too)
- Hair Spray
- Hair Dryer
- Spray bottle filled with water (recommended but not necessary)
1.Start off with lightly damp hair. (Mac's hair was dry, so we misted it with a spray bottle filled with water.)
2. Using the long side, rub the chalk over the damp hair until you are satisfied with the color saturation. (More than one coat may be needed, depending on the color.)
3. Spray an even coat of hair spray over the damp, colored hair.
4. Gently dry with a hair dryer.
That's it! Unbelievably easy. The color lasted on Mac's hair the entire day, as long as he didn't touch it. However, it is chalk, so a small amount of flaking is possible. Either way, it was pretty awesome for about 5 minutes of extra work. I was definitely satisfied. :)
This would have been awesome to do for April Fools! I should have thought of that sooner. Darn it! Next year...
You will need:
- Colored Chalk (we used sidewalk chalk, but colored chalkboard chalk is great too)
- Hair Spray
- Hair Dryer
- Spray bottle filled with water (recommended but not necessary)
1.Start off with lightly damp hair. (Mac's hair was dry, so we misted it with a spray bottle filled with water.)
2. Using the long side, rub the chalk over the damp hair until you are satisfied with the color saturation. (More than one coat may be needed, depending on the color.)
3. Spray an even coat of hair spray over the damp, colored hair.
4. Gently dry with a hair dryer.
That's it! Unbelievably easy. The color lasted on Mac's hair the entire day, as long as he didn't touch it. However, it is chalk, so a small amount of flaking is possible. Either way, it was pretty awesome for about 5 minutes of extra work. I was definitely satisfied. :)
This would have been awesome to do for April Fools! I should have thought of that sooner. Darn it! Next year...
Tuesday, April 1, 2014
Finding Beauty within the Chaos
You know, it seems that sometimes despite our best efforts, chaos seems to find its way into our lives. This season has been absolute, 100% mad chaos for me. Chaos, chaos, and more chaos. No matter how hard I try, the conflicts always seem to pile up at once. It drives me crazy. I've had countless moments of frustration, but I've also learned a lot through these circumstances - mainly the importance of finding the beautiful moments within the chaotic moments.
![]() |
| broken DSLR camera |
Over the past six weeks or so, I've celebrated a handful of family members' birthdays, a school field trip, judged a fine arts festival, sprained my ankle, got a staph infection in my sinuses, had an asthma attack, had a couple of anxiety attacks and lost a lot of sleep, been sick and taken care of sick children multiple times. Multiple times. Mac also managed to break both my iPad and DSLR camera within about 10 days of each other. (Neither was intentional, nor is he allowed to handle those items, but I assure you he has been grounded.) I also signed up to run in a 5k sponsored by an organization that confronts human trafficking. After I signed up for the 5k, I got really sick for a couple of weeks and was unable to run. And then, as soon as I started to feel better, I sprained my ankle! Seriously. I don't know how I manage these things sometimes. My ankle finally healed enough for me to resume running again last weekend. The 5k is this weekend. (Baahhhhh!!) Chaos? Yes. Crazy? Possibly. But the real question is, am I ok? The answer is YES!
Yes. I am ok. These chaotic six weeks haven't been my favorite, but I'm still ok. Why? Because despite everything, I've realized that there are always good moments, beautiful moments, in the midst of the conflicts. It's not like I'm in love with the continuous chaos that I seem to find myself in again and again, but I'm learning to appreciate the moments that often get overlooked during conflict.
![]() |
| Geocaching adventures & digging our Jeep out of the sand |
Over the weekend, I had a night where I didn't sleep well, due to to medication I had to take. And, due to unrelated circumstances, the boys didn't sleep well either. The next morning didn't go well for us and I was sleep deprived and a little foggy. It was a frustrating. However, Joel and I decided to make the most of the day and took the boys Geocaching (or as we call it, Treasure Hunting). Our adventure started out well and we found our first cache of the day (or treasure). But then we couldn't find the next cache. Mac was so disappointed. So, we chose a different cache - out in the desert near our house. Less than a mile from the next cache (0.3 miles to be exact), our Jeep got stuck in a patch of soft sand (it only has 2 wheel drive). So, Joel, Mac, and I spent the next 30 minutes digging our Jeep out of the ruts. It was a lot of work. And we would get out of one rut, only to get stuck in another one. Each time we would get out of one rut, we would cheer Joel on. It made it fun. Eventually we got out, but by that time the wind had picked up so much that it was difficult to walk against and our Jeep was on the verge of overheating. After all the digging, and the fact that we were so close to the cache, how could we give up? We couldn't! We walked the last 0.3 miles to the cache in the wind while our Jeep cooled off. Guess what? We found the cache, and the boys got a couple of awesome souvenirs. Mac got a paracord bracelet and Cheese got an army man. It was truly a triumphant moment, a beautiful moment, for our family. It was just a silly little family adventure, but in that adventure we were able to show that hard work, perseverance, and a good attitude can reap great rewards. It really did for us that day.
![]() |
| Each day has its own beautiful moments |
That day started out rough for all of us, and our Jeep got stuck in the sand during our adventure. Both of those incidents had great potential to spoil our fun. Instead we chose to keep a positive attitude. You know what? I've found that even in the worst days, there's almost always something positive to focus on. I recently had a day where I was so exhausted and overwhelmed, I had to go to the staircase landing, have a quick cry-break, pull myself together, and then go take care of the boys. Even on that very difficult day, I encountered a couple of beautiful moments with my kids.
![]() |
| Sweet moment in the midst of a chaotic day |
Sometimes, it seems that life has handed you one gigantic bowl of lemons. Despite our greatest efforts, we can't always control our circumstances. It just doesn't always work out that way. Beyond frustrating! But despite the conflict and chaos, it's important to look for those beautiful moments. Finding the beautiful moments in the midst of the chaotic moments truly makes life more enjoyable.
Labels:
chaos,
everyday life,
geocaching,
perspective
Thursday, March 27, 2014
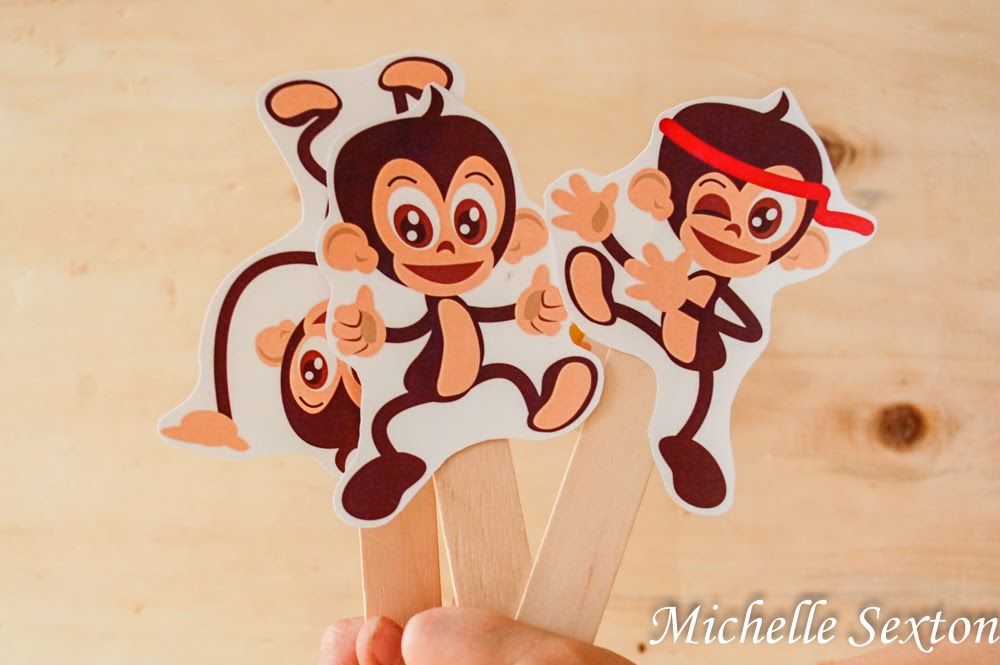
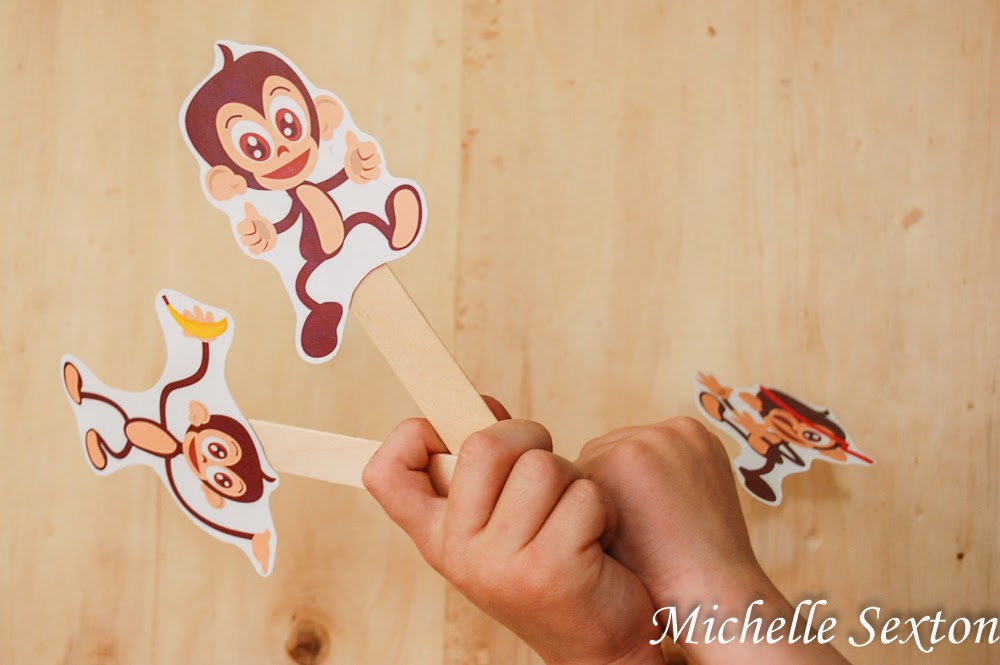
Free Printable Monkey Puppets
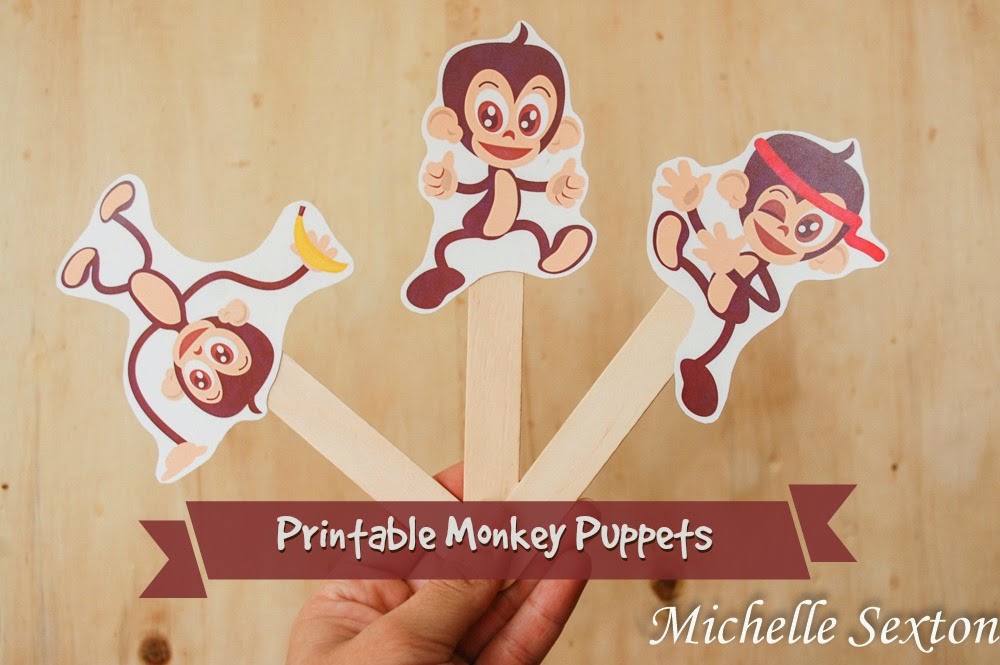
Looking for an easy paper craft for kids today? Look no further! I have an free adorable printable paper craft toy to share - Monkey Puppets! These cute little monkey puppets are so fun, my boys could hardly wait for me to finish making them. Cheese kept point at the laptop screen and babbling toddler gibberish as I was putting together the printable. Needless to say, they could hardly wait to get their hands on them. I recommend that you print out these monkeys, assemble, hand them to your kids and fix dinner as fast as you can while they play quietly. (Because quiet moments seem to be few and far between when you have little ones!)
- 3 popsicle sticks (we used the larger size)
- masking tape or glue
- scissors
Here's how we made these fun little monkey puppets:
Print out the Monkey Printable onto card stock. Cut out the monkeys and tape or glue the popsicle sticks to the back of each monkey.
Play with them.
So hard, right? Yeah, no it wasn't. Major win for quick and easy kids entertainment!
Want another set of printable puppets? Try the Silly Shape Finger Puppets.
Enjoy this printable and use it as much as you like for personal use or even in the classroom, but please remember a couple of things -
1. If you post about this printable on your blog, always link back here.
2. Don't pin directly to the link, but instead this page.
3. You can't sell this printable or any other printables available on So Here's My Life :)
Got it? Ok cool.
Labels:
Kids activities,
kids fun,
monkey,
popsicle sticks,
printable,
printables,
toy
Tuesday, March 25, 2014
Swallow Stenciled Denim Jacket
This post is sponsored by Plaid Crafts via Blueprint Social. I received materials for this project and compensation for my time - all opinions are my own!
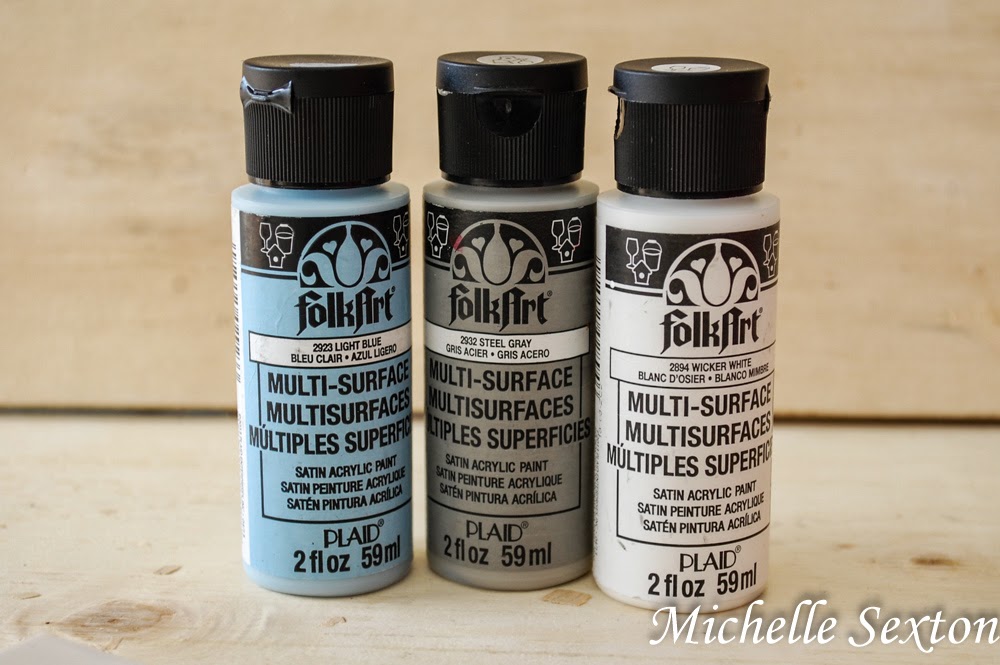
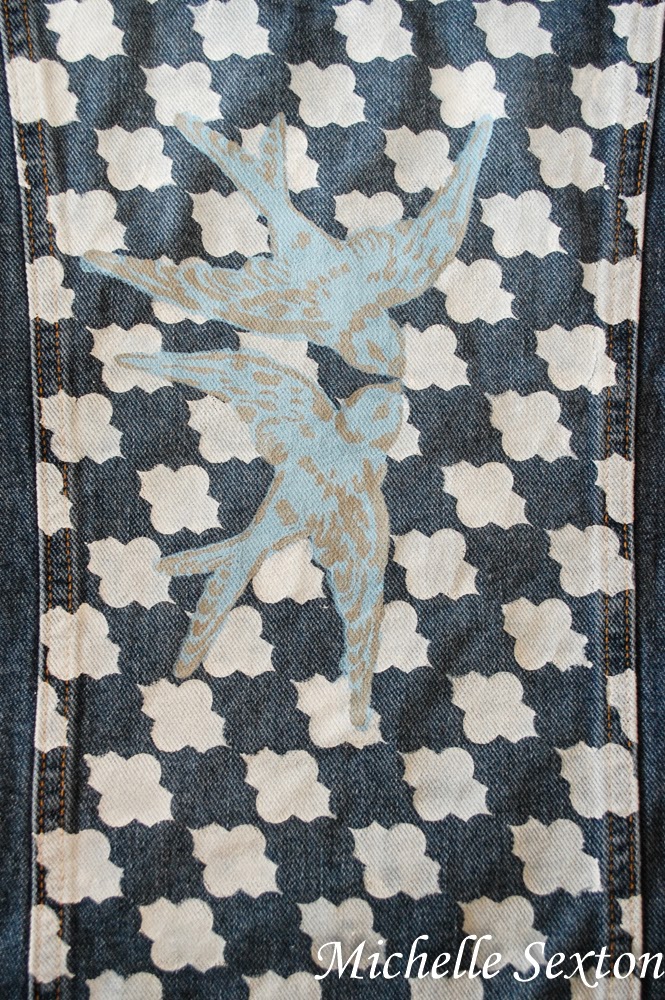
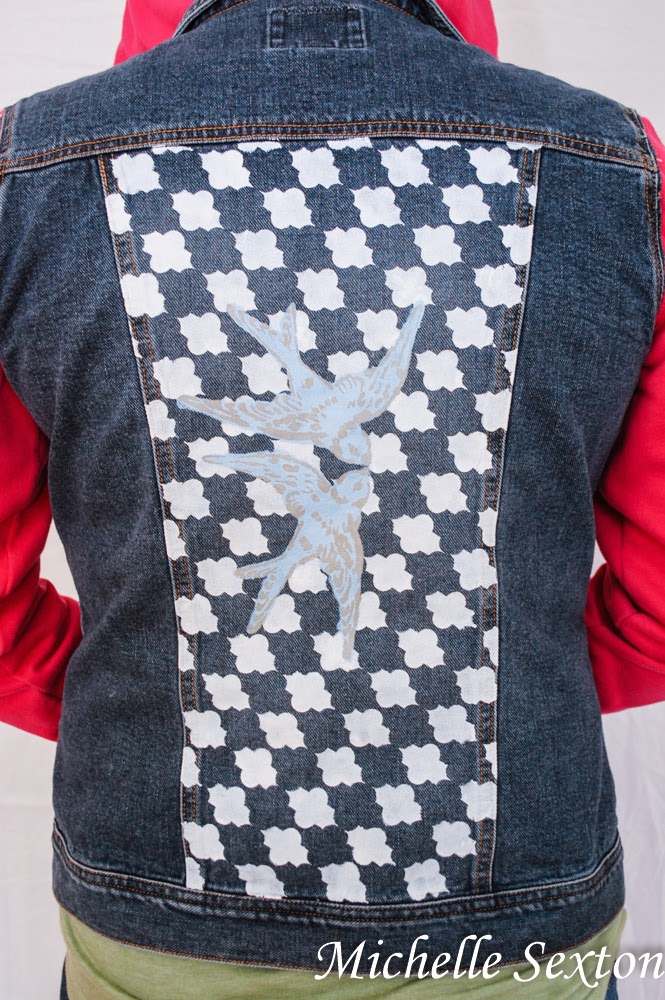
Hey! So, did you see last week's Hooded Denim Jacket DIY? If you missed it, you can find it here. I came up with an amazingly easy way to create a hooded denim jacket, without taking apart the hoodie or denim jacket and restitching it back together. Quick, go and see it. You do not want to miss out! Anyway, at the end of that post I told you I had one more amazing upgrade. Remember that? Have you been on edge for the last five days, waiting in great anticipation to see the awesome upgrade? I'm going to pretend like you said yes. So, today the icing on the cake is revealed with help from Stencil1 and FolkArt Multi-Surface Paints. I used a fantastic set of layered swallow stencils to create the finishing touches for my hooded denim jacket project. Are you ready to see it? (Because I'm dying to show you!)
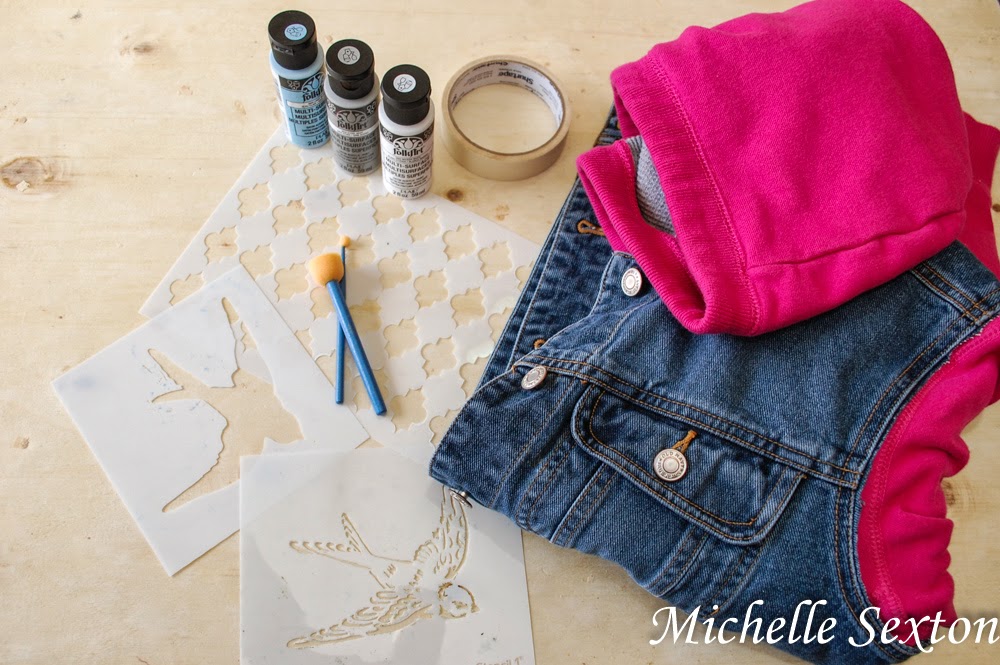
Here's what you need:
- Awesome Hooded Denim Jacket
- Multi-Surface Paint like FolkArt
- Sponge Brushes
- Swallow Set Sencils
- Masking Tape
Here's how I made it:
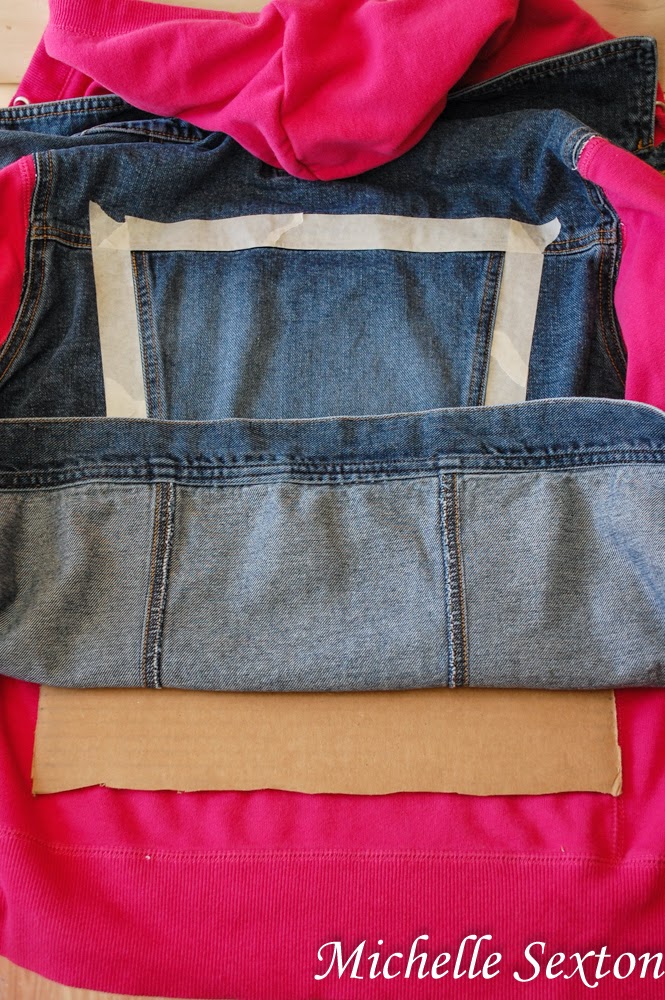
Before starting, make sure the surface of the jacket is clean and wrinkle-free. Open up the jacket so it lays on a flat surface. I recommend sliping an unfolded piece of cardboard underneath the denim. It provides a flat surface to work on and also prevents any chance of paint bleeding onto the fabric underneath the denim. Tape around the edges of the rectangle on the back of the jacket.
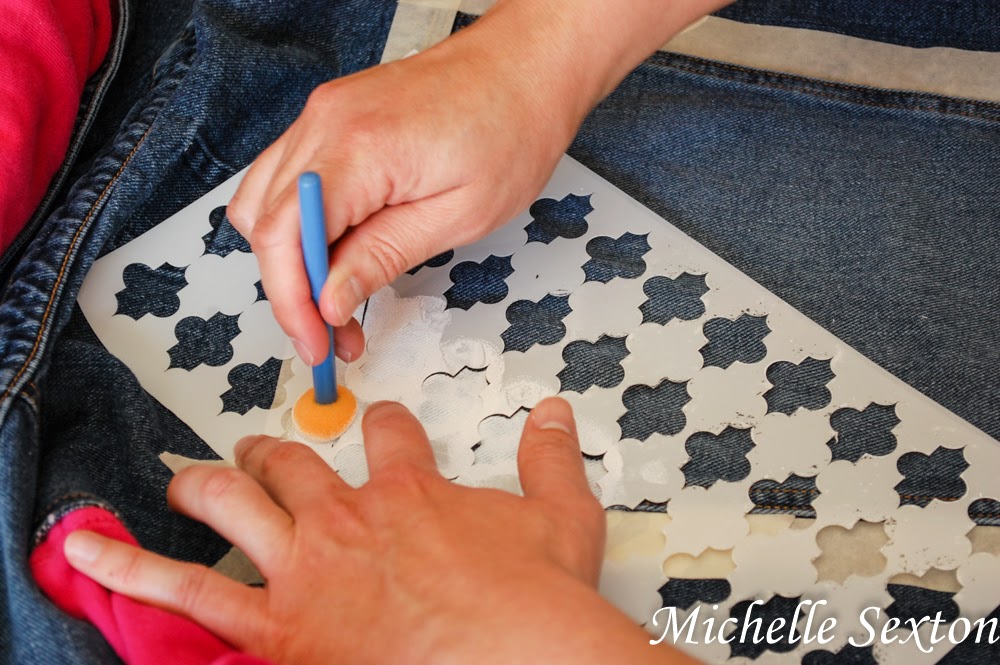
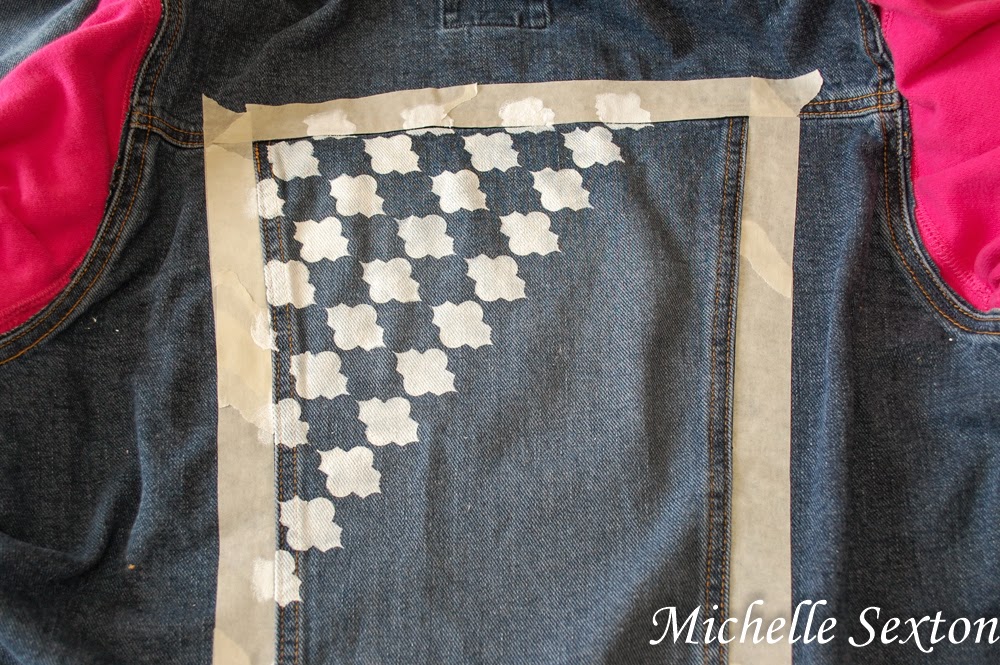
Place the patterned stencil at a 45 degree angle, making sure the shape starts at the top left corner of the rectangle. Place one small strip of masking tape on the edge of the stencil, just to keep it in place as you work. Using a sponge brush, gently dab the fabric overlaid by the stencil in an up and down motion.
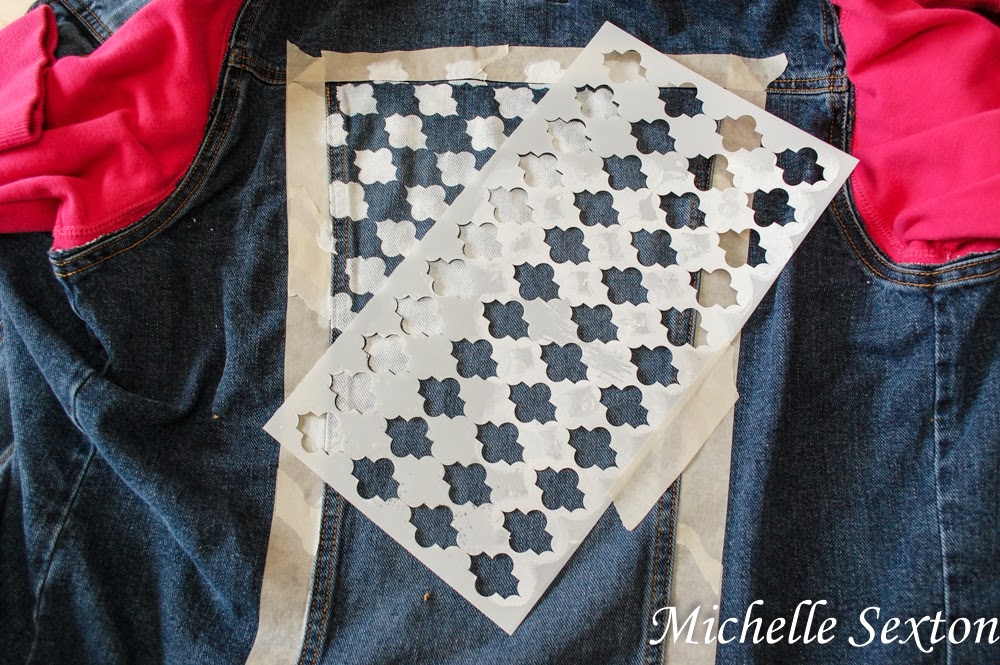
Once all shapes inside the patterned section of the stencil have been used, peel the stencil in a gentle, upward motion. Allow paint to dry for at least 15 minutes, depending on how much paint was applied. Once painted fabric is dry, line up the patterned stencil with the a portion of the dried section, and apply paint, creating additional shapes and extending the pattern coverage. Repeat this process until the entire rectangle section is covered in the stencil pattern. (Don't forget to wash off the stencils afterward so you can re-use them later. These mylar stencils are durable and easy to clean.)
Once the patterned section is completely dry, position the bird silhouette stencil over the painted pattern section, and dab paint. Allow to dry completely. (I found that the bird silhouette needed an additional coat of paint. However, make sure to allow paint to dry completely before applying an additional coat.)
Once the silhouette has dried, paint an additional silhouette below the first bird.
Finally place the bird detail stencil over the silhouette and dab. Allow to fully dry before adorning. (It's hard to wait, I know!)
Are you feeling the inspiration yet? Go make one for yourself! This stencil set and the rest of the collection can be found at Jo-Ann Fabric & Craft stores.
P.S. The FolkArt Multi-Surface Paint can be used on just about anything AND are even dishwasher safe! (gasp) I seriously love this paint.
Like what you see? Find more awesome stuff from Plaid Crafts here:
Subscribe to:
Posts (Atom)