So Here's My Life

The things we make,
the food we eat and
the shenanigans in between.

A blog about making things by
MICHELLE SEXTON

Showing posts with label embroider. Show all posts

Thursday, February 20, 2014

Pearl Embellished Beanie

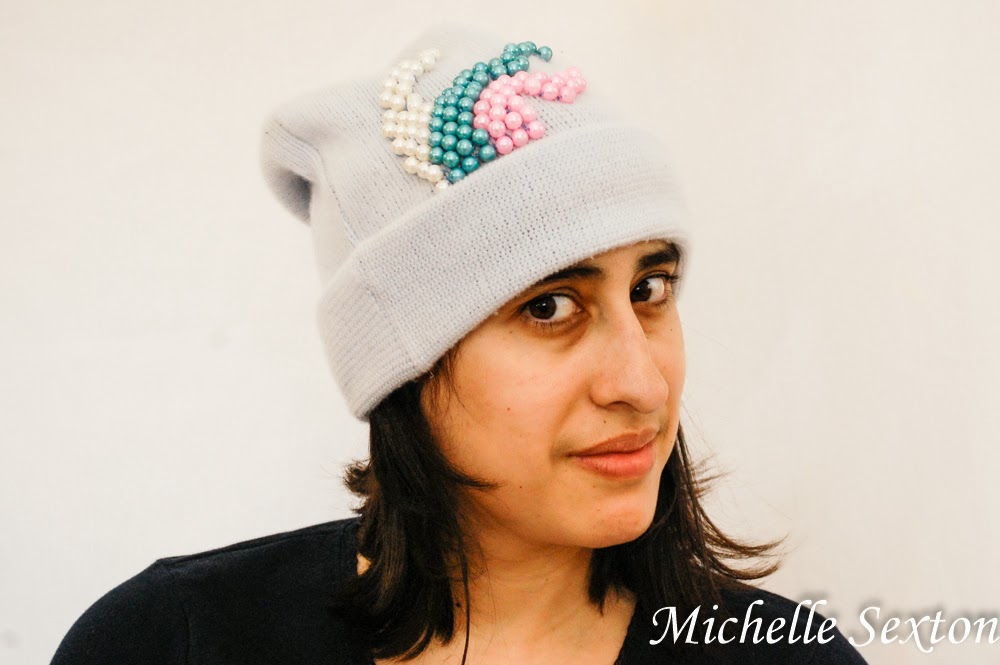
One final winter project to keep you occupied as you await Spring's arrival. I made another beanie. Ok. Actually,make this one, I embellished it. I've had this terrific, baby blue beanie in my closet for years. It was a gift from my mom several years ago and wore it often when I first received it. However, over the years I lost interest in it, mainly because it was so plain, and I've acquired so many additional fun hats. So what do you do with old clothing items that have lost their appeal? Upcycle them, of course! The beauty of this project is the fact that this can be done at your own leisure. It's the perfect activity to work on as you sit on the couch and watch a movie once the kids have gone to bed...or not, provided that your kids can abstain from interrupting you every 3 and half minutes. We have yet to achieve this status in our house. ;)

Upcycle a beanie by embellishing with beads - click through and find out more.

supplies needed

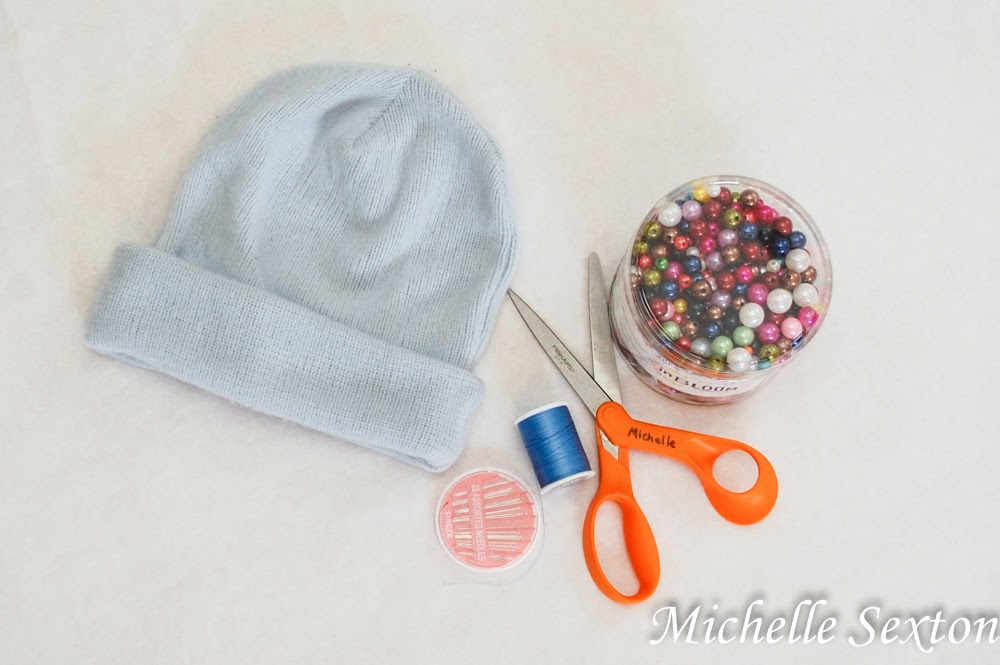
You will need:
- an assortment of faux pearl beads
- a beanie
- needle
- thread
-scissors
Bam that's it! Don't you love it when there's only a couple of items needed for a project? I do.

So here's how I made this awesome beanie:

capture arrangement with cell phone
Original arrangement taken with cell phone photo to use as a reference

Arrange the beads until you find a design that you like. Take a picture of it to use as a reference guide. (I snapped a photo using my cell phone.)

A couple of recommendations for the stitching beads:
- Double thread the needle, just to keep each bead extra secure.
- Stitch each bead to the hat three times before tying it off and moving onto the next.
- Knot each individual bead to the hat separately, even if  you don't cut the thread after each bead. This will keep you bead loss to a minimum if the beads get caught on something.

stitch entire bottom row to begin

Start out by stitching the entire bottom row of beads (all three colors), just above the brim. I recommend marking each spot with chalk where each bead is to be sewn. (I didn't do this, but only because I didn't think about it until afterwards. Duh.) The bottom row will give you a foundation to work off of.

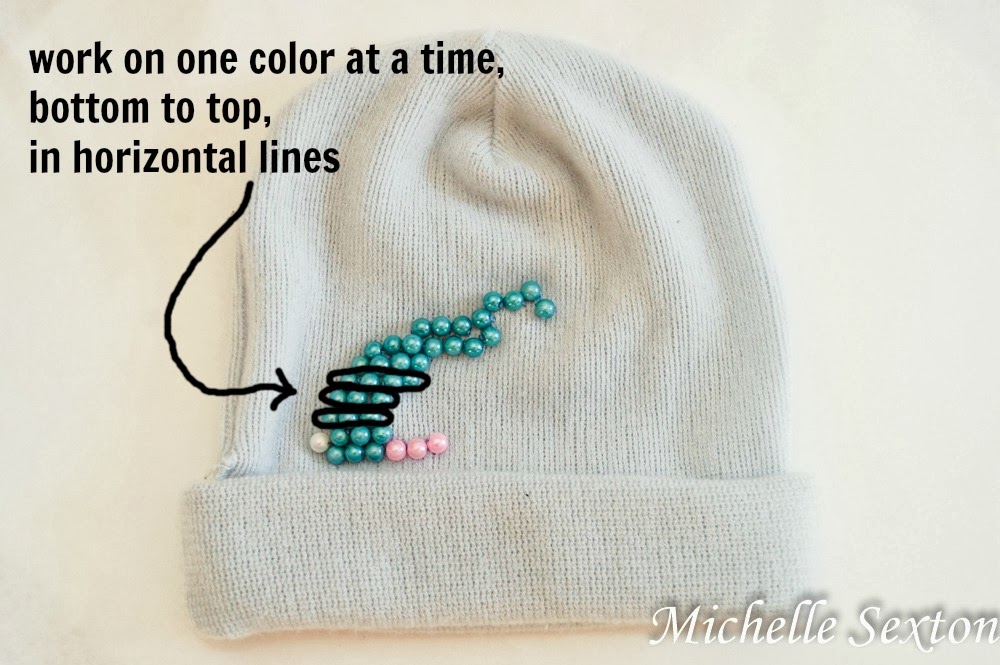
work on one color at a time, bottom to top, in horizontal rows

knot each bead individually

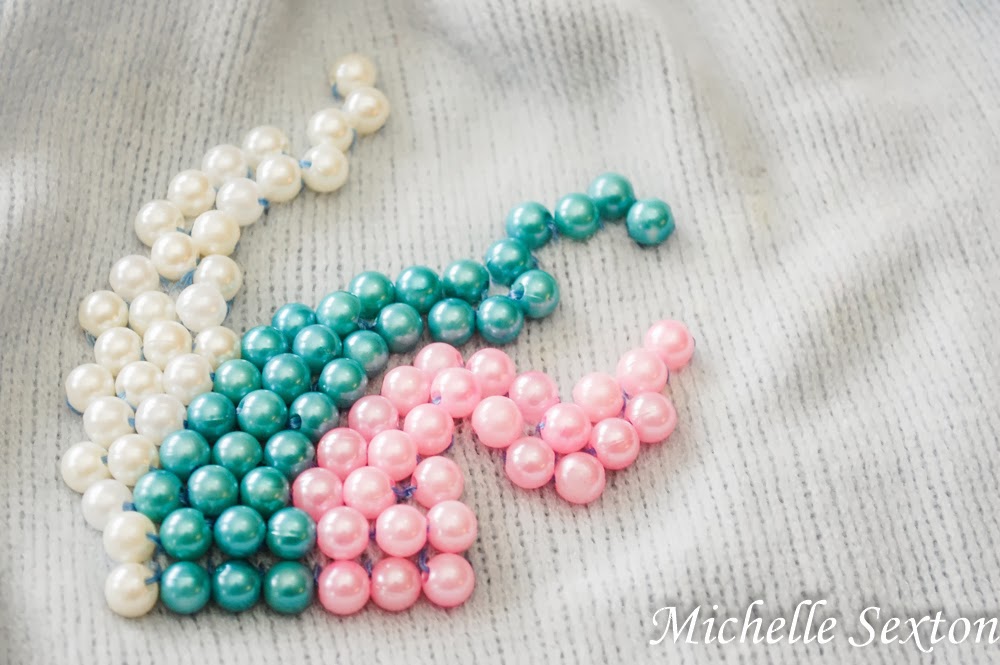
Once the bottom row has been completed, continue by stitching the center color (mine was blue), working your way from bottom to top, horizontal row by horizontal row, until the entire color section has been completed. Be sure to reference your "prearranged" picture every so often to keep track of the progress.

After completing the center color, continue with the next color (either side is fine). Again, work your way up to the top, completing one horizontal row at a time.

Repeat again with the final color.

Upcycle a beanie by adding beads - click through and find out more

Embellish a beanie with beads - click through and learn more

Upcycle a beanie by adding beads - click through and learn more

Simple? Definitely. The hardest part of this project was finding uninterrupted time to sit down and work on it, which rarely occurs before 7:30 PM. Life of a mom, right?


Tuesday, January 21, 2014

Upcycled Color Block Bracelet

I had a bracelet laying around our house. It wasn't anything special, but it provided a discount if it was worn to a local sports store. Instead of tossing it in the trash after the promotion expired, I decided to upcycle  it into something more fun - a Bollywood-like, color blocked bracelet. Boom! Awesome upgrade. The fun colors and sparkly rhinestones provide a sweet uniqueness to this accessory. Project bonus: It's quick and easy to make! (Well...of course it is, because you know, that's really my thing...you never know how long a project will take when you have a couple of munchkins around to provide numerous interruptions.) Plus, this bracelet is so fun, I get complements every time I wear it. What more could you ask for? ;)


Supplies needed:
- embroidery floss (I used three different colors)
- rhinestone chain
- small charm
- a cuff bracelet
- scissors
- super glue or some other type of quick drying glue (optional)
- plastic needle, small crochet hook or some other type of tool to tie off ends


Start out by attaching the rhinestone chain down the center of the bracelet. I lucked out and was able to slip the ends of the rhinestone chain into the plastic tips on the bracelet. If this isn't an option for you (unless the bracelet is similar to the one I used), use super glue to secure both ends of the chain to the bracelet. Trim the ends of the rhinestone chain if needed.


Next, tie a square knot with embroidery floss at one end of the bracelet, on top of the secured end of the chain. Wrap the floss around each link of the chain (between the rhinestones). (This is just to secure the chain to the bracelet as you work on it.)


Once each chain link has been wrapped with the floss, begin wrapping to cover the entire bracelet, working your way from one end to the opposite end. Wrap floss neatly around the bracelet, keeping each strand as flush as possible to the previous strand. Wrap floss as close to each rhinestone as you can.


To change embroidery floss colors, tie both ends of the different colored floss into a square knot, and continue to wrap. Be sure to hide the knot, as you continue to wrap.

Continue wrapping until the entire bracelet is covered, and switching floss colors as often as desired.
There's truly no wrong way to do this.

At some point during the wrapping process (maybe after 1/3 of the bracelet has been wrapped), string the charm onto the floss when changing floss colors and continue wrapping. If you forget to do this (like I did), it can be tied on afterwards, using matching floss, and hiding the knots and trimmed ends.

Once the entire bracelet is wrapped, tie a square knot to secure the floss to the bracelet. Trim and hide the ends underneath the wrapped floss. I used a small crochet hook to tie the final knot and keep it tight.


A couple of tips to keep in mind:

- I had plastic ends on my bracelet that allowed me to wrap the floss onto the bracelet without the floss slipping off the ends. If this is not an option, tie the floss with square knots and secure them to the bracelet using super glue. Once the super glue is dry, wrap over the super-glued sections again to conceal any super glue. Repeat these steps on the opposite end of the bracelet once the entire bracelet has been wrapped.

- Square knots are crucial to prevent the embroidery floss slippage.


The Crafty Blog Stalker

Tuesday, March 6, 2012

Denim Inspiration

This by far, was my favorite DIY clothing project, as well as my favorite pair of jeans. Unfortunately, they are a size 2 and I haven't worn a size for at least 5 years. I'm pretty sure that my size 2 days have come and gone, especially after pregnancy. 

I actually decorated these jeans about 5 years ago, before The Toddler was even a thought in our minds and my hips were a size 2. (And no, I did not look like I was anorexic or unhealthy as a size 2 either...just in case you were wondering...I'm just sayin')  ;)

I really have a thing for buttons. Honestly, my favorite way to decorate apparel is with buttons. I love to place random colored buttons all over an article of clothing. Several years ago I bought a large bag of buttons at an antique store. I had no idea what I would use them for, but I found the various shapes and brilliant colors completely inspiring. After I bought them, I would empty them all out and admire their uniqueness...wait...why am I telling you guys about this? Pretend you didn't read that last sentence. ANYWAY, all that to say, I LOVE buttons. You can check out a couple of my other button projects here and here.


Here's a couple of close-up shots to give you an idea of how I decorated them.


It was an easy and fun project, but a little more on the time consuming side. I think I remember spending close to 8 hours hand-stitching the buttons and embroidering patterns on this project. The thing that made it so time consuming, was that I changed thread colors so often. But it was definitely time well spent. :)


I miss wearing these jeans, not being a size 2, just wearing these jeans. I think I need to up-cycle these jeans into something else. Any suggestions?

By the way, I have at least one more button project up my sleeve...at least for now.
But I am making the effort to keep my button obsession at bay. ;)