So Here's My Life

The things we make,
the food we eat and
the shenanigans in between.

A blog about making things by
MICHELLE SEXTON

Showing posts with label beanie. Show all posts

Thursday, March 6, 2014

Turn a Beanie into an iPad/Android Case in 30 minutes or less

So, let's talk about iPads. Wait...you don't have an iPad? Oh right, you're on the Android team. It's cool. We don't discriminate in this house. We use both Mac and Android devices. Joel has an iPhone and an Android tablet. I have an Android phone and an iPad mini. The boys inherited the first generation iPad. (Don't tell them that it belongs to them, we haven't disclosed this information to them. They still think it's mine. Ha ha!) We just can't choose a side in this house! It's crazy, but we are ok with this impartiality. Anyway, so last month my awesome husband gave me an iPad mini (!!!!) for Valentine's Day. Yeah, I was unbelievably excited to have my very own iPad all to myself - no more sharing the iPad sharing with the Preschool Patrol. So, one of the first thoughts I had after I got my iPad was, "Oh wait, I don't have a case for it! I can make one!!" This realization was followed by feelings of excitement. Oh yes, I was definitely excited.

After sifting through several items, I realized one of the easiest ways to make an iPad case is to make it from an unused beanie. (Yeah, I have more than one unused beanie. Remember the beanie that I embellished with pearl beads?) So, today I'm excited to show you how I made case for my iPad and how unbelievably quick and easy it was. I'm talking 30-minutes-quick. You should definitely make one yourself, as well. Also, here's an added bonus: this beanie will probably end up getting far more use as an iPad (or Android) case than actually wearing it as a hat. You only wear it a couple months out of the year anyway, right? Score! So, are you ready to make one? Let's do it!

Convert an old beanie into an iPad/Android case in 30 minutes or less - click through and see how

You will need:
- beanie
- twine
- 5 buttons
- needle
- thread
- chalk (or washable pen)
- star shaped cookie cutter
- scissors
- pins
- sewing machine (optional)

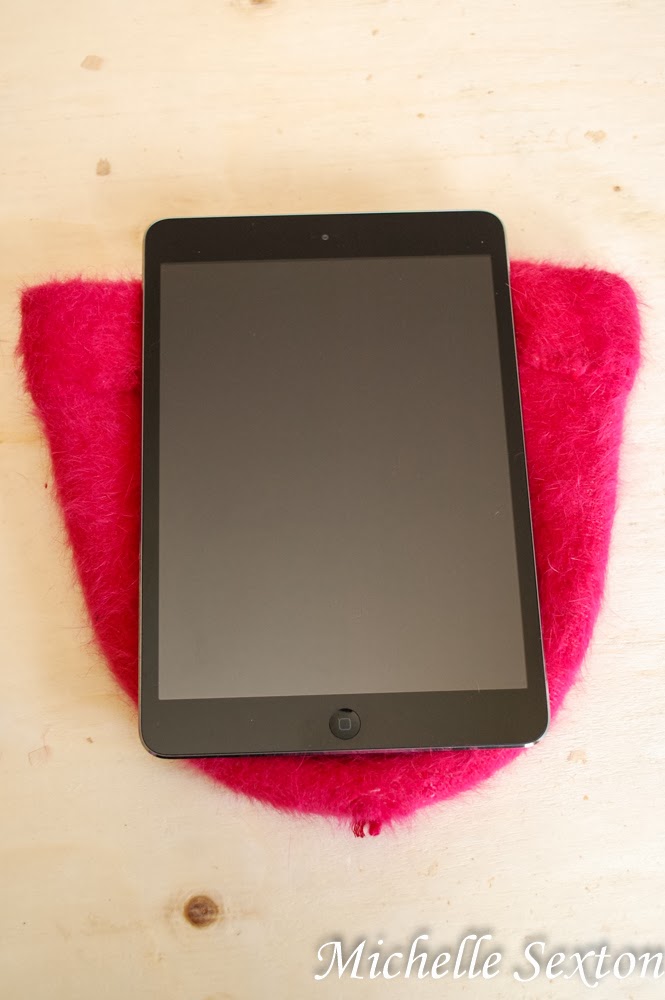
lay iPad on top of inside-out beanie

Start out by turning the beanie inside out. Lay the tablet on top and centered on the beanie. 

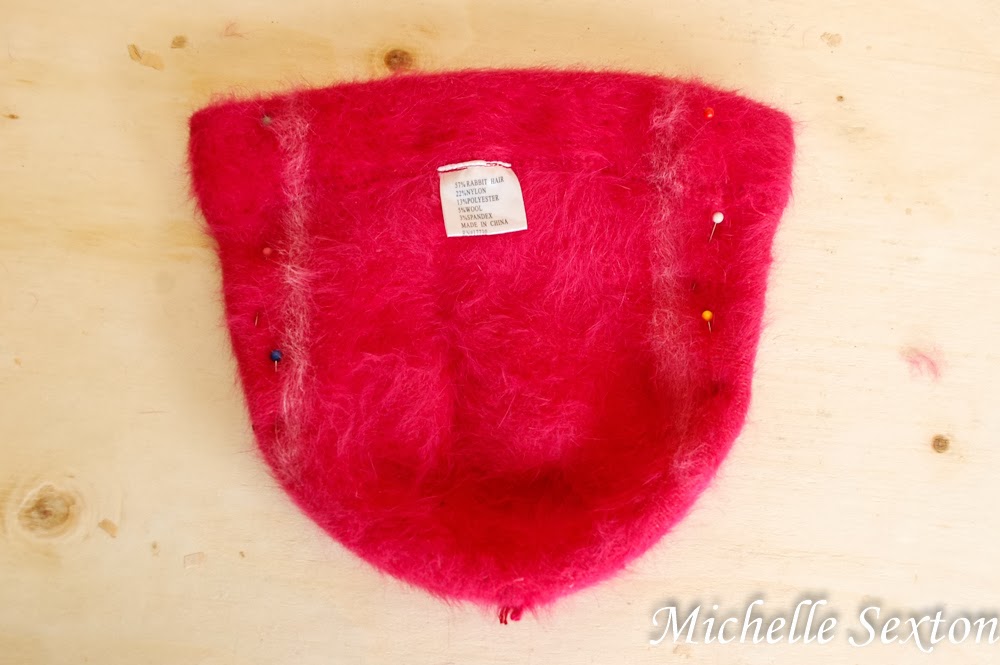
outline beanie and pin

Mark an outline onto the beanie with chalk around the tablet. Pin around the chalk path. 

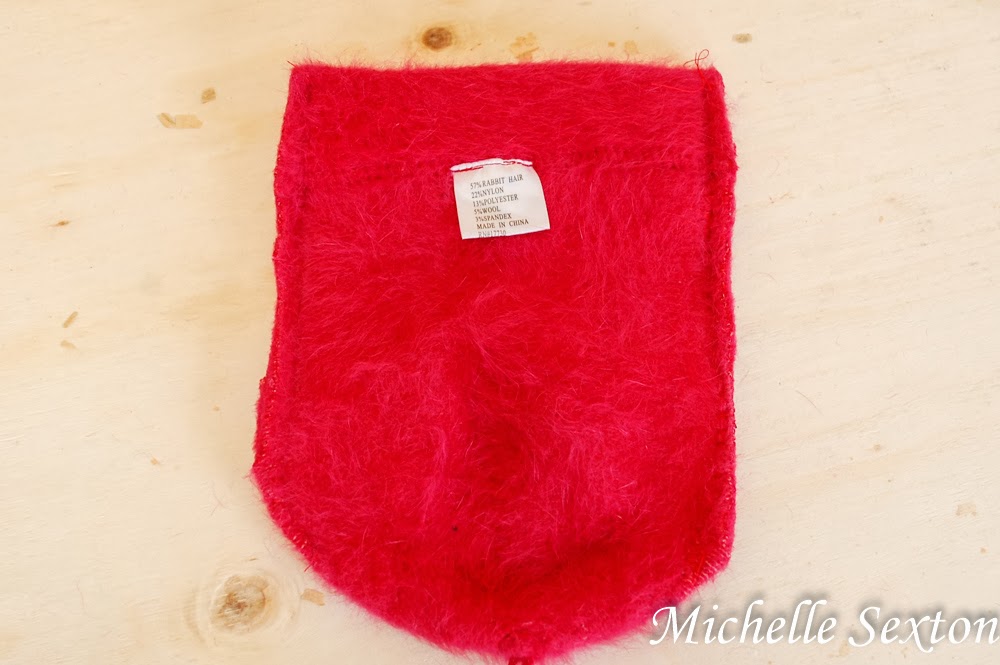
sew along outline

trim excess fabric

Sew along the chalk paths and cut off the excess fabric. 

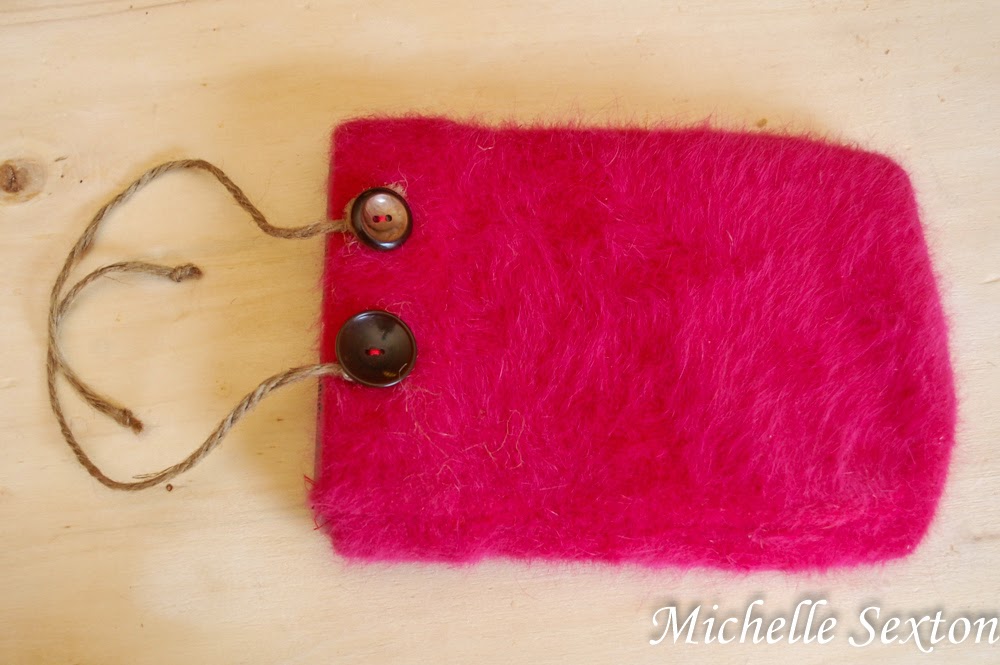
add buttons and tie twine strands

Stitch two buttons at the top of the case, on both sides of the opening. Cut two strands of twine, each approximately 6 inches long. Tie each strand between the buttons and the case on the back side. 

place cookie cutter on top of front of case and trace

trace outline of cookie cutter onto case

Lay a star-shaped cookie cutter on top of the front of the case and trace along the edges with chalk. 

stitch twine onto star outline

star outline

Make an iPad/Android case from a beanie - click through and learn how

Cut a strand of twine long enough to fit around the outline of the cookie cutter. Stitch the twine onto the outline traced onto the front of the case. (Obviously, I did not follow the exact outline of cookie cutter, but the important thing is stay as close to the corners of the outline as possible.) Finally, sew a button onto the center of the star. 

Make an iPad Case from an old beanie in 30 minutes or less - click through and learn how


Unbelievably easy, right? Quick, look at the clock. It took you less than 30 minutes to make this, didn't it? Well, if it didn't, you should definitely blame it on the kids. ;)

Thursday, February 20, 2014

Pearl Embellished Beanie

One final winter project to keep you occupied as you await Spring's arrival. I made another beanie. Ok. Actually,make this one, I embellished it. I've had this terrific, baby blue beanie in my closet for years. It was a gift from my mom several years ago and wore it often when I first received it. However, over the years I lost interest in it, mainly because it was so plain, and I've acquired so many additional fun hats. So what do you do with old clothing items that have lost their appeal? Upcycle them, of course! The beauty of this project is the fact that this can be done at your own leisure. It's the perfect activity to work on as you sit on the couch and watch a movie once the kids have gone to bed...or not, provided that your kids can abstain from interrupting you every 3 and half minutes. We have yet to achieve this status in our house. ;)
Upcycle a beanie by embellishing with beads - click through and find out more.

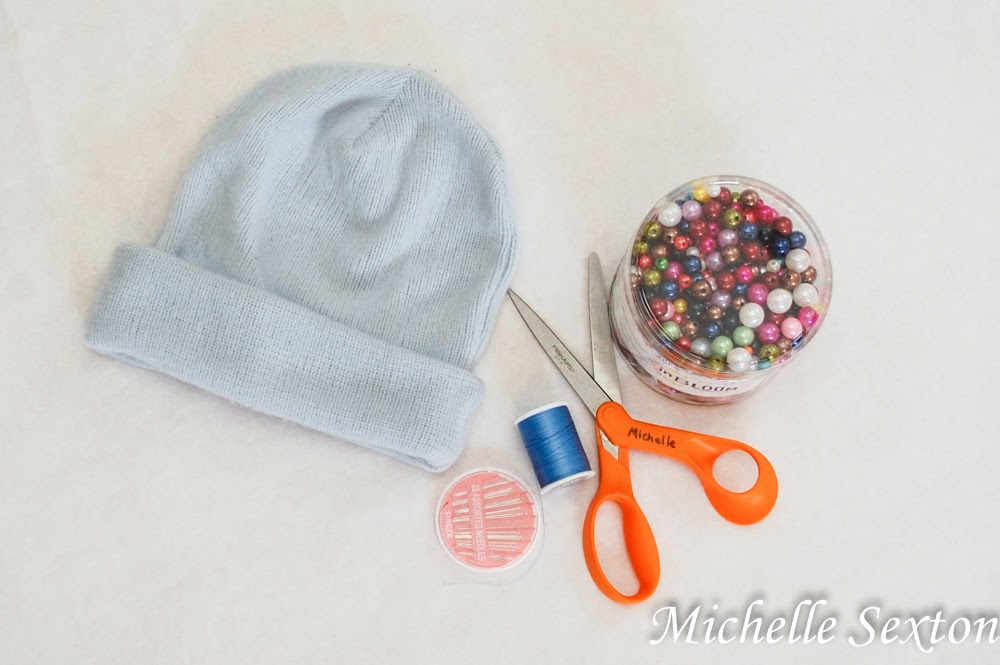
supplies needed

You will need:
- an assortment of faux pearl beads
- a beanie
- needle
- thread
-scissors
Bam that's it! Don't you love it when there's only a couple of items needed for a project? I do.

So here's how I made this awesome beanie:

capture arrangement with cell phone
Original arrangement taken with cell phone photo to use as a reference

Arrange the beads until you find a design that you like. Take a picture of it to use as a reference guide. (I snapped a photo using my cell phone.)

A couple of recommendations for the stitching beads:
- Double thread the needle, just to keep each bead extra secure.
- Stitch each bead to the hat three times before tying it off and moving onto the next.
- Knot each individual bead to the hat separately, even if  you don't cut the thread after each bead. This will keep you bead loss to a minimum if the beads get caught on something.

stitch entire bottom row to begin

Start out by stitching the entire bottom row of beads (all three colors), just above the brim. I recommend marking each spot with chalk where each bead is to be sewn. (I didn't do this, but only because I didn't think about it until afterwards. Duh.) The bottom row will give you a foundation to work off of.

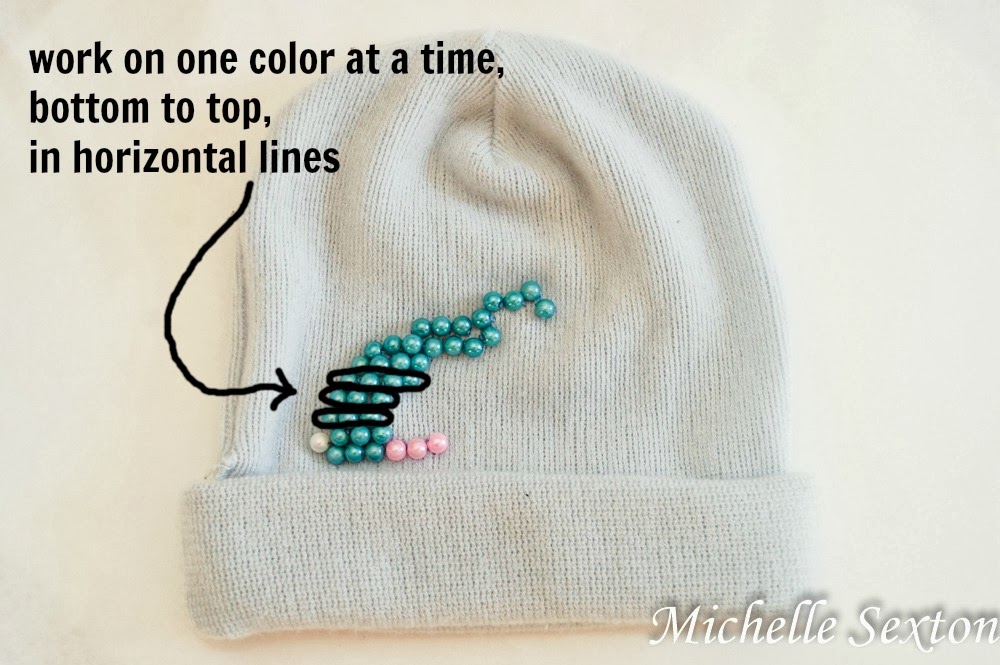
work on one color at a time, bottom to top, in horizontal rows

knot each bead individually

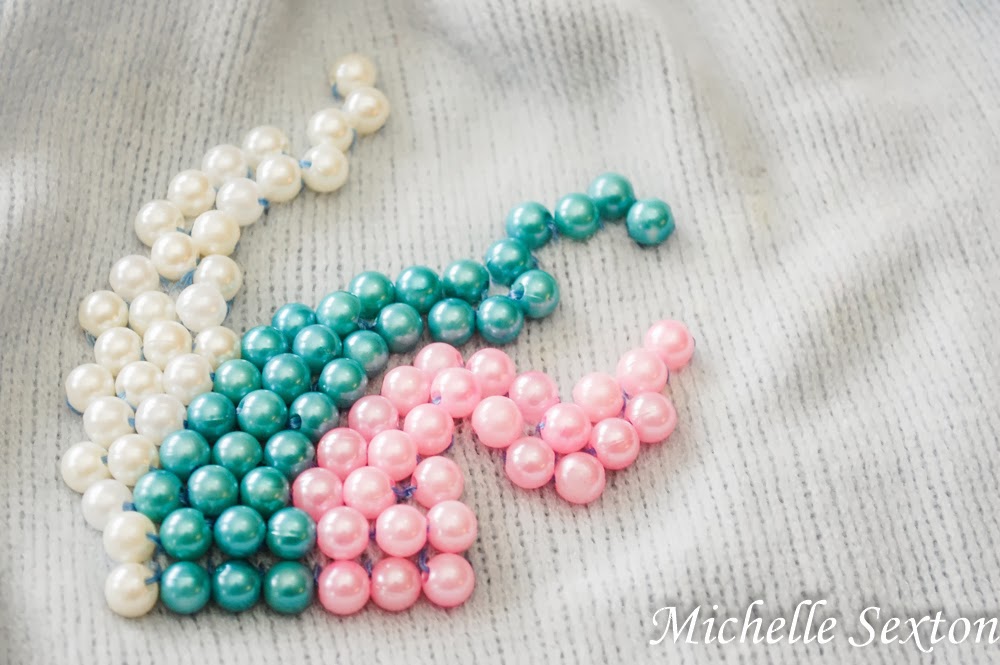
Once the bottom row has been completed, continue by stitching the center color (mine was blue), working your way from bottom to top, horizontal row by horizontal row, until the entire color section has been completed. Be sure to reference your "prearranged" picture every so often to keep track of the progress.

After completing the center color, continue with the next color (either side is fine). Again, work your way up to the top, completing one horizontal row at a time.

Repeat again with the final color.

Upcycle a beanie by adding beads - click through and find out more

Embellish a beanie with beads - click through and learn more

Upcycle a beanie by adding beads - click through and learn more

Simple? Definitely. The hardest part of this project was finding uninterrupted time to sit down and work on it, which rarely occurs before 7:30 PM. Life of a mom, right?


Tuesday, February 18, 2014

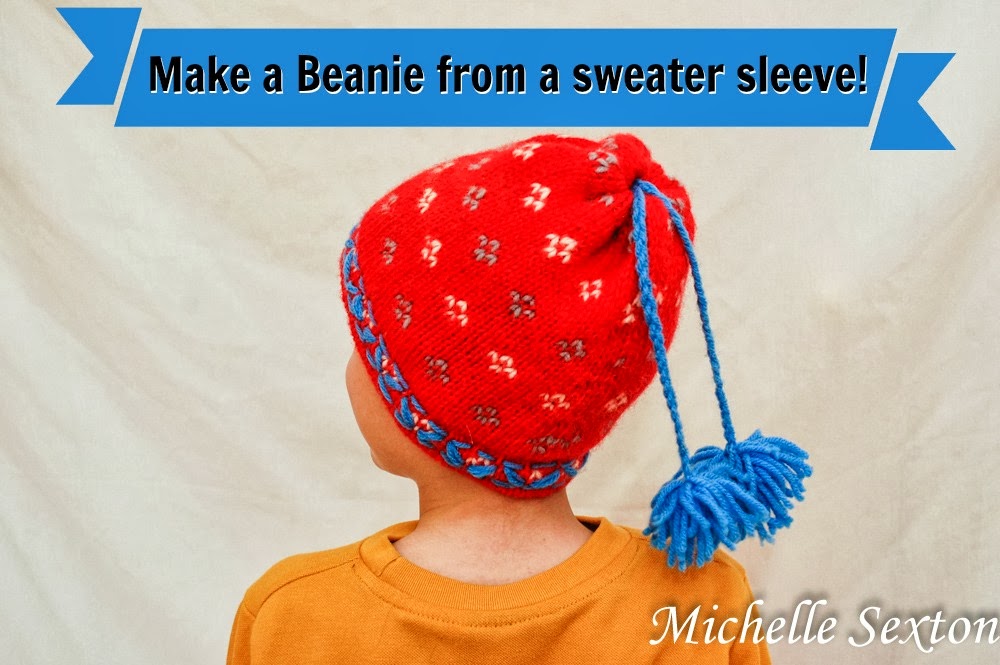
How to Make a Beanie from a Sweater Sleeve

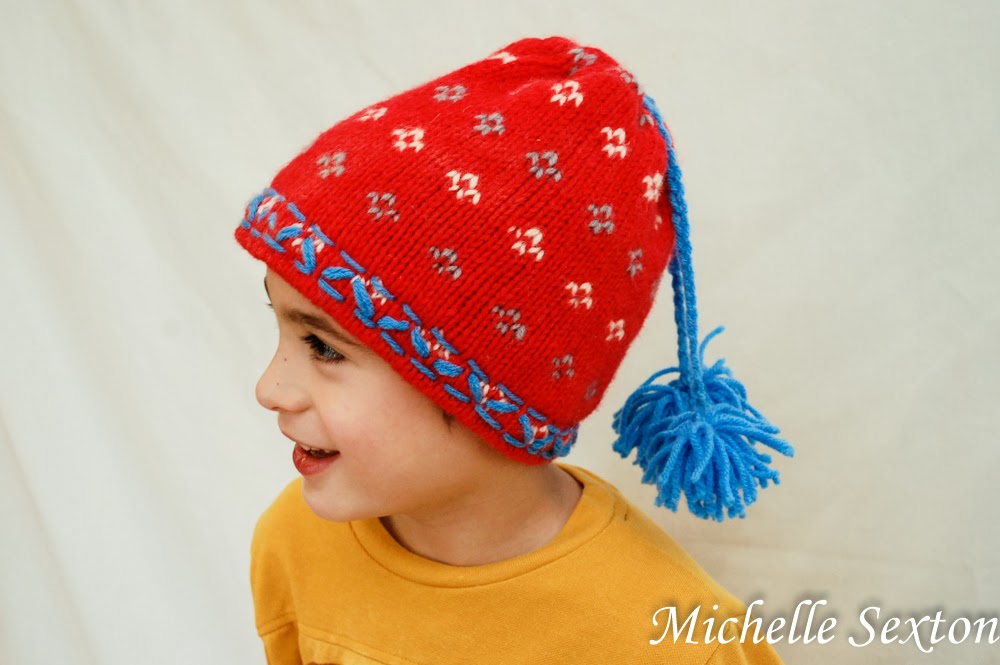
Have you had your fill of winter yet? Has Snowmageddon depleted your creative energy? Well, guess what? Here's an unexpected and easy sewing project to make for your little ones in one evening. This easy little project may just make these last days of winter a little more bearable, once you see your little ones wearing these cute little beanies on their heads.

Learn how to make a beanie from a sweater sleeve with only a minimal amount of sewing! Click through and find out how.

Make this easy beanie with only a minimal amount of sewing - click through and find out how.

These beanies were made with the leftover material from an upcycled sweater project that I shared a couple of weeks ago. The sweater originally had gigantic baggy sleeves that proclaimed, "I'm so outdated!" They just had to go. So, I cut them off and made a cute pair of boot cuffs, and still had a bit of leftover sleeve material. Instead of tossing them, I thought, "Why not make hats for the boys?"

so many uses for one sweater!

Here's the original sweater. It's a hand-knit wool sweater and a bit on the heavy side. This project is totally doable with the heavy wool sweater, but would probably work out even better on a medium-weight sweater. You'll need need at least 12 inches of a sleeve to work with (per hat).

Here's how I made these cute little beanies:

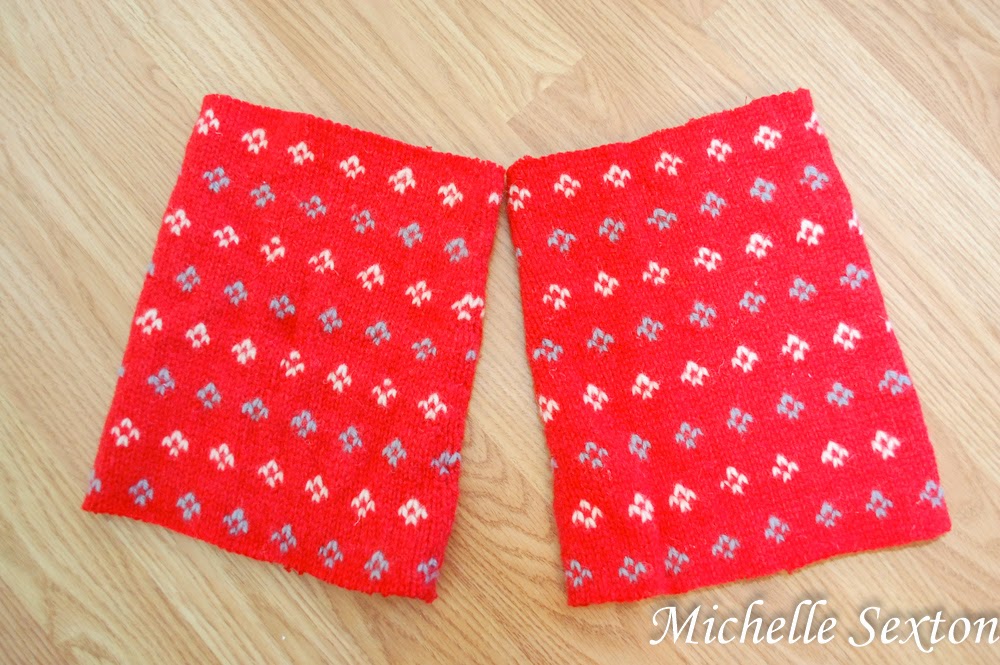
start out with two sweater sleeves

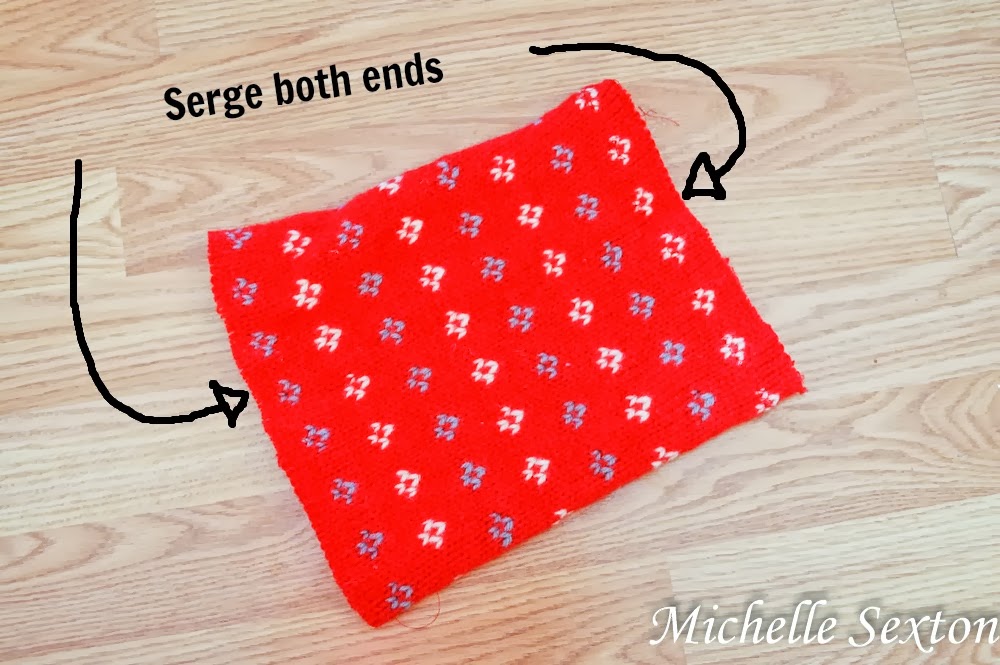
Start out by serging each trimmed end of the sleeve to prevent the sweater from unraveling as you work on it.

serge both ends of the sweater

pin the ends

Turn the sleeve inside out, fold one end, and pin it. (This is the top portion of the hat. So, if the sleeve has a smaller end, it would be ideal to use the smaller end here.) Side note: the photo shows both ends pinned, but you can pin each end and work on them one at a time.

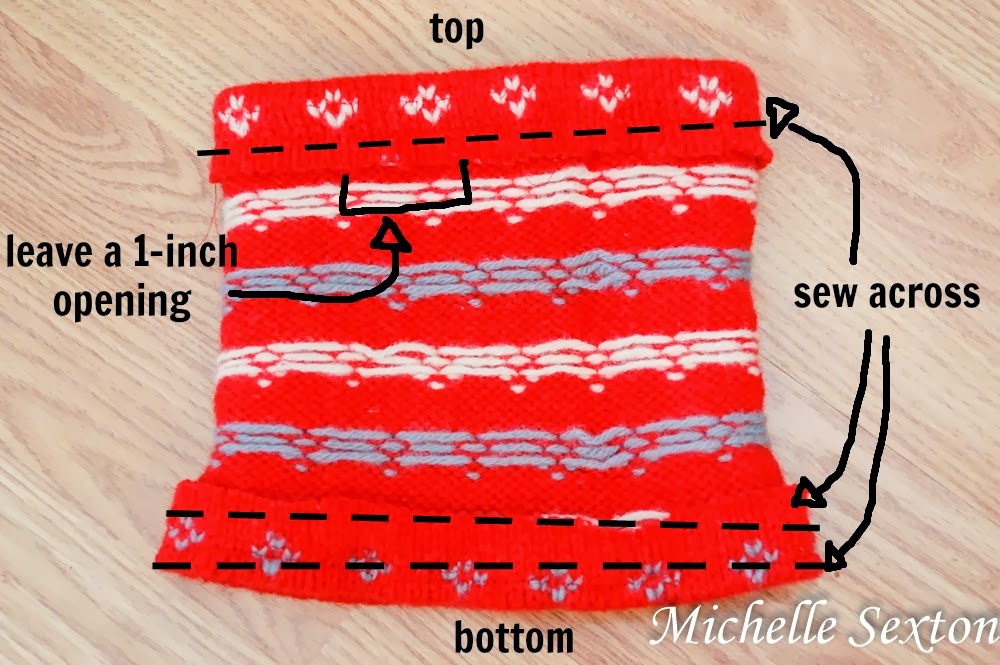
sew across each opening

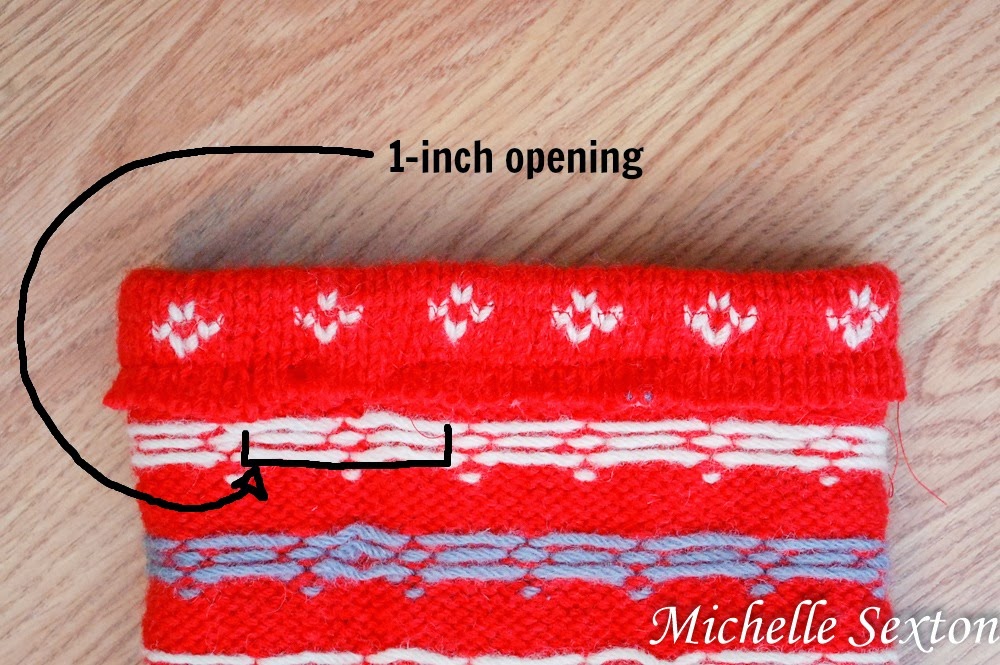
leave a 1 inch opening

Sew a line about 1 inch above the fold of the sleeve, leaving a 1 inch opening between the starting and ending points. Be sure to run the sewing machine forward and backward a couple of times to prevent the stitch from unraveling (at the starting and ending points), especially since the ends are not connected. (I used a serged stitch here, but a straight stitch would be fine too.)

While the sleeve is still inside out, fold the opposite end of the sleeve over, pin, and sew two separate lines over the folded portion.  Make one about 1/4 inch above the fold and one about 1 inch above the fold to create a faux brim. This time, make sure to connect the beginning and ending points.

Guess what? That's all the sewing needed! For. Real. Gasp!

braid 3 strands of yarn together

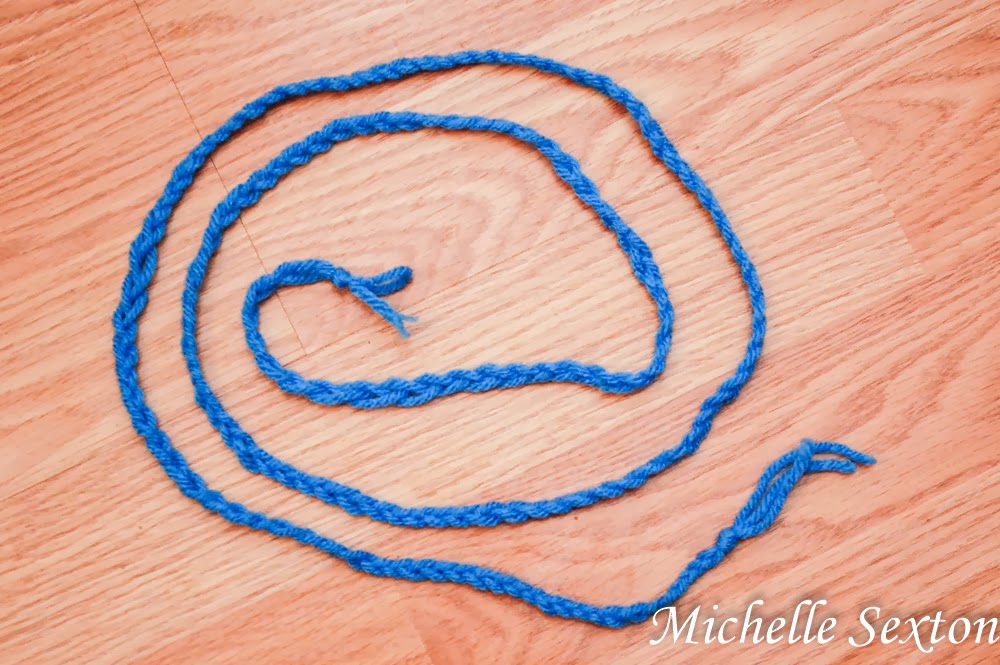
Set aside the sleeve/hat. Braid three strands of yarn into approximately the length of 2 feet.

thread yarn through the top opening

use a crochet hook to thread yarn through top opening

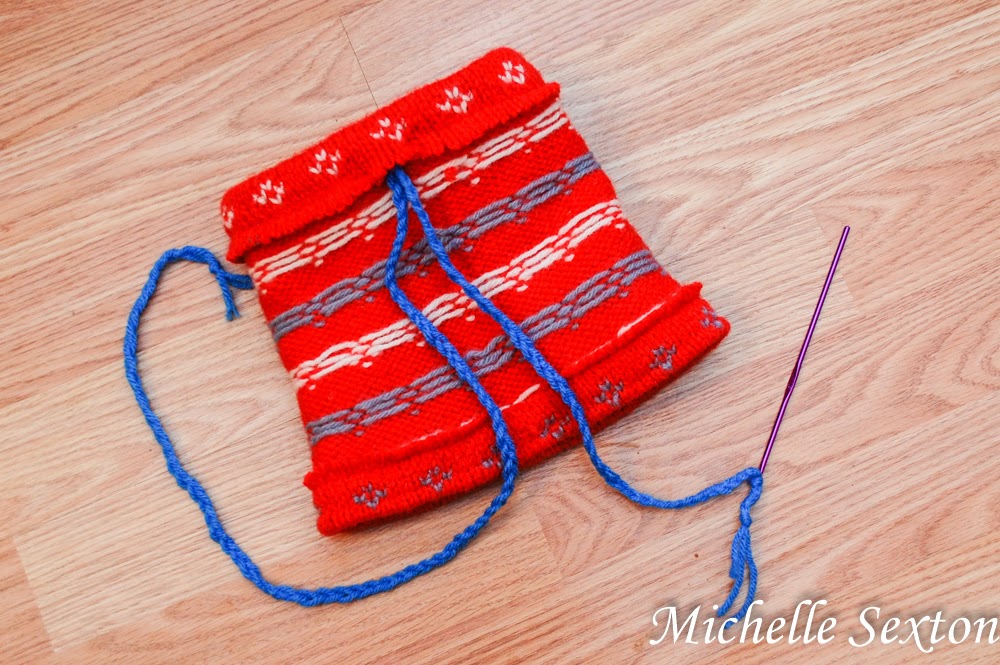
Tie one end of the braided yarn onto a small crochet needle.  Thread the yarn through the top opening of the hat (the end with the 1 inch opening) and out the other end to create a "drawstring".

pull tight and tie a square knot

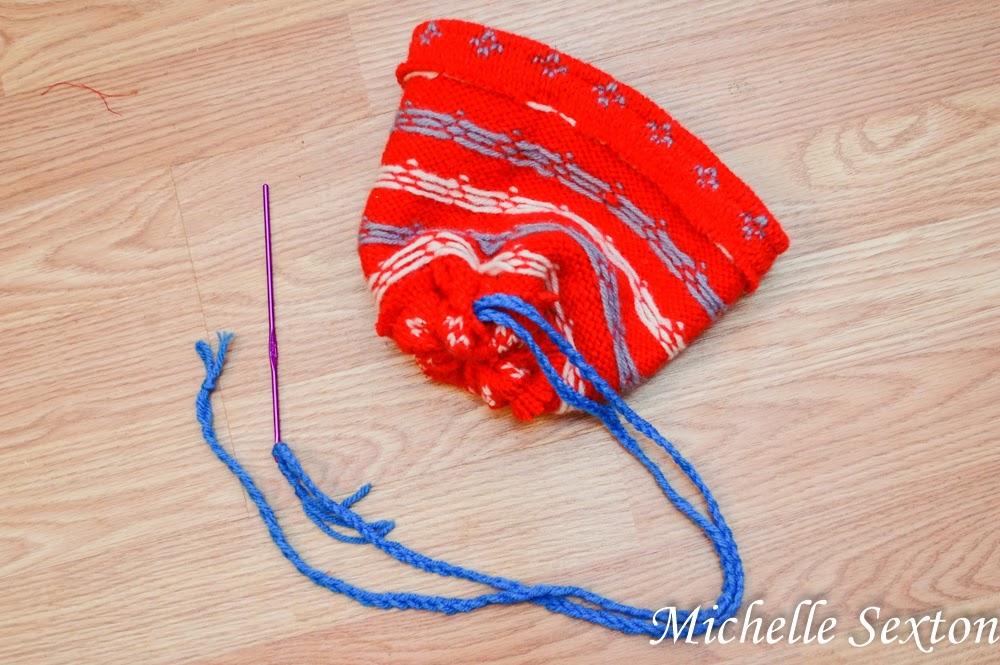
turn hat right side out and pull yarn strands through

Pull the yarn tight and tie square knot. Turn the hat right side out and pull drawstrings through the small opening at the top of the hat.

trim ends and add pom poms

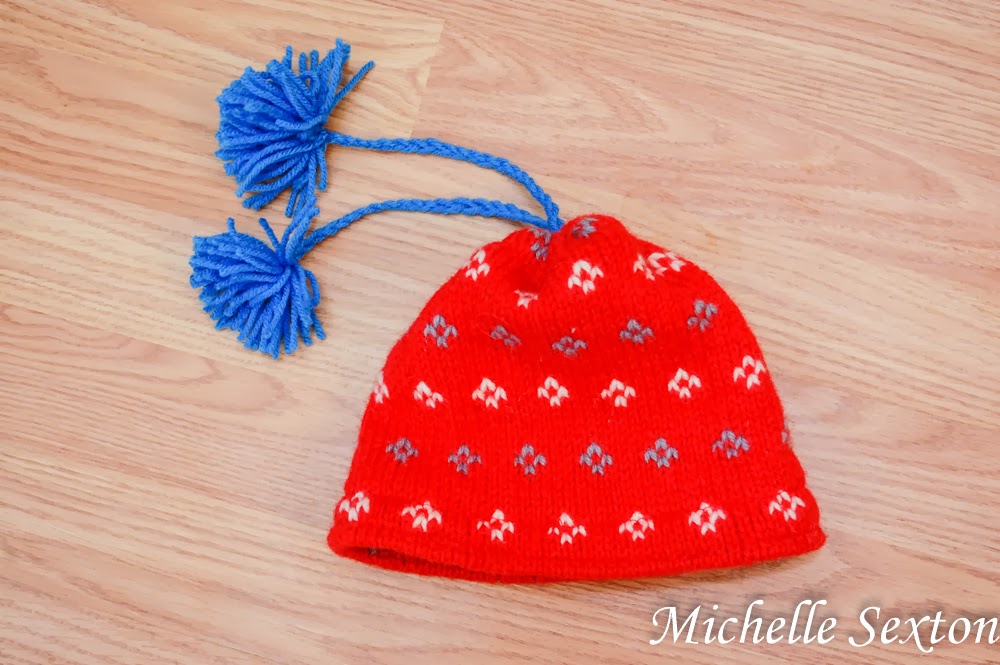
Trim the ends of the drawstrings, leaving approximately 8 inches (or more if you like), and tie off the ends. Make two pom poms and attach them to each end of the drawstring.

embroider a pattern on the brim

Double threaded a plastic needle with yarn, then "embroider" a cute pattern onto the "brim" of the hat.

Make a beanie from a sweater sleeve with a minimal amount of sewing - click through and learn how

Easy way to convert a sweater sleeve into a beanie - click through and learn how

Wa-La! That's it! Easy-Peasy. Who would have ever thought to make a hat out of a sweater sleeve??
:)