So Here's My Life

The things we make,
the food we eat and
the shenanigans in between.

A blog about making things by
MICHELLE SEXTON

Showing posts with label beads. Show all posts

Thursday, February 20, 2014

Pearl Embellished Beanie

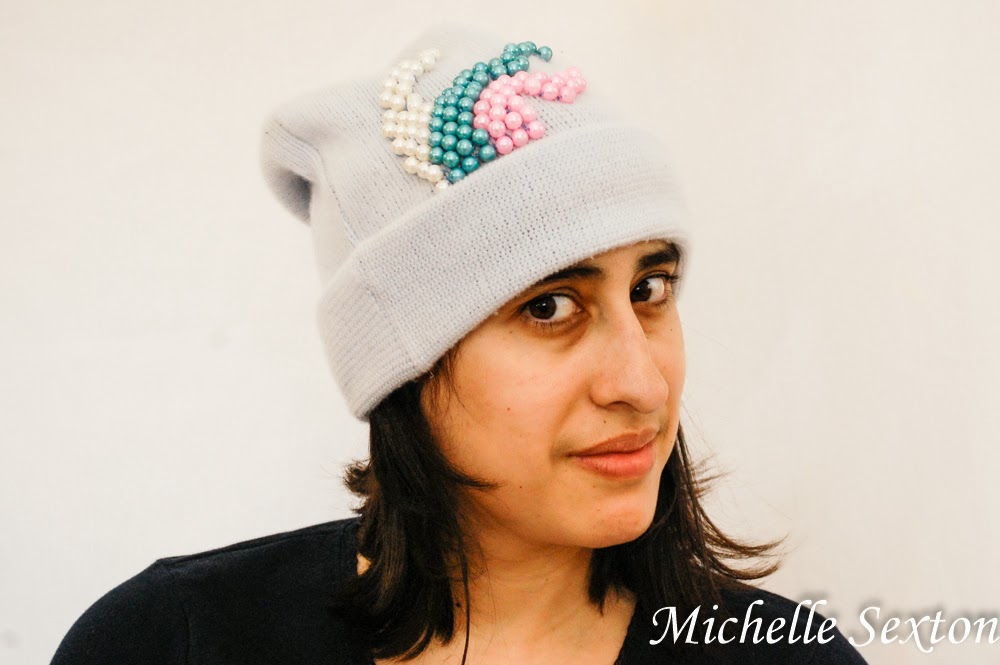
One final winter project to keep you occupied as you await Spring's arrival. I made another beanie. Ok. Actually,make this one, I embellished it. I've had this terrific, baby blue beanie in my closet for years. It was a gift from my mom several years ago and wore it often when I first received it. However, over the years I lost interest in it, mainly because it was so plain, and I've acquired so many additional fun hats. So what do you do with old clothing items that have lost their appeal? Upcycle them, of course! The beauty of this project is the fact that this can be done at your own leisure. It's the perfect activity to work on as you sit on the couch and watch a movie once the kids have gone to bed...or not, provided that your kids can abstain from interrupting you every 3 and half minutes. We have yet to achieve this status in our house. ;)

Upcycle a beanie by embellishing with beads - click through and find out more.

supplies needed

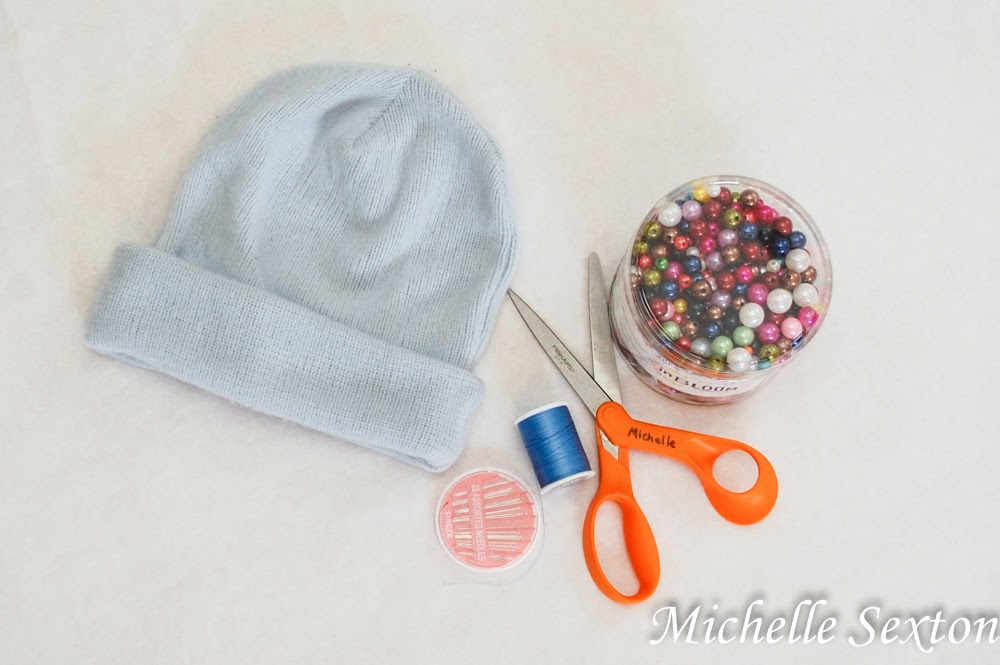
You will need:
- an assortment of faux pearl beads
- a beanie
- needle
- thread
-scissors
Bam that's it! Don't you love it when there's only a couple of items needed for a project? I do.

So here's how I made this awesome beanie:

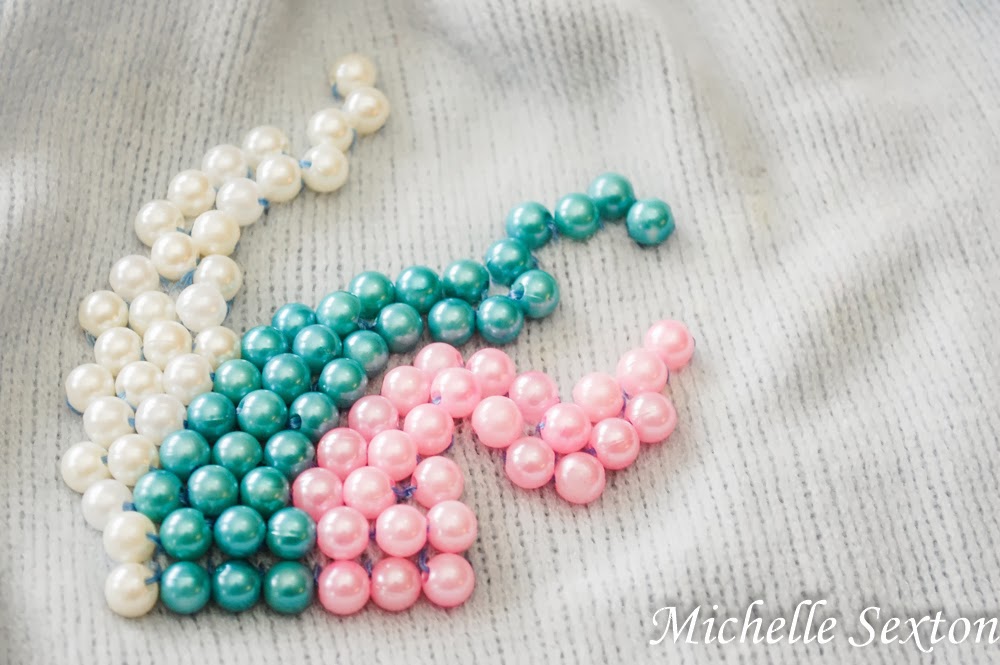
capture arrangement with cell phone
Original arrangement taken with cell phone photo to use as a reference

Arrange the beads until you find a design that you like. Take a picture of it to use as a reference guide. (I snapped a photo using my cell phone.)

A couple of recommendations for the stitching beads:
- Double thread the needle, just to keep each bead extra secure.
- Stitch each bead to the hat three times before tying it off and moving onto the next.
- Knot each individual bead to the hat separately, even if  you don't cut the thread after each bead. This will keep you bead loss to a minimum if the beads get caught on something.

stitch entire bottom row to begin

Start out by stitching the entire bottom row of beads (all three colors), just above the brim. I recommend marking each spot with chalk where each bead is to be sewn. (I didn't do this, but only because I didn't think about it until afterwards. Duh.) The bottom row will give you a foundation to work off of.
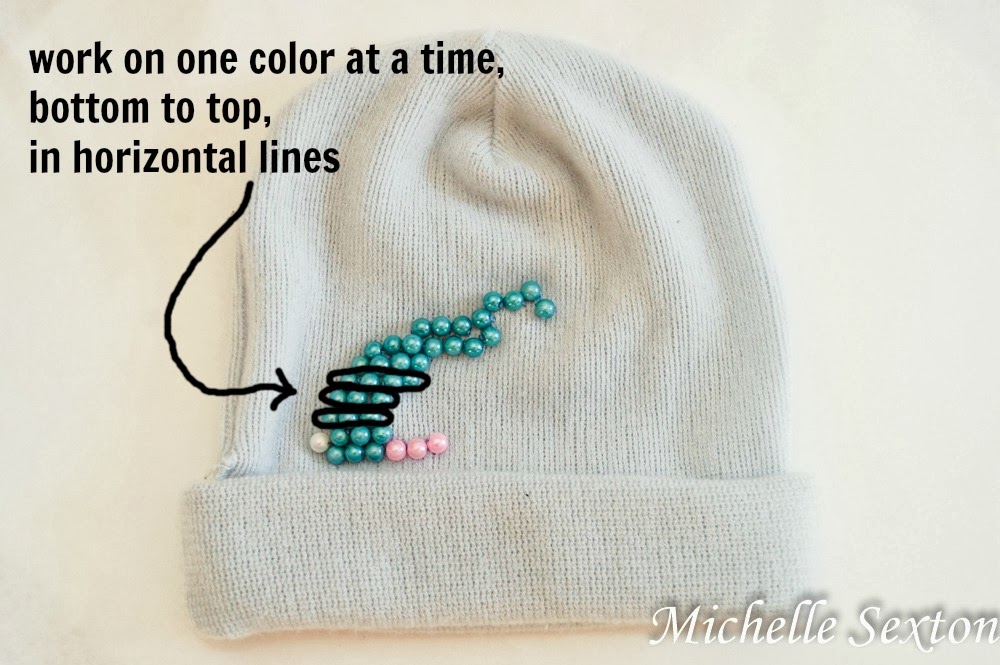
work on one color at a time, bottom to top, in horizontal rows

knot each bead individually

Once the bottom row has been completed, continue by stitching the center color (mine was blue), working your way from bottom to top, horizontal row by horizontal row, until the entire color section has been completed. Be sure to reference your "prearranged" picture every so often to keep track of the progress.

After completing the center color, continue with the next color (either side is fine). Again, work your way up to the top, completing one horizontal row at a time.

Repeat again with the final color.

Upcycle a beanie by adding beads - click through and find out more

Embellish a beanie with beads - click through and learn more

Upcycle a beanie by adding beads - click through and learn more

Simple? Definitely. The hardest part of this project was finding uninterrupted time to sit down and work on it, which rarely occurs before 7:30 PM. Life of a mom, right?


Thursday, January 9, 2014

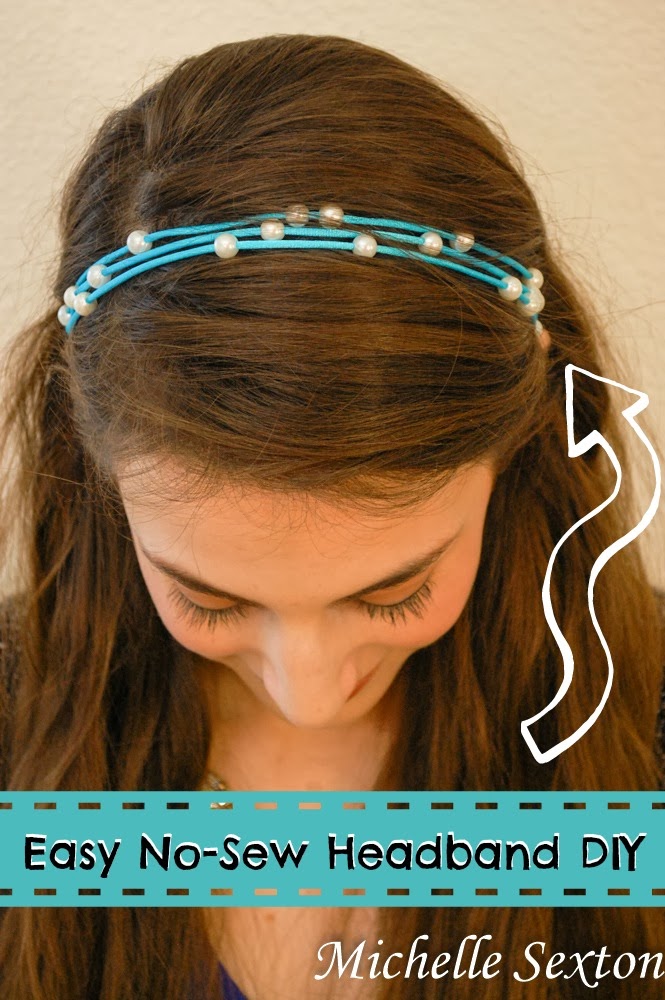
Easy No-Sew Headband DIY

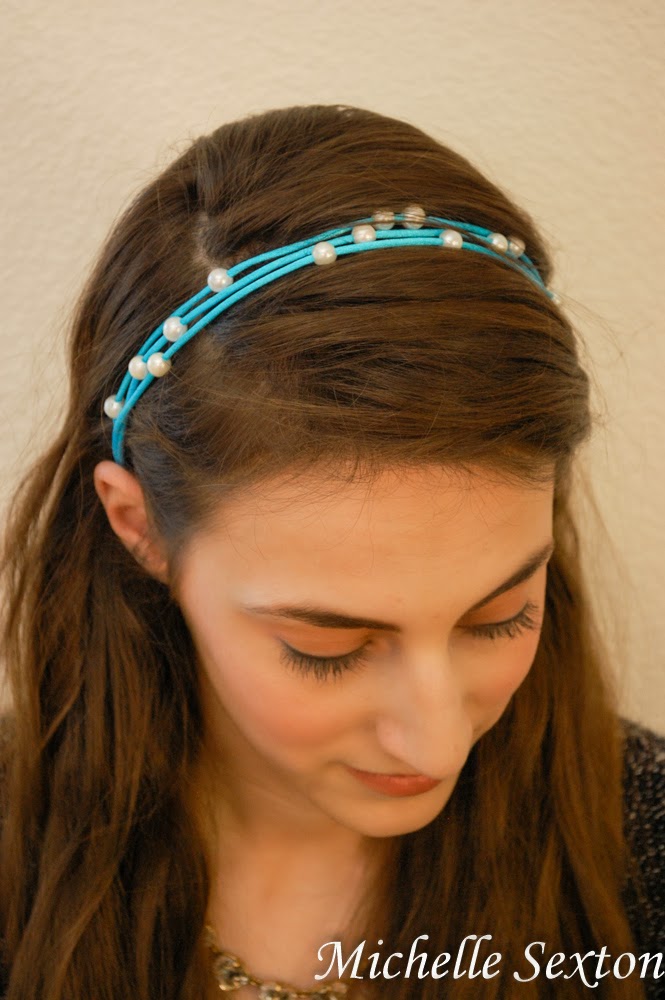
It's been a while since we've actually made something that doesn't include a printable - not that I'm complaining or anything. I LOVE printables, but I think it's time to make something crafty that we can wear. So, here's what I've got - a No-Sew Headband. I've had this project in my head for a couple of months, but didn't take the time to work on it until recently. What I love about this headband is that it's cute, it's an easy way to dress up an outfit, and it's super quick to make. There's no sewing involved and it takes 15 minutes to make or less...depending on how many times you get distracted during this project. ;)

My crafty friend, Sarah, is the one in the pictures. I had her wear the headband so I could do the photos. (Have I ever told you how bad I am at taking selfies? Really bad. It takes FOREVER to get a good photo. It's much easier to have someone else be in the picture. And then, I don't have to make the effort to NOT look frumpy for a photo. Ha, ha!) If you want to find out more about Sarah, you can find her on Undiscovered Virtues.

Here's a quick and easy No-Sew Headband DIY that takes 15 minutes or less to make. Click through for instructions.

Supplies Needed:
-satin cord (around 75 inches - depending on the size of your head)
-faux pearl beads
-scissors
-small strip of elastic (about 5 inches)
-lighter

To start out, you need enough satin cord to wrap around your head three times (from the base of your head to the top of your head) plus an additional foot just to be safe. Then, thread the beads onto the cord. (I used 18 beads, 6 for each section.)

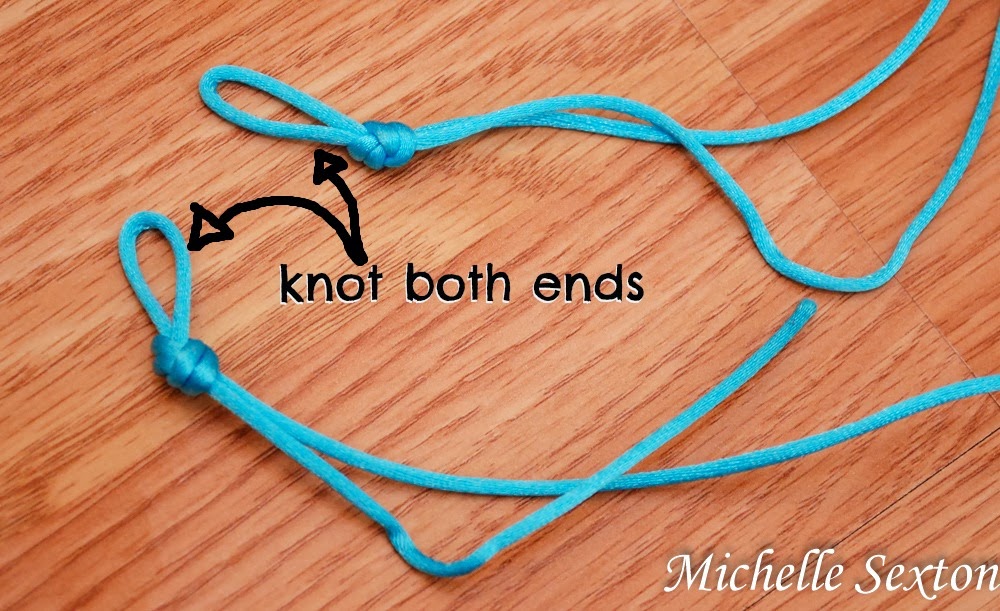
fold over and tie a knot to form a loop on each end.

At each end of the cord, form a loop and tie a knot.

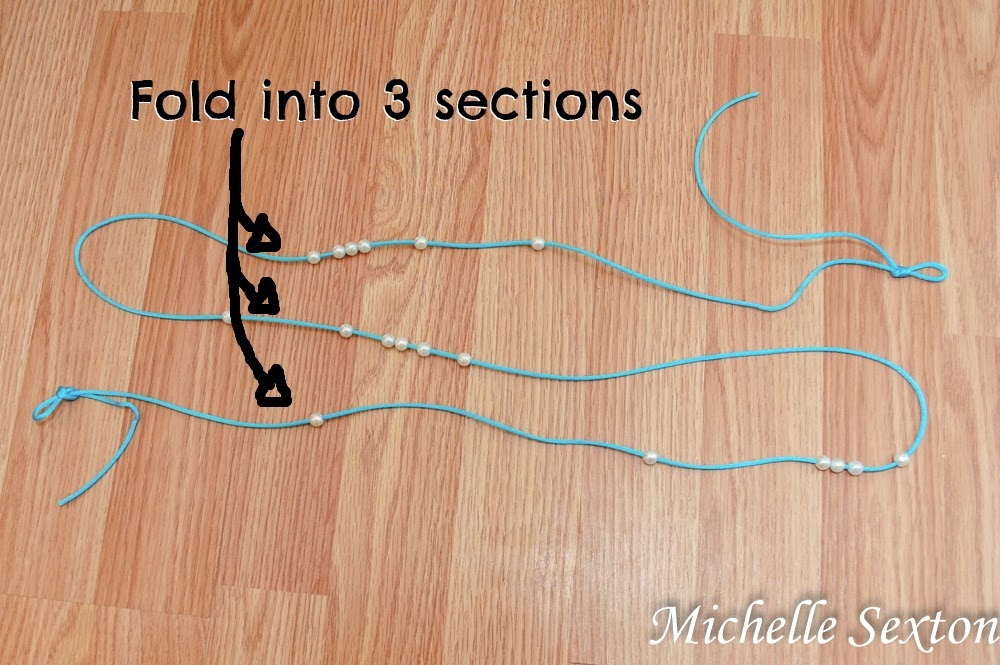
Fold the cord into 3 sections to create an "S" shape

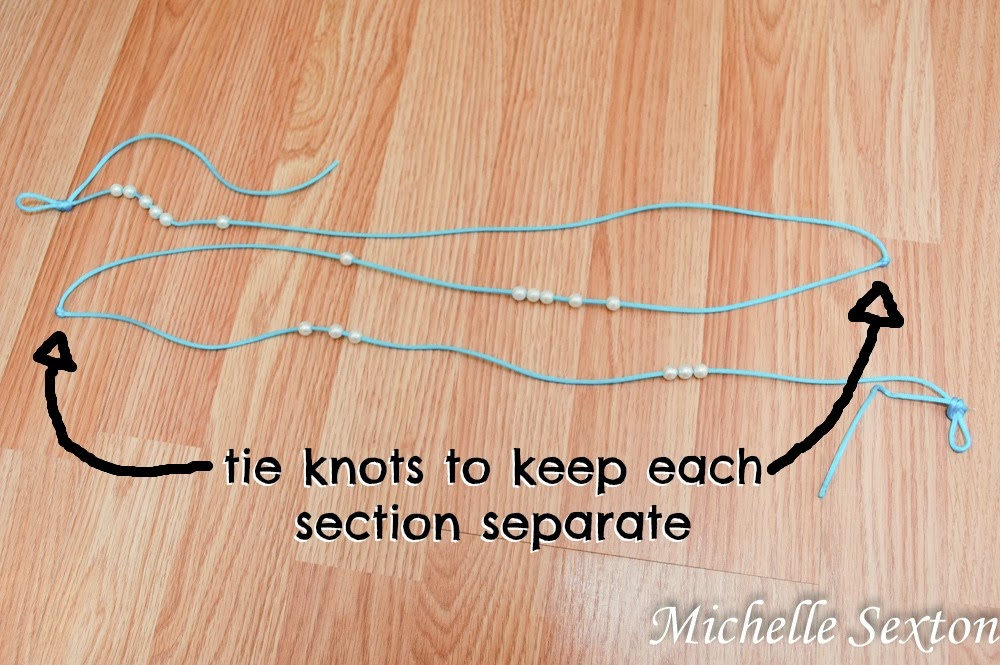
Next, fold the cord into 3 sections, (creating an "S" Shape) making sure to distribute an even amount of beads in each section (6 beads per section).

tie a knot to form a corner

Tie knots to keep each section separate.

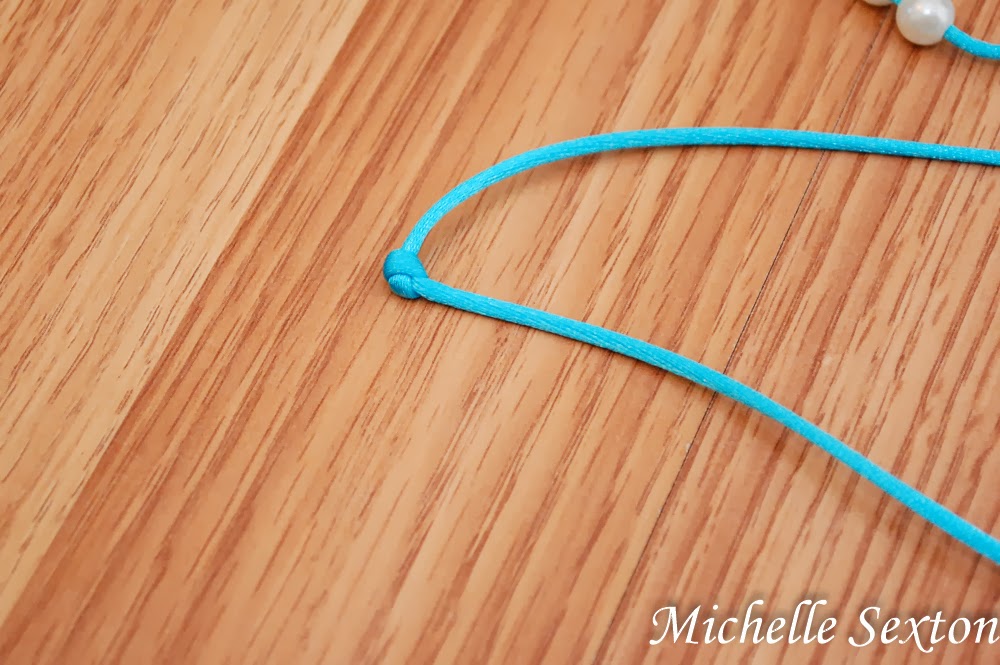
Tie a knot at the end of each section to create a knotted "corner". Keeping the sections in the "S" shape (as shown in the photo above), gather the sections together, adding a knotted "corner" to the closest looped end. Repeat these steps on the opposite side. 

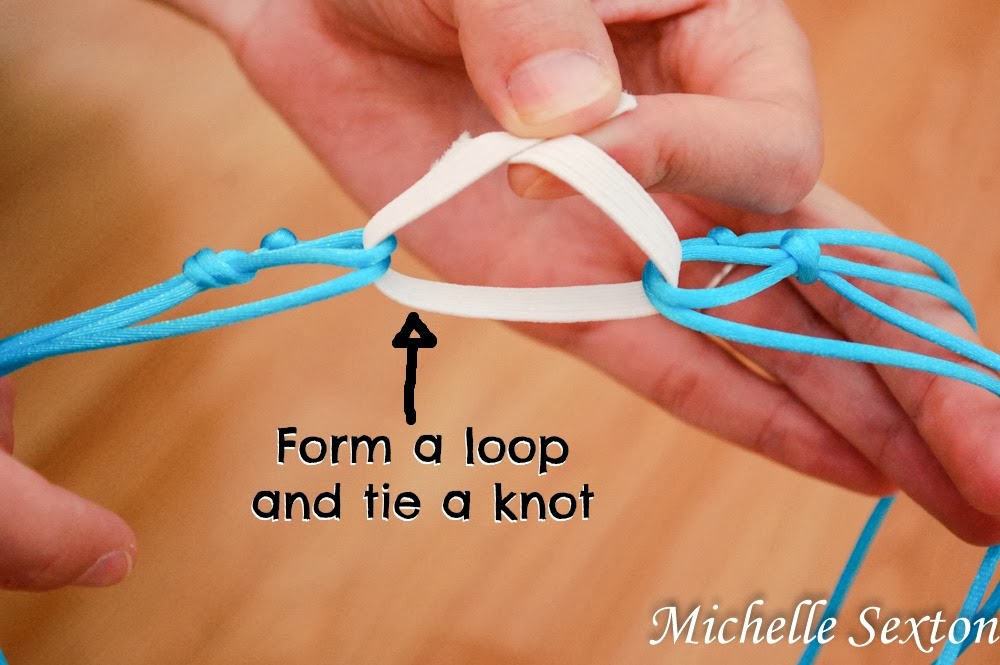
Form a loop and tie a knot

easy headband DIY  - No Sew

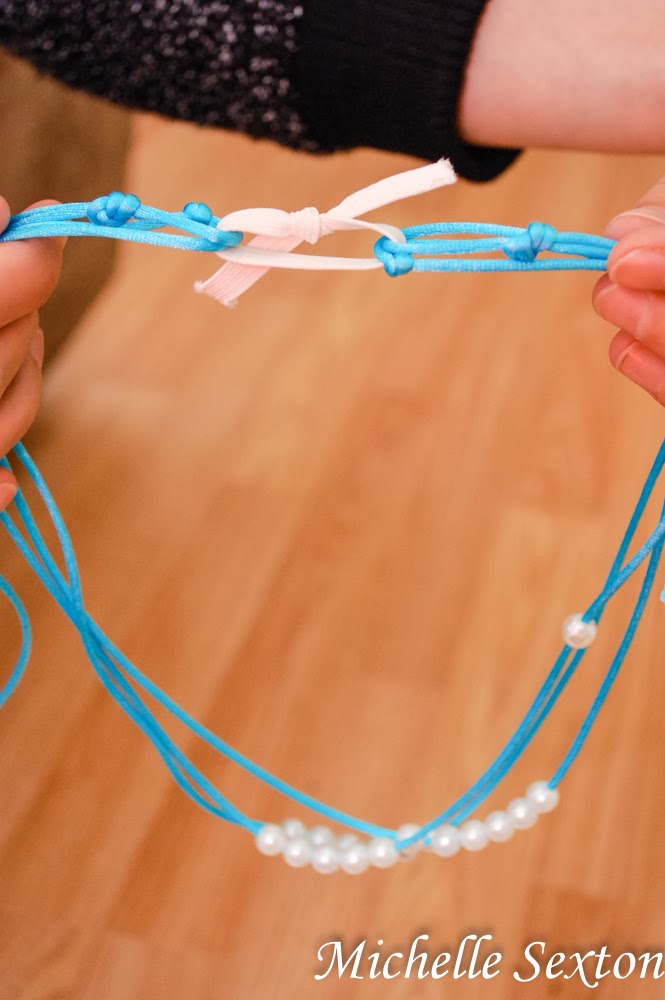
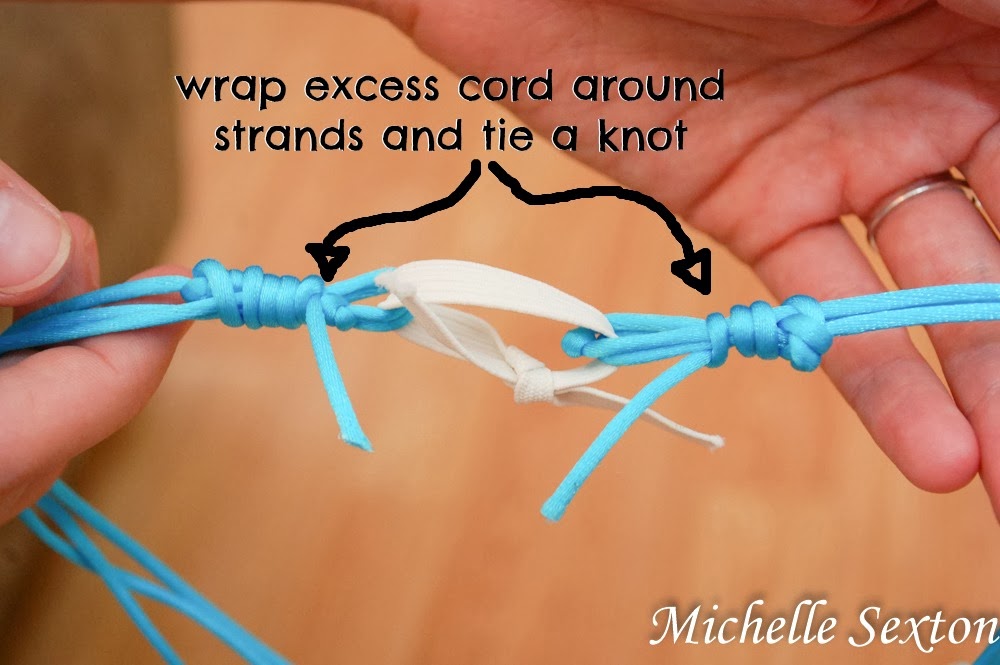
Thread the strip of elastic through each gathered end (each gathered end should have a knotted corner and a looped end) to form a loop, then tie a knot in the elastic to secure it.

wrap excess strands around ends

Using the excess cord leftover from the looped end, wrap the cord around the strands and tie a knot. Pull as tight as possible.

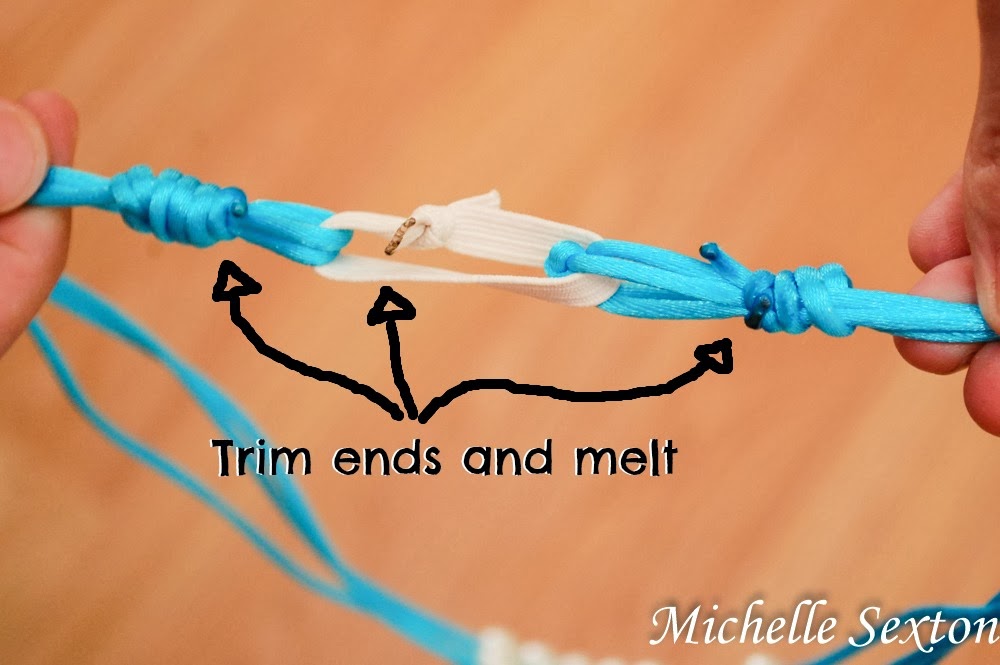
trim the ends and melt

easy no sew DIY Headband

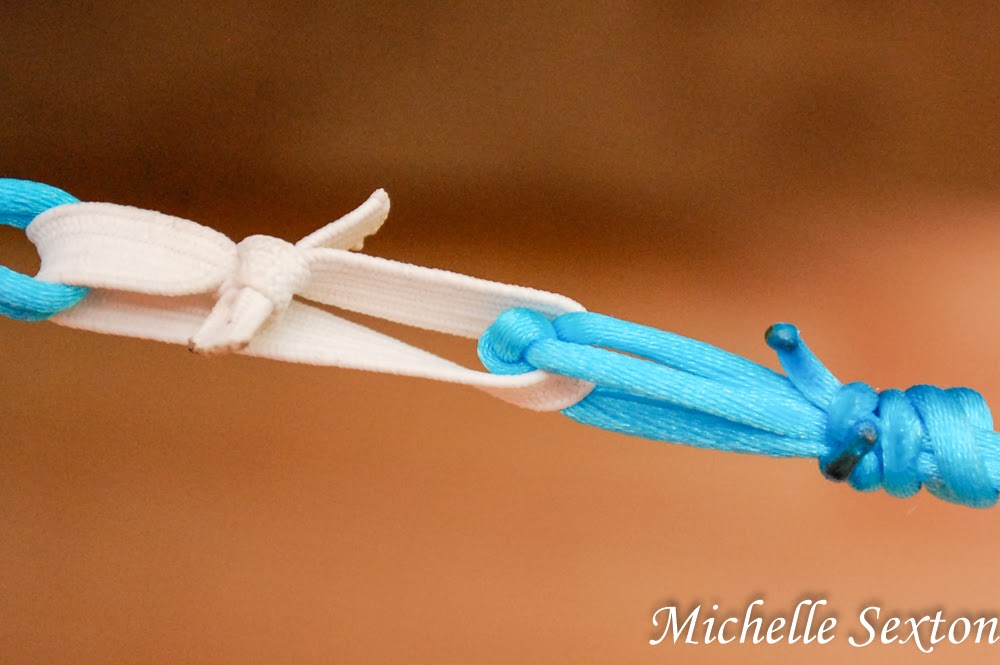
melt ends of trimmed elastic and cord

Trim the ends of the elastic, as well as the cord. Using the lighter, carefully melt the trimmed end of the elastic and cord, including the knot from the wrapped ends of the cord, to ensure nothing comes unraveled. 

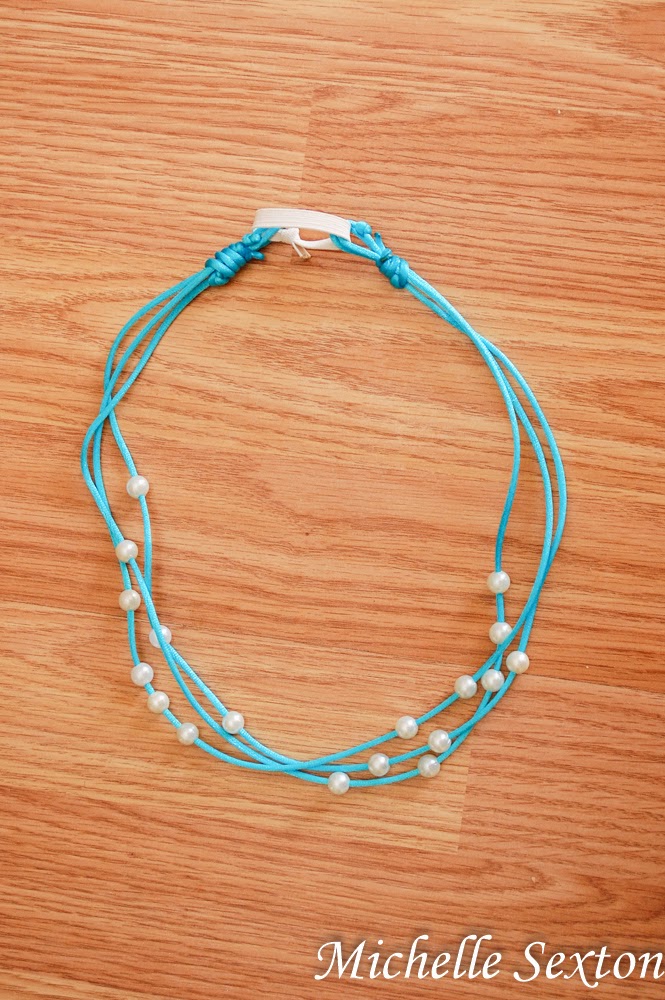
Easy No-Sew Headband DIY - takes 15 minutes or less to make

A quick and easy DIY. No-Sew headband only takes 15 minutes or less to make!

Wear and enjoy the accessory that you created!

Wednesday, October 5, 2011

Bead sorting.

My husband and son have both been sick over the last couple of days so we've done lots of projects. I did one this morning that was lots of fun. We used two of my son's favorite things - a container of multicolored beads and an ice cube tray with fun shapes. (He is constantly rummaging through my cabinets to find the fun ice cube trays - which I find annoying because the rest of the contents in the cabinet end up all over the floor.)
beads and ice cube tray


My son is still not that great at recognizing colors, so I wanted to do an activity to work on colors. So I had him sort the beads into different colors using the ice cube tray and we talked about the colors as he did it.
sorting beads by color
toddler sorting beads


He was fascinated by all the different colors of the beads at first. I had to explain it to him a couple of times before he understood what to do. He wanted to grab the beads by the fistful and dump them into the tray. But eventually he figured it out, and enjoyed himself.
 But after a while, his impatient nature took over and he decided that picking up beads one by one was a little too time consuming. So instead he started picking the beads up with his mouth and dropping them into the different categories. I made him stop after a while. It was too gross....and I kept thinking about how those beads would stink after we finished.

leaving 


So then he decided that he was done. Oh well. I know he enjoyed it.
beads sorted


This was as far as he got - not bad for a 2.5 year old....at least my 2.5 year old. :) I think we will do this activity several more times. It was entertaining for him even though he lacked the patience to finish sorting the beads....maybe larger objects next time?

Sunday, October 2, 2011

I made this!

I've been doing a lot of browsing on Pinterest lately and have come across numerous diy necklace projects. They all look so fun and fairly easy. So I took that inspiration and came up with this:

I'm not going to lie. I love it. Now I just have to put together an outfit to go with it. Making this necklace was so simple. The hardest part about it was tying knots in the correct places to make it all balanced. And I just realized that when I took the photo above, the necklace was crooked. It's not crooked in real life.

I wanted to do something similar to the Helmut Lang necklace I came across on the blog, P.S. I made this. I don't have leather scraps but I do have tons and tons of blue fabric leftover from my wedding decorations. I'm always looking for new ways to use my blue fabric. These are the supplies I used to make the necklace.

  • Thread three separate 18 x 1.5 inch strands of fabric with beads in random order.
  • Knot them in random places. 
  • Safety-pin the three beaded fabric strands together at one end and knot them together.

  • Repeat on the other end of the three fabric strands. 
  • Knot the ends of your unbeaded strand to the three beaded strands tied together
  • After all the pieces are knotted together and balanced just how you want them, losen the knots from the unbeaded strand, put a small dab of hot glue inside the knots, and tightened them back up (to keep it from coming untied). 
  • Finally trim the ends outside of the knots. Tah Dah!!! Fun.


Note: the fabric I used was polyester or something similar so it does not unravel easily. I didn't hem the fabric, I used it with raw edges.