So Here's My Life

The things we make,
the food we eat and
the shenanigans in between.

A blog about making things by
MICHELLE SEXTON

Showing posts with label headband. Show all posts

Thursday, January 9, 2014

Easy No-Sew Headband DIY

It's been a while since we've actually made something that doesn't include a printable - not that I'm complaining or anything. I LOVE printables, but I think it's time to make something crafty that we can wear. So, here's what I've got - a No-Sew Headband. I've had this project in my head for a couple of months, but didn't take the time to work on it until recently. What I love about this headband is that it's cute, it's an easy way to dress up an outfit, and it's super quick to make. There's no sewing involved and it takes 15 minutes to make or less...depending on how many times you get distracted during this project. ;)

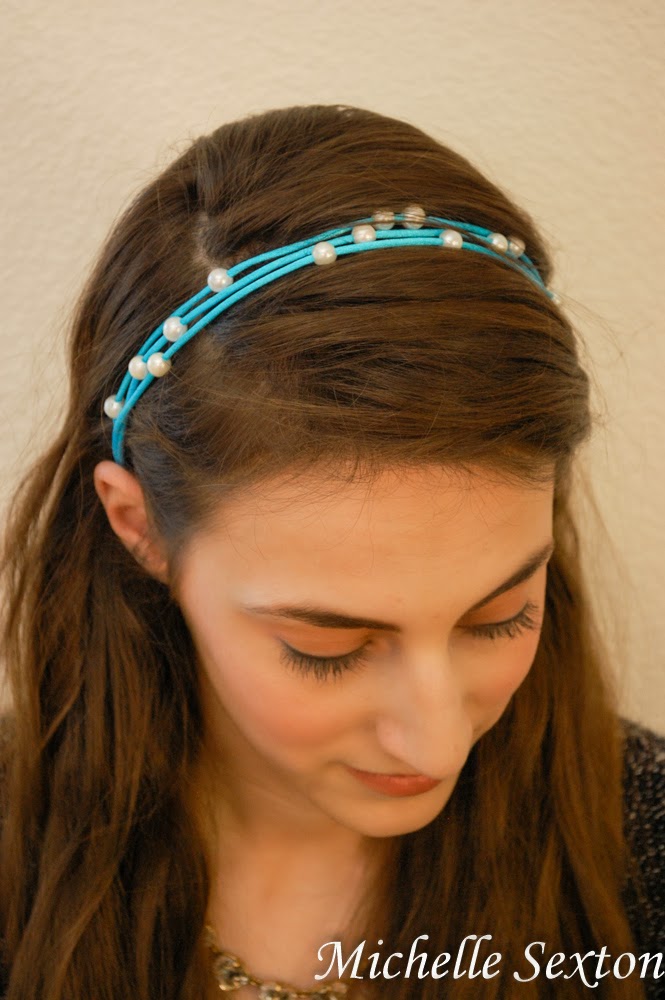
My crafty friend, Sarah, is the one in the pictures. I had her wear the headband so I could do the photos. (Have I ever told you how bad I am at taking selfies? Really bad. It takes FOREVER to get a good photo. It's much easier to have someone else be in the picture. And then, I don't have to make the effort to NOT look frumpy for a photo. Ha, ha!) If you want to find out more about Sarah, you can find her on Undiscovered Virtues.

Here's a quick and easy No-Sew Headband DIY that takes 15 minutes or less to make. Click through for instructions.

Supplies Needed:
-satin cord (around 75 inches - depending on the size of your head)
-faux pearl beads
-scissors
-small strip of elastic (about 5 inches)
-lighter

To start out, you need enough satin cord to wrap around your head three times (from the base of your head to the top of your head) plus an additional foot just to be safe. Then, thread the beads onto the cord. (I used 18 beads, 6 for each section.)

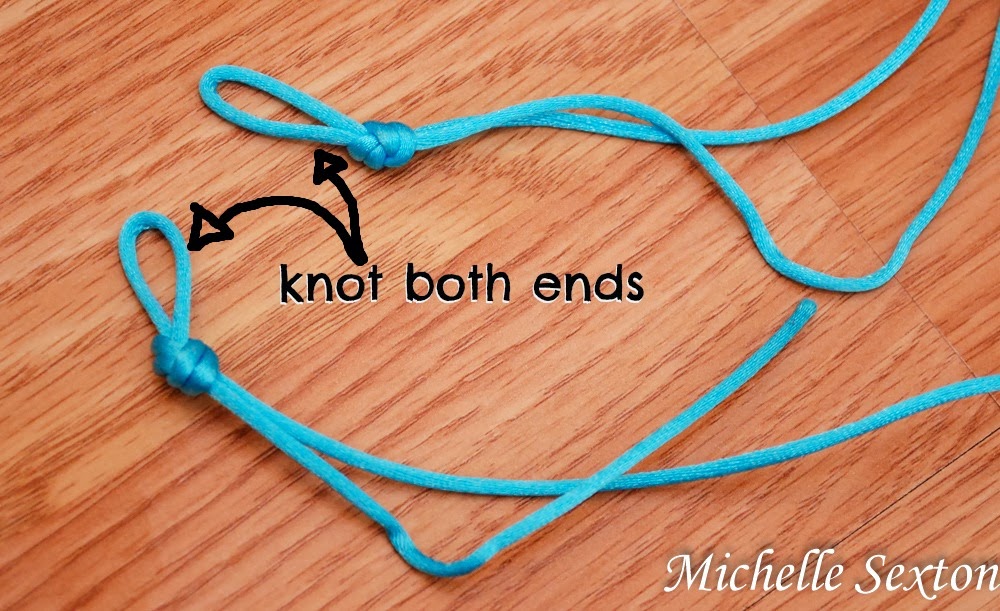
fold over and tie a knot to form a loop on each end.

At each end of the cord, form a loop and tie a knot.

Fold the cord into 3 sections to create an "S" shape

Next, fold the cord into 3 sections, (creating an "S" Shape) making sure to distribute an even amount of beads in each section (6 beads per section).

tie a knot to form a corner

Tie knots to keep each section separate.

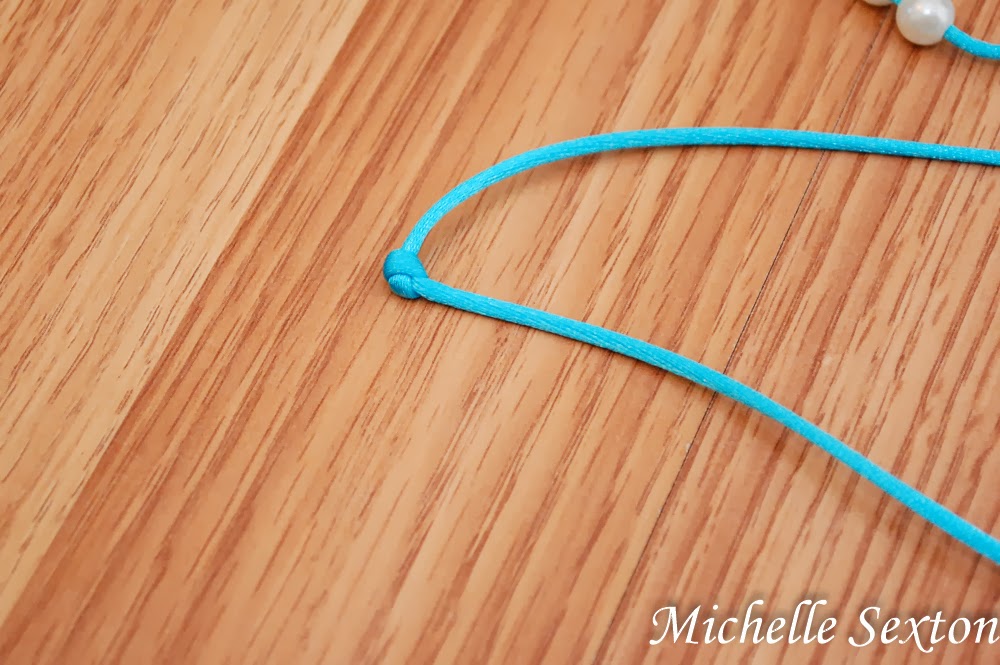
Tie a knot at the end of each section to create a knotted "corner". Keeping the sections in the "S" shape (as shown in the photo above), gather the sections together, adding a knotted "corner" to the closest looped end. Repeat these steps on the opposite side. 

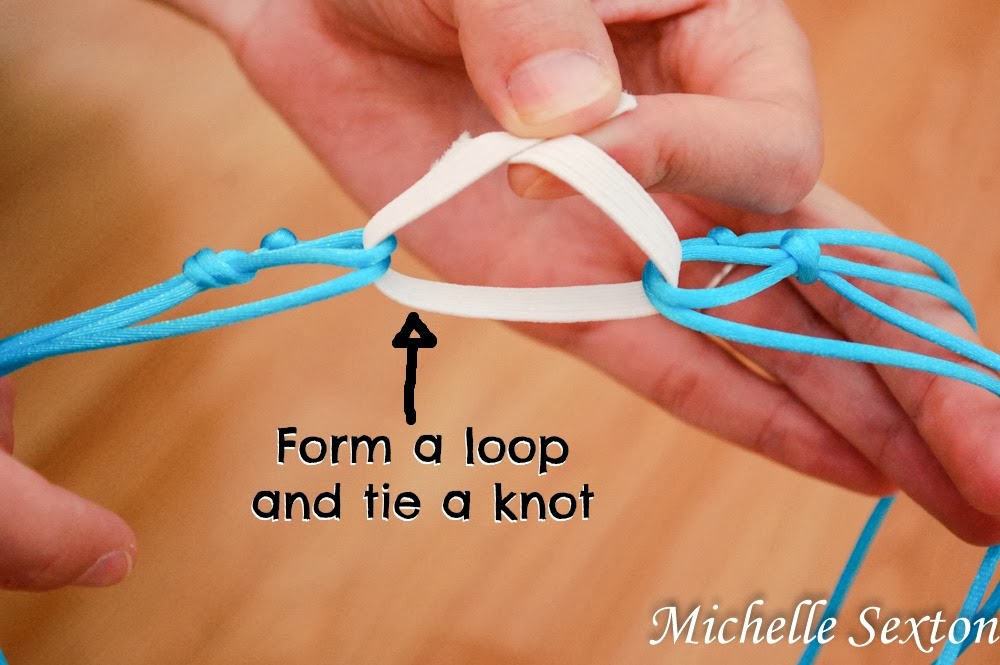
Form a loop and tie a knot

easy headband DIY  - No Sew

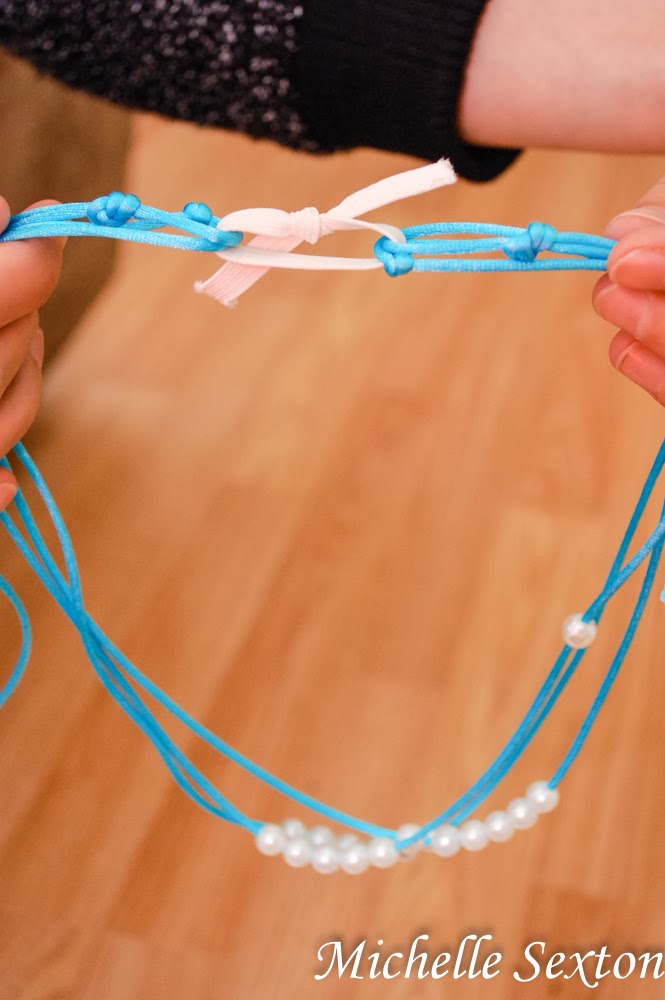
Thread the strip of elastic through each gathered end (each gathered end should have a knotted corner and a looped end) to form a loop, then tie a knot in the elastic to secure it.

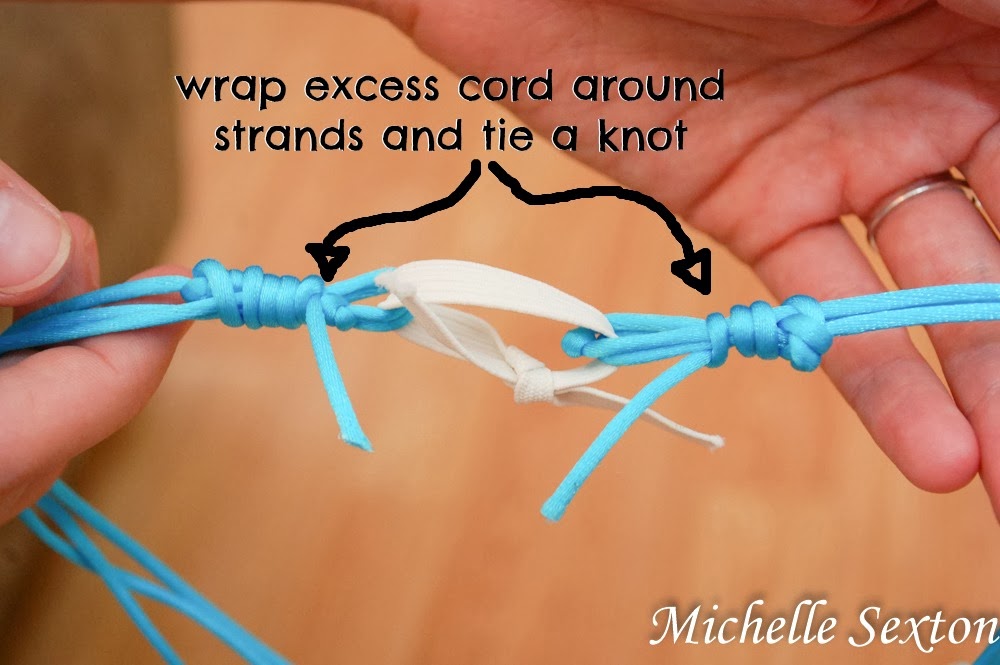
wrap excess strands around ends

Using the excess cord leftover from the looped end, wrap the cord around the strands and tie a knot. Pull as tight as possible.

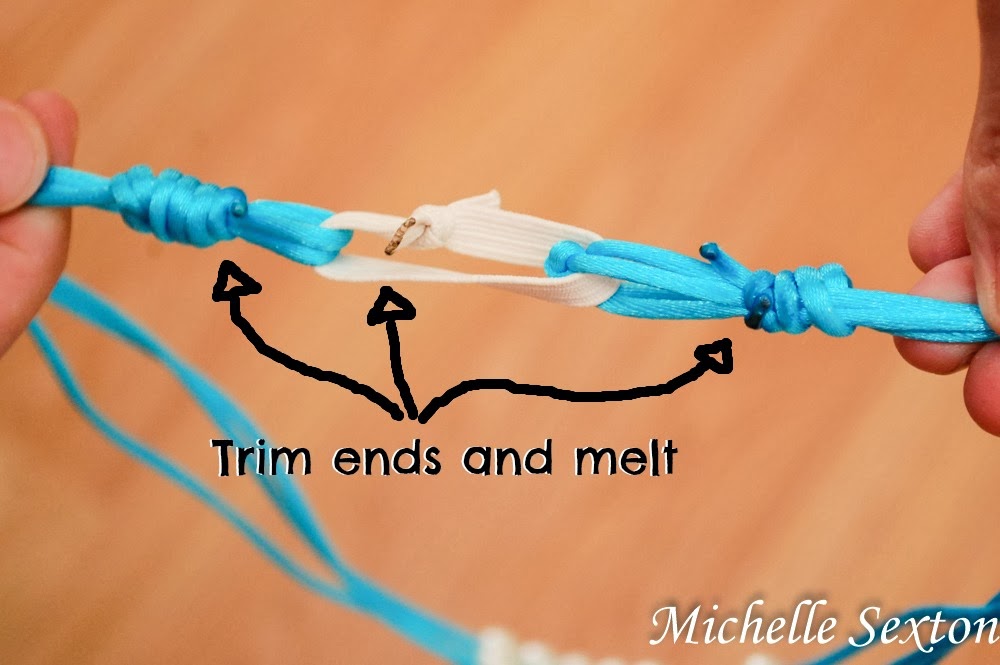
trim the ends and melt

easy no sew DIY Headband

melt ends of trimmed elastic and cord

Trim the ends of the elastic, as well as the cord. Using the lighter, carefully melt the trimmed end of the elastic and cord, including the knot from the wrapped ends of the cord, to ensure nothing comes unraveled. 

Easy No-Sew Headband DIY - takes 15 minutes or less to make

A quick and easy DIY. No-Sew headband only takes 15 minutes or less to make!

Wear and enjoy the accessory that you created!

Sunday, February 19, 2012

DIY T-shirt Headband

Headbands are pretty much the most useful accessory for moms. You can wear one just for fun, but they are also great for those days when you have to run out of the house without a shower. (I hate those days) Since you have on such a cute headband, no one will even notice that your hair is unwashed!


In my previous blog post, I talked about a blogger's gift exchange I participated in. If you clicked over to Megan's page, the blogger I got matched up with, you saw that I made her a headband. I made this headband from a T-shirt sleeve, and took less than an hour. Here's how I did it:

I found this t-shirt at a flea market in the fall. A vendor was selling a bunch of t-shirts for $1 each. So I snagged an XXL sized one, with the intention to use it for an undetermined future project.


Start by cutting off the sleeve of the T-shirt.

Determine the desired width of the headband, and trim off the excess fabric. But keep in mind that you want to leave a little extra for sewing and hemming the raw side. I wanted mine to be about an inch wide, so I gave myself an additional inch of fabric to work with.

Next, serge the raw edge of the T-shirt. (Actually in retrospect, you can probably skip this step, because t-shirt material typically doesn't unravel...didn't think about that until now. Duh)


Next turn the sleeve inside out, fold over the trimmed side, pin it, and sew it.

Then, to hide the unfinished edge, while the sleeve is still inside out, fold over the sewn edge, pin it, and sew it one more time to give it a more finished look.

Your headband should look something like the one pictured above. Then stitch a decorative line down the opposite side of the headband (The side that you didn't sew yet).


Once you have finished, add some cute accessories, like buttons. (it just so happens that I LOVE buttons. It's my secret obsession) I hand stitched these on, but if you are feeling super lazy, you could always use hot glue!

Done! Quick & Easy.
:)
I Heart Nap Time Today's Creative Blog