So Here's My Life

The things we make,
the food we eat and
the shenanigans in between.

A blog about making things by
MICHELLE SEXTON

Tuesday, February 4, 2014

Easy Upcycled Sweater Vest Tutorial

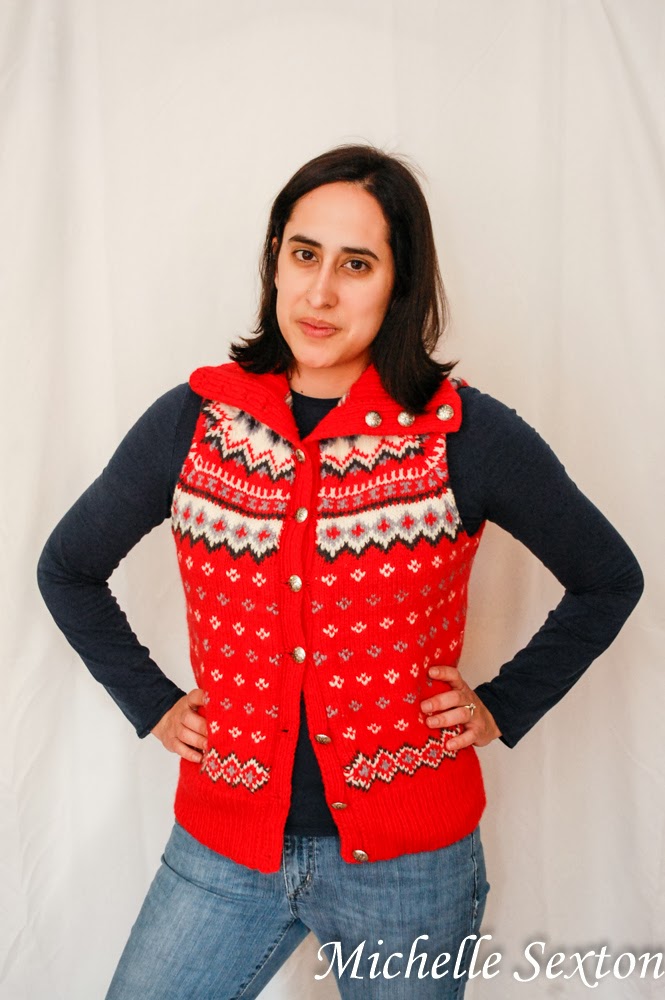
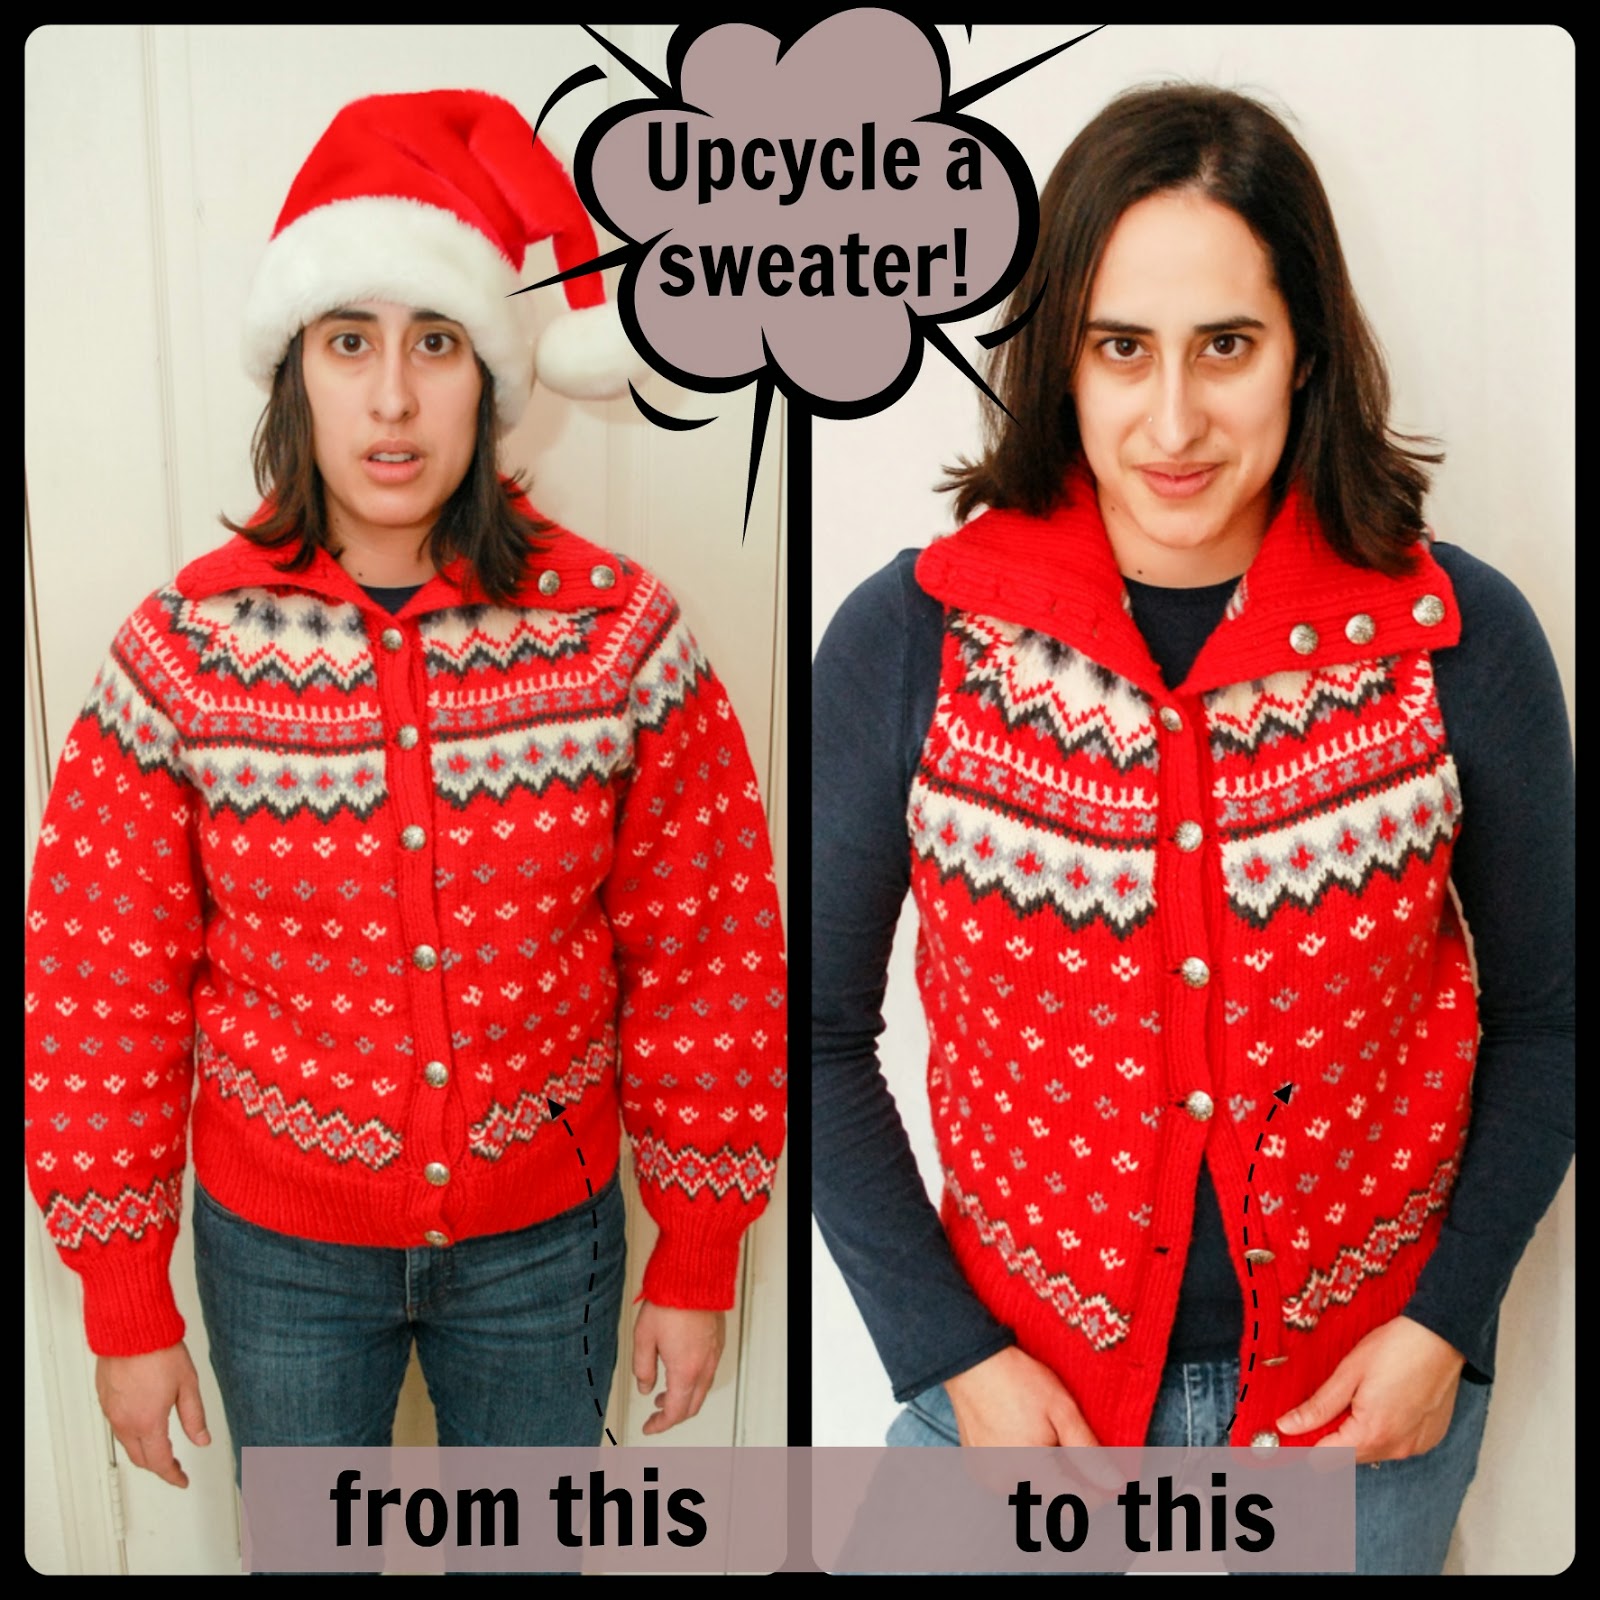
Did you know that upcycling is one of my favorite things to do? You didn't? Well, now you do. I get a great amount of satisfaction in converting an unwanted article of clothing into something new and different. It's just so much fun. I've had this sweater in the back of my closet for a while, begging to be changed into something else. It needed to be upcycled. Rest assured, I never actually wore this sweater until after I upcycled it. (I heard those sighs of relief. Yeah.) This hand-knit sweater from Norway was truly a diamond in the rough with its Fair Isle pattern, beautifully crafted buttons, and amazing fold-over collar, but it was hard to appreciate it's beauty. So, I gave this sweater a small make-over and turned it into a sweet sweater vest. When I wear it now, I pretend I live in Maine...because, somehow, Maine seems exotic to a person who has lived in the desert for most of her life. And in my mind, people in Maine wear sweater vests like this. Don't be offended.

Easy Upcycled Sweater Vest Tutorial - click through and learn how to make one.

A couple of years ago, I bought several clothing articles from a second hand store. It was one of those sales where you stuff as many items into a bag as possible and only pay 25 cents per bag. It was awesome. I found this awesome red sweater at that sale too. When I first found it, I was like, "Oh...wow...that's...loud," and then I put it back and continued sifting through the clothing piles. But, I couldn't get that sweater out of my head. Sure, it was loud, and even a bit eccentric, but the more I thought about it, the more I realized I actually liked this sweater. Not as it was, but I knew it had potential. So, I stuffed it in my bag, purchased it and brought it home. Little did I know, that at that time, I was pregnant with our second kid. (Pregnancy is not kind to me, and I have a very limited amount of creativity during this time. The only desire I have during these moments is to lay face down the couch with a trash can nearby, for puking, until my due date arrives.) A few days later, I found out I was pregnant. All plans to revamp this sweater were forgotten about until recently, when I switched out my seasonal clothes and came across this sweater. After casually considering my options for a month or two, I finally decided this eccentric sweater would be so much more awesome and a lot less crazy if it didn't have those frumpy, baggy sleeves. So, I got rid of them and now it's an awesome sweater vest and, currently, my favorite thing to wear. (I try not to wear it everyday because people might start to think that I don't wash my clothes.) ;)

Upcycle a frumpy sweater like this into something better - click through and see how
Before the upcycle

Before I start, let me just tell you, I am not a sewing expert in any way, shape, or form. I know how to work a sewing machine (uhh...mostly...or I can read the manual) and I can sew a straight line, but that's about it. This is an easy project, so don't get intimated if your seamstress skills are lacking. If I can do this project, you can too, provided that you can work a sewing machine...at least a little bit. :)

Ok. Project time.

Serge the sleeves before trimming

serge close up - upcycle a sweater
A closer look at the serged sleeve. Hard to see due to the fact that the thread is also red.

Start out by serging the top and bottom portion of the sleeves in a straight line, just above the armpit (pictured above) to prevent the sweater from unraveling once it's trimmed. Repeat the serge on the opposite sleeve, as well.

trim the sleeves of the sweater - upcycle a sweater

Once you have serged both sleeves, cut off both the sleeves below the serged line. (Side note: I recommend saving the sleeves to upcycle into something else - like maybe these awesome leg warmer/mock boot socks)
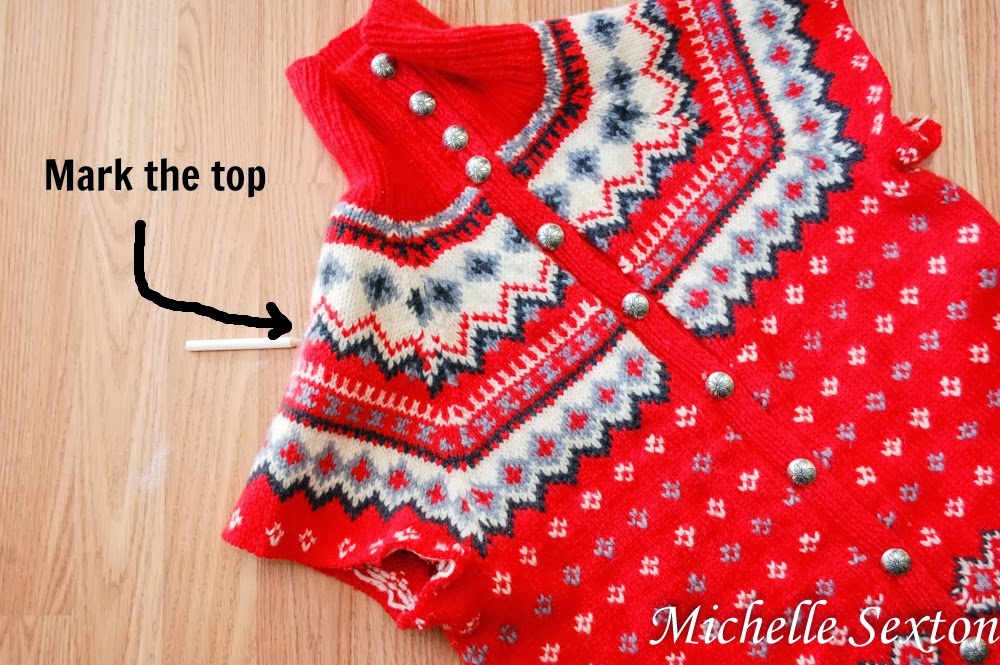
Mark the top of the sweater - upcycle a sweater!

Once the sleeves have been cut off, decide where you would like the top of the vest to end on your shoulder, and mark it.

Draw a path to make the arm cutouts - how to upcycle a sweater

Draw a rounded path on the top portion of the sleeve from the top of the marked shoulder to the bottom near the armpit.

serge along the arm cut out path - how to upcycle a sweater

Serge along the outside of the drawn path on the top portion of the sleeve only. Trim away the top part of the sleeve (after the top has been serged). Using the path made from the top part of the sleeve that has been cut away, trace the sleeve path onto the bottom half of the sleeve, serge, and then trim. (Be sure to connect the serge lines from the top portion to the bottom portion.)

fold the sweater in half to trace the arm cutouts - upcycle a sweater

Once the top and bottom of the first side of the sweater have been serged and trimmed, fold the sweater in half and trace the sleeve path onto the top portion of the opposite side of the sweater. Serge the top portion of the sleeve, cut away the excess, retraced the path onto the bottom portion of the sleeve, serge, and trim again. 
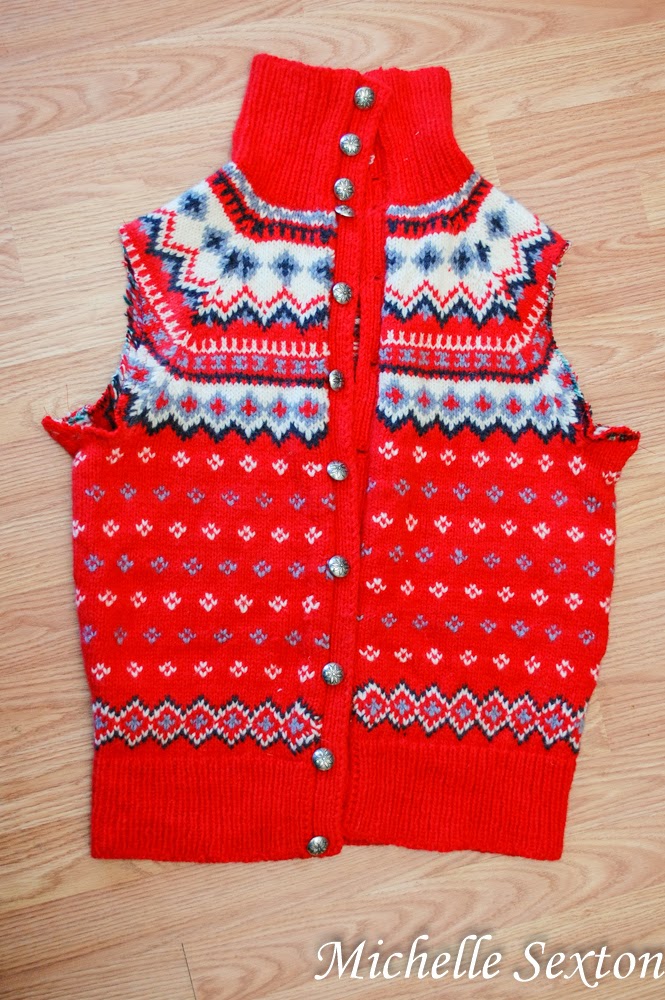
how to upcycle a sweater!

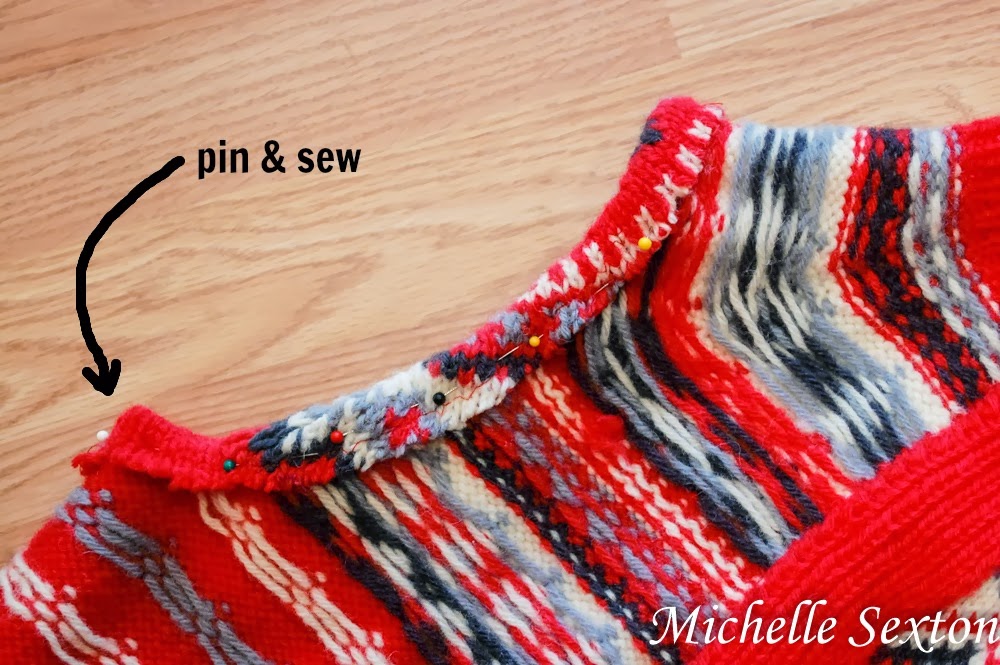
pin and sew the raw edges - upcycle a sweater!

Turn the sweater inside out, pin the raw edges, and sew a straight stitch along the edges. Trim the excess thread, turn inside out, and wear! 
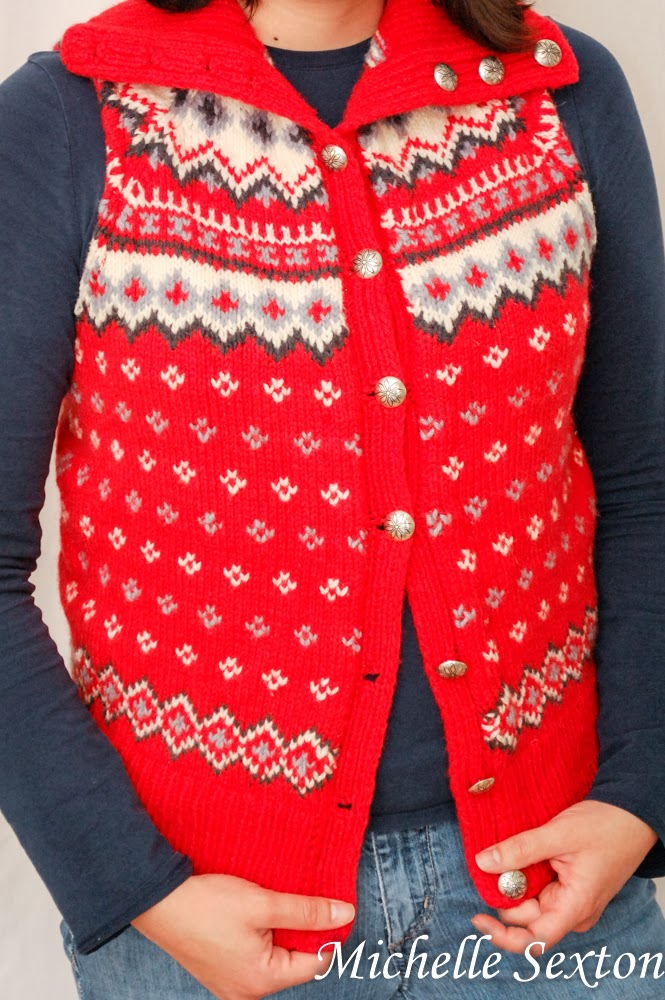
How to Upcycle a Sweater - Click through and learn how

Easy way to upcycle a sweater into a vest - click through and learn how

I'm so pleased with how this turned out and it allows me to indulge in my Maine fantasy. Did you know I live on the coast and have a boat dock at the edge of my yard? I like to wear this sweater vest while I sit on the dock, sip the cappuccino in my mug, and watch the fishing boats off in the distance. Well, maybe not, but I can always pretend. (This sweater vest makes it all possible.)
easy upcycled sweater vest tutorial - click through and see how easy it is.

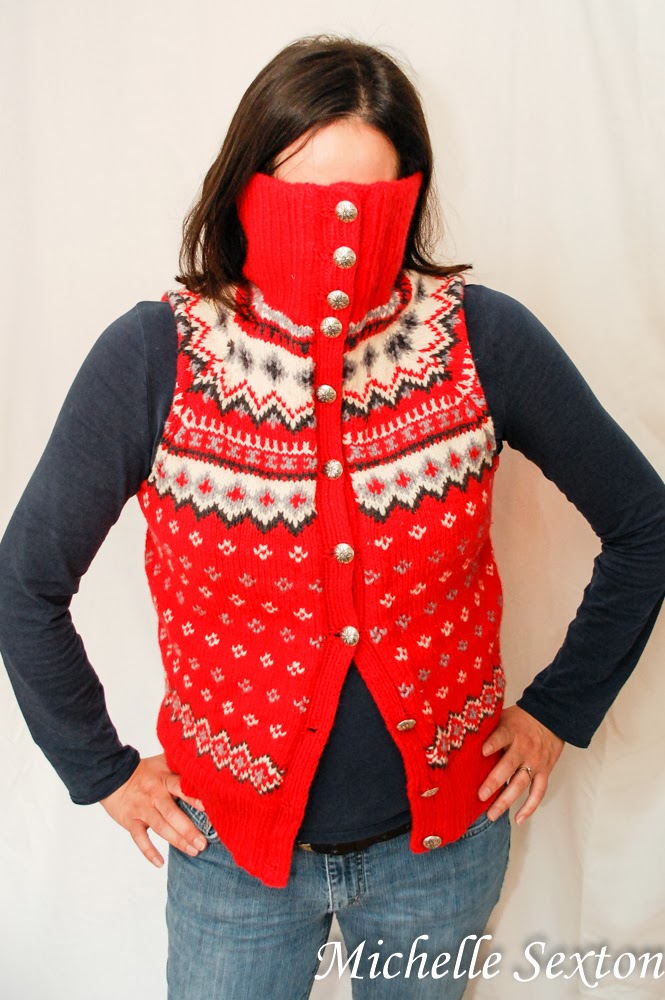
And look - the collar is still just as awesome as it was before. 

how to upcycle a sweater into a vest - click through and learn how

If it gets really cold, I can wear the sweater like this. Will you still be my friend if I wear it like this? ;) Go and make a vest for yourself now!

Thursday, January 30, 2014

Printable Finger Puppets - Free Silly Shapes DIY for Kids

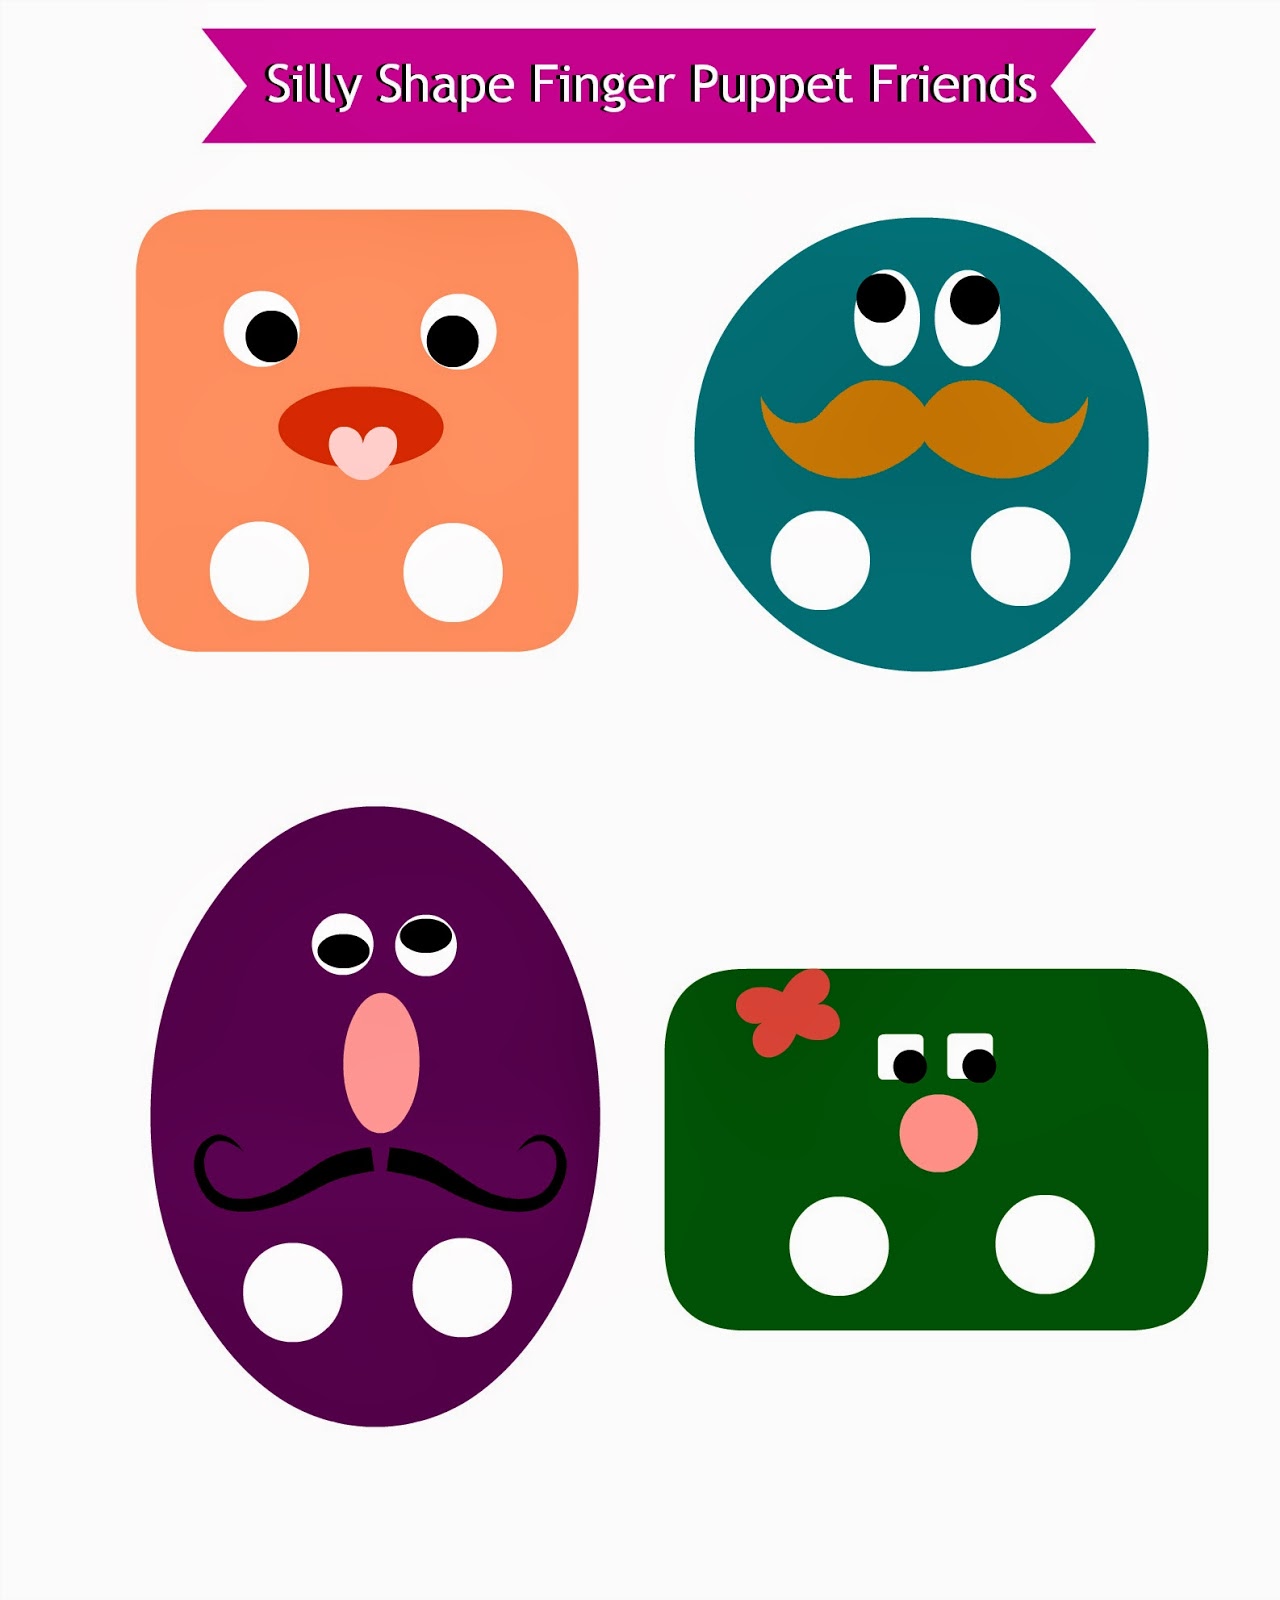
"I hate free stuff." Said no one, ever. Yeah, that's right. Why? Because everyone loves free stuff. I know you do, too....so, go ahead, raise your hand and admit it. You know what I love even more than free stuff? Free stuff for kids. What? Seriously? Oh yes, and here's why - every now and then, we're all prone to a bad day with our kids. Maybe everyone is going a little stir crazy after being locked in the house for a couple of days due to illness or bad weather. Or, perhaps you just need a little peace and quiet so you can finish fixing dinner before 9 pm. Whatever the circumstance, it's always nice to pull out a printable activity to keep the munchkins entertained. Yeah, it is. Actually, I've decided I like free stuff so much, I dedicated a whole entire pin board to collect Free Printables. (It's still new, so don't judge me for not having 4,531 pins on it yet.) So, ANYWAY, in order to feed my printable obsession (and, of course, to keep my kids entertained), I made this fun little finger puppet printable. The finger puppet printable was a huge hut in this house. Even Cheese got involved in the finger puppet playtime. (So incredibly adorable). I highly recommend printing these out for your household, too.

Free Printable Finger Puppets - Click through and download these!

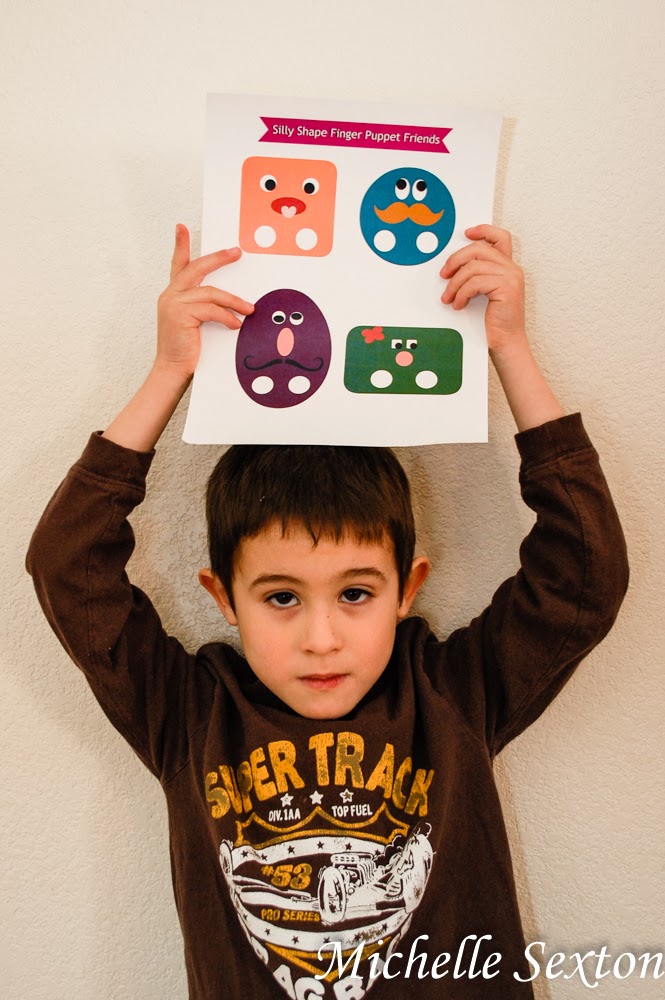
By the way, print the finger puppets onto card stock for the best results.

Free Silly Shape Friends Printable - perfect entertainment for you kids! Click through to get these!


Hand out this cute printable to the munchkins.

Free Finger Puppet Printable - perfect way to entertain little ones

Get these finger puppets! Free printable to download  - click through!

And enjoy a little peace and quiet :)

Tuesday, January 28, 2014

Safety Pin Bib Necklace Tutorial

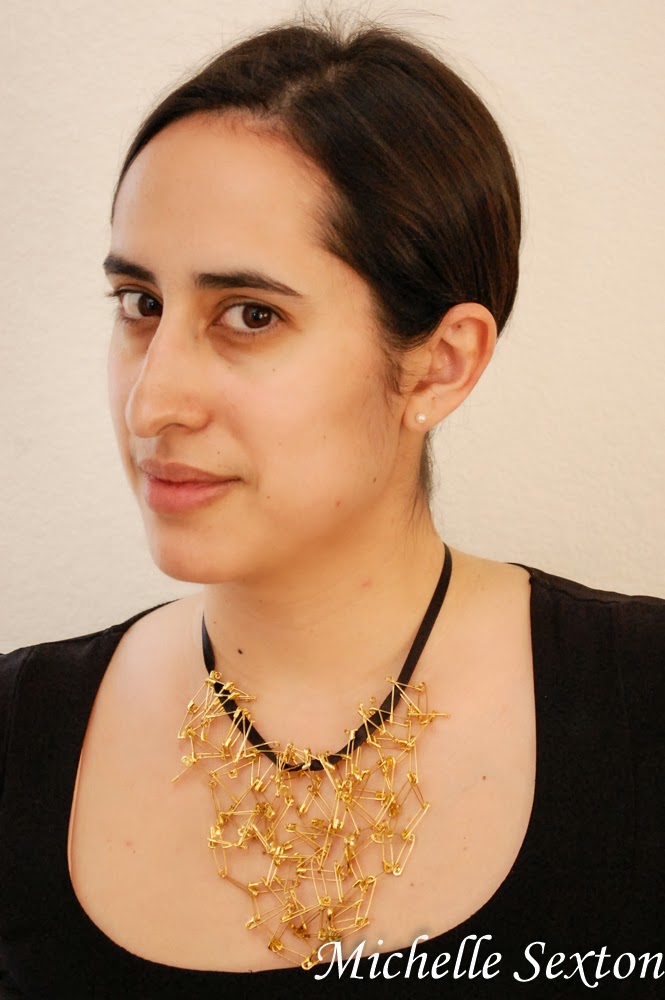
Do you remember the grunge phase of the 90's? I do. I was in high school back then. And, I was on top of the world...or so I thought. I rocked flannel shirts and combat boots...but my mom didn't let me wear torn jeans...so, I guess I wasn't that hardcore. Yeah...uhh...so, I have a craft to share. It's a safety pin bib necklace- with a hint of 90's grunge...but with a more grown-up taste. Hopefully. Wait! Don't leave yet! I know you're not ready to repeat the 90's grunge quite, yet (even though I've seen a recent appearance of combat boots and overalls), but stick around for a couple more minutes so I can show you how fly this bib necklace came out. (Did you pick up on that 90's slang I just used there?) Just don't tell anyone you're going for the 90's grunge, instead you're really more about rockin' the whole artistic appearance. They will definitely believe you.

This Safety Pin Bib Necklace is a creative and unexpected way to use safety pins - Click through and find out how to make this!

Ok, so back to the safety pin bib necklace. Here's what you're going to need:

Supplies:
- a box of safety pins, 100 count or more (I found gold ones in the craft section of Walmart)
- about 12 inches of black satin ribbon (1/4 wide)
- scissors

To Make a Safety Pin Bib necklace, start by making a chain of safety pins

To start the necklace, create a safety pin "chain" by connecting several pins (about 15 - more or less) together. Link each pin together through the "eye" at the top of the pin or the "loop" at the bottom of the safety pin.

Thread a ribbon through the safety pin chain to make a Safety Pin Bib Necklace

Next, thread the strand of ribbon through the middle of each safety pin link and center the "chain" on the ribbon strand. Be sure that the ribbon lays flat (not twisted) after threading through the chain. The threaded chain serves as the base of the necklace.

Tie a knot with the ribbon around both safety pins on the ends of the chain to keep the chain extended (not pictured).

safety pin bib necklace
starting to take shape...

progression of the safety pin bib neckace
progression - still adding safety pins

Fasten safety pins beneath the threaded chain until you have the desired shape. For the best results, each pin should be fastened either through the "eye" or the "loop" of the safety pin. This isn't required, but I've found that this is the easiest way to maintain the shape of the bib. Work towards an even and balanced bib shape.

I recommend tying off the ends of the necklace and draping the necklace over your knee as you fasten the pins in order to keep the necklace still.

There's a little bit of trial and error and removing and refastening pins that goes with this project as you determine the desired shape. This is an easy project, but it takes a small amount of patience (but just a small amount) as you construct the bib.

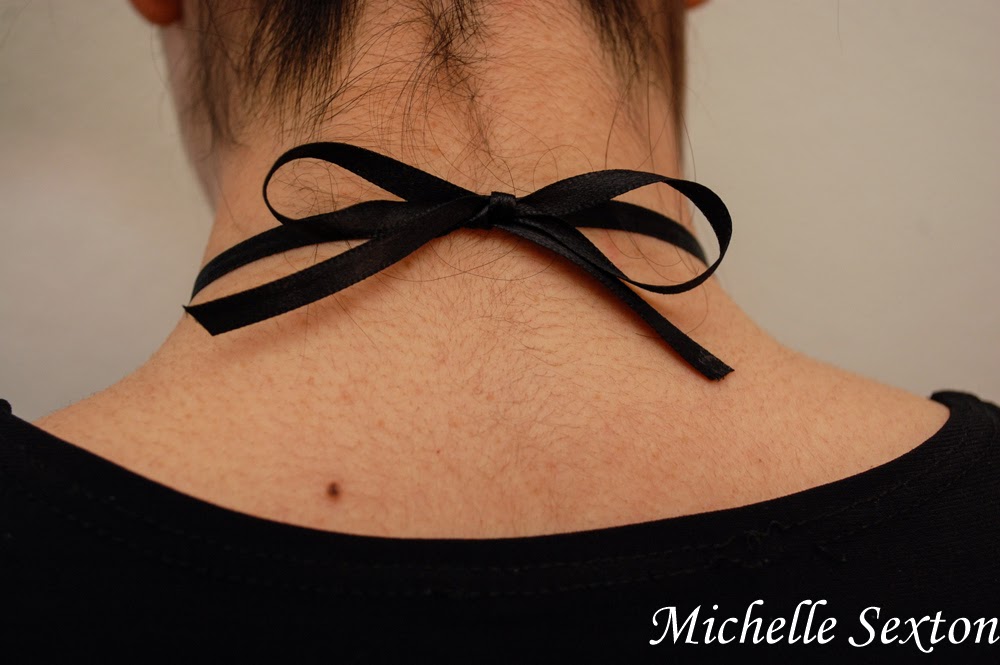
Tie a bow to wear this Safety Pin Bib Necklace

To wear this necklace, tie the ends of the ribbon into a bow in the back.

Make this Safety Pin Bib Necklace - Click through and find out how to make it.

Safety Pin Bib Necklace - Click through and find out how to make this

Once completed, wear this amazing necklace with pride. Each time you receive a compliment, reply, "Thanks, I made it."  :)

Thursday, January 23, 2014

The Toy Purge of 2013

I want to do something a little different today. As it turned out, I need a couple more days to refine the projects I had originally planned on posting. It's been a while since I've written a post about everyday life around here. I've had this subject on my mind for a several months. It hasn't been until now that I've taken the time to sit down and share it with you guys.

Providing an enriched life does not mean providing more possessions for our children, but instead teaching them to appreciate what they do have - Life Lessons from SoHeresMyLife.com

I went on a trip to Kenya when I was still single and in my early 20's. While I was in Kenya, my team and I visited Kibera, the largest slum on the continent of Africa. We had to walk in and out of the area on foot, and were not allowed to bring bags, or anything of value. The people were dressed in dirty rags. Sewage and trash filled the streets and the smell was terrible. It was a memorable experience, to say the least.

Twelve years later, I still reflect back on that experience from time to time. My husband and I own our home (well...as long as we pay our mortgage!), we have two cars, and plenty of furniture, clothes, kitchen gadgets, appliances, and a multitude of miscellaneous possessions. Society tells us that we can never have enough possessions. There is always something you need to make your life better. Happiness can be found with every new item you purchase. This is false. True happiness is not found in possessions, but in God. Nothing else. Living in our society is truly a blessing, but I've found that it's important to keep our consuming desires in check, especially when you consider the living conditions in poverty-stricken parts of the world.

A couple of months ago, Joel and I had a difficult time getting Mac to put away his toys on a regular basis. Regardless of the fact that I rotated out his toys, and sifted through them on a regular basis to get rid of the junk, the conflict never seemed to subside. The toy situation consistently escalated into a tense conflict. During these moments, I would remember the Kiberian slum that I walked through as a young adult, and would feel a terrible sense of guilt. The people inside that slum struggled on a daily basis to find enough food, shelter, and clean water, and yet my son had so many toys, that he was overwhelmed with the task of taking care of them. I finally realized that both of my boys had too many toys.

Life Lessons - sorting through the toy clutter and what we learned @ SoHeresMyLife.com
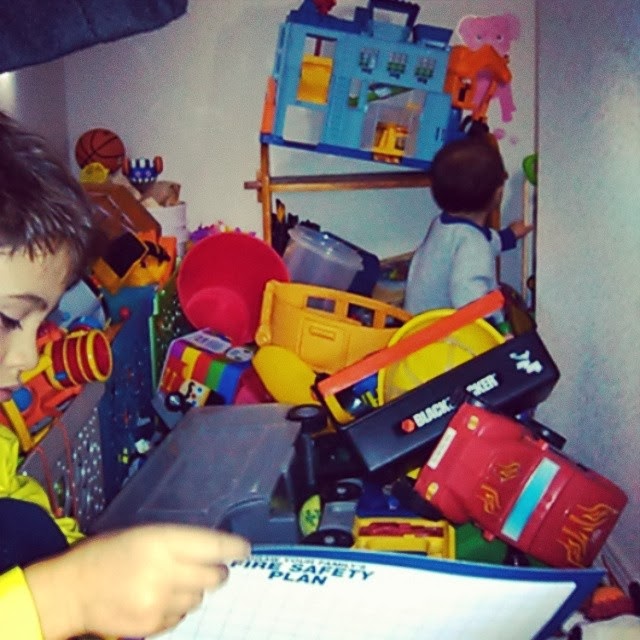
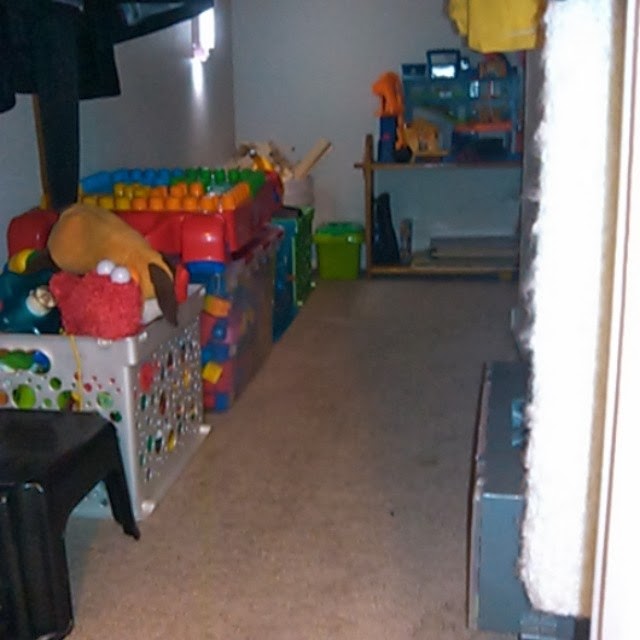
This is the closet where the boys store their toys. It's actually worse than it looks. The floor was completely covered in toys. The ironic part is that Mac was looking at the Fire Safety plan.

After this realization, Joel and I came up with a game plan, also known as The Toy Purge of 2013. (Just kidding...well, sort of. We really do call it that when we joke about it.) I sat Mac down and explained to him that since he gave us such a hard time each time he had to put away his toys, it meant that he had too many. I told him that we had to get rid of some of them. So, we set aside a day and sorted through all of the toys. Mac picked out his favorite toys to keep, and we got rid of the others, including the broken toys. It was a hard day for both Mac and I and there were plenty of tears, but after it was over, we had a smaller, manageable stash of toys.

Sorting through toys to give away - Life Lessons from SoHeresMyLife.com
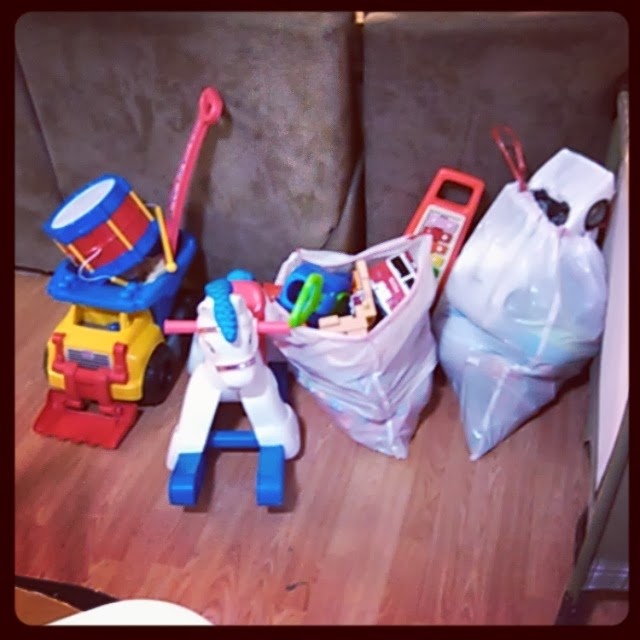
These are the toys we chose to donate. Part of me still feels bad that we had to get rid of these great toys.


What we learned through donating toys at SoHeresMyLife.com
This is the closet after The Toy Purge. Still plenty of toys, but so much more manageable. 

We ended up giving away 3 trash bags of toys to a local charity and since that day, both of them have forgotten about the donated toys. The boys seem to have a better appreciation of the toys they kept. Since The Toy Purge, the conflict surrounding the toys has significantly decreased and both boys no longer seem overwhelmed by the sheer volume of the toys in their possession. It was definitely a difficult thing to go through, but it was a good reminder of what is truly important.

Wealth consists not in having great possessions but in having few wants - Life Lessons from SoHeresMyLife.com

The Toy Purge of 2013 provided several life lessons for Mac, but this experience taught me a couple of things as well:

1. We live in an incredibly wealthy society and, as parents, we always want the absolute best for our children. This often includes material possessions - toys, clothes, a matching furniture set for their bedroom, perfectly decorated rooms, etc. None of this is bad, but it's important for us to know when to draw the line. We have to remember what is truly important - material possessions are not.

2. As Mac and I sorted through his toys that day, he would often tear up when I made him choose toys. Those were horrible moments for me. As my son mourned over choosing between his toys, I felt like someone was ripping my heart out of my chest. I wanted to cry too. I want my children to have an enriched and full life and to be a part of every blessing possible - toys included. I felt like I was robbing him of these blessings when he was forced to choose between his toys. I felt like the meanest mom in the world. During those heart-wrenching moments, I had to remind myself that my children will not have a less-enriched life if they only have one toy fire truck instead of three. Providing an enriched life does not mean providing more possessions for our children, but instead teaching them to appreciate what they do have.

The Toy Purge of 2013 was a difficult experience, but an important one for our family. What we learned from The Purge continues to effect our family's perspective on a daily basis. Last night, Joel and I were sorting through several boxes in our office to donate to a local charity. It wasn't easy, and we had some difficult moments. We had to remind each other of what is truly import. This morning, Mac gave me a hard time when I made him clean his room before school until I turned on the timer and told him I would donate every thing left on the floor when it went off. His toys were picked up with five minutes to spare. (We've made a lot of progress.) Life lessons aren't always easy to go through, but we always come away with renewed perspective about true value.

Tuesday, January 21, 2014

Upcycled Color Block Bracelet

I had a bracelet laying around our house. It wasn't anything special, but it provided a discount if it was worn to a local sports store. Instead of tossing it in the trash after the promotion expired, I decided to upcycle  it into something more fun - a Bollywood-like, color blocked bracelet. Boom! Awesome upgrade. The fun colors and sparkly rhinestones provide a sweet uniqueness to this accessory. Project bonus: It's quick and easy to make! (Well...of course it is, because you know, that's really my thing...you never know how long a project will take when you have a couple of munchkins around to provide numerous interruptions.) Plus, this bracelet is so fun, I get complements every time I wear it. What more could you ask for? ;)


Supplies needed:
- embroidery floss (I used three different colors)
- rhinestone chain
- small charm
- a cuff bracelet
- scissors
- super glue or some other type of quick drying glue (optional)
- plastic needle, small crochet hook or some other type of tool to tie off ends


Start out by attaching the rhinestone chain down the center of the bracelet. I lucked out and was able to slip the ends of the rhinestone chain into the plastic tips on the bracelet. If this isn't an option for you (unless the bracelet is similar to the one I used), use super glue to secure both ends of the chain to the bracelet. Trim the ends of the rhinestone chain if needed.


Next, tie a square knot with embroidery floss at one end of the bracelet, on top of the secured end of the chain. Wrap the floss around each link of the chain (between the rhinestones). (This is just to secure the chain to the bracelet as you work on it.)


Once each chain link has been wrapped with the floss, begin wrapping to cover the entire bracelet, working your way from one end to the opposite end. Wrap floss neatly around the bracelet, keeping each strand as flush as possible to the previous strand. Wrap floss as close to each rhinestone as you can.


To change embroidery floss colors, tie both ends of the different colored floss into a square knot, and continue to wrap. Be sure to hide the knot, as you continue to wrap.

Continue wrapping until the entire bracelet is covered, and switching floss colors as often as desired.
There's truly no wrong way to do this.

At some point during the wrapping process (maybe after 1/3 of the bracelet has been wrapped), string the charm onto the floss when changing floss colors and continue wrapping. If you forget to do this (like I did), it can be tied on afterwards, using matching floss, and hiding the knots and trimmed ends.

Once the entire bracelet is wrapped, tie a square knot to secure the floss to the bracelet. Trim and hide the ends underneath the wrapped floss. I used a small crochet hook to tie the final knot and keep it tight.


A couple of tips to keep in mind:

- I had plastic ends on my bracelet that allowed me to wrap the floss onto the bracelet without the floss slipping off the ends. If this is not an option, tie the floss with square knots and secure them to the bracelet using super glue. Once the super glue is dry, wrap over the super-glued sections again to conceal any super glue. Repeat these steps on the opposite end of the bracelet once the entire bracelet has been wrapped.

- Square knots are crucial to prevent the embroidery floss slippage.


The Crafty Blog Stalker

Thursday, January 16, 2014

Printable Train Tracks

Today, my husband Joel has a fun activity to share with you for your kids.  A while back, he made the Printable Road Maps for Toy Cars craft and it became a reader favorite for several weeks.  Because the printable roads were so popular, he created a printable train tracks project.  He also has an additional project in the works to add to these.  It should make an appearance within the next month or two.  Sign up for email notifications on the right side of the page to make sure that you don't miss out on the next printable project!


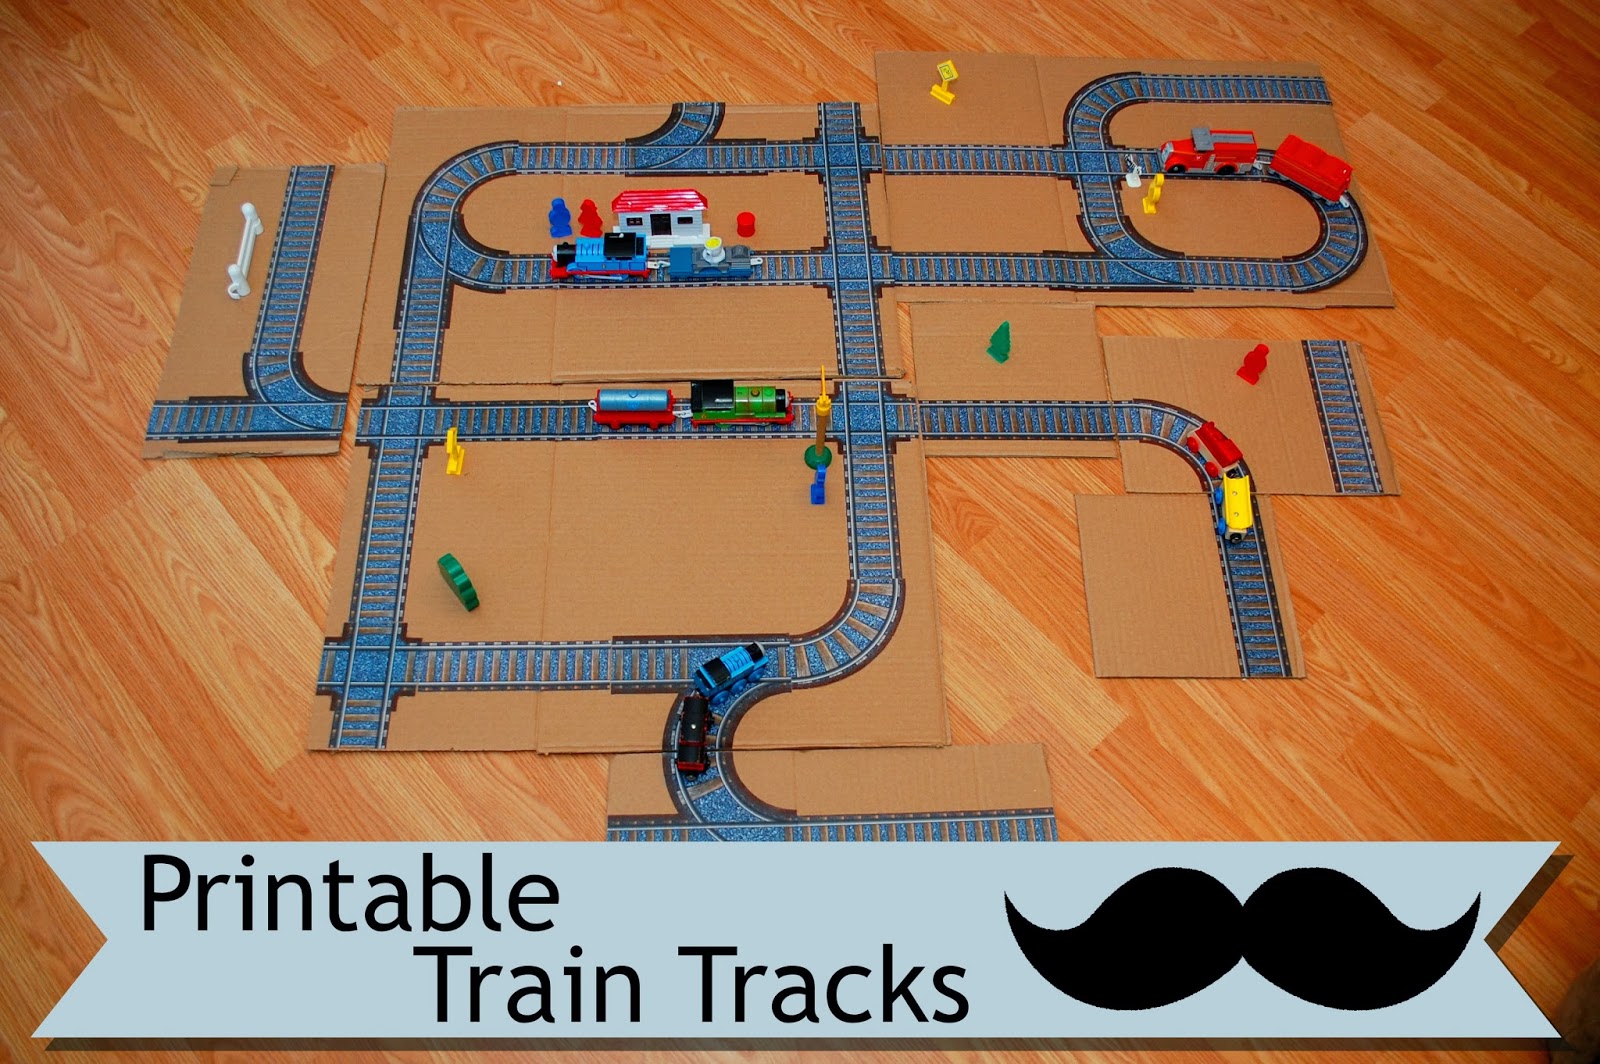
This free PDF printable train track project is the perfect activity for your kids.  Click through and find out how to make this.

Toy trains are really fun.  I've always enjoyed playing with them, but the sets can be really pricey.  Not only that, but different sets are often incompatible and don't offer much variation in the ways that you can set them up.  Enter printable train tracks...

With this set, you can create each panel in whatever way seems the most interesting to you and your kiddo.  Then, you can arrange the panels in infinitely different arrangements.  All it will cost you is a little ink, paper and time.  So, here we go!

First, print out this PDF.

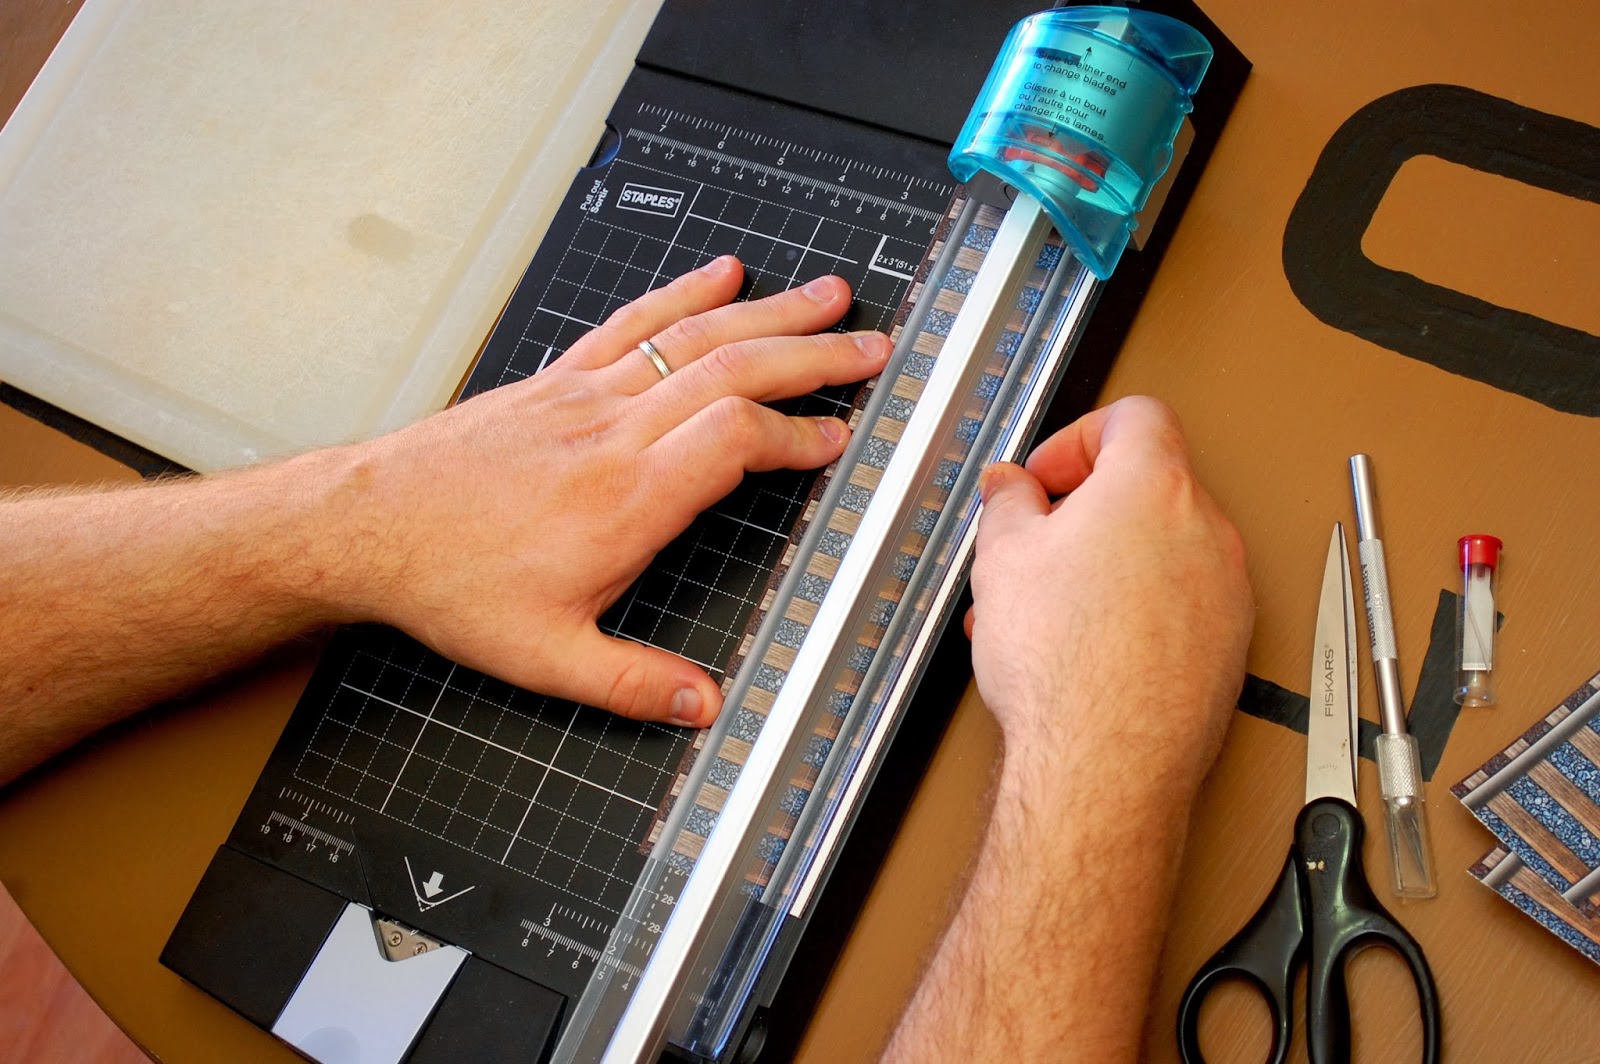
trimming train tracks with a paper trimmer

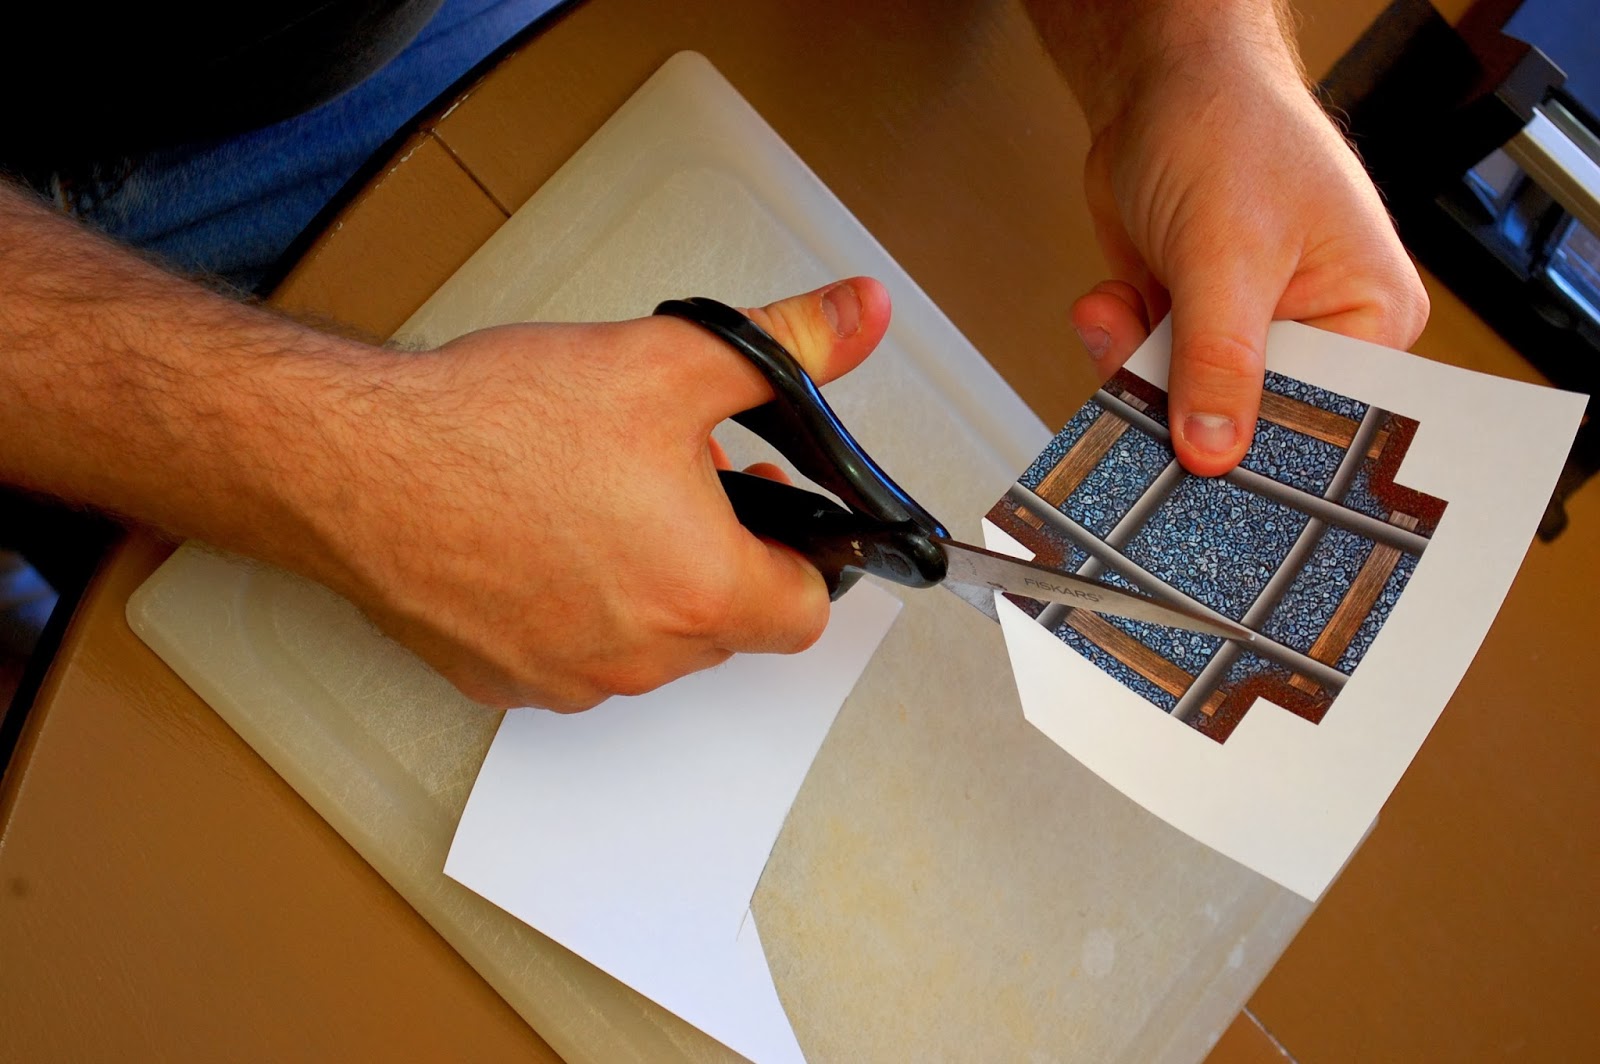
trimming train tracks with scissors

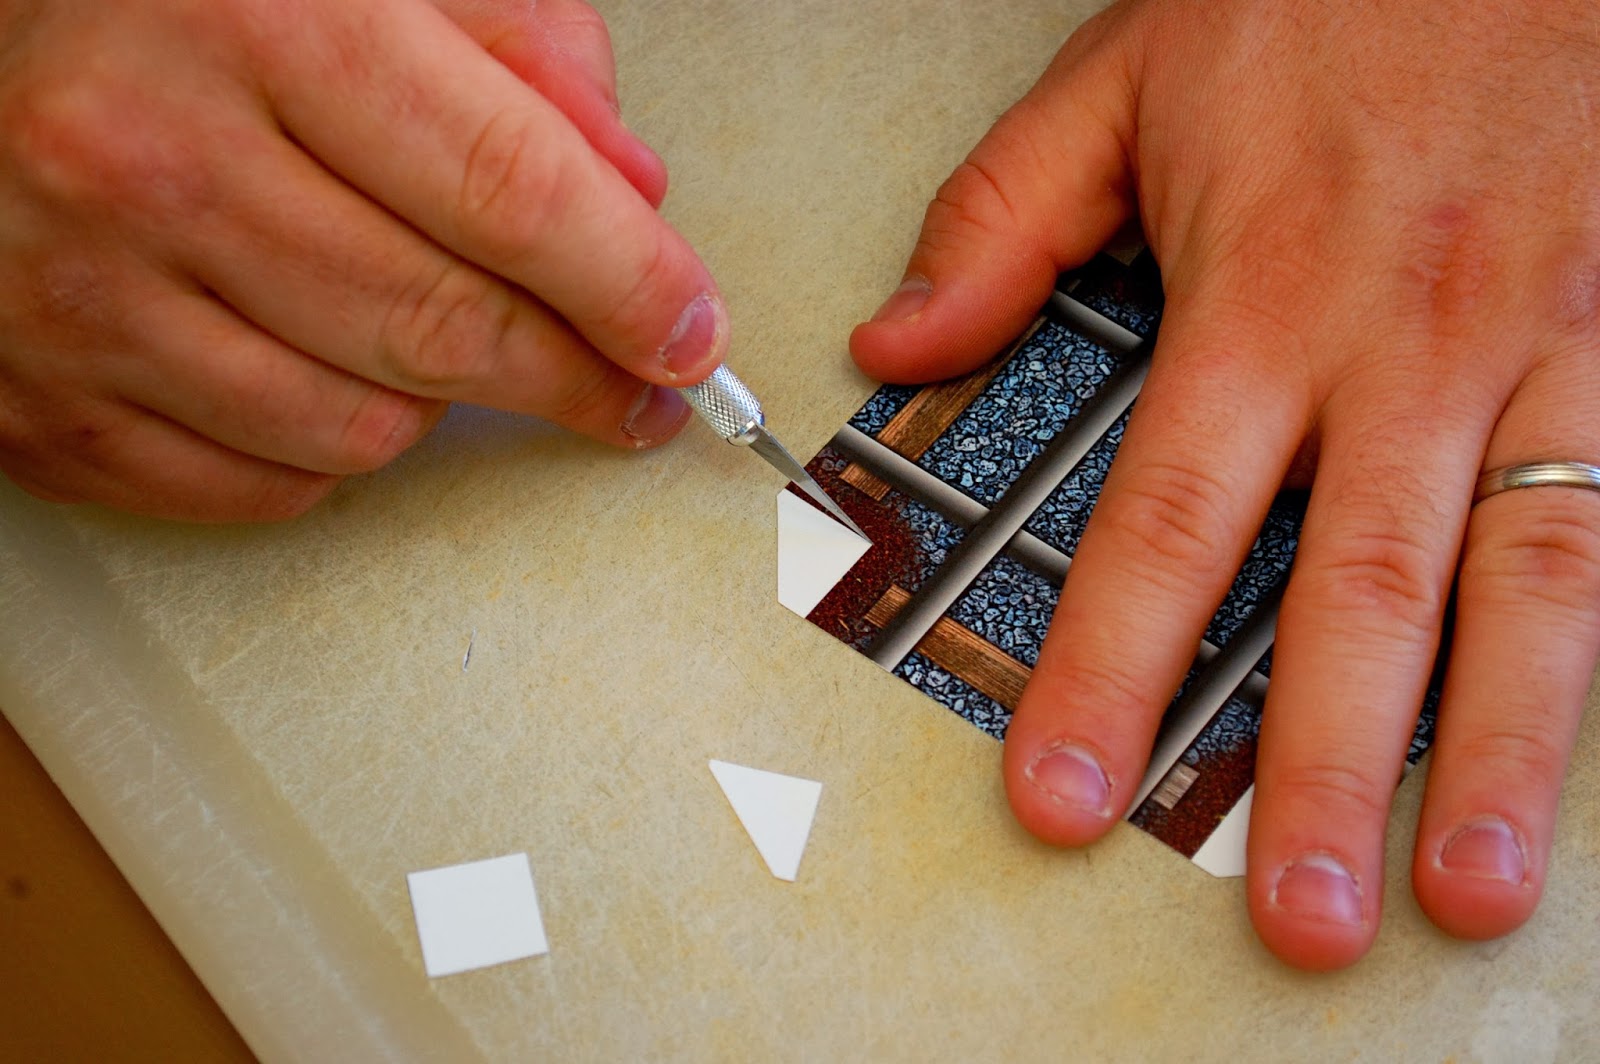
trimming train tracks with an exacto knife

Next, cut each piece out of the printout by trimming around the edges of each piece.  You can use any cutting method that works for you.  I chose a paper trimmer for the straight cuts, scissors for the long curves and an Exacto knife for the smaller pieces.

cardboard panels cut

After that, take a medium-sized cardboard box and cut it so that you have some large panels and some small panels.  I chose to make 4 large and 4 small by leaving the top flap on each side of the box. If a portion of one of the panels is damaged, you can trim that part off.  They don't all need to be standard sizes.

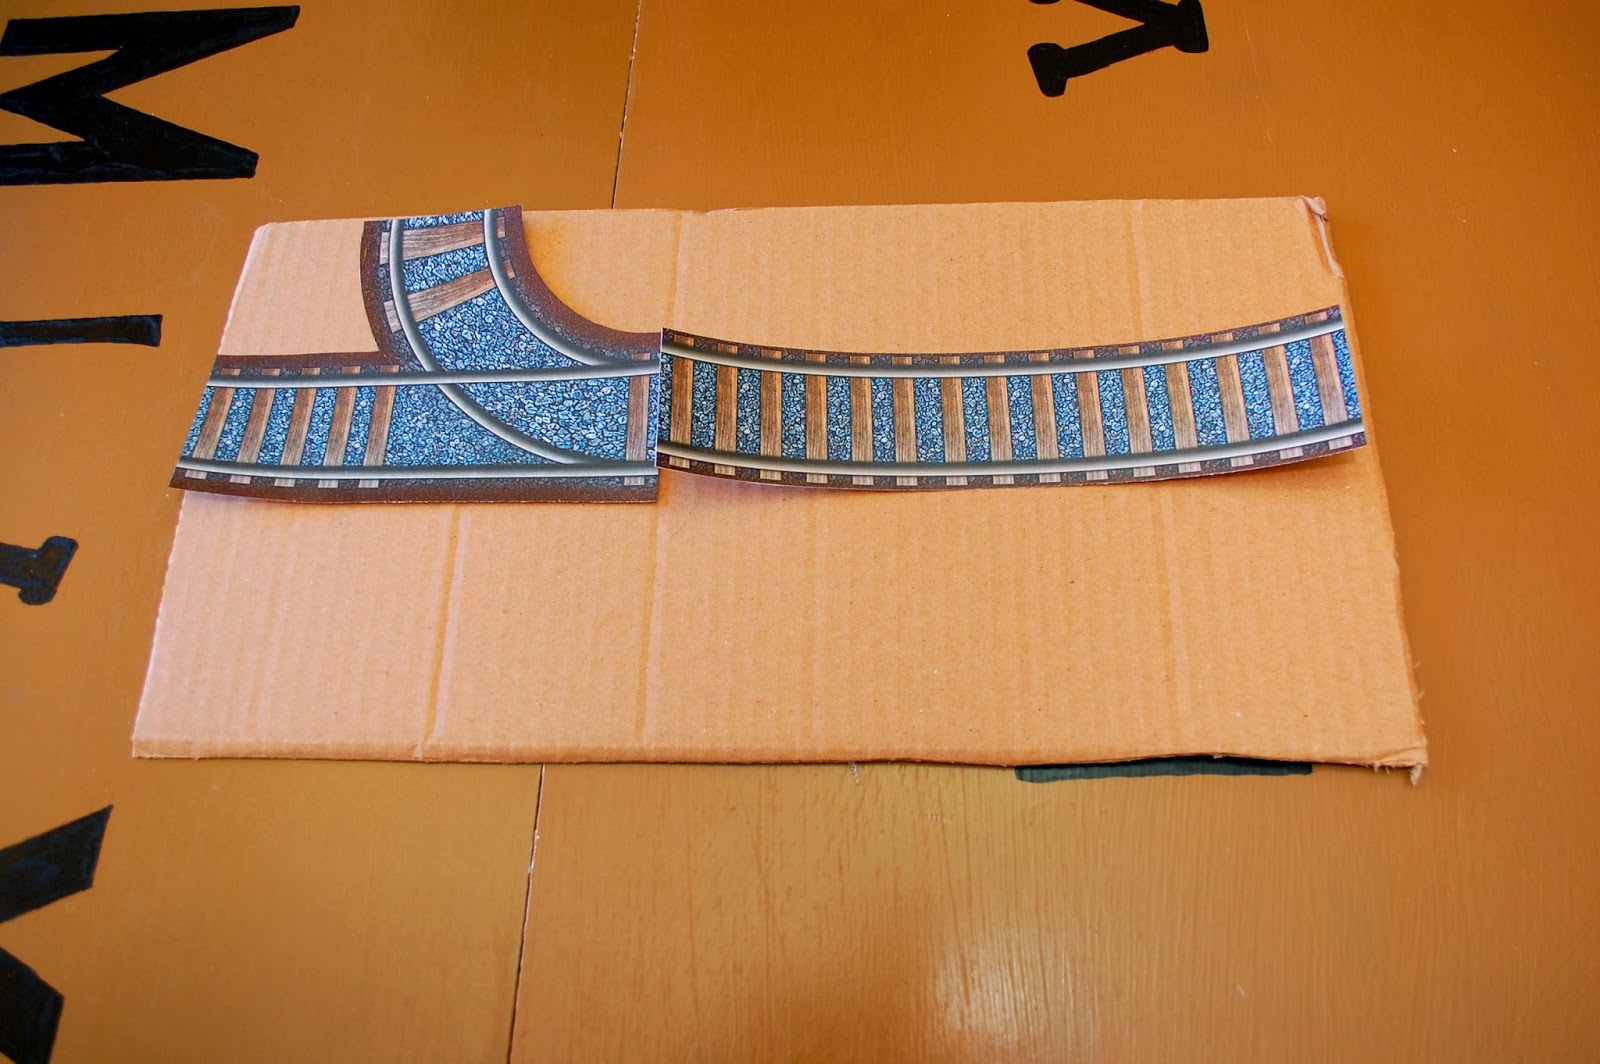
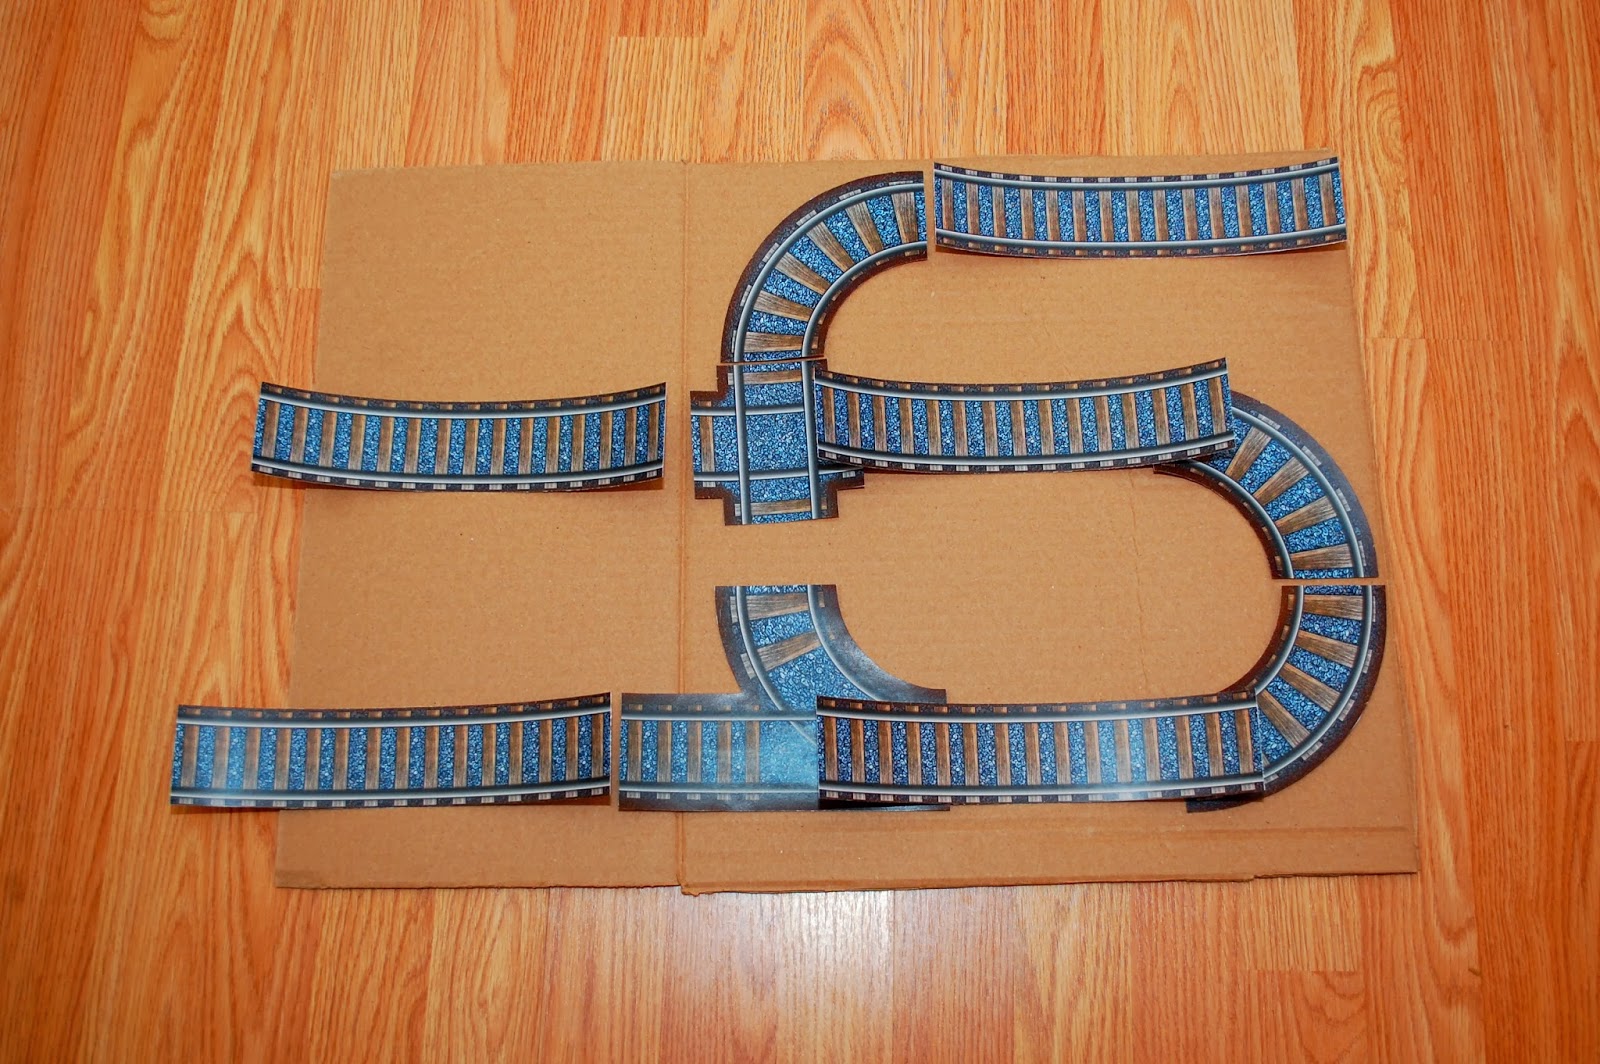
paper train tracks laid out on cardboard panel

second laid out panel

Now, you begin the coolest part.  Arrange the pieces on the panels in whatever arrangement looks the most fun.  You can always trim the long, straight pieces to whatever length you need.

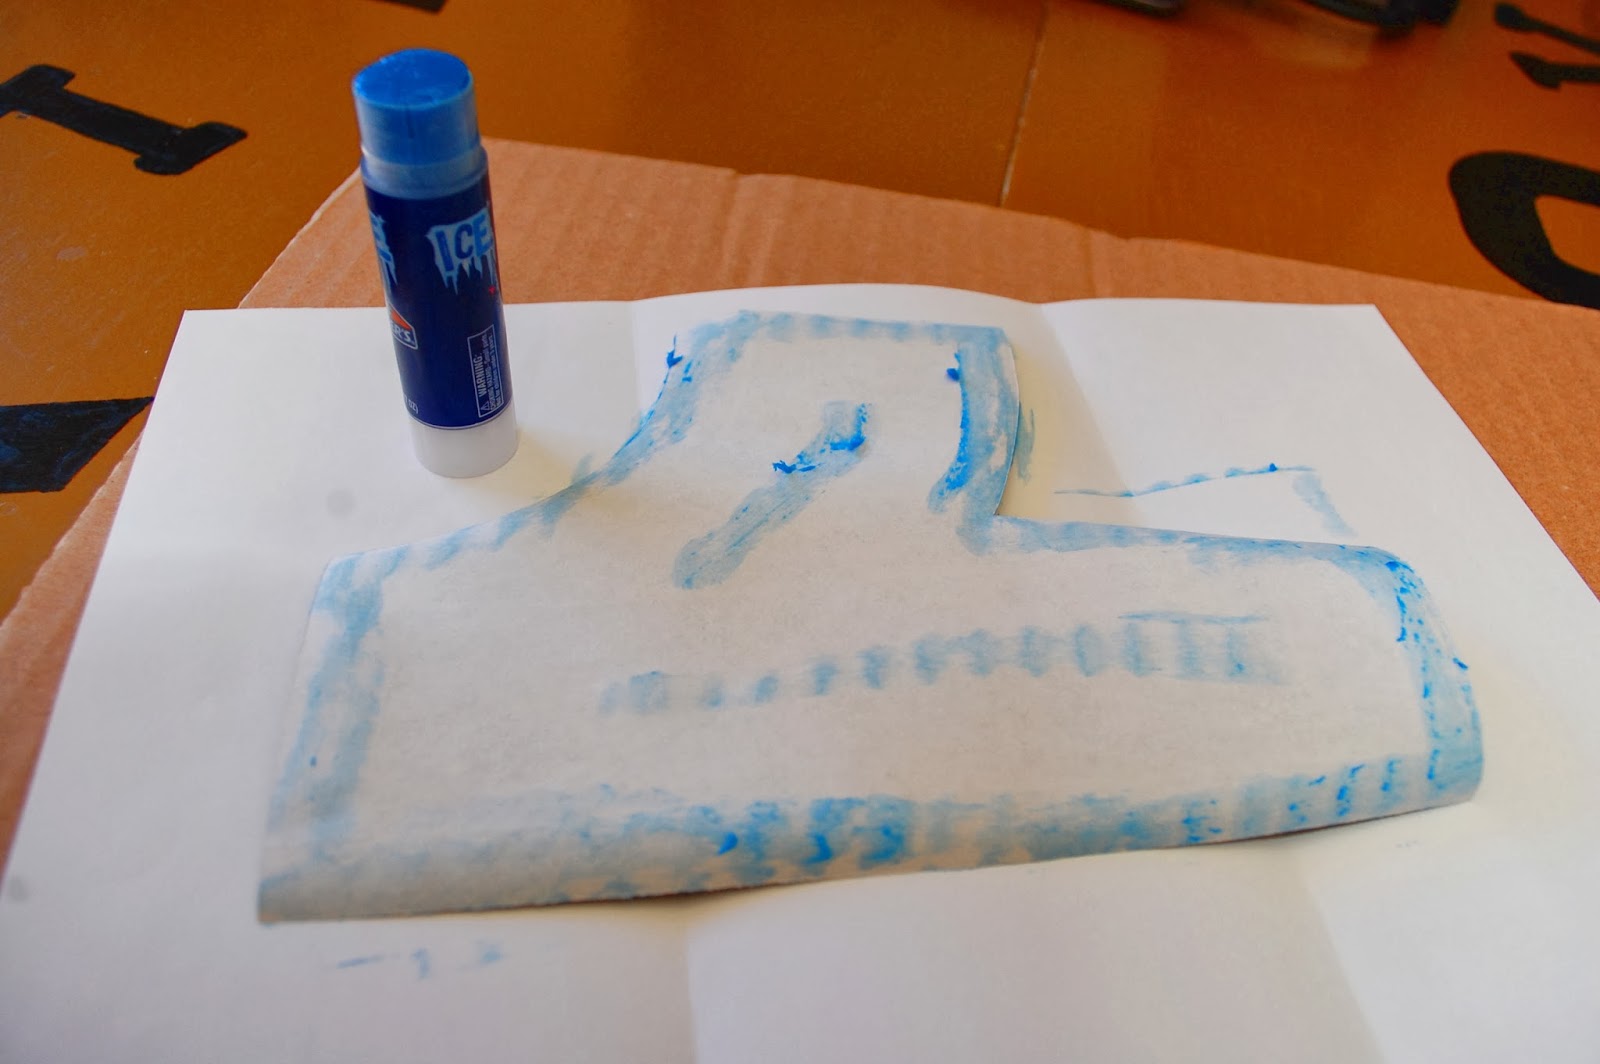
gluing cut out train track

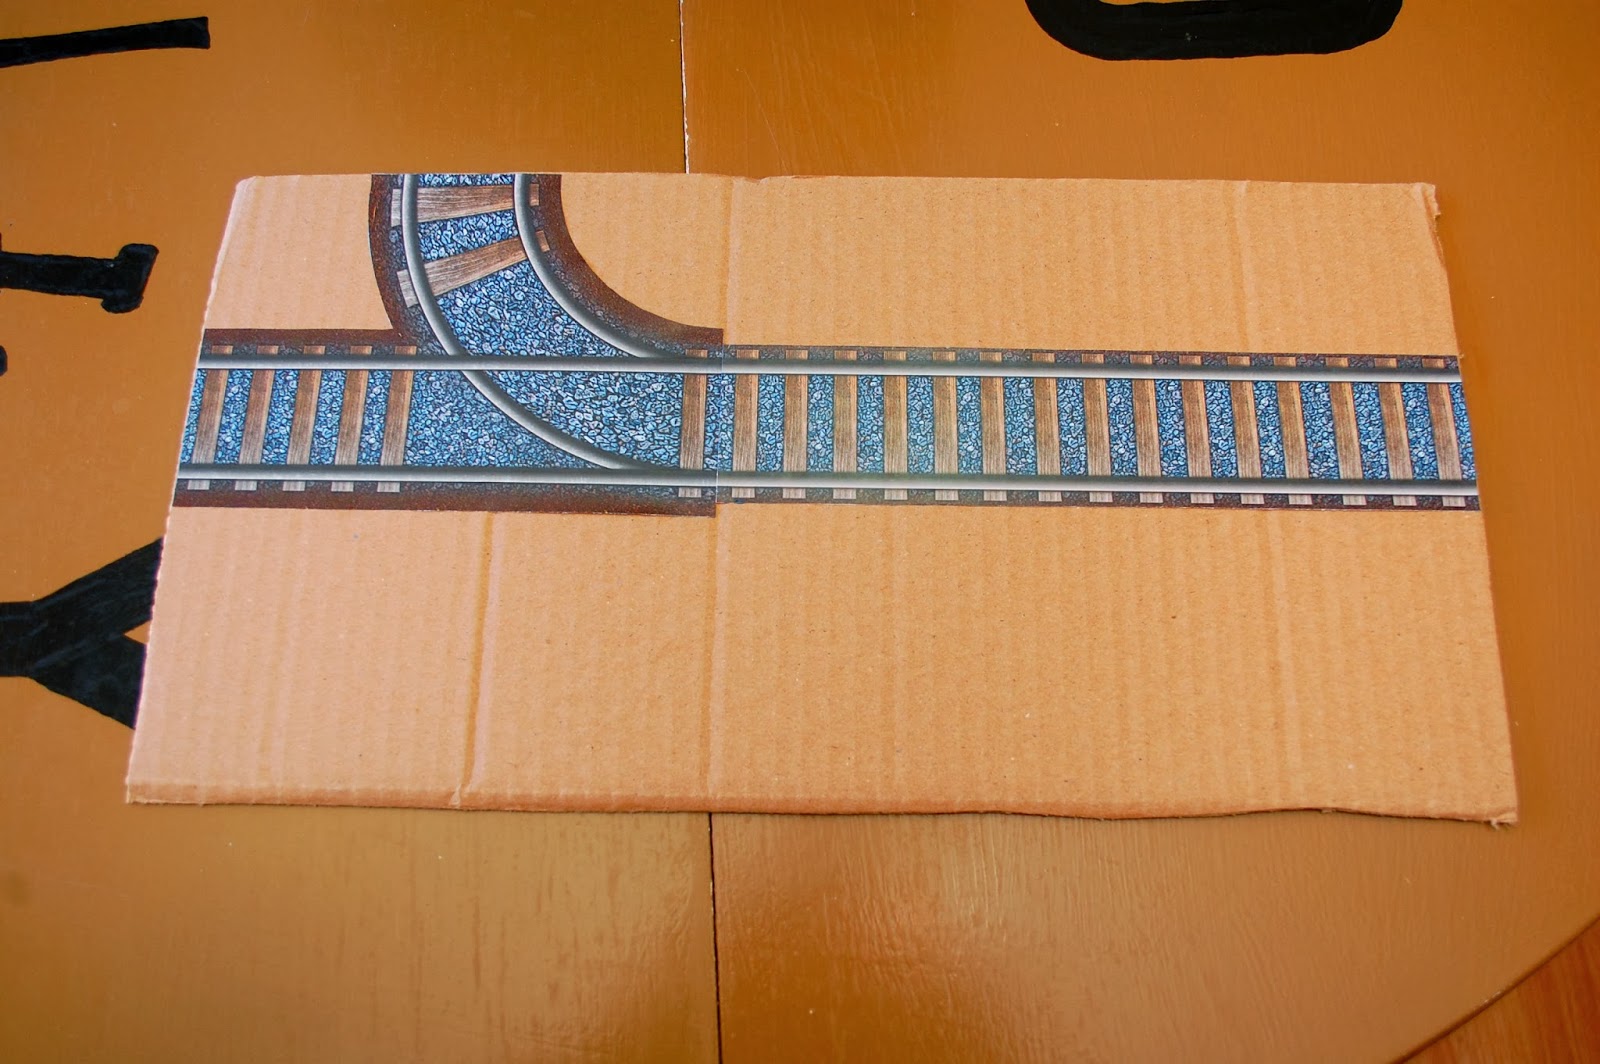
printable train tracks glued to cardboard panel

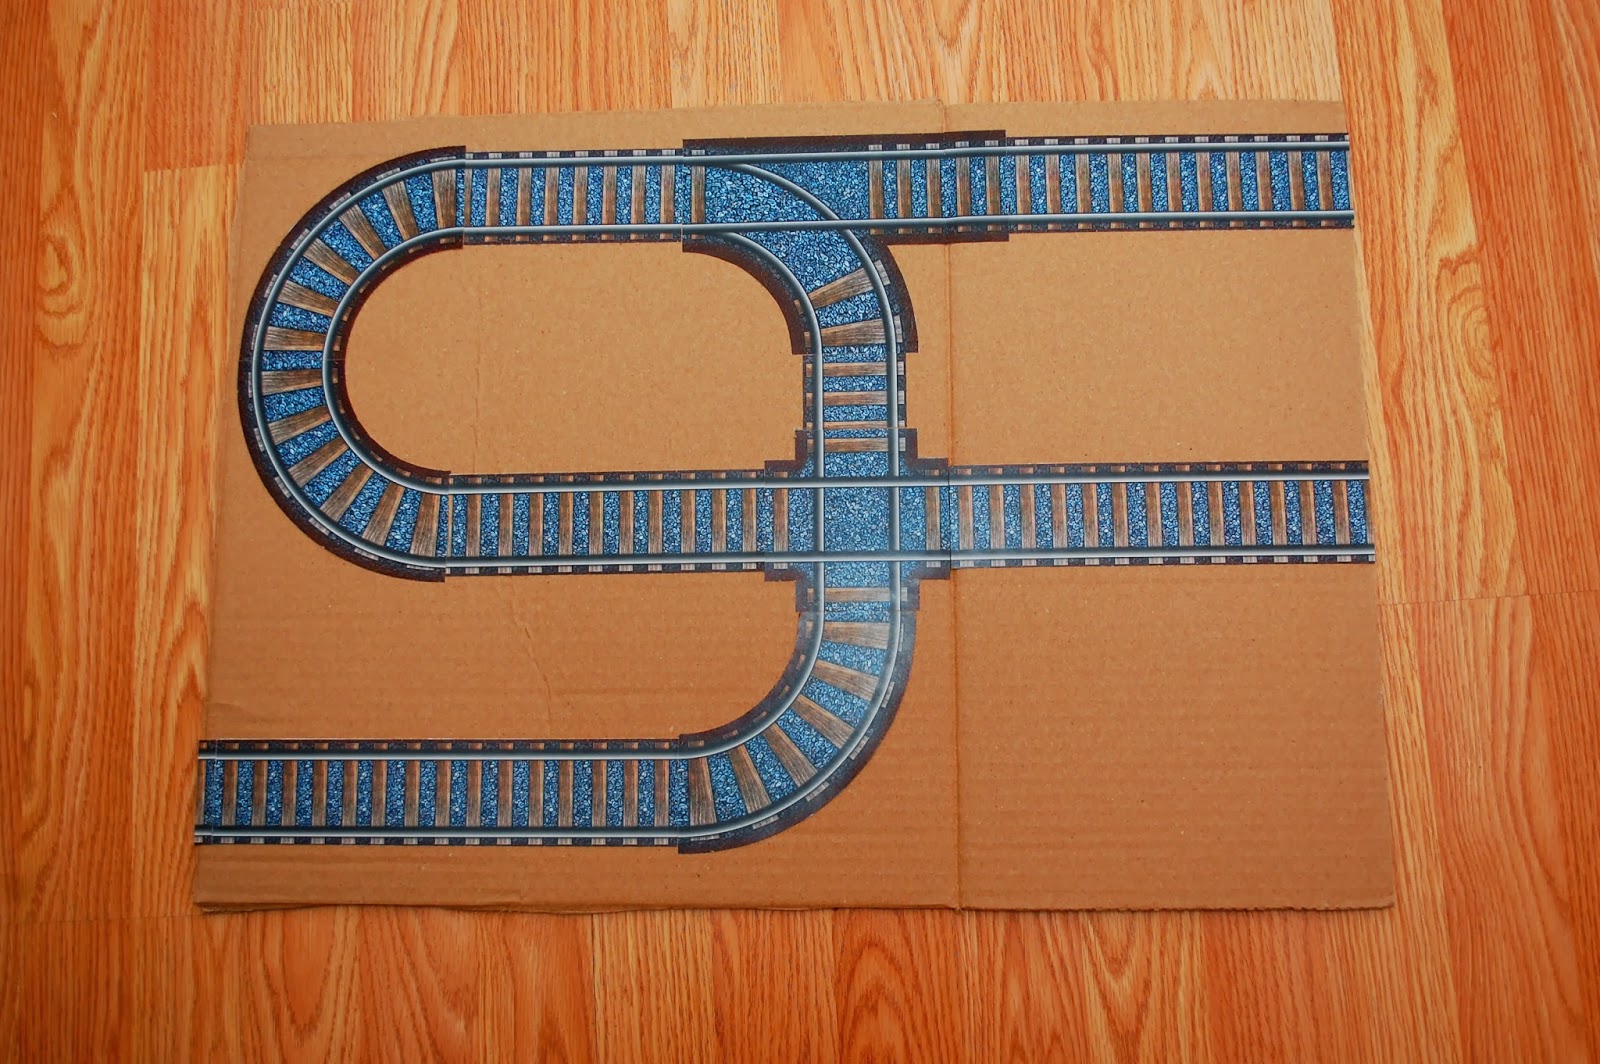
printable train tracks glued to second cardboard panel

When you have the arrangement you like, glue it down.  You can use a glue stick or brushed school glue, if needed, but spray adhesive is the quickest and cleanest method.  I started off with a glue stick, but switched to spray adhesive on the second panel.

assembled printable train track panels

Once you have all of the panels created, begin arranging them and start playing.  After a while, rearrange and you have a whole new track!

Tip: After I create one panel, I line up the edge pieces on the next panel so that they line up perfectly when placed next to each other.  This is especially useful on the large panels.

Another tip: Checking out Printable Road Maps for Toy Cars before you dig into this project will be helpful, as the idea was first developed there.  The 2 projects complement each other well and many of my (Joel's) future projects will expand on these ideas.  Make sure you sign up for email notifications so that you don't miss them.