So Here's My Life

The things we make,
the food we eat and
the shenanigans in between.

A blog about making things by
MICHELLE SEXTON

Showing posts with label children. Show all posts

Tuesday, February 18, 2014

How to Make a Beanie from a Sweater Sleeve

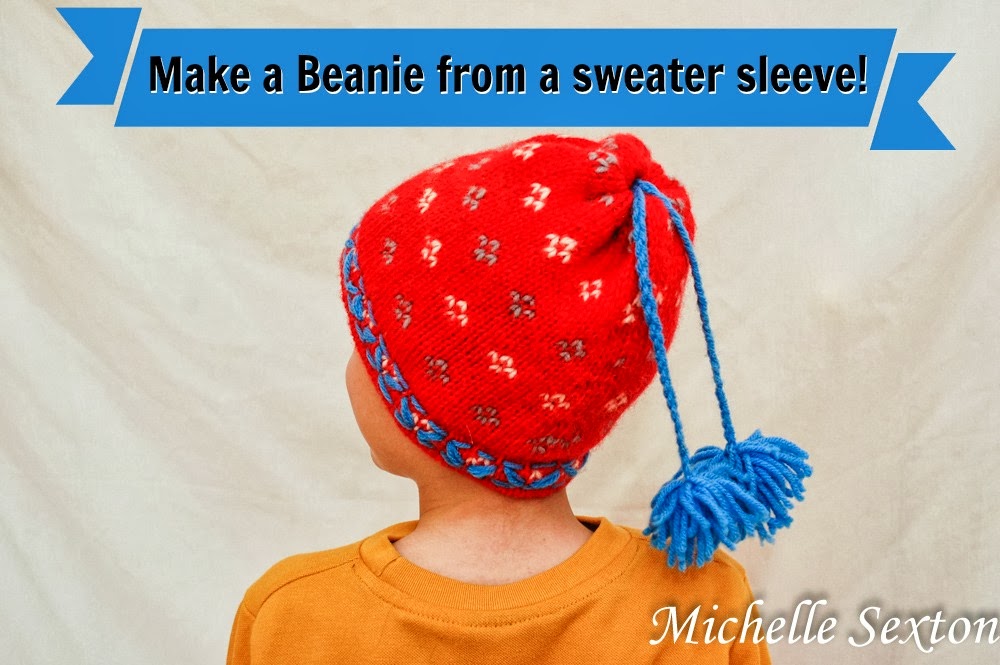
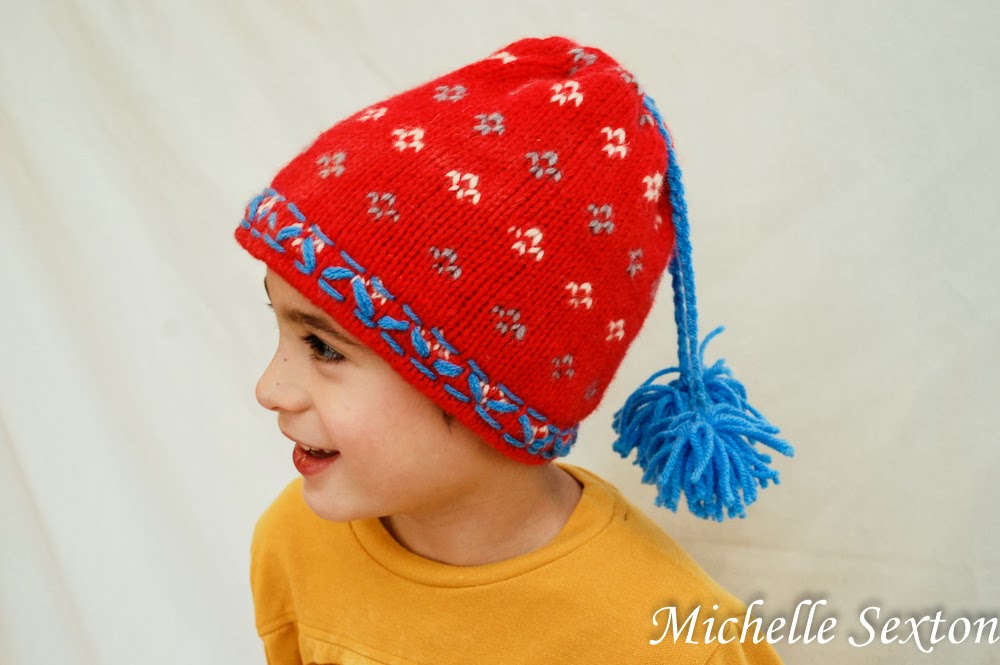
Have you had your fill of winter yet? Has Snowmageddon depleted your creative energy? Well, guess what? Here's an unexpected and easy sewing project to make for your little ones in one evening. This easy little project may just make these last days of winter a little more bearable, once you see your little ones wearing these cute little beanies on their heads.

Learn how to make a beanie from a sweater sleeve with only a minimal amount of sewing! Click through and find out how.

Make this easy beanie with only a minimal amount of sewing - click through and find out how.

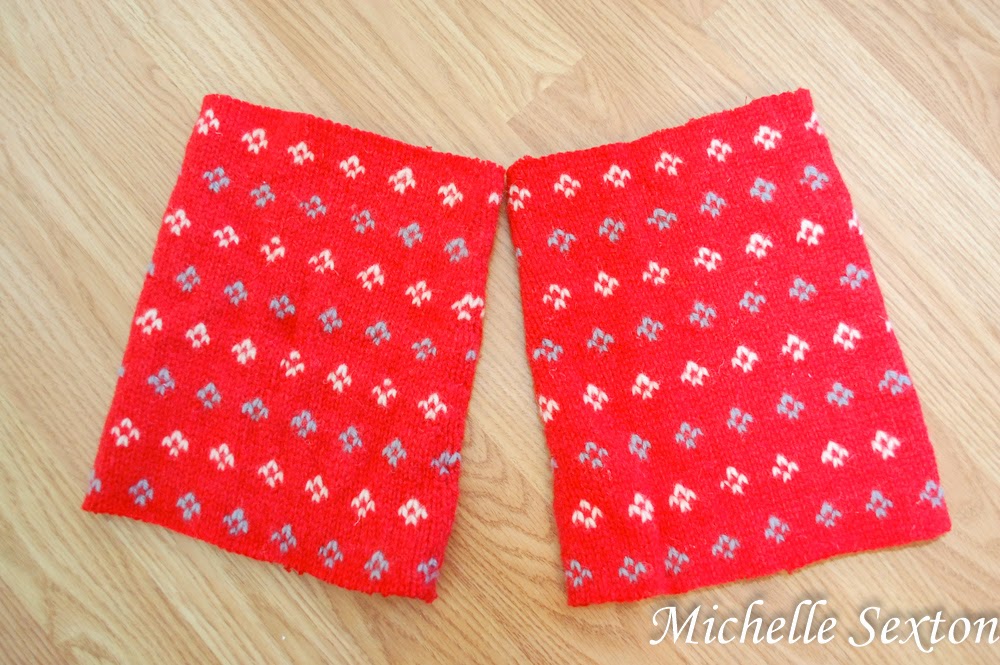
These beanies were made with the leftover material from an upcycled sweater project that I shared a couple of weeks ago. The sweater originally had gigantic baggy sleeves that proclaimed, "I'm so outdated!" They just had to go. So, I cut them off and made a cute pair of boot cuffs, and still had a bit of leftover sleeve material. Instead of tossing them, I thought, "Why not make hats for the boys?"

so many uses for one sweater!

Here's the original sweater. It's a hand-knit wool sweater and a bit on the heavy side. This project is totally doable with the heavy wool sweater, but would probably work out even better on a medium-weight sweater. You'll need need at least 12 inches of a sleeve to work with (per hat).

Here's how I made these cute little beanies:

start out with two sweater sleeves

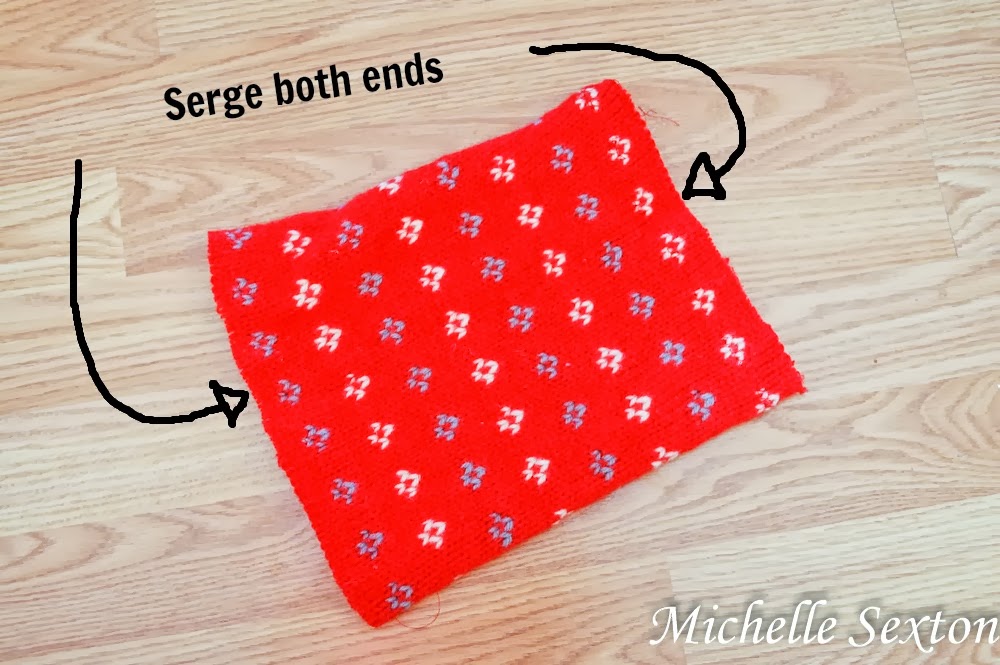
Start out by serging each trimmed end of the sleeve to prevent the sweater from unraveling as you work on it.

serge both ends of the sweater

pin the ends

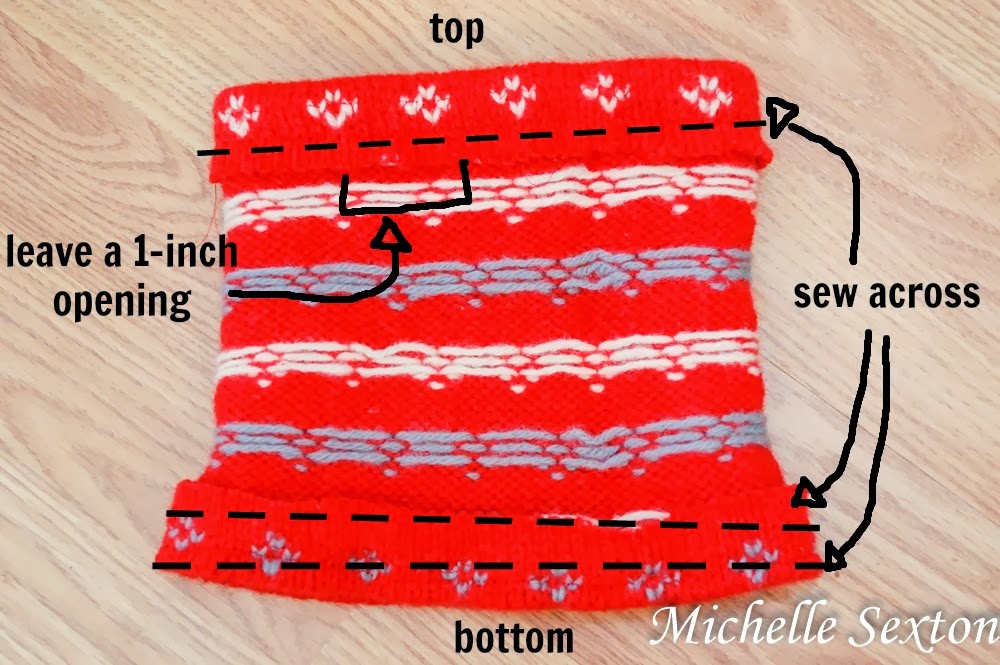
Turn the sleeve inside out, fold one end, and pin it. (This is the top portion of the hat. So, if the sleeve has a smaller end, it would be ideal to use the smaller end here.) Side note: the photo shows both ends pinned, but you can pin each end and work on them one at a time.

sew across each opening

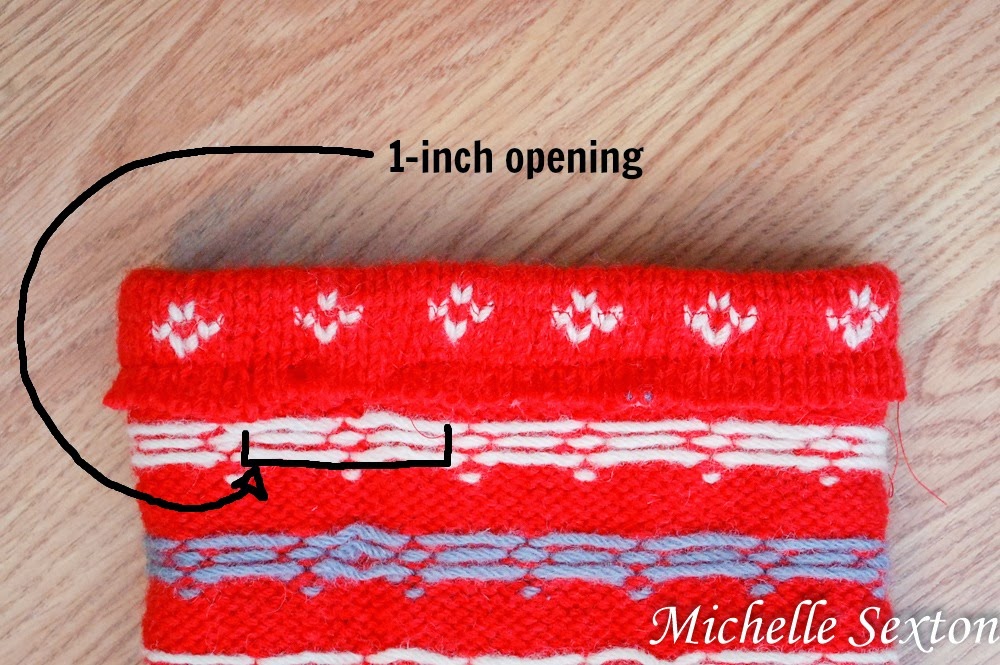
leave a 1 inch opening

Sew a line about 1 inch above the fold of the sleeve, leaving a 1 inch opening between the starting and ending points. Be sure to run the sewing machine forward and backward a couple of times to prevent the stitch from unraveling (at the starting and ending points), especially since the ends are not connected. (I used a serged stitch here, but a straight stitch would be fine too.)

While the sleeve is still inside out, fold the opposite end of the sleeve over, pin, and sew two separate lines over the folded portion.  Make one about 1/4 inch above the fold and one about 1 inch above the fold to create a faux brim. This time, make sure to connect the beginning and ending points.

Guess what? That's all the sewing needed! For. Real. Gasp!

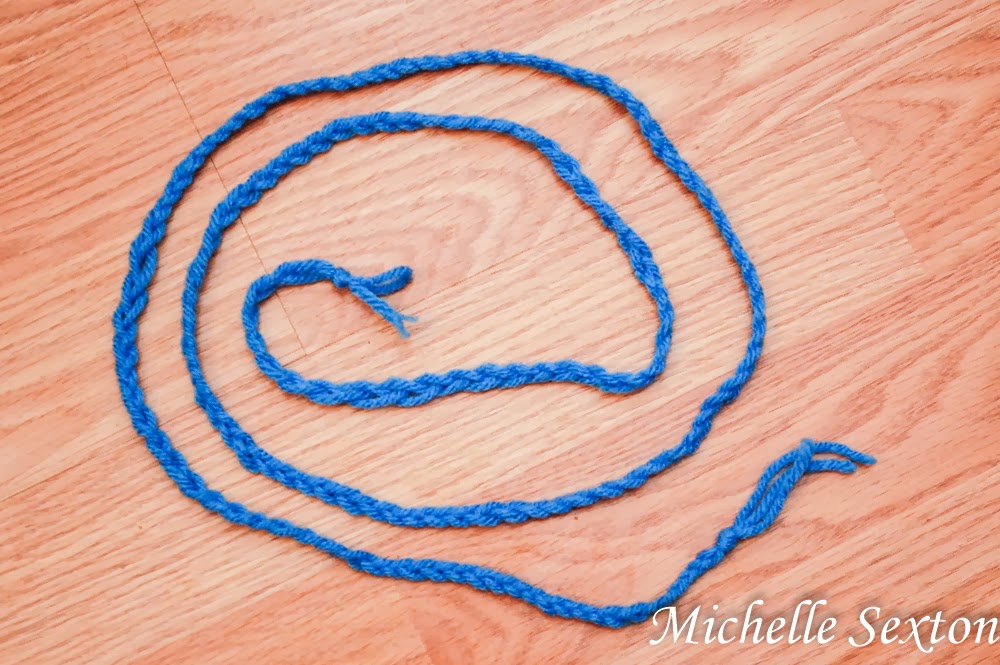
braid 3 strands of yarn together

Set aside the sleeve/hat. Braid three strands of yarn into approximately the length of 2 feet.

thread yarn through the top opening

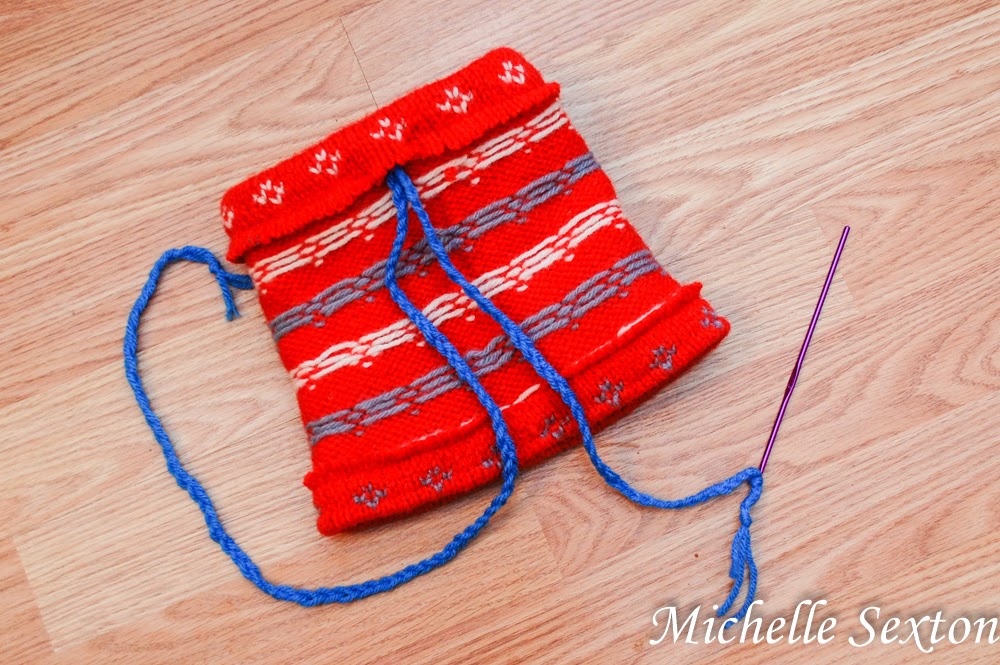
use a crochet hook to thread yarn through top opening

Tie one end of the braided yarn onto a small crochet needle.  Thread the yarn through the top opening of the hat (the end with the 1 inch opening) and out the other end to create a "drawstring".

pull tight and tie a square knot

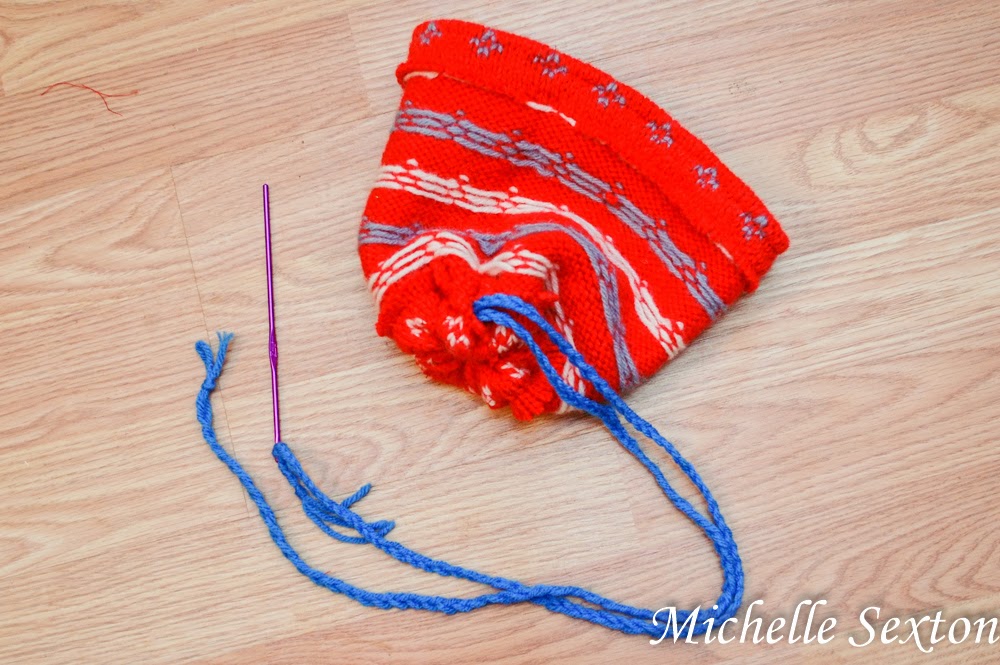
turn hat right side out and pull yarn strands through

Pull the yarn tight and tie square knot. Turn the hat right side out and pull drawstrings through the small opening at the top of the hat.

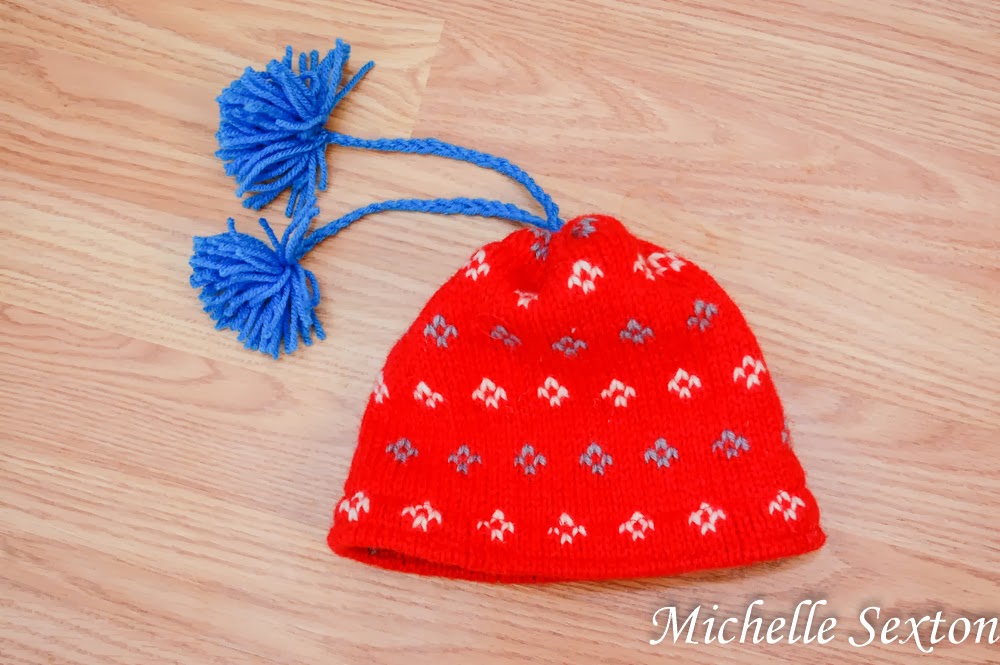
trim ends and add pom poms

Trim the ends of the drawstrings, leaving approximately 8 inches (or more if you like), and tie off the ends. Make two pom poms and attach them to each end of the drawstring.

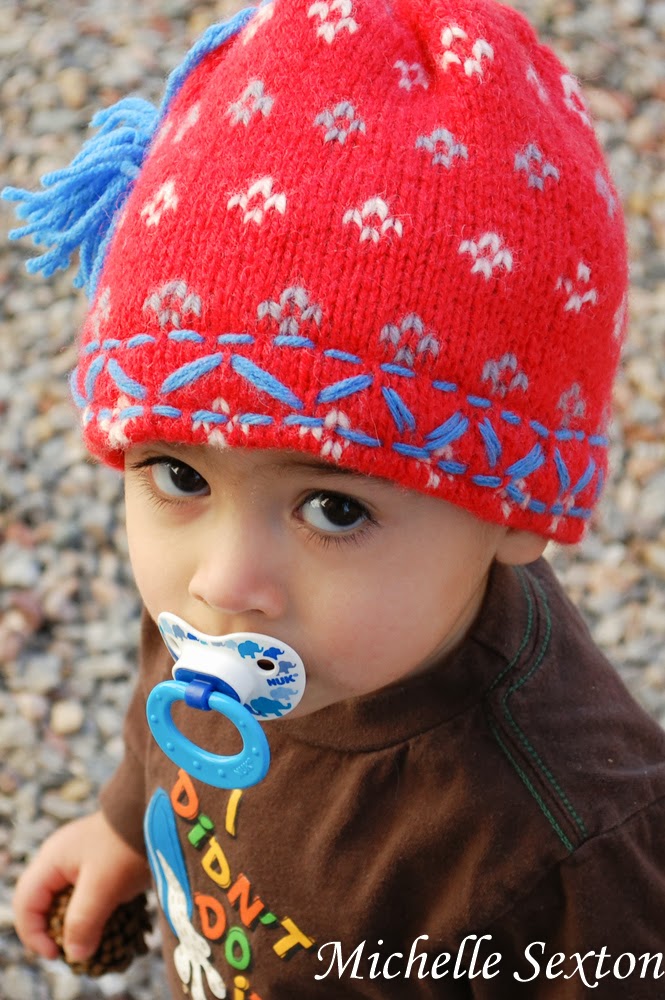
embroider a pattern on the brim

Double threaded a plastic needle with yarn, then "embroider" a cute pattern onto the "brim" of the hat.

Make a beanie from a sweater sleeve with a minimal amount of sewing - click through and learn how

Easy way to convert a sweater sleeve into a beanie - click through and learn how

Wa-La! That's it! Easy-Peasy. Who would have ever thought to make a hat out of a sweater sleeve??
:)


Thursday, January 23, 2014

The Toy Purge of 2013

I want to do something a little different today. As it turned out, I need a couple more days to refine the projects I had originally planned on posting. It's been a while since I've written a post about everyday life around here. I've had this subject on my mind for a several months. It hasn't been until now that I've taken the time to sit down and share it with you guys.

Providing an enriched life does not mean providing more possessions for our children, but instead teaching them to appreciate what they do have - Life Lessons from SoHeresMyLife.com

I went on a trip to Kenya when I was still single and in my early 20's. While I was in Kenya, my team and I visited Kibera, the largest slum on the continent of Africa. We had to walk in and out of the area on foot, and were not allowed to bring bags, or anything of value. The people were dressed in dirty rags. Sewage and trash filled the streets and the smell was terrible. It was a memorable experience, to say the least.

Twelve years later, I still reflect back on that experience from time to time. My husband and I own our home (well...as long as we pay our mortgage!), we have two cars, and plenty of furniture, clothes, kitchen gadgets, appliances, and a multitude of miscellaneous possessions. Society tells us that we can never have enough possessions. There is always something you need to make your life better. Happiness can be found with every new item you purchase. This is false. True happiness is not found in possessions, but in God. Nothing else. Living in our society is truly a blessing, but I've found that it's important to keep our consuming desires in check, especially when you consider the living conditions in poverty-stricken parts of the world.

A couple of months ago, Joel and I had a difficult time getting Mac to put away his toys on a regular basis. Regardless of the fact that I rotated out his toys, and sifted through them on a regular basis to get rid of the junk, the conflict never seemed to subside. The toy situation consistently escalated into a tense conflict. During these moments, I would remember the Kiberian slum that I walked through as a young adult, and would feel a terrible sense of guilt. The people inside that slum struggled on a daily basis to find enough food, shelter, and clean water, and yet my son had so many toys, that he was overwhelmed with the task of taking care of them. I finally realized that both of my boys had too many toys.
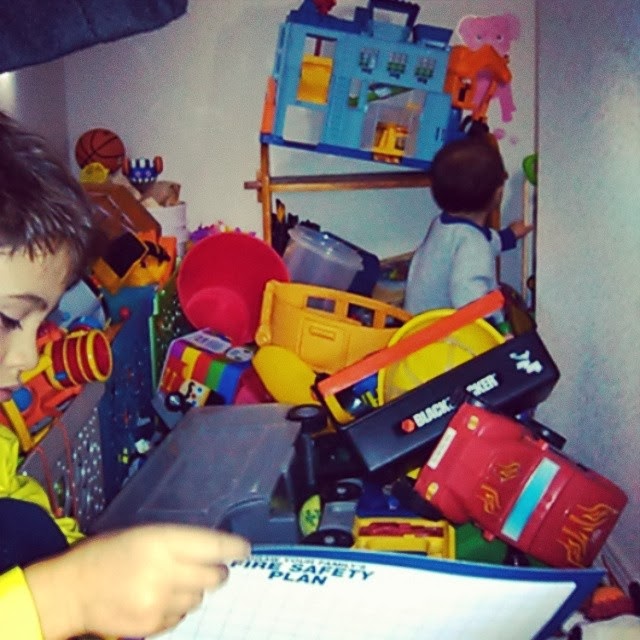
Life Lessons - sorting through the toy clutter and what we learned @ SoHeresMyLife.com
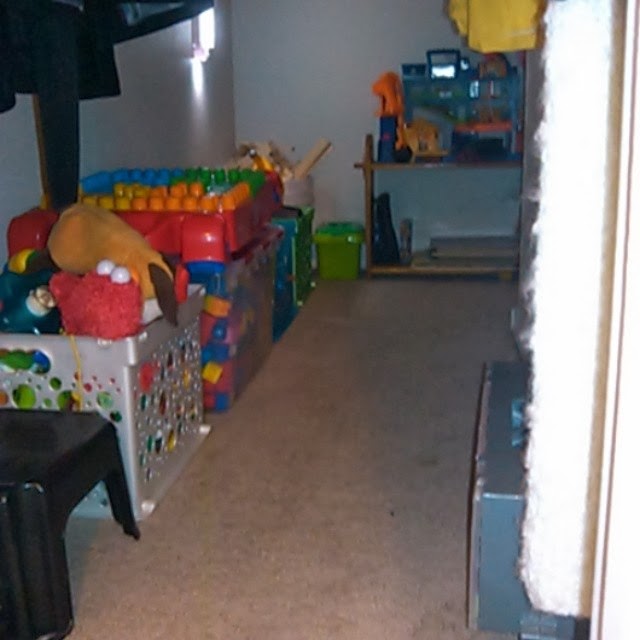
This is the closet where the boys store their toys. It's actually worse than it looks. The floor was completely covered in toys. The ironic part is that Mac was looking at the Fire Safety plan.

After this realization, Joel and I came up with a game plan, also known as The Toy Purge of 2013. (Just kidding...well, sort of. We really do call it that when we joke about it.) I sat Mac down and explained to him that since he gave us such a hard time each time he had to put away his toys, it meant that he had too many. I told him that we had to get rid of some of them. So, we set aside a day and sorted through all of the toys. Mac picked out his favorite toys to keep, and we got rid of the others, including the broken toys. It was a hard day for both Mac and I and there were plenty of tears, but after it was over, we had a smaller, manageable stash of toys.
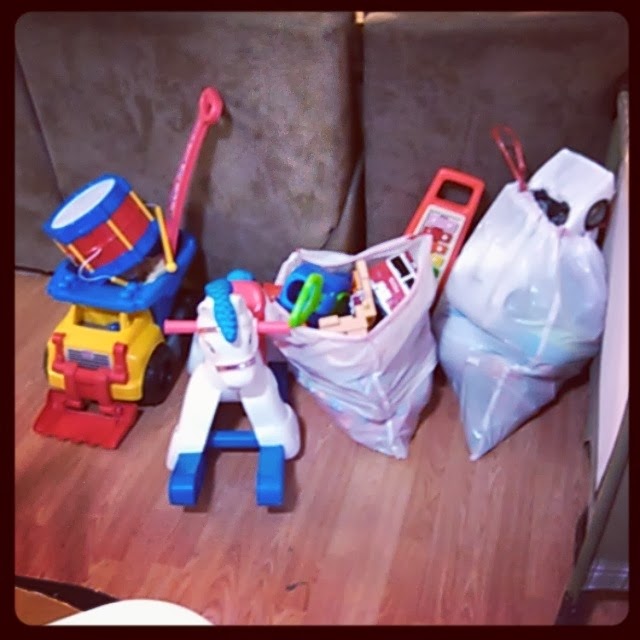
Sorting through toys to give away - Life Lessons from SoHeresMyLife.com
These are the toys we chose to donate. Part of me still feels bad that we had to get rid of these great toys.


What we learned through donating toys at SoHeresMyLife.com
This is the closet after The Toy Purge. Still plenty of toys, but so much more manageable. 

We ended up giving away 3 trash bags of toys to a local charity and since that day, both of them have forgotten about the donated toys. The boys seem to have a better appreciation of the toys they kept. Since The Toy Purge, the conflict surrounding the toys has significantly decreased and both boys no longer seem overwhelmed by the sheer volume of the toys in their possession. It was definitely a difficult thing to go through, but it was a good reminder of what is truly important.

Wealth consists not in having great possessions but in having few wants - Life Lessons from SoHeresMyLife.com

The Toy Purge of 2013 provided several life lessons for Mac, but this experience taught me a couple of things as well:

1. We live in an incredibly wealthy society and, as parents, we always want the absolute best for our children. This often includes material possessions - toys, clothes, a matching furniture set for their bedroom, perfectly decorated rooms, etc. None of this is bad, but it's important for us to know when to draw the line. We have to remember what is truly important - material possessions are not.

2. As Mac and I sorted through his toys that day, he would often tear up when I made him choose toys. Those were horrible moments for me. As my son mourned over choosing between his toys, I felt like someone was ripping my heart out of my chest. I wanted to cry too. I want my children to have an enriched and full life and to be a part of every blessing possible - toys included. I felt like I was robbing him of these blessings when he was forced to choose between his toys. I felt like the meanest mom in the world. During those heart-wrenching moments, I had to remind myself that my children will not have a less-enriched life if they only have one toy fire truck instead of three. Providing an enriched life does not mean providing more possessions for our children, but instead teaching them to appreciate what they do have.

The Toy Purge of 2013 was a difficult experience, but an important one for our family. What we learned from The Purge continues to effect our family's perspective on a daily basis. Last night, Joel and I were sorting through several boxes in our office to donate to a local charity. It wasn't easy, and we had some difficult moments. We had to remind each other of what is truly import. This morning, Mac gave me a hard time when I made him clean his room before school until I turned on the timer and told him I would donate every thing left on the floor when it went off. His toys were picked up with five minutes to spare. (We've made a lot of progress.) Life lessons aren't always easy to go through, but we always come away with renewed perspective about true value.

Thursday, October 10, 2013

Eyeball Candle Holder Jars

I'm not a huge fan of Halloween. I don't like creepy things, but Mac has 3 Halloween shirts. And we made this eyeball jar the other day. So, maybe I am contradicting myself? Perhaps.

Eyeball Jars on display from a preschool project

A couple of days ago, Mac and I made eyeball candle holder jars. They were pretty fun. Other than getting his fingers sticky, he loved making them. It's a quick and easy project for a four-year old. And it uses lots of eyeballs. How cool is that?

After Mac finished his eyeball jar, he proudly carried it around the house for the next couple of days (without a candle, of course). He was disappointed when I told him he couldn't drink out of it. He also repeatedly showed his younger brother, "Look! An eyeball jar!" Cheese had no idea what he was looking at. Mac was even planning on taking it to school for Show 'N Tell, but changed his mind at the last minute.

Anyway, this was fun for the both of us to do. And here's how we did it:

Supplies needed:
- jar
- orange tissue paper
- Mod Podge
- sponge brush
- a package of wiggle eyes

tissue paper crumpling by a preschooler
Start by crumpling your tissue paper to give a wrinkled look.

preschooler tearing tissue paper
Tear the tissue paper into strips. Ours were about 6 inches long and 1 inch wide.

preschooler painting glue
Using the sponge brush and the Mod Podge, cover approximately 1/4 of the jar.

preschool child adding tissue paper
Press the tissue paper strips on top of the wet Mod Podge. Continue painting Mod Podge in sections and covering with tissue paper until the entire jar is covered.

child adding glue
Once the jar is covered, do a second coat of Mod Podge, and cover with an additional layer of tissue paper. Continue with the second coat until the entire jar is covered.

child adding eyes to a jar
Paint a section of the jar with Mod Podge, and stick on the wiggle eyes however your heart desires.

preschool boy admiring craft
Once you have finished sticking on the eyes, allow to dry for about 10 minutes or so. (It doesn't need to be completely dry). Paint one more coat of Mod Podge over the entire jar including the eyes. Be sure to paint in the crevices between the eyes to keep them from falling off after it dries. Allow it to dry for several hours.

Eyeball jars with candles
 A couple of tips:
-When painting over the eyes, make sure to use long brush strokes instead of blotting on the Mod Podge. Blotting creates tiny bubbles that will dry in the Mod Podge, which create a whitish film over the eyes.
-Instead of tearing strips of tissue paper, consider tearing tissue paper into 1 inch squares. This will probably be a little easier to arrange on the jar. I didn't think about this until after we finished.

glowing eyeball jars for Halloween


Keeping It Simple


nap-time creations

Tuesday, October 1, 2013

Priorities

I have 2 baskets of unfolded laundry in the living room, several dismantled baby items in the hallway, a LOT of dusting to do, and two bathrooms that need to be cleaned. I cannot even begin to tell you how much this bothers me. It drives me crazy.

I can never seem to stay completely on top of all of the household tasks. There's always something that needs to be done - sorting through old toys, switching out seasonal clothes, weeds to be pulled in the yard, or those chores that always seem to be put off - like dusting the fan blades. I have a hard time relaxing when I have a list of tasks that need to be taken care of.


Lately Mac has asked me several time to play with him, and I've declined each time, due to the fact that I had to work on something else. Last week he asked me again and my initial reaction was to decline again, but then I had this realization, "My son wants me to play with him. Why am I saying 'no?' It's not like this task has to be done right now." In that moment I felt so sad when I realized that he had asked me to spend time with him and I had previously declined several times. Why was I so focused on finishing that task? Why did it matter so much?

It matters because we all seem to think that a person's worth depends on how much they accomplish.  In a lot of ways, a person's worth is in fact, determined by what they accomplish. True. However, I think a balance that needs to be established when it comes to spending time with your family. It's so easy to get caught up in the things that need to get done at home or extra money that needs to be earned, that time with your family, your children, slips away. Never to be replaced. They won't always be young.

I have come across several adults with grown children who regret not spending more time with their children when they were young. This is not a regret that I want to have in life. Not at all. Have you ever come across someone who said, "I wish my parents had spent more time cleaning the house and less time hanging out with us." Probably not. So I think those weeds can wait a little bit longer and those fan blades can be cleaned later.


I'm not encouraging you to allow your house to fall into a sanitation hazard, or to quit your job and become homeless all for the sake of family time. But I do think it's important to keep your family time a priority. Set aside time to spend with your little ones. Don't be afraid to temporarily set aside a task to play. Your children will only be small for a short time. Don't allow these precious moments to slip away.


Tuesday, September 17, 2013

Thoughts about Birthday Parties for Little Ones Under 5

Can we talk about birthday parties? Let's talk about birthday parties. I have birthdays on the brain because Cheese (aka the younger son - read the About Me section for a better explanation) is turning one. Exciting and sad all at once.

Birthdays are typically a big deal. Kids' birthdays seem to be a huge deal. After 4 years of planning birthdays, I have a come to a couple of conclusions.


Hosting a birthday party at your home is a LOT of work. Often times it's easier and cheaper to pay a venue to host a party.

I hosted Mac's first and second birthday parties at my house. It was a LOT of work. In addition to making sure our house was spotless, there were endless hours googling birthday theme ideas, food prep, and party details. Details, details, details...

When Mac turned 3, I was pregnant with Cheese (Such a weird sentence). Since I felt like sleeping (or puking) most of the time, the last thing I wanted to do was plan a toddler's birthday party. So, we ended up hosting his birthday at Chick-Fil-A, one of the most inexpensive places in town to have a party. Win!

Mac's birthday party was so easy and inexpensive that we returned for his fourth birthday. This time, though, it was at his request. (LOVE this kid).

We ended up spending so much less money by hiring a venue than we had by hosting it at our house. The decorations, activities and food ended up surpassing the cost of simply paying someone else to do it all!

The birthday party probably won't be remembered by your kid or their friends for longer than a couple of weeks.

Pinterest is awesome, but it also gives unrealistic expectations for hosting events. Specifically, kids' birthday parties. I've seen AMAZING birthday parties on there. The problem is after seeing those ideas, anything less than the immaculate parties you saw are going to seem lame. There's no way you want to give your child a lame birthday party, right? Let me ask you something, do you remember each birthday party you attended as a child? What about the cakes and decorations?

If you are anything like me, you can only vaguely recall two or three, but that's about it. I certainly don't remember any parties before I turned 5.

Every parent wants the best for their child, and birthdays fall in line with that desire. So, we spend hours upon hours planning, baking, cleaning and setting up for a birthday party. The thing is, they probably won't be able to remember it for longer than a couple of weeks. So, maybe we need to rethink how much time and energy we put into the inconsequential party details.

That hand-painted pendant banner probably won't be remembered by your guests and will end up sitting in your closet for a couple years before you finally convince yourself to toss it. Instead a couple of decorations from the Dollar Store will still provide a fun and celebratory atmosphere. Plus it's so much less work!

Keep your life simple and provide an easy and inexpensive party. Skip the hand-made decorations and hand-crafted party favors. 

At this age, (like under the age of 5) most kids aren't going to care WHAT you do at a party, they just want to play. And what about party favors? Really, party favors provide temporary amusement, but little else. Honestly, most of the party favors end up in the bottom of the toy box or trash sooner rather than later.

As a mom, some of my favorite party favors are fruit snacks and play-doh (Though I do have a couple mom friends that despise play-doh).

So, what am I saying? Give your kid a crappy party, because they won't remember it? Skip the party favors, because they'll end up in the trash anyway? Not at all! Let's just tone it down some. Immaculate parties are just not necessary, especially since most of it won't be remembered anyway. Let's simplify. The purpose of a birthday party is to celebrate a birthday. You can still celebrate without a meticulously detailed party.


Above all else, don't exhaust yourself over party details. It's just not worth it!

Cheese's birthday is in a couple weeks. We plan to invite both sets of grandparents over to our house, sing Happy Birthday to him, and eat cake. However, as my boys get older and if they want a spectacular themed birthday party, I'm totally game. But they're going to have to help. ;)

Tuesday, September 3, 2013

3 Parenting Books that Have Made My Life Easier

I think that every parent gets to the point where they feel stuck on an issue with their child - Sleeping, Eating, Schedules, etc. So maybe a book will help, right? But there's so many, so how do you know what to choose? These three books have been unbelievably helpful to me over the past several years.

 
1. Healthy Sleep Habits, Happy Child by Marc Weissbluth
I wish I had known about this book when my older son was born. I had SO MUCH trouble getting him to sleep enough. He hated sleeping (still does). I had so many sleep battles with him when he was younger. But what I didn't know was how much I really didn't understand about sleep. Around my son's first birthday a friend recommended this book to me after a comment about his sleep deprivation. This book helped me correct his sleep issues. It explains how sleep works, why certain sleep issues to occur, and how to fix those problems. The knowledge from this book has helped me so much and my baby has much better sleep habits than my older son did at this age. We still encounter sleep issues from time to time, but it's so much easier to fix the problems now.


2. How to Get Your Kid to Eat: But Not Too Much by Ellyn Satter
We've had feeding battles with my older since...uhhh...birth. No lie. When it comes to eating, he can usually think of about 23,546 other things that he would rather do. It's not exactly that he hates food, but he just isn't that interested in eating (except chocolate). I suspect that the fact that he had projectile reflux as an infant has some sort of subconscious influence toward his food apathy. This was a huge issue for us when he was younger. I was constantly stressed about his food consumption. It wasn't something that I expressed too often, but it was always in the back of my mind. How to Get Your Kid to Eat But Not Too Much talks about strategies to teach your child to be a healthy eater. It discusses different problems that occur during different age groups as well and how to deal with them in a conflict free manner. After implementing these strategies, my husband and I were able to help our son to become a better eater. He is still a picky eater, but the food "battles" at the dinner table have diminished significantly. And we can always get him to at least try his food. (That never happened before the book). (This book was recommended by the occupational therapist that worked with my older son on his feeding issues as a baby AND the strategies in this book are also taught in WIC programs)


3. On Becoming Baby Wise: Giving Your Infant the Gift of Nighttime Sleep by Gary Ezzo and Robert Bucknam
I've used the Babywise strategies with both of my boys. Between 12 to 15 weeks of age both of them were sleeping 12 hour stretches at night...It may have been a little longer with my older son due to his projectile vomiting (good times). Babywise emphasizes the importance of establishing a consistent schedule with your baby which in turn allows flexibility when you aren't always able to maintain the schedule (aka grocery shopping day). I really love the wake/feed/play/sleep cycle that they teach in this book too. There are a few things that I'm not completely on board with, but overall, this is a great book that has helped us establish good habits.


I realize that these books and strategies aren't for everyone - especially when it comes to Babywise. It seems that even the mention of Babywise stirs up ill feelings in people. It's cool. Don't worry about it. I promise I won't think you are a bad parent if you choose to do things a different way from me. These books and strategies have helped us establish the environment that we are striving for in our specific family. Every family is unique in the way that they operate and the goals that they establish. But if you are looking for information, then these are the books I would recommend to start off with. :) What parenting books have you found helpful?