So Here's My Life

The things we make,
the food we eat and
the shenanigans in between.

A blog about making things by
MICHELLE SEXTON

Tuesday, February 18, 2014

How to Make a Beanie from a Sweater Sleeve

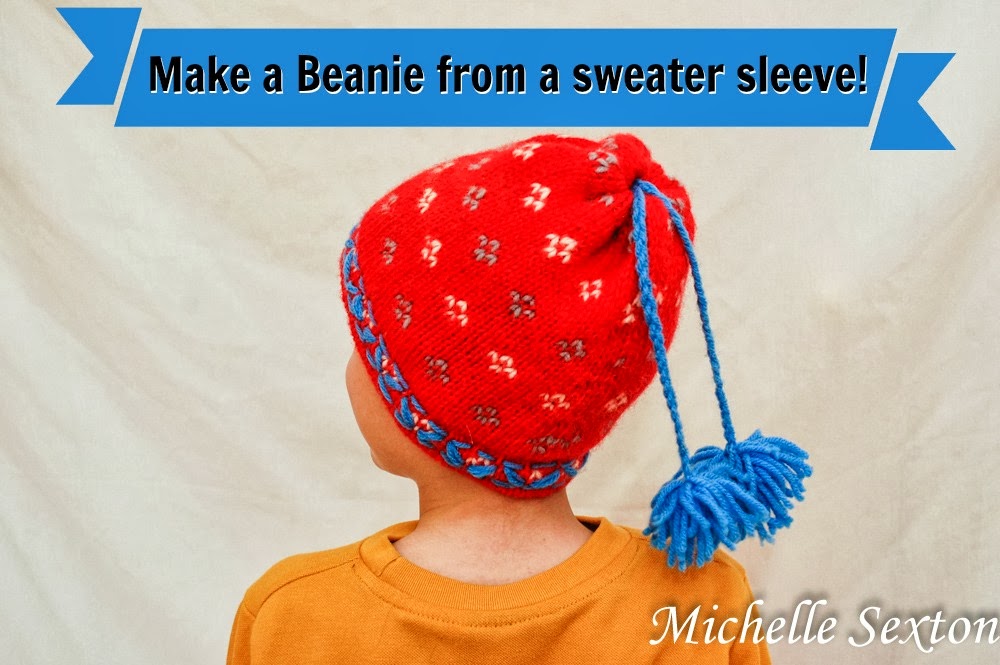
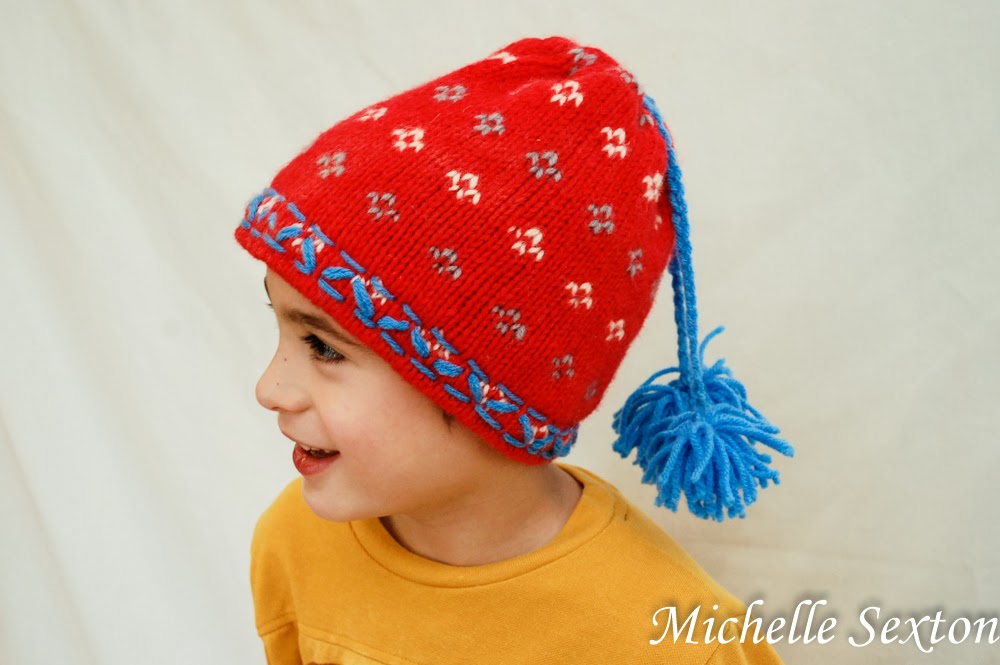
Have you had your fill of winter yet? Has Snowmageddon depleted your creative energy? Well, guess what? Here's an unexpected and easy sewing project to make for your little ones in one evening. This easy little project may just make these last days of winter a little more bearable, once you see your little ones wearing these cute little beanies on their heads.

Learn how to make a beanie from a sweater sleeve with only a minimal amount of sewing! Click through and find out how.

Make this easy beanie with only a minimal amount of sewing - click through and find out how.

These beanies were made with the leftover material from an upcycled sweater project that I shared a couple of weeks ago. The sweater originally had gigantic baggy sleeves that proclaimed, "I'm so outdated!" They just had to go. So, I cut them off and made a cute pair of boot cuffs, and still had a bit of leftover sleeve material. Instead of tossing them, I thought, "Why not make hats for the boys?"

so many uses for one sweater!

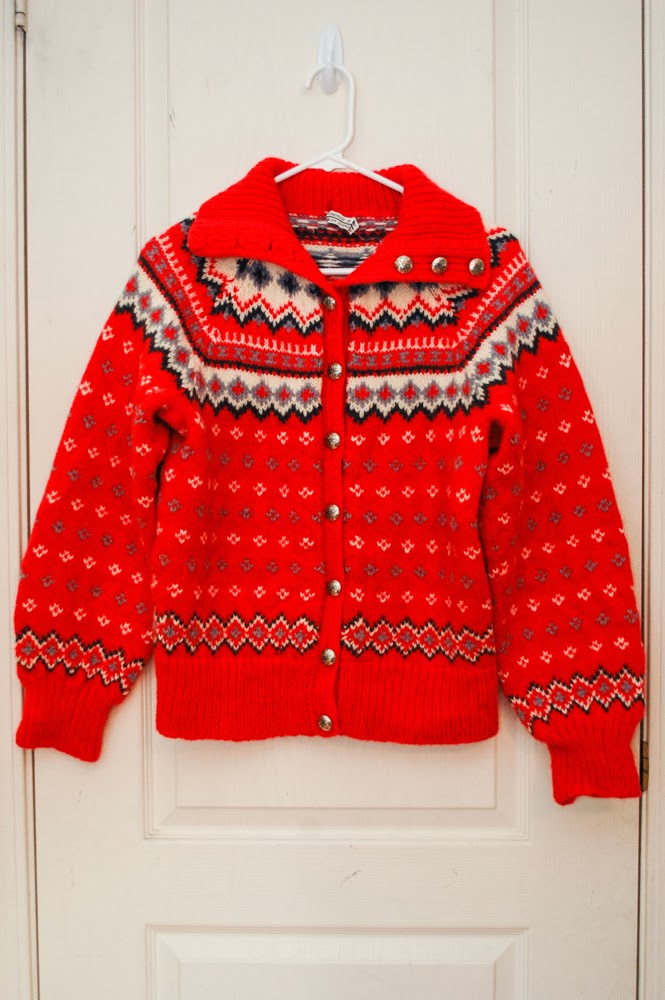
Here's the original sweater. It's a hand-knit wool sweater and a bit on the heavy side. This project is totally doable with the heavy wool sweater, but would probably work out even better on a medium-weight sweater. You'll need need at least 12 inches of a sleeve to work with (per hat).

Here's how I made these cute little beanies:
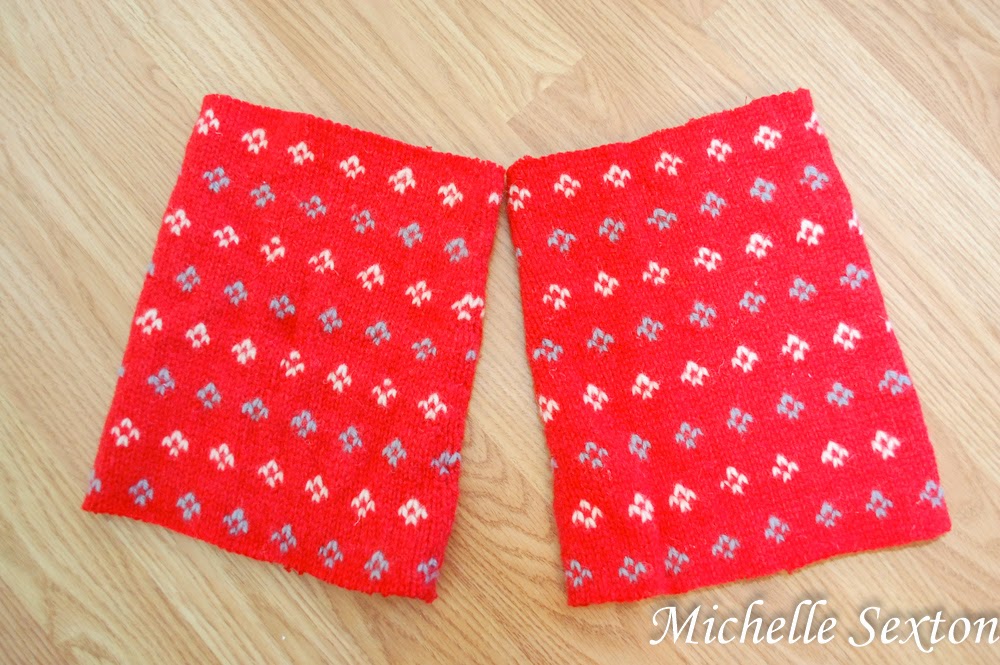
start out with two sweater sleeves

Start out by serging each trimmed end of the sleeve to prevent the sweater from unraveling as you work on it.
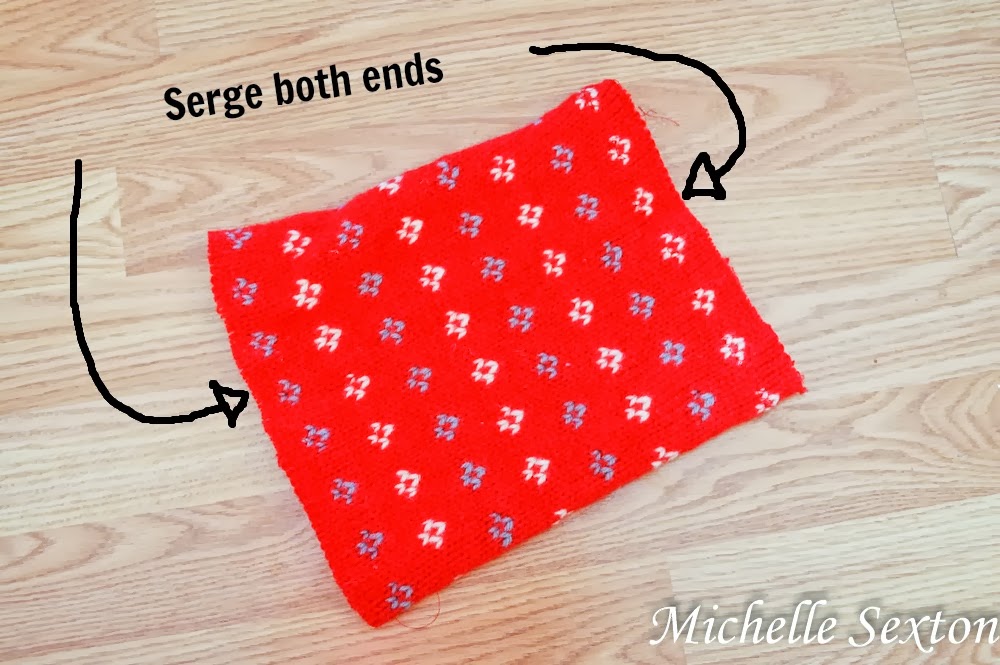
serge both ends of the sweater

pin the ends

Turn the sleeve inside out, fold one end, and pin it. (This is the top portion of the hat. So, if the sleeve has a smaller end, it would be ideal to use the smaller end here.) Side note: the photo shows both ends pinned, but you can pin each end and work on them one at a time.
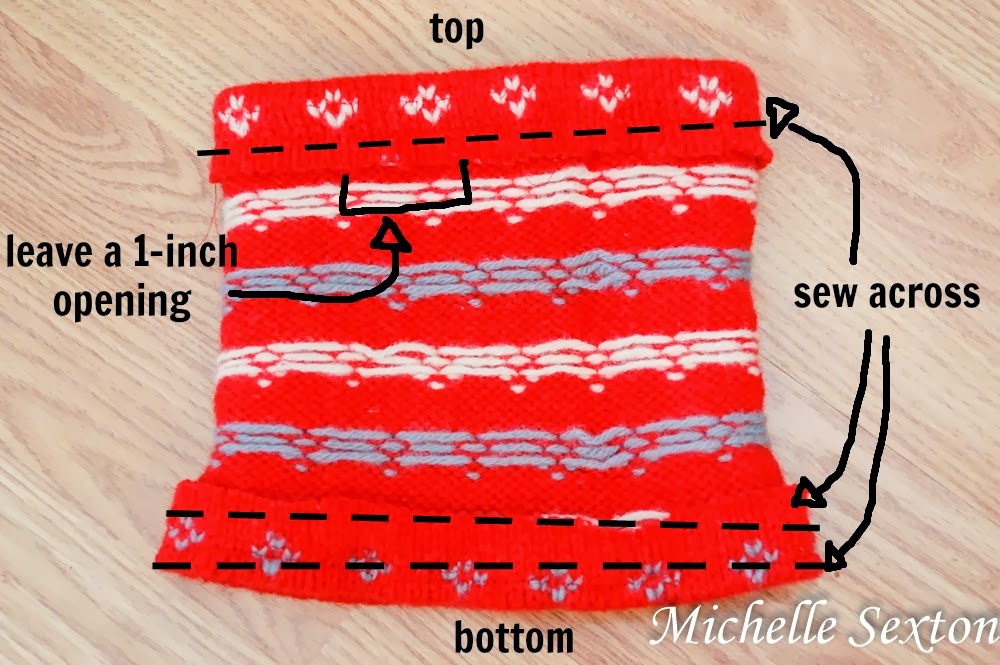
sew across each opening

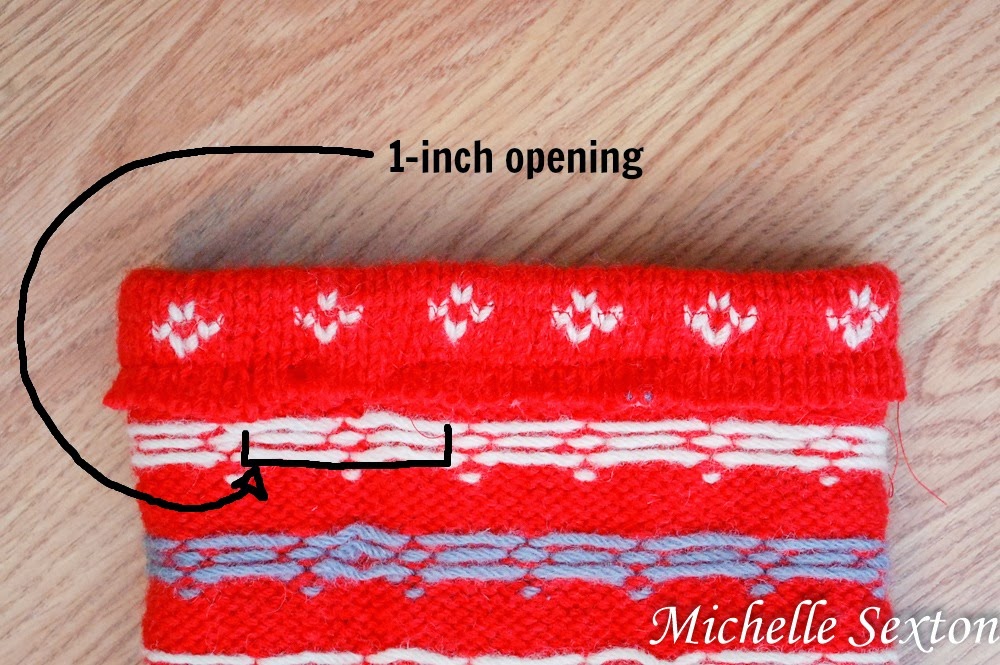
leave a 1 inch opening

Sew a line about 1 inch above the fold of the sleeve, leaving a 1 inch opening between the starting and ending points. Be sure to run the sewing machine forward and backward a couple of times to prevent the stitch from unraveling (at the starting and ending points), especially since the ends are not connected. (I used a serged stitch here, but a straight stitch would be fine too.)

While the sleeve is still inside out, fold the opposite end of the sleeve over, pin, and sew two separate lines over the folded portion.  Make one about 1/4 inch above the fold and one about 1 inch above the fold to create a faux brim. This time, make sure to connect the beginning and ending points.

Guess what? That's all the sewing needed! For. Real. Gasp!
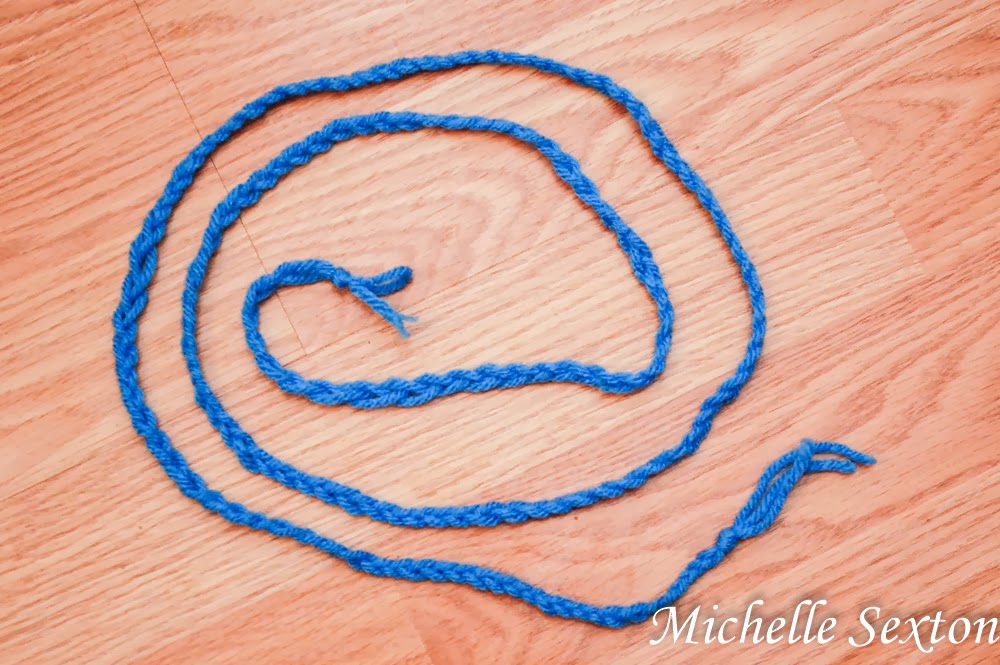
braid 3 strands of yarn together

Set aside the sleeve/hat. Braid three strands of yarn into approximately the length of 2 feet.

thread yarn through the top opening

use a crochet hook to thread yarn through top opening

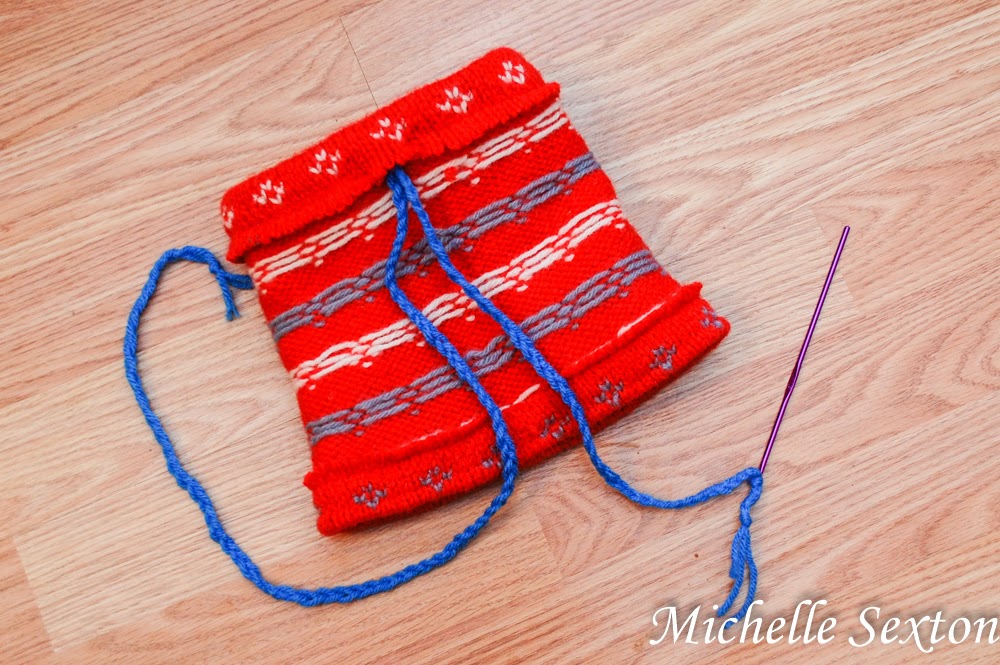
Tie one end of the braided yarn onto a small crochet needle.  Thread the yarn through the top opening of the hat (the end with the 1 inch opening) and out the other end to create a "drawstring".
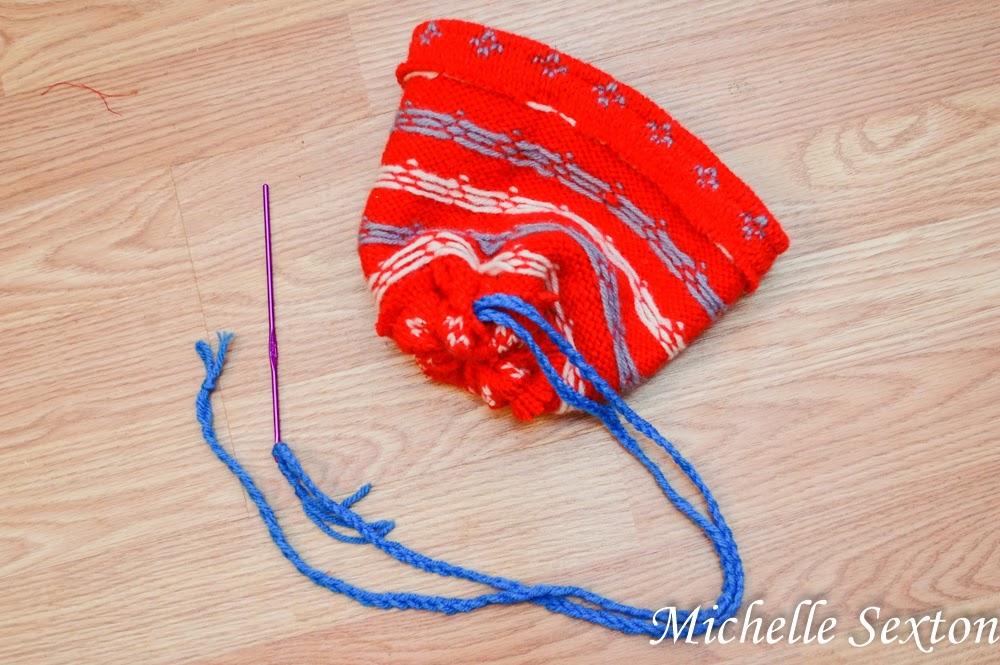
pull tight and tie a square knot

turn hat right side out and pull yarn strands through

Pull the yarn tight and tie square knot. Turn the hat right side out and pull drawstrings through the small opening at the top of the hat.
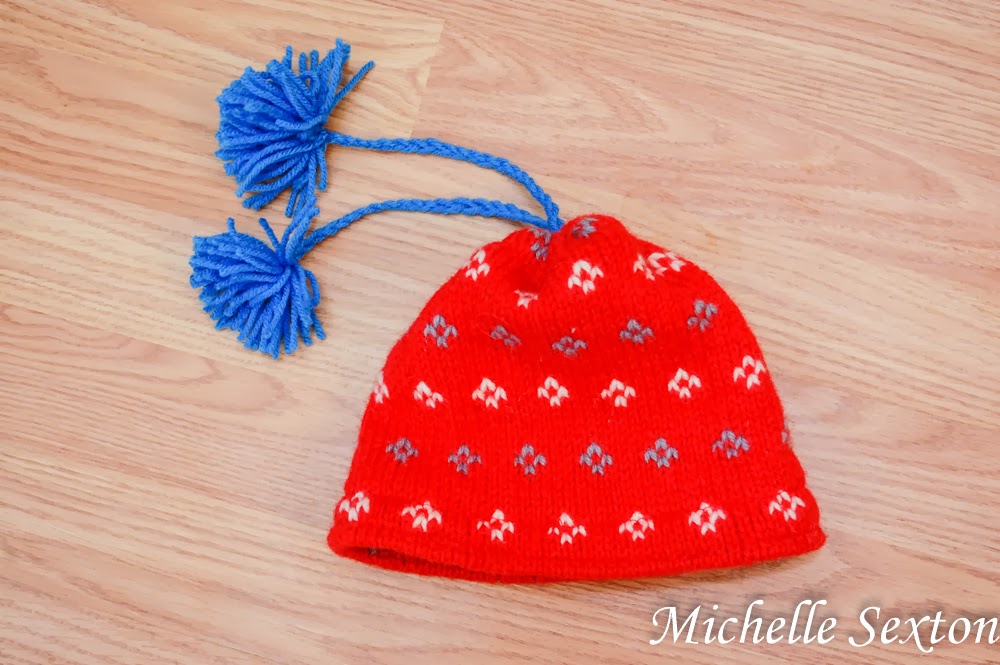
trim ends and add pom poms

Trim the ends of the drawstrings, leaving approximately 8 inches (or more if you like), and tie off the ends. Make two pom poms and attach them to each end of the drawstring.

embroider a pattern on the brim

Double threaded a plastic needle with yarn, then "embroider" a cute pattern onto the "brim" of the hat.

Make a beanie from a sweater sleeve with a minimal amount of sewing - click through and learn how

Easy way to convert a sweater sleeve into a beanie - click through and learn how

Wa-La! That's it! Easy-Peasy. Who would have ever thought to make a hat out of a sweater sleeve??
:)


Thursday, February 13, 2014

Spring Flower Wallpaper for Android and iPad Tablets

Over the past couple of weeks, I have taken note of several comments, spanning multiple social media platforms, about the anticipation of Spring. Now that the Holidays are over, it seems the whimsical winter wonderland desires have faded, and everybody is ready for Spring. Are you with me? Is anybody else ready for Spring?

I am definitely ready for Spring. In fact, to be quite honest, I dread this time of year. It's so uninspiring, cold, and well...boring. Lately, I've found myself day dreaming about the Spring Season - the activities, the weather, the clothes, so much so that I've even been doodling about it. So, if you're in the same Post-Holiday/Pre-Spring Funk that I've been in, perhaps this will cheer you up and maybe even give you a little inspiration.

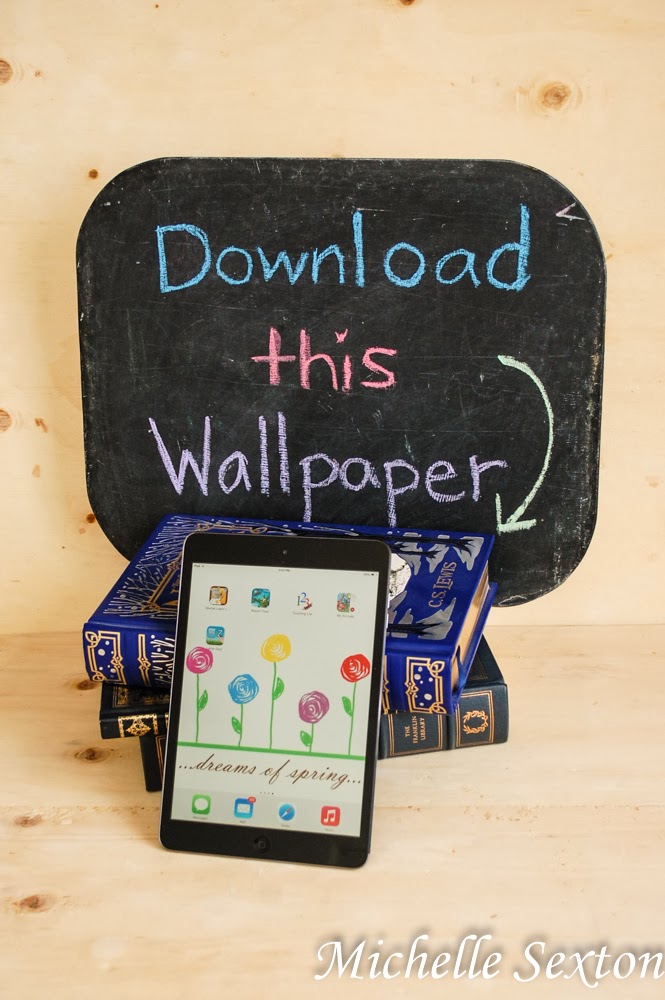
I have a fun, Spring-inspired wallpaper for iPads, iPad minis, and yes, even Android tablets. (We don't discriminate in this household. We use both Android and Mac devices.) Download this wallpaper and remind yourself: Don't despair! Spring is coming. It's just around the corner.

Tuesday, February 11, 2014

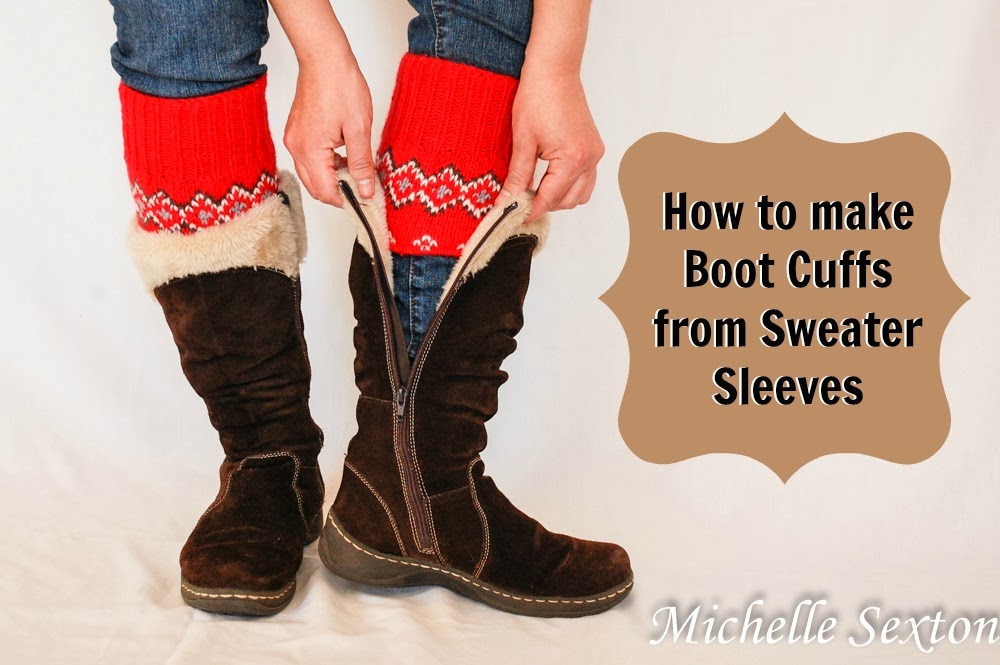
Sweater Boot Cuffs from Sleeves DIY in 15 minutes or less

I have a "thing" for upcycling clothes. I've mentioned it before, so I apologize if I sound like a broken record, but I LOVE it. I find it incredibly gratifying to change up an unused article of clothing into something better. I also find it fun to save the unused and discarded pieces for future projects. It's kind of like a game for me...or more like a challenge - "How many different things can I make from this ugly sweater?" The answer? Lots of things! Last week, I shared about how I converted an ugly sweater into an awesome, non-dorky vest...well, at least I think so. Anyway, I saved the sleeves from the sweater and decided to use them for something else - Boot Cuffs.

I know what you are thinking - "Wait a minute...didn't you make boot cuffs a couple of years ago?" Nope. It was leg warmers and mock boot socks. Here's the thing - the legwarmers and boot cuffs are awesome (and yes, I still wear them and still get compliments), BUT some of my boots fit so snugly, I'm not able to wear the leg warmers and zip up boots. Oh, the tragedy! (First world problems right here.)

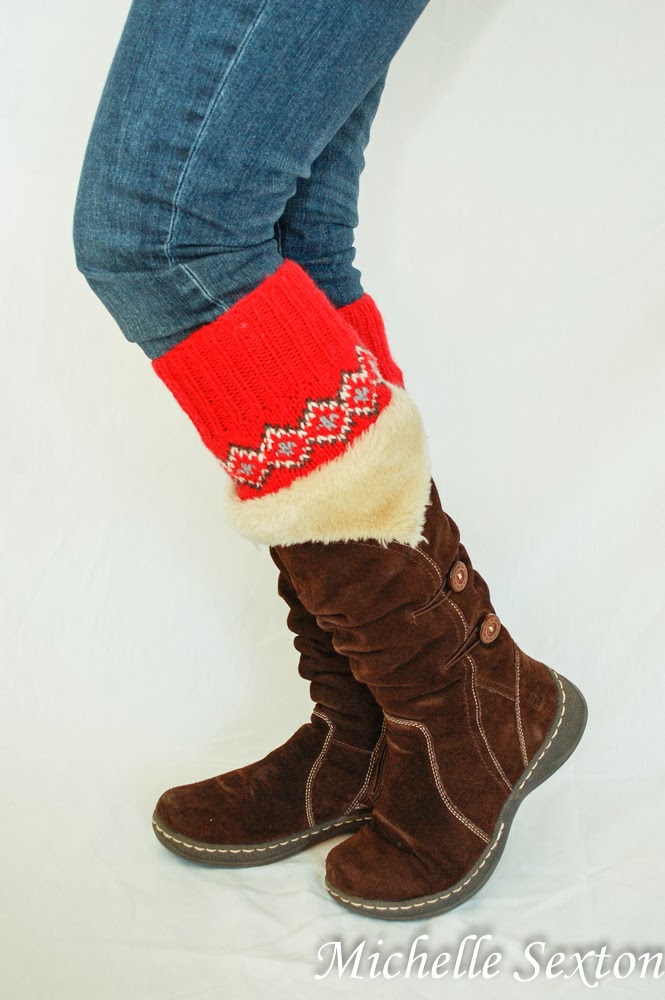
Enter the boot cuffs - the perfect solution for snug fitting boots. Isn't the whole point of wearing leg warmers to show off the cute "socks" by allowing them to peek over the top of your boot anyway? (Well, aside from the fact that they provide extra warmth). Duh! Why didn't I think of this sooner? I'm going to blame it on the Mom Brain. Yeah. By the way, I forgot to mention this earlier, but this project was so easy, it only took 15 minutes to make. Sssssssssssscore!

How to turn sweater sleeves into boot cuffs - 15 minute tutorial - click through and learn how.

So, it all started with the sweater. Sweet, wonderful, loud, hand-crafted sweater from Norway. It spoke to me that day in the second-hand store and said, "You know I'm wonderful. I just need a little work. Please buy me so I can reach my full potential." So, of course, I had to oblige.

upcycle an old sweater into new articles of clothing

Here's how I made the boot cuffs:

how to turn sweater sleeves into boot socks

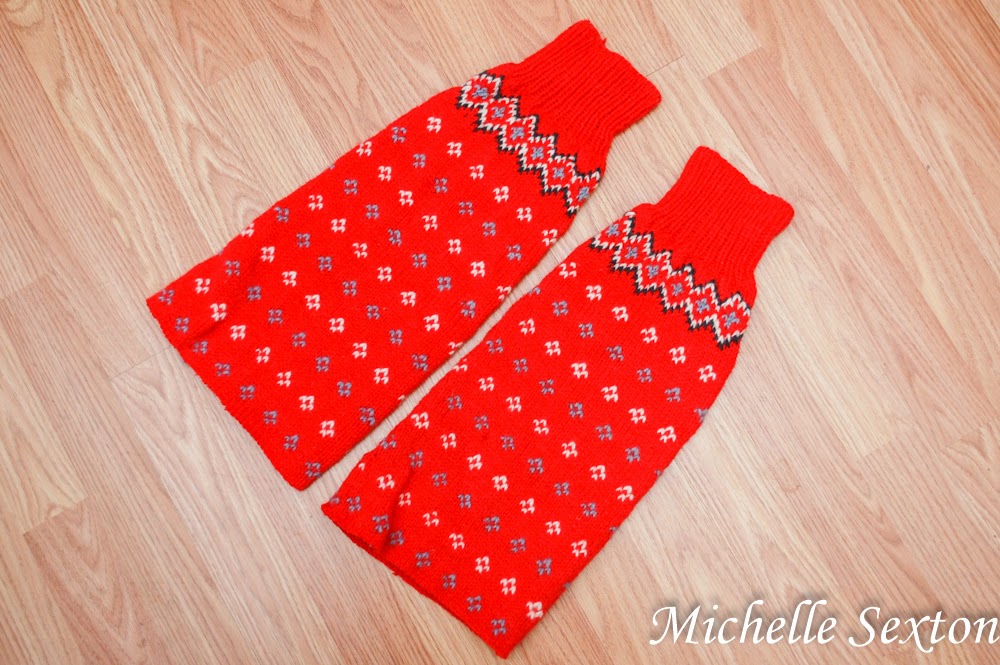
I started out with two leftover sweater sleeves.

turn sweater sleeves into boot cuffs - start 8 inches below cuff.

make sweater sleeves into boot cuffs

serge at the bottom

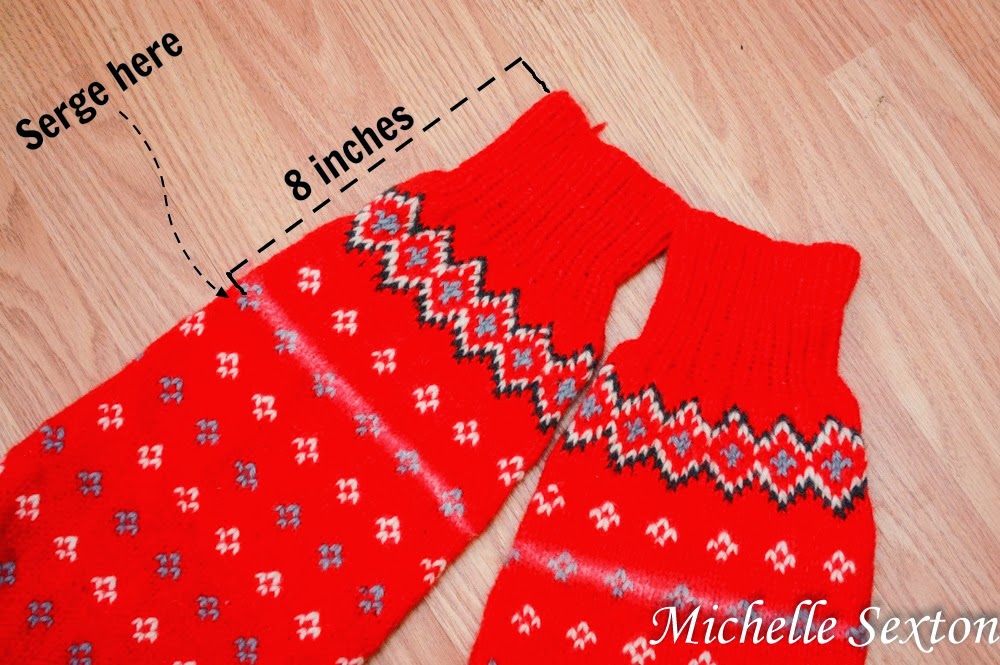
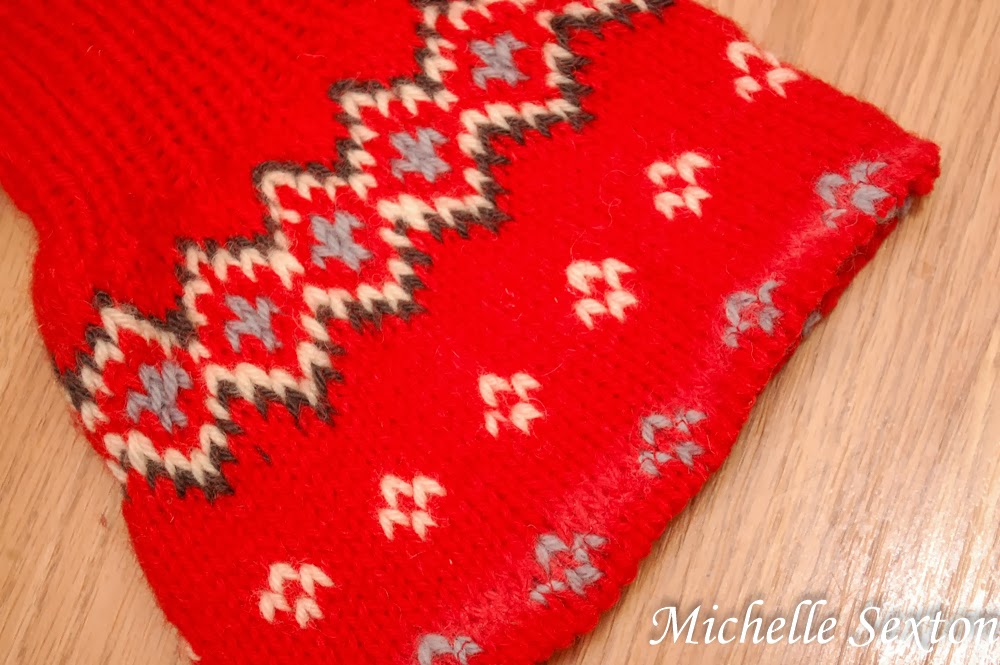
Starting at the cuff (the portion of the sleeve that sits on your wrist), measure approximately 8 inches down and serge a line completely around the sleeve. Trim off the excess fabric below the serge.

turn inside out, fold over, and pin

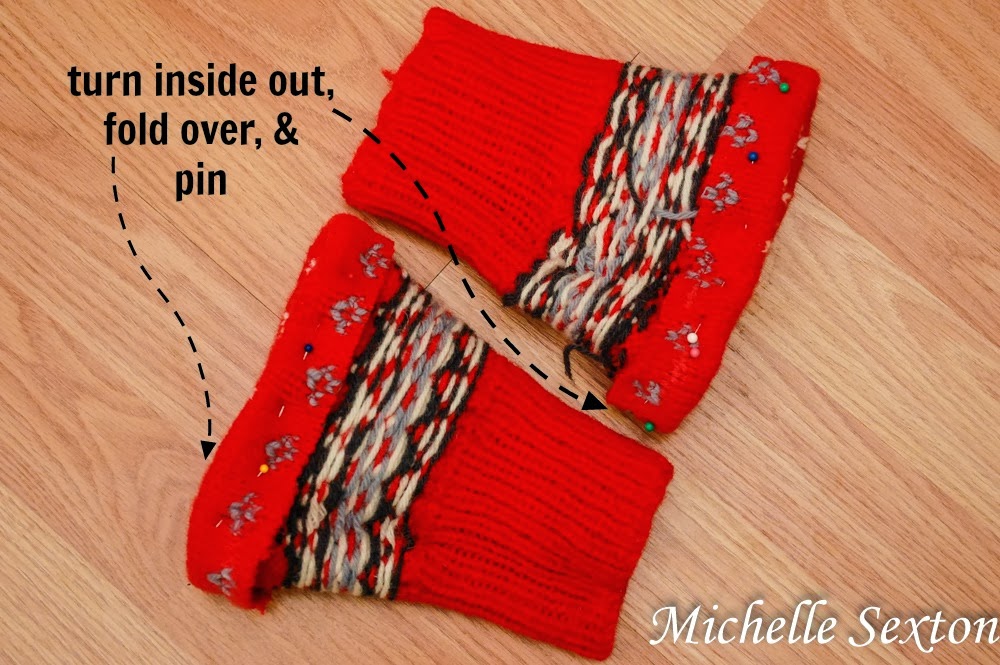
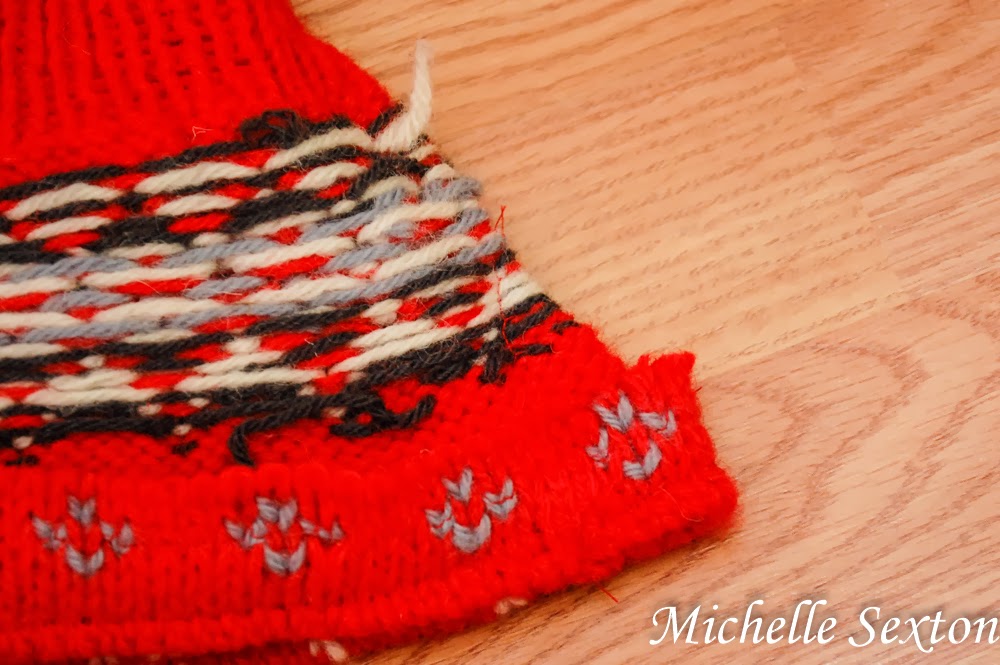
Turn the serged sleeve cuff inside out, fold the fabric, and pin. Serge (or use a straight stitch on) the pinned portion of the fabric.

measure excess, mark, sew, and trim

serge along marked path

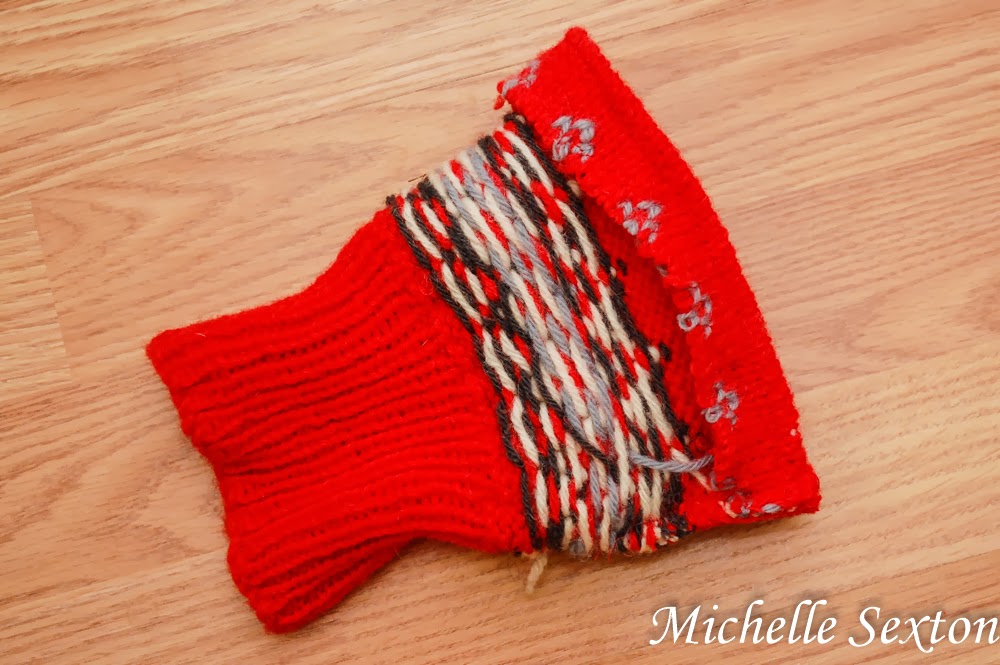
Almost done (believe it or not)! Turn the sewn cuff right-side out and slip it onto your leg, just below your knee. If the cuff fits snugly, breathe a sigh of relief and relish in the fact that you have completed this simple project with very little effort. However, if the cuff came with really baggy sleeves, like mine did, you have one more adjustment to make. Since the baggy sleeves fit loose around my calves, I had to taper the sleeve portion to create a snug fit. While wearing the cuff, get an approximate idea of how much fabric needs to be removed to achieve the desired fit around your calf. Turn the cuff inside-out again and mark the fabric. If you like to be precise, you can use a measuring tape and mark off the excess fabric. I'm impatient, so I estimated and marked about a "pinch" of fabric. Sew a line down the marked path and trim off excess fabric.

finished product, inside out

Turn right-side-out and wear! That's it, friends! Super quick and easy!

Make boot cuffs from a pair of sweater sleeves - simple 15 minute tutorial

Hey, guess what? Did you like this little mini-upcycled project I did with the leftover scraps from last week's project? I made something else, too. Come back next week and see what it is. :)

Thursday, February 6, 2014

Baked Hash Brown Patties

If I were to ask you what your favorite breakfast side is, would the answer be hash browns? Yes? I knew it! Hash browns are pretty high on my list of favorite breakfast sides...in fact, I'm pretty sure they ARE my favorite side to eat for breakfast. Yes, yes they are, and now I know that you like them, too. So, do you want to make some? (Pshhh...like I really have to ask! I KNOW you do.) I found an awesome upgraded recipe for hash browns to share with you. These aren't your typical hash browns. Instead of frying the life out of those grated potatoes (and adding waaay too much grease), we bake them! They're not as crispy as the fried version, but these hash browns are still firm, non-soggy, and extremely satisfying, you won't even miss the crispies.  They have several bonus ingredients in them: onions, garlic, cheddar cheese, and even eggs! What? Oh, yes they do. But wait, there's more - the coup d'etat of this dish is a hint of sour cream and bacon to top off these baked hash brown patties. What more could you ask for? Nothing, really.


Ready to make them? Great! Let's get started:

Ingredients:
- 2 pre-cooked hickory-smoked bacon slices
- 2 teaspoons of olive oil, divided
- 3 cups of chopped frozen (thawed) onion
- 3 garlic cloves, minced or put through a garlic press
- 1 1/2 pounds of shredded peeled baking potato (about 2 large ones)
- 1/3 (1 1/2 ounces) reduced fat shredded sharp cheddar cheese
- 3/4 teaspoon salt
- 1/2 teaspoon freshly ground black pepper
- 2 large eggs
- cooking spray
- 1/2 cup reduced-fat sour cream


Make it like this:
Preheat oven to 425 degrees. Peel and grate potatoes. Then, put potatoes in a clean dish towel and gently squeeze out the excess moisture. (super important step to avoid soggy hash browns)

Heat olive oil in a medium non-stick skillet. Add onion and cook over medium high heat for 5 minutes, stirring occasionally. Add garlic and cook for 2 minutes, stirring frequently. Remove from heat and allow onion mixture to cool for 5 minutes. Combine onion mixture, grated potato, cheddar cheese, salt, black pepper, and eggs in a medium bowl, stirring well. Put pre-cooked bacon on a plate lined with paper towels and heat for 40 seconds or until crisp (assuming the bacon needs to be reheated). Set aside.

Divide the potato mixture into 8 equal portions and shape each portion into a 1/2 inch thick patty. Place the patties on a baking sheet coated with cooking spray. Coat tops of patties lightly with cooking spray. Bake at 425 degrees for 15 minutes. Flip and cook another 10-15 minutes on the other side (or until patties are dark golden and set). Top with crumbled bacon and sour cream.


Eat and enjoy these baked hash brown patties and then repeat again the next day. :)

By the way, I found this recipe on the Shrinking On a Budget website.

Tuesday, February 4, 2014

Easy Upcycled Sweater Vest Tutorial

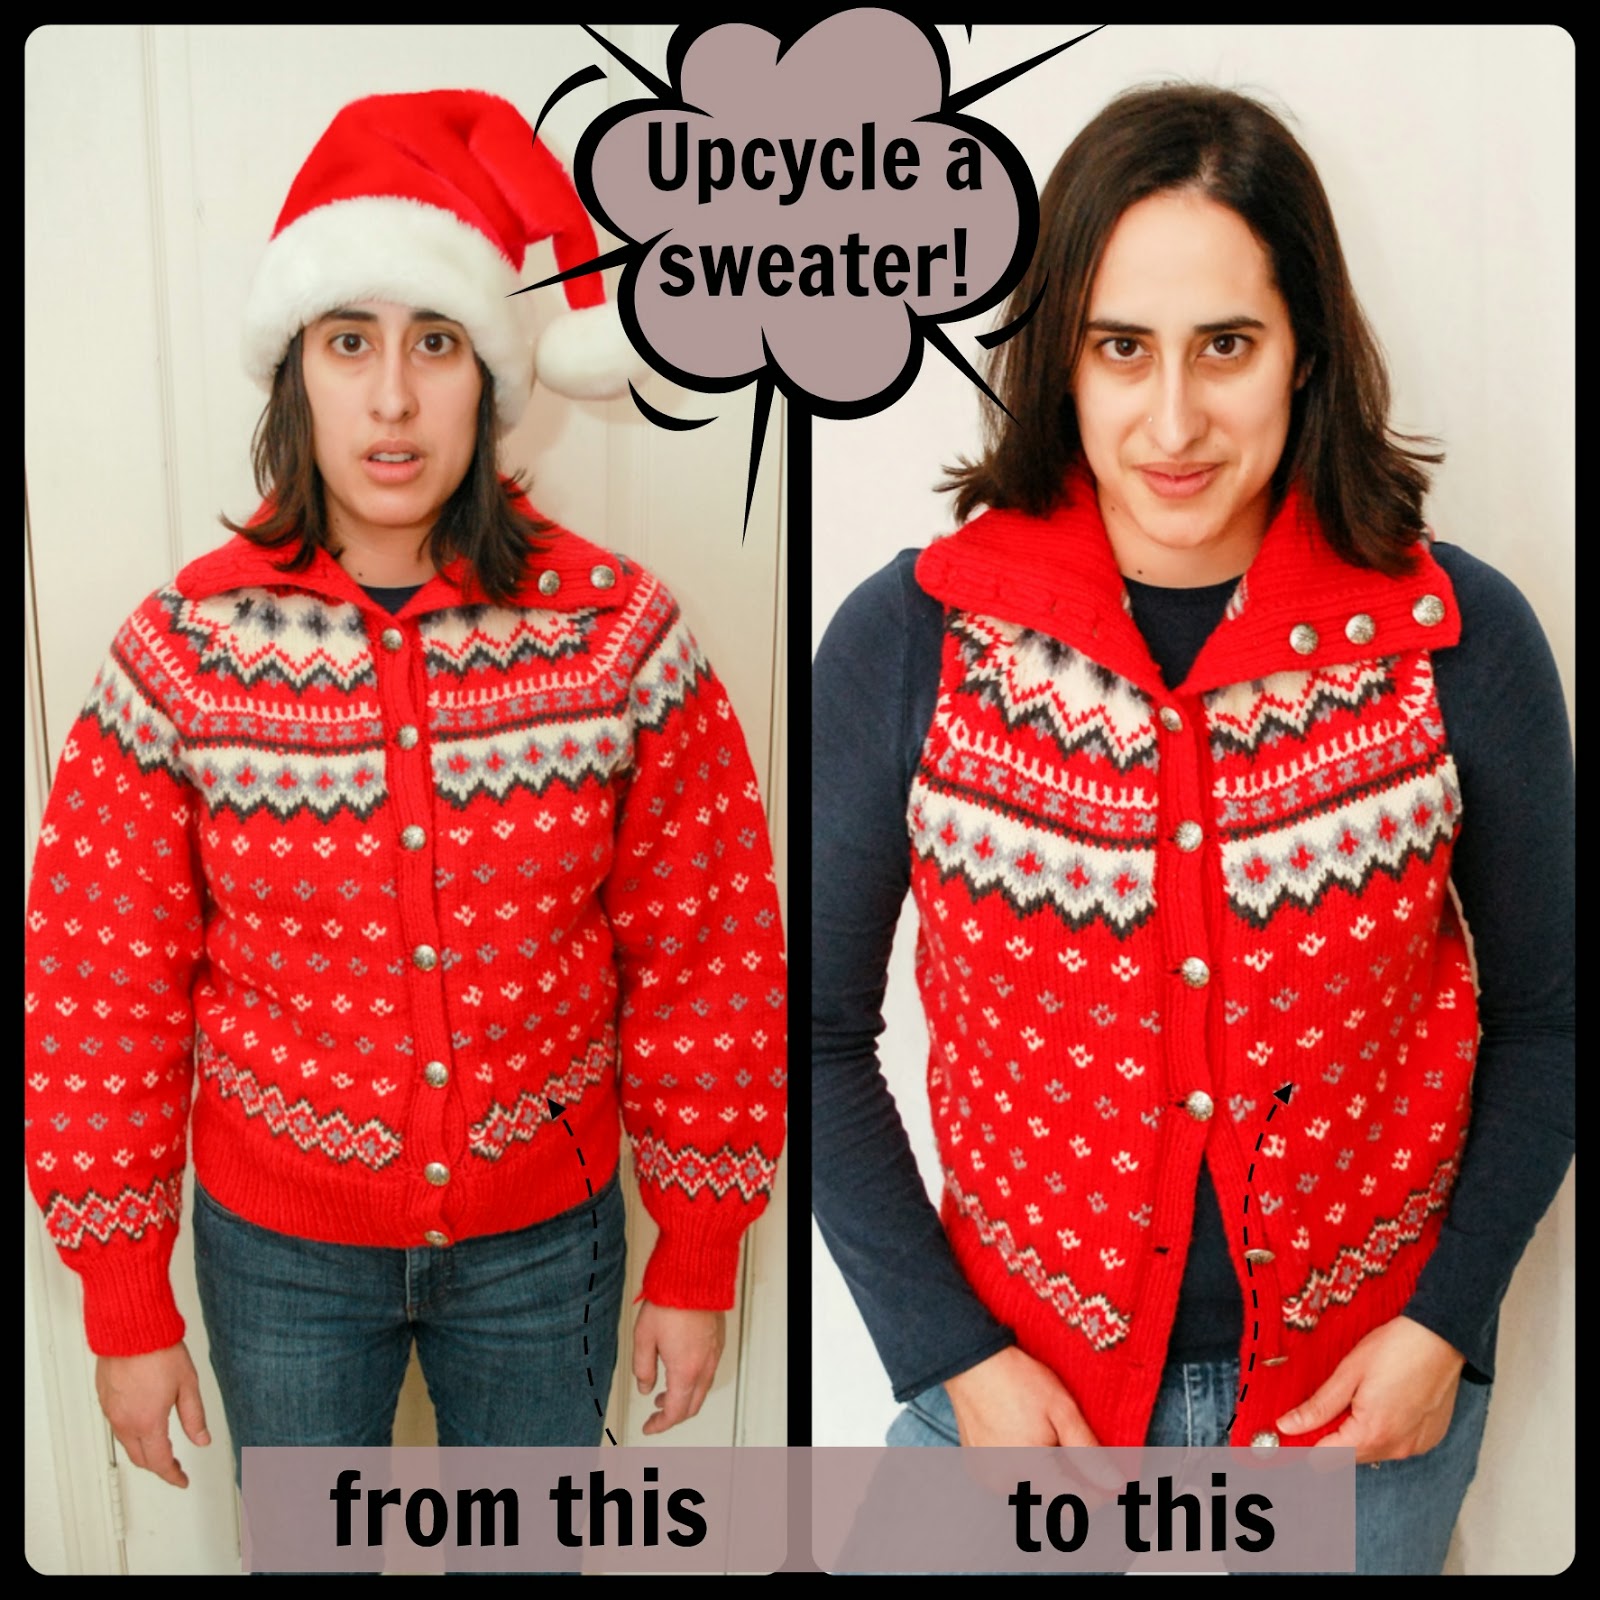
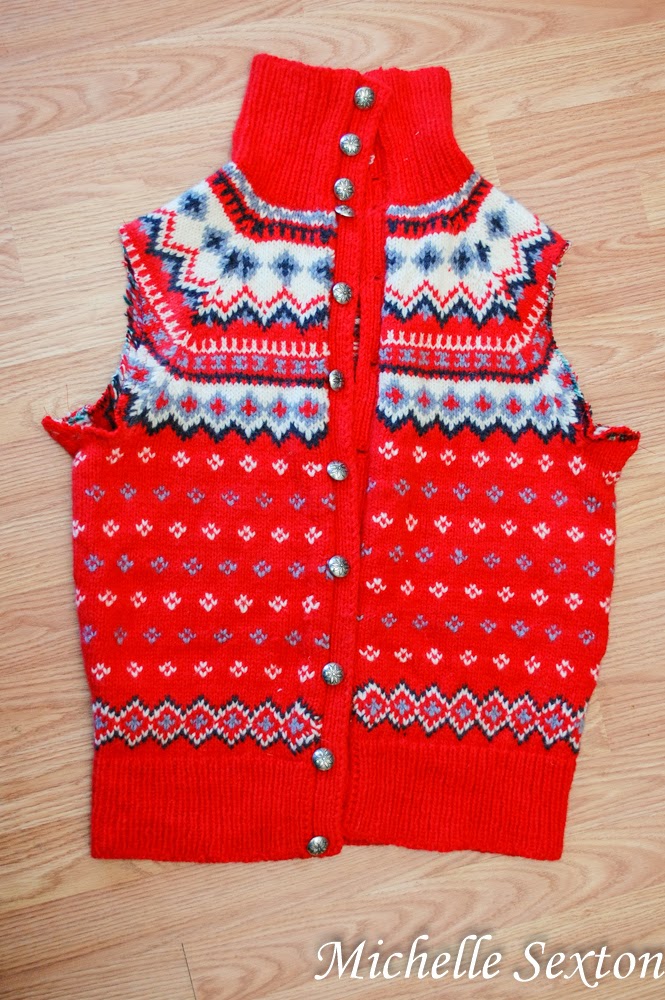
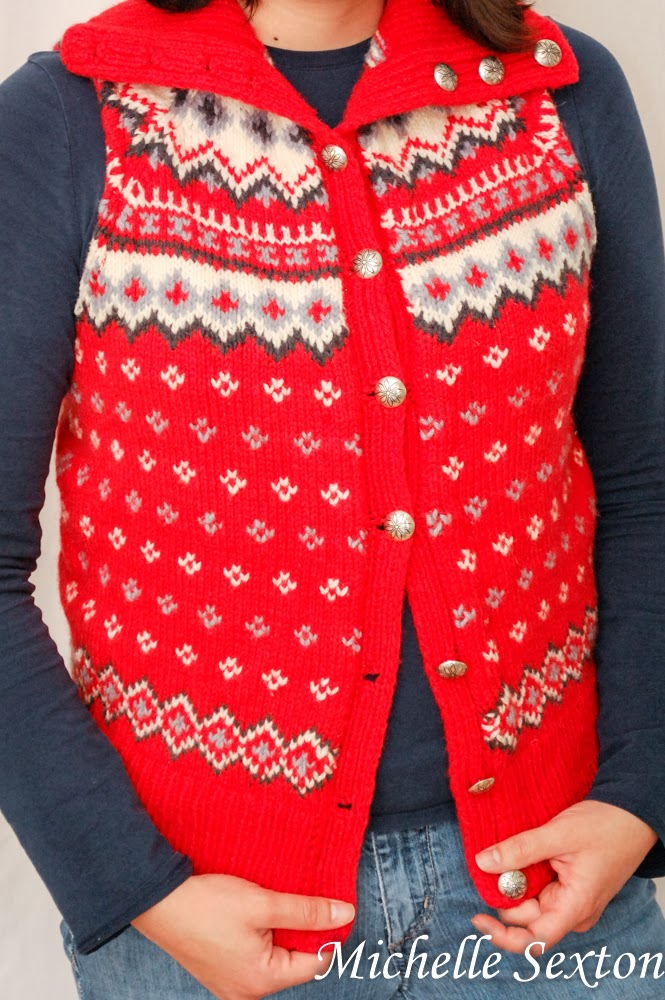
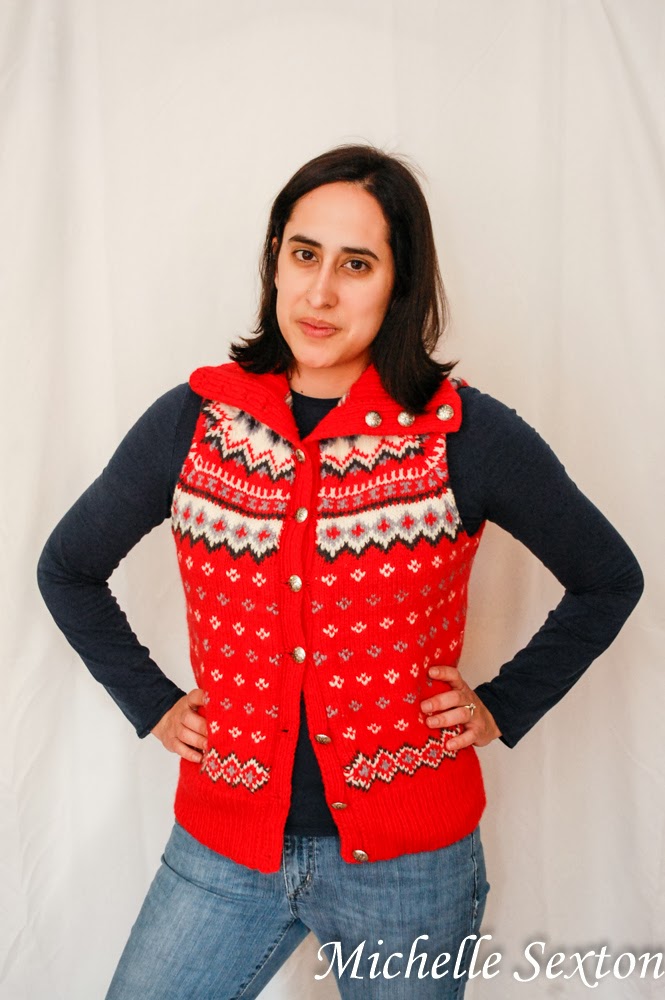
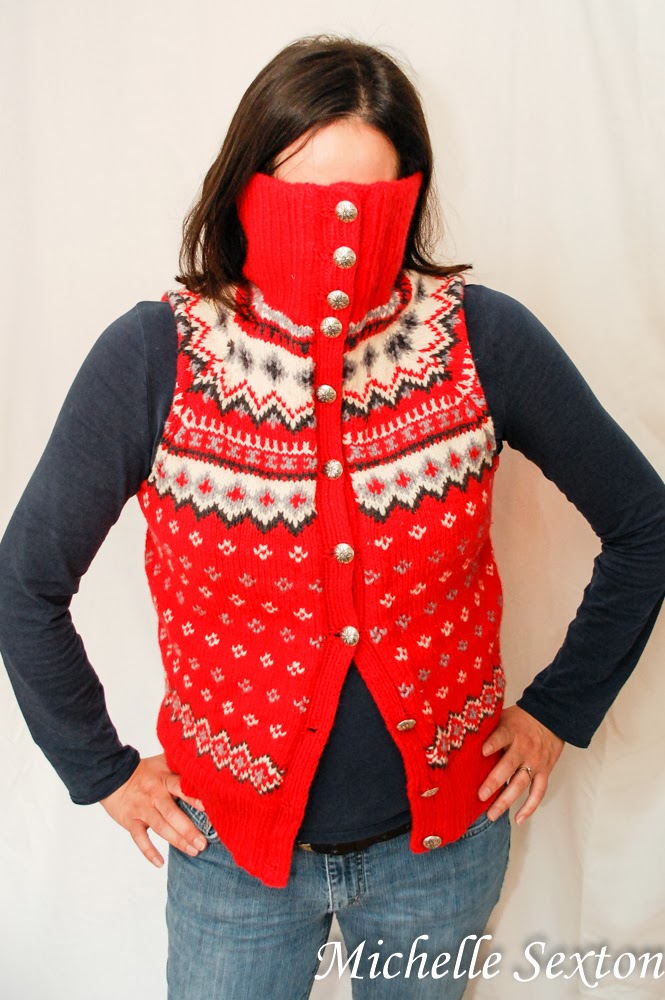
Did you know that upcycling is one of my favorite things to do? You didn't? Well, now you do. I get a great amount of satisfaction in converting an unwanted article of clothing into something new and different. It's just so much fun. I've had this sweater in the back of my closet for a while, begging to be changed into something else. It needed to be upcycled. Rest assured, I never actually wore this sweater until after I upcycled it. (I heard those sighs of relief. Yeah.) This hand-knit sweater from Norway was truly a diamond in the rough with its Fair Isle pattern, beautifully crafted buttons, and amazing fold-over collar, but it was hard to appreciate it's beauty. So, I gave this sweater a small make-over and turned it into a sweet sweater vest. When I wear it now, I pretend I live in Maine...because, somehow, Maine seems exotic to a person who has lived in the desert for most of her life. And in my mind, people in Maine wear sweater vests like this. Don't be offended.

Easy Upcycled Sweater Vest Tutorial - click through and learn how to make one.

A couple of years ago, I bought several clothing articles from a second hand store. It was one of those sales where you stuff as many items into a bag as possible and only pay 25 cents per bag. It was awesome. I found this awesome red sweater at that sale too. When I first found it, I was like, "Oh...wow...that's...loud," and then I put it back and continued sifting through the clothing piles. But, I couldn't get that sweater out of my head. Sure, it was loud, and even a bit eccentric, but the more I thought about it, the more I realized I actually liked this sweater. Not as it was, but I knew it had potential. So, I stuffed it in my bag, purchased it and brought it home. Little did I know, that at that time, I was pregnant with our second kid. (Pregnancy is not kind to me, and I have a very limited amount of creativity during this time. The only desire I have during these moments is to lay face down the couch with a trash can nearby, for puking, until my due date arrives.) A few days later, I found out I was pregnant. All plans to revamp this sweater were forgotten about until recently, when I switched out my seasonal clothes and came across this sweater. After casually considering my options for a month or two, I finally decided this eccentric sweater would be so much more awesome and a lot less crazy if it didn't have those frumpy, baggy sleeves. So, I got rid of them and now it's an awesome sweater vest and, currently, my favorite thing to wear. (I try not to wear it everyday because people might start to think that I don't wash my clothes.) ;)

Upcycle a frumpy sweater like this into something better - click through and see how
Before the upcycle

Before I start, let me just tell you, I am not a sewing expert in any way, shape, or form. I know how to work a sewing machine (uhh...mostly...or I can read the manual) and I can sew a straight line, but that's about it. This is an easy project, so don't get intimated if your seamstress skills are lacking. If I can do this project, you can too, provided that you can work a sewing machine...at least a little bit. :)

Ok. Project time.

Serge the sleeves before trimming

serge close up - upcycle a sweater
A closer look at the serged sleeve. Hard to see due to the fact that the thread is also red.

Start out by serging the top and bottom portion of the sleeves in a straight line, just above the armpit (pictured above) to prevent the sweater from unraveling once it's trimmed. Repeat the serge on the opposite sleeve, as well.

trim the sleeves of the sweater - upcycle a sweater

Once you have serged both sleeves, cut off both the sleeves below the serged line. (Side note: I recommend saving the sleeves to upcycle into something else - like maybe these awesome leg warmer/mock boot socks)

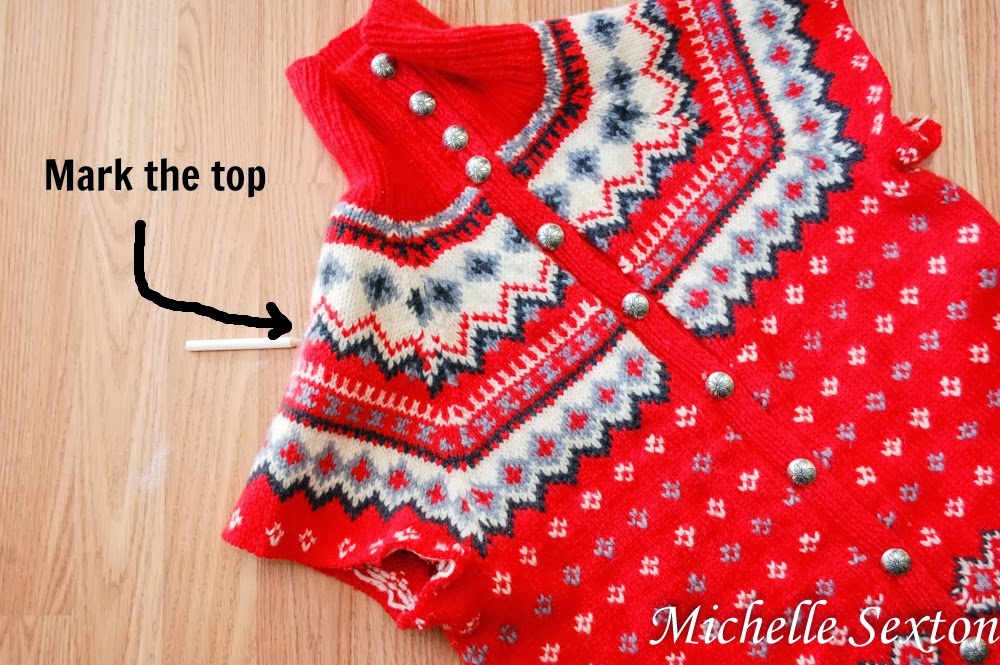
Mark the top of the sweater - upcycle a sweater!

Once the sleeves have been cut off, decide where you would like the top of the vest to end on your shoulder, and mark it.

Draw a path to make the arm cutouts - how to upcycle a sweater

Draw a rounded path on the top portion of the sleeve from the top of the marked shoulder to the bottom near the armpit.

serge along the arm cut out path - how to upcycle a sweater

Serge along the outside of the drawn path on the top portion of the sleeve only. Trim away the top part of the sleeve (after the top has been serged). Using the path made from the top part of the sleeve that has been cut away, trace the sleeve path onto the bottom half of the sleeve, serge, and then trim. (Be sure to connect the serge lines from the top portion to the bottom portion.)

fold the sweater in half to trace the arm cutouts - upcycle a sweater

Once the top and bottom of the first side of the sweater have been serged and trimmed, fold the sweater in half and trace the sleeve path onto the top portion of the opposite side of the sweater. Serge the top portion of the sleeve, cut away the excess, retraced the path onto the bottom portion of the sleeve, serge, and trim again. 

how to upcycle a sweater!

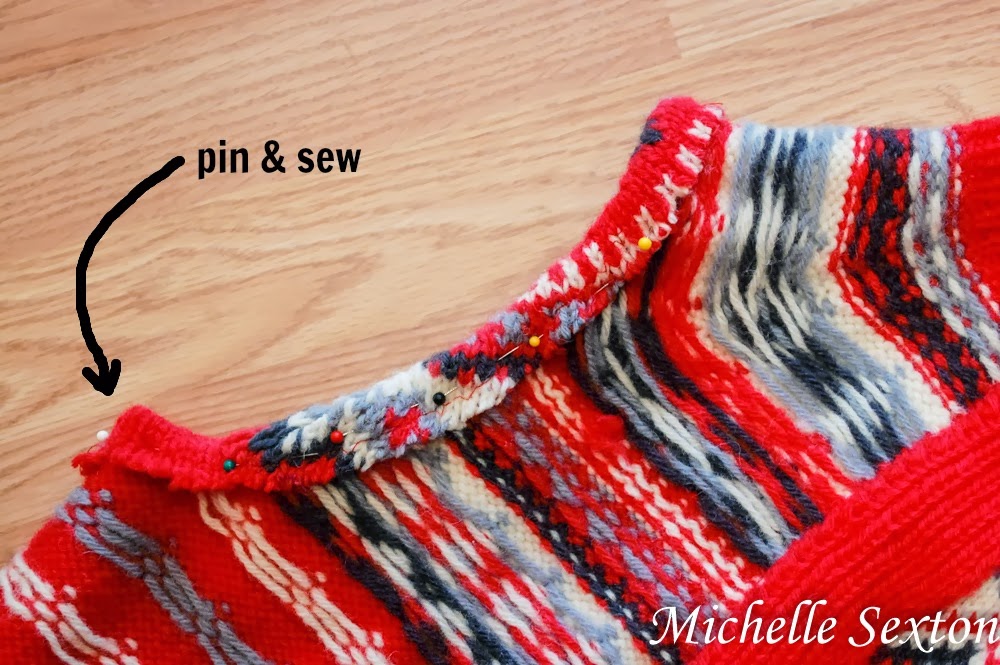
pin and sew the raw edges - upcycle a sweater!

Turn the sweater inside out, pin the raw edges, and sew a straight stitch along the edges. Trim the excess thread, turn inside out, and wear! 

How to Upcycle a Sweater - Click through and learn how

Easy way to upcycle a sweater into a vest - click through and learn how

I'm so pleased with how this turned out and it allows me to indulge in my Maine fantasy. Did you know I live on the coast and have a boat dock at the edge of my yard? I like to wear this sweater vest while I sit on the dock, sip the cappuccino in my mug, and watch the fishing boats off in the distance. Well, maybe not, but I can always pretend. (This sweater vest makes it all possible.)

easy upcycled sweater vest tutorial - click through and see how easy it is.

And look - the collar is still just as awesome as it was before. 

how to upcycle a sweater into a vest - click through and learn how

If it gets really cold, I can wear the sweater like this. Will you still be my friend if I wear it like this? ;) Go and make a vest for yourself now!

Thursday, January 30, 2014

Printable Finger Puppets - Free Silly Shapes DIY for Kids

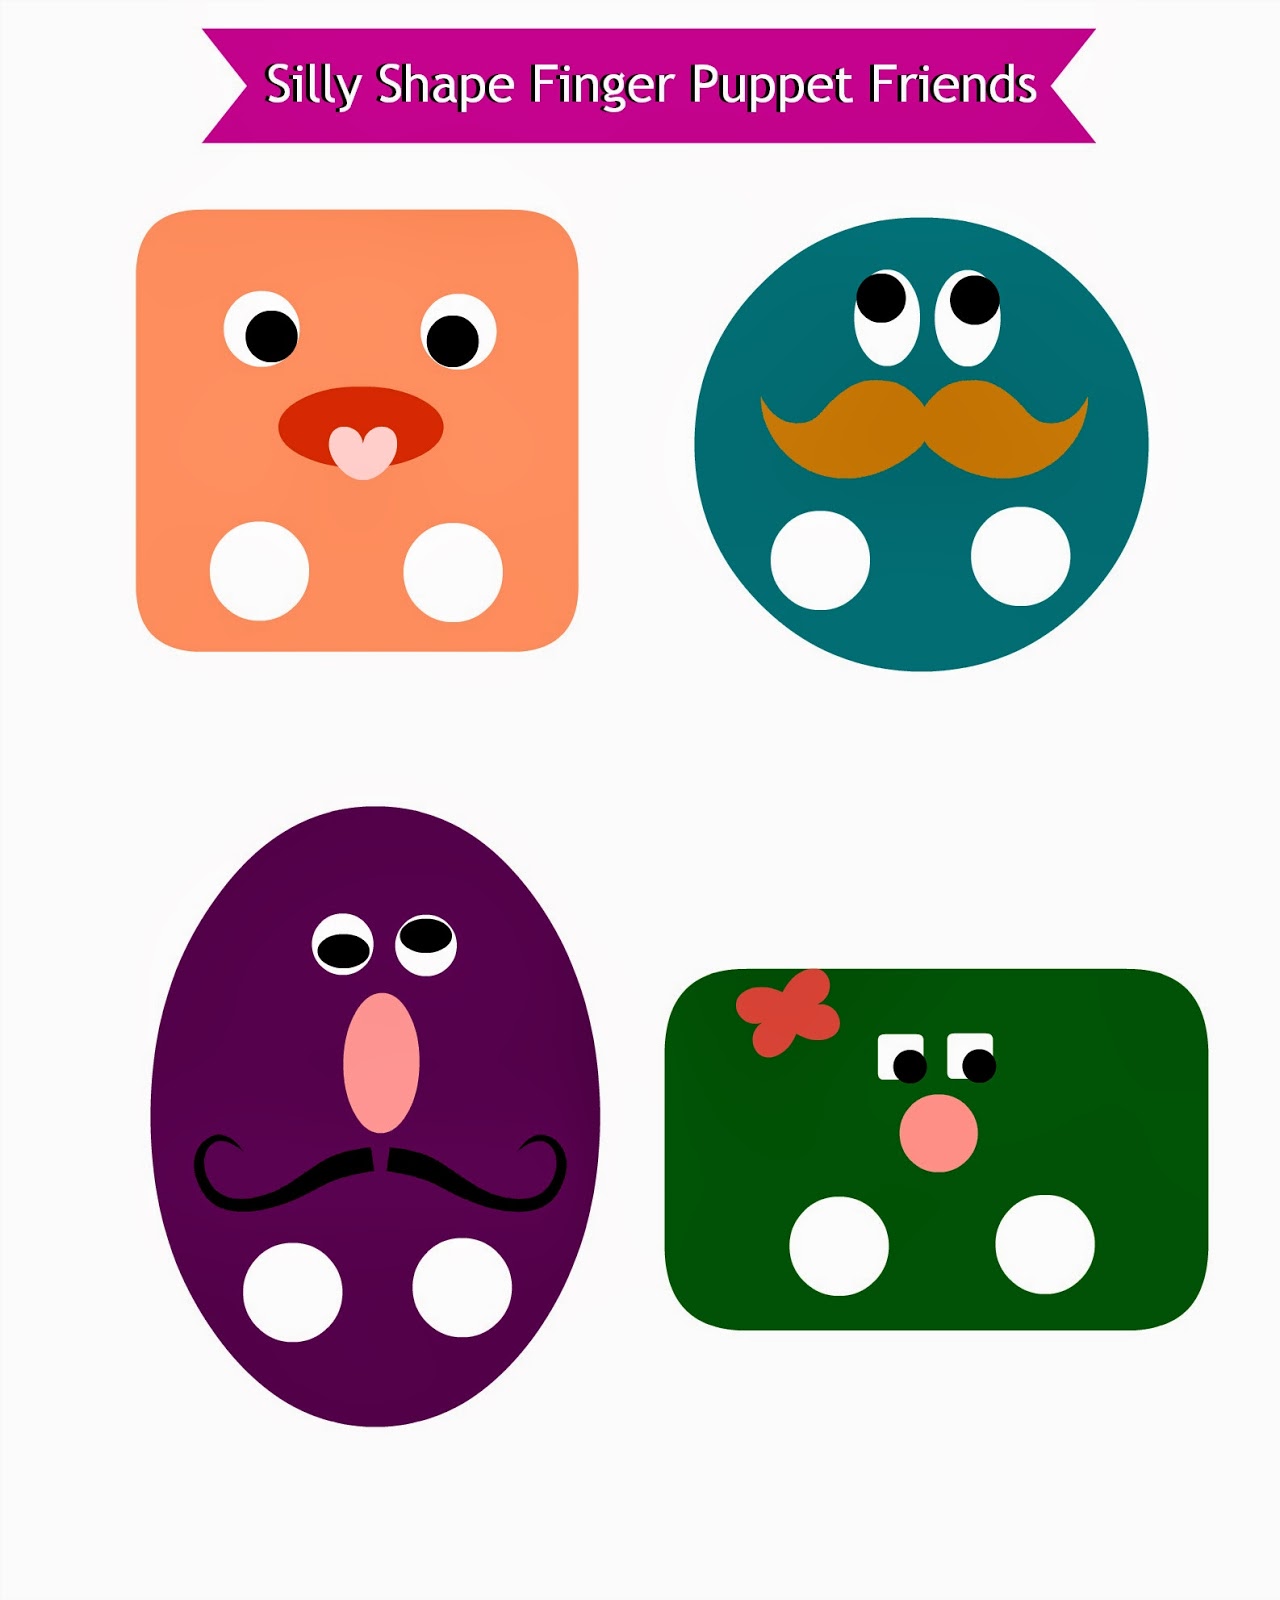
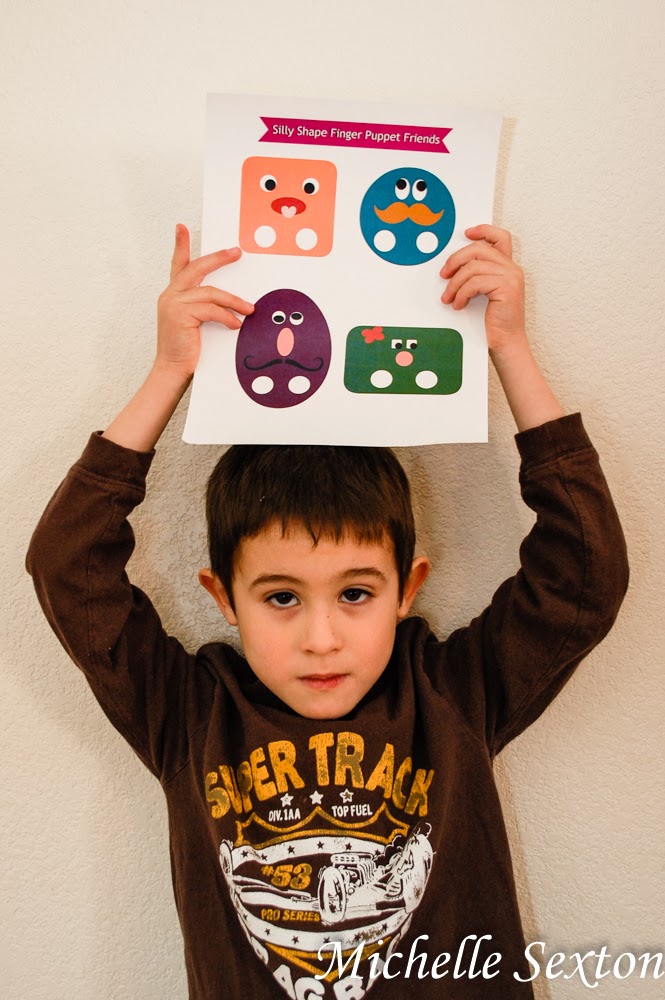
"I hate free stuff." Said no one, ever. Yeah, that's right. Why? Because everyone loves free stuff. I know you do, too....so, go ahead, raise your hand and admit it. You know what I love even more than free stuff? Free stuff for kids. What? Seriously? Oh yes, and here's why - every now and then, we're all prone to a bad day with our kids. Maybe everyone is going a little stir crazy after being locked in the house for a couple of days due to illness or bad weather. Or, perhaps you just need a little peace and quiet so you can finish fixing dinner before 9 pm. Whatever the circumstance, it's always nice to pull out a printable activity to keep the munchkins entertained. Yeah, it is. Actually, I've decided I like free stuff so much, I dedicated a whole entire pin board to collect Free Printables. (It's still new, so don't judge me for not having 4,531 pins on it yet.) So, ANYWAY, in order to feed my printable obsession (and, of course, to keep my kids entertained), I made this fun little finger puppet printable. The finger puppet printable was a huge hut in this house. Even Cheese got involved in the finger puppet playtime. (So incredibly adorable). I highly recommend printing these out for your household, too.

Free Printable Finger Puppets - Click through and download these!

By the way, print the finger puppets onto card stock for the best results.

Free Silly Shape Friends Printable - perfect entertainment for you kids! Click through to get these!


Hand out this cute printable to the munchkins.

Free Finger Puppet Printable - perfect way to entertain little ones

Get these finger puppets! Free printable to download  - click through!

And enjoy a little peace and quiet :)

Tuesday, January 28, 2014

Safety Pin Bib Necklace Tutorial

Do you remember the grunge phase of the 90's? I do. I was in high school back then. And, I was on top of the world...or so I thought. I rocked flannel shirts and combat boots...but my mom didn't let me wear torn jeans...so, I guess I wasn't that hardcore. Yeah...uhh...so, I have a craft to share. It's a safety pin bib necklace- with a hint of 90's grunge...but with a more grown-up taste. Hopefully. Wait! Don't leave yet! I know you're not ready to repeat the 90's grunge quite, yet (even though I've seen a recent appearance of combat boots and overalls), but stick around for a couple more minutes so I can show you how fly this bib necklace came out. (Did you pick up on that 90's slang I just used there?) Just don't tell anyone you're going for the 90's grunge, instead you're really more about rockin' the whole artistic appearance. They will definitely believe you.

This Safety Pin Bib Necklace is a creative and unexpected way to use safety pins - Click through and find out how to make this!

Ok, so back to the safety pin bib necklace. Here's what you're going to need:

Supplies:
- a box of safety pins, 100 count or more (I found gold ones in the craft section of Walmart)
- about 12 inches of black satin ribbon (1/4 wide)
- scissors

To Make a Safety Pin Bib necklace, start by making a chain of safety pins

To start the necklace, create a safety pin "chain" by connecting several pins (about 15 - more or less) together. Link each pin together through the "eye" at the top of the pin or the "loop" at the bottom of the safety pin.

Thread a ribbon through the safety pin chain to make a Safety Pin Bib Necklace

Next, thread the strand of ribbon through the middle of each safety pin link and center the "chain" on the ribbon strand. Be sure that the ribbon lays flat (not twisted) after threading through the chain. The threaded chain serves as the base of the necklace.

Tie a knot with the ribbon around both safety pins on the ends of the chain to keep the chain extended (not pictured).

safety pin bib necklace
starting to take shape...

progression of the safety pin bib neckace
progression - still adding safety pins

Fasten safety pins beneath the threaded chain until you have the desired shape. For the best results, each pin should be fastened either through the "eye" or the "loop" of the safety pin. This isn't required, but I've found that this is the easiest way to maintain the shape of the bib. Work towards an even and balanced bib shape.

I recommend tying off the ends of the necklace and draping the necklace over your knee as you fasten the pins in order to keep the necklace still.

There's a little bit of trial and error and removing and refastening pins that goes with this project as you determine the desired shape. This is an easy project, but it takes a small amount of patience (but just a small amount) as you construct the bib.

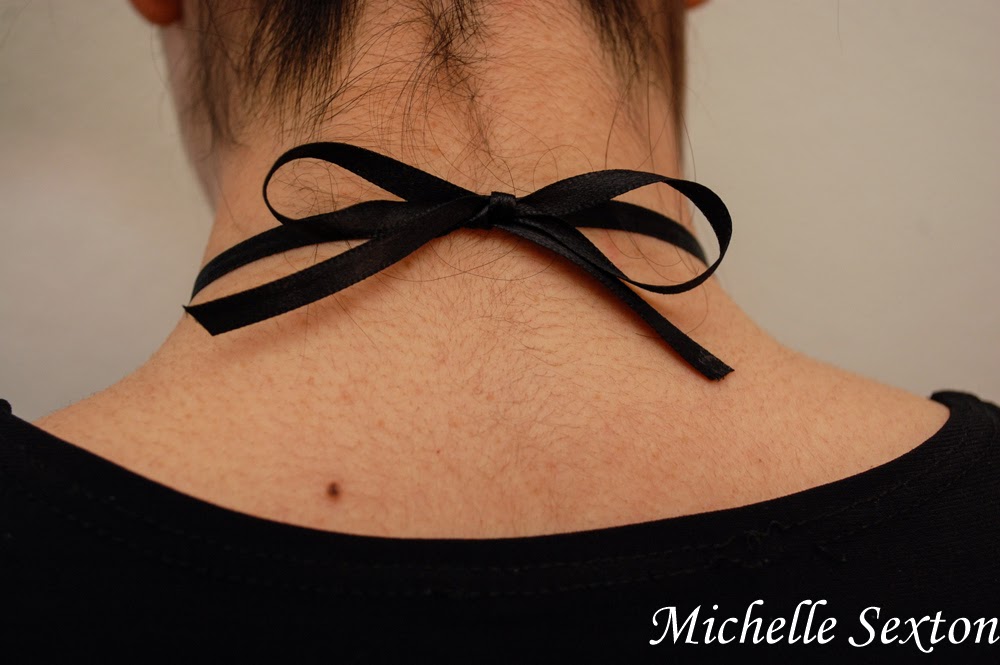
Tie a bow to wear this Safety Pin Bib Necklace

To wear this necklace, tie the ends of the ribbon into a bow in the back.

Make this Safety Pin Bib Necklace - Click through and find out how to make it.

Safety Pin Bib Necklace - Click through and find out how to make this

Once completed, wear this amazing necklace with pride. Each time you receive a compliment, reply, "Thanks, I made it."  :)