So Here's My Life

The things we make,
the food we eat and
the shenanigans in between.

A blog about making things by
MICHELLE SEXTON

Tuesday, March 11, 2014

Onesie Decorating with a Stencil - There's A Nap For That

If you follow me on Instagram, you may have seen this photo pop up recently. We painted onesies for the mother-to-be at a friend's baby shower recently. Yeah, I know: genius! Why didn't we think of doing this sooner??? So anyway, after scrolling through Pinterest to gain a little inspiration, I came across the phrase, "There's A Nap For That." "How perfect is that?" I thought. And so, I painted a onesie with that phrase, and added a thunder cloud and a lightning bolt. I loved it so much, I decided that I REALLY needed one of these for my own munchkin. So, I put together a stencil pattern in Silhouette Studio (the program that came with my Silhouette Cameo) and had the Cameo cut it out using freezer paper. Super easy. Do you want to make one too? Awesome. I knew you did. Wait, you don't own a Silhouette? No worries. I've also included a way to make this hysterical onsie without a Silhouette, too. See? I've got you covered.

Decorate a onsie with a freezer paper stencil using a Silhouette, or cut it out by hand. This tutorial provides the file to download this stencil as well as instructions on using freezer paper. Click through and learn how.

Oh wait, did you guys even know that I have a Silhouette? I do! You want to hear the terrible part? We bought it about two and half years ago, but I haven't used until a couple of weeks ago. Gasp! I know! The reason I hadn't used it until recently was due to the fact that it was purchased about a month prior to the day Cheese was born. I had serious pregnancy brain back then and there was no way I could think about anything creative. Yeah, so my husband used it a couple of times to create a couple geeky role playing games and it got set aside until recently. Such a sad story, but the good part is we are back in Silhouette business now! Woo hoo!

Supplies needed:
- onesie
- fabric paint or acrylic paint (I used acrylic)
- sponge brush
- freezer paper (one 8" x 8" square)
- Silhouette (or printer, exacto knife, and cutting mat/board)
- iron

Ok, friends, you have two ways to make this: with a Silhouette or with just a Printer. Obviously, if you don't have a Silhoutte, you should go for the printer option.

If using a Silhouette, download this file. Place the sheet of freezer paper onto the cutting mat, shiny side up. Cut the freezer paper using the Silhouette. Carefully peel the freezer paper stencil off the cutting mat, making sure not to tear the freezer paper.

If using a printer, download this PDF and print it. Tape the printed template onto a cutting mat, place the freezer paper (shiny side down) over the printed template and tape it down as well. Using an exacto knife, cut around the printed letters and shapes to create a freezer paper stencil.

Use a freezer paper stencil to decorate a onsie - click through and get to download this stencil

Use freezer paper to paint a shirt - click through and learn how

Ok. So, at this point, you should have a super awesome freezer paper stencil that was either cut with the Silhouette or by hand. It should look like the one in the photo above. Cut the cloud, lightning, and letters into three separate sections.
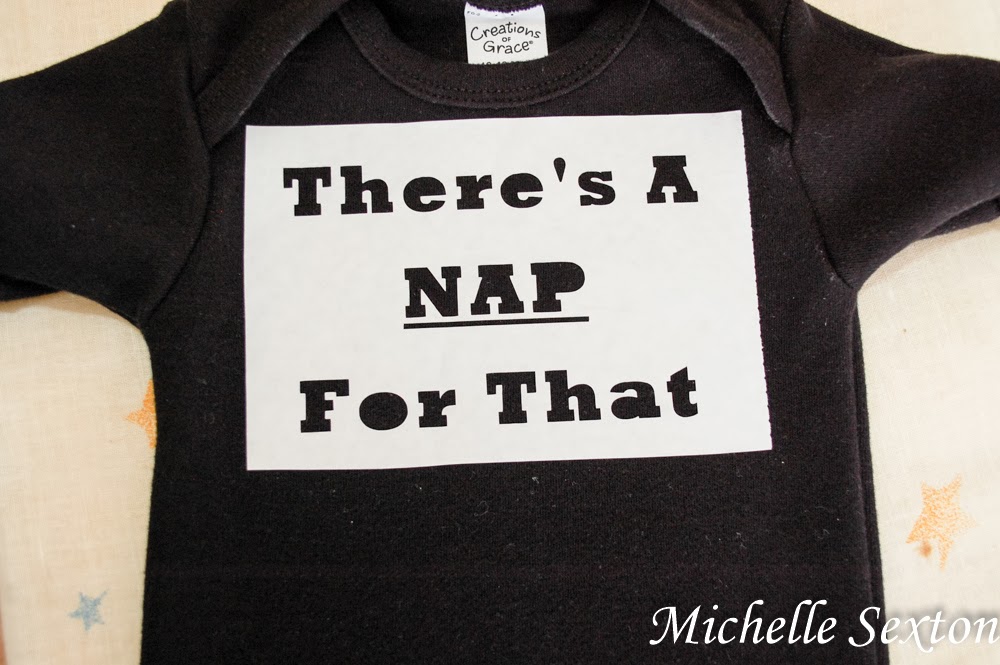
use an iron to adhere a freezer paper stencil to fabric

How to iron a freezer paper stencil on to fabric

Arrange the letters and cloud freezer paper stencils (shiny side down) on top of the onesie and iron with dry medium heat until the freezer paper adheres to the fabric. Be sure to iron over all the corners and small cuts. (Side note: I hate small intricate details, so I chose not to use the center cut outs for letters the R, A, P, and O. However, if you prefer to use the center cut outs for the letters, go for it and iron those on! P.S. I admire your patience!!)

Place a piece of cardboard inside the onesie, underneath the stencil area, to prevent the paint from bleeding through onto the backside. (I didn't actually do this, because I forgot. I totally lucked out because the onesie fabric was thick enough to not allow paint to bleed through.)

Decorate a onesie with a freezer paper stencil

Using the foam brush, paint a thin and even layer over the letters and cloud in an up-down motion. (Side-to-side motions tend to make the paint seep underneath the stencil.) Avoid painting a thick layer of paint over the stenciled areas. Leave the stencil on the fabric and allow to dry. Add additional coats, if needed.

Once the paint is completely dry, gently and slowly peel the stencil  freezer paper off the fabric. Press your fingers on the the painted shapes and letters as you peel the stencil from the fabric to prevent the paint from peeling up, also.
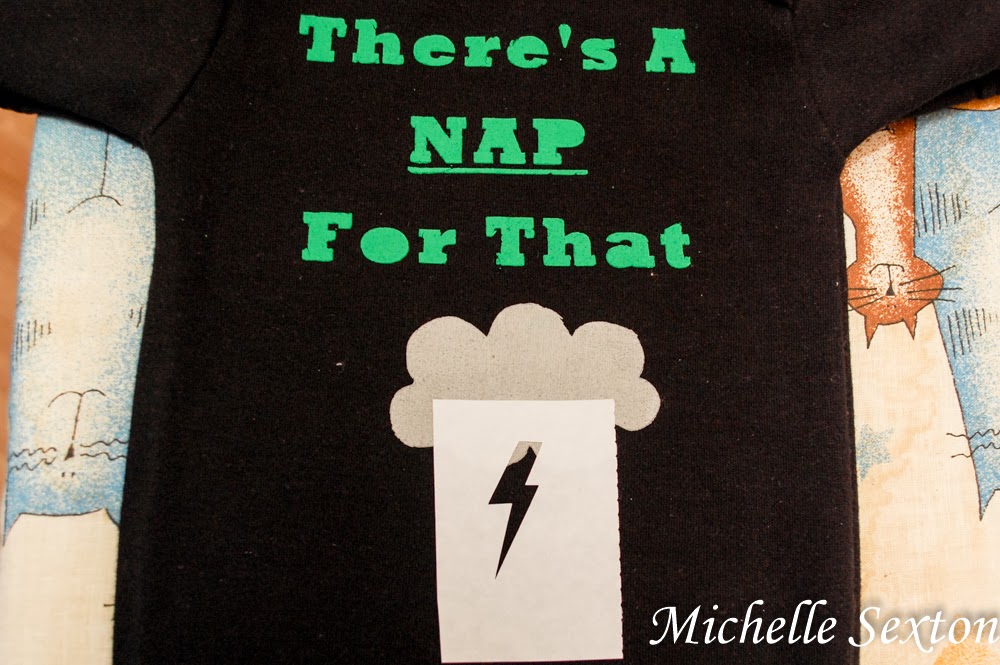
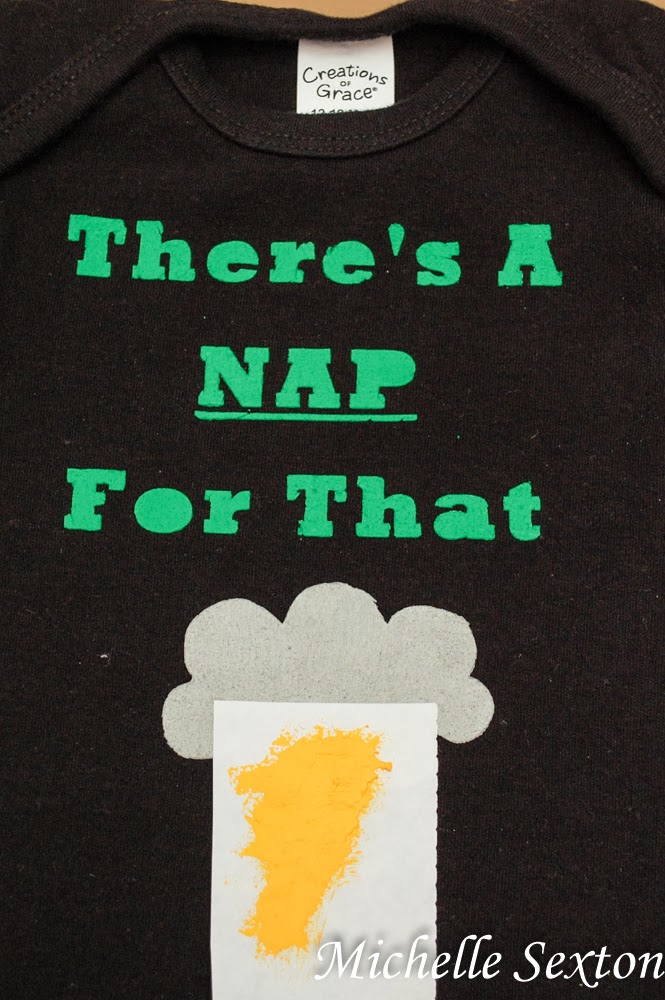
How to decorate a onesie with freezer paper - easy tutorial

There's A Nap For That Onsie Tutorial

Gently iron the lightning bolt freezer paper stencil to overlap at the bottom of the cloud. Paint the lightning bolt and allow to dry completely before removing the stencil from the fabric.

So much fun, right? I had a ridiculous amount of fun making this onesie. I could hardly wait until the next day to put it on Cheese!
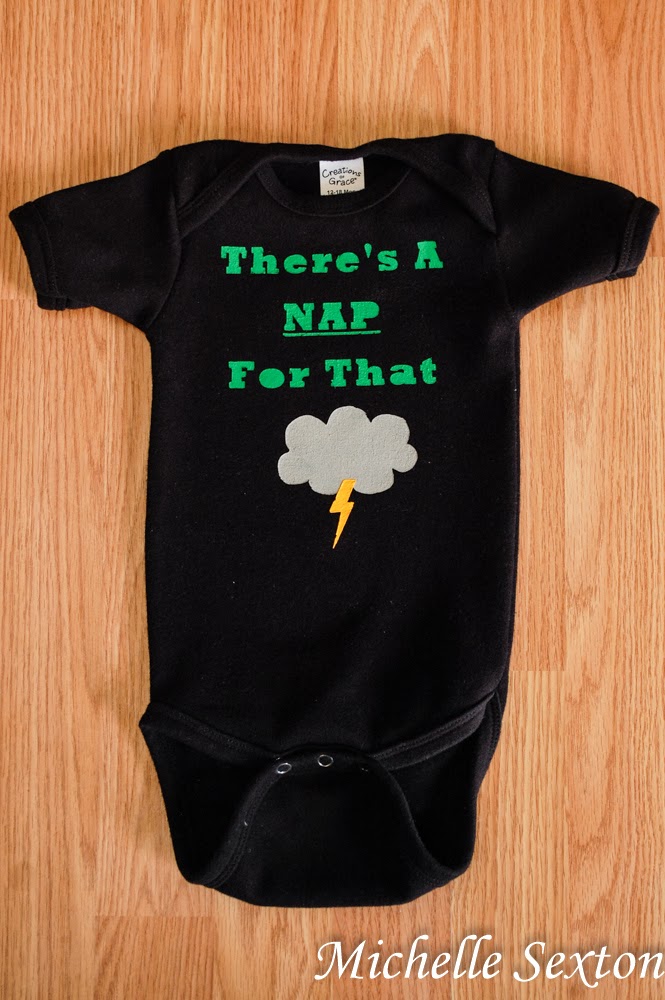
There's A NAP For That - decorate a onesie. This tutorial also provides the Free file to download to create this with a Silhouette as well as a PDF to create it by hand!

There's A NAP For That - Learn how to decorate a onesie like this with Freezer Paper - tutorial also includes a Silhouette file as well as a PDF to create this stencil by hand

P.S. If you don't have a Silhouette Cameo, but you'd like to get in on the stencil-creating fun, Amazon has a great deal on a Starter Kit Bundle for under $300!  This awesome tool can be used to create custom vinyl wall clings, cool printables for the kids and you can even swap the blade out for really awesome glitter pens and stuff to make super-creative crafts.

Please remember that you're free to use the ideas and materials in this blog for your personal use, but not for commercial use.

Thursday, March 6, 2014

Turn a Beanie into an iPad/Android Case in 30 minutes or less

So, let's talk about iPads. Wait...you don't have an iPad? Oh right, you're on the Android team. It's cool. We don't discriminate in this house. We use both Mac and Android devices. Joel has an iPhone and an Android tablet. I have an Android phone and an iPad mini. The boys inherited the first generation iPad. (Don't tell them that it belongs to them, we haven't disclosed this information to them. They still think it's mine. Ha ha!) We just can't choose a side in this house! It's crazy, but we are ok with this impartiality. Anyway, so last month my awesome husband gave me an iPad mini (!!!!) for Valentine's Day. Yeah, I was unbelievably excited to have my very own iPad all to myself - no more sharing the iPad sharing with the Preschool Patrol. So, one of the first thoughts I had after I got my iPad was, "Oh wait, I don't have a case for it! I can make one!!" This realization was followed by feelings of excitement. Oh yes, I was definitely excited.

After sifting through several items, I realized one of the easiest ways to make an iPad case is to make it from an unused beanie. (Yeah, I have more than one unused beanie. Remember the beanie that I embellished with pearl beads?) So, today I'm excited to show you how I made case for my iPad and how unbelievably quick and easy it was. I'm talking 30-minutes-quick. You should definitely make one yourself, as well. Also, here's an added bonus: this beanie will probably end up getting far more use as an iPad (or Android) case than actually wearing it as a hat. You only wear it a couple months out of the year anyway, right? Score! So, are you ready to make one? Let's do it!

Convert an old beanie into an iPad/Android case in 30 minutes or less - click through and see how

You will need:
- beanie
- twine
- 5 buttons
- needle
- thread
- chalk (or washable pen)
- star shaped cookie cutter
- scissors
- pins
- sewing machine (optional)

lay iPad on top of inside-out beanie

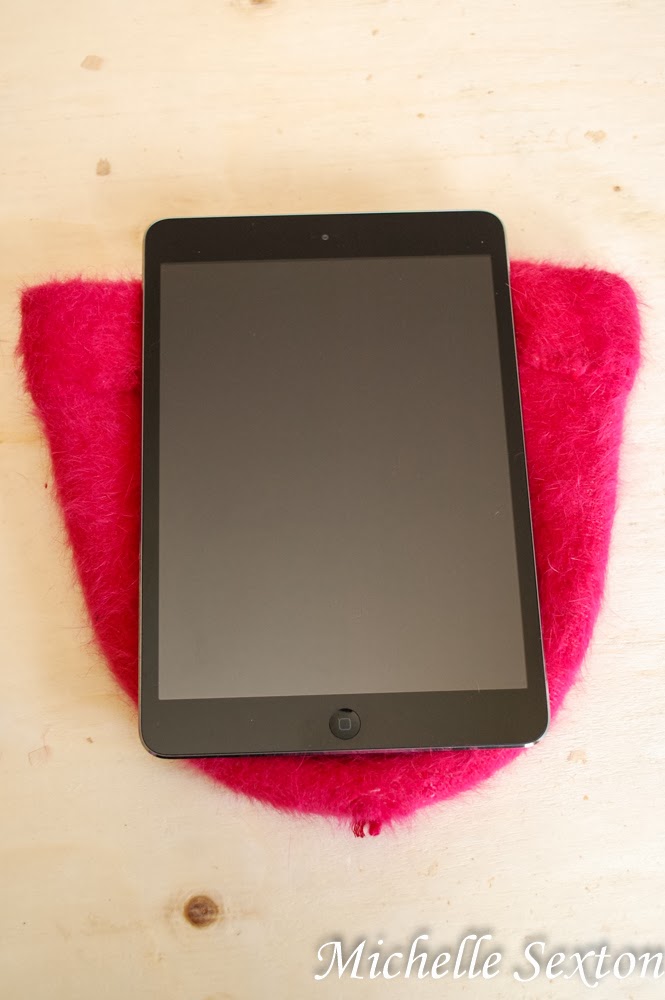
Start out by turning the beanie inside out. Lay the tablet on top and centered on the beanie. 

outline beanie and pin

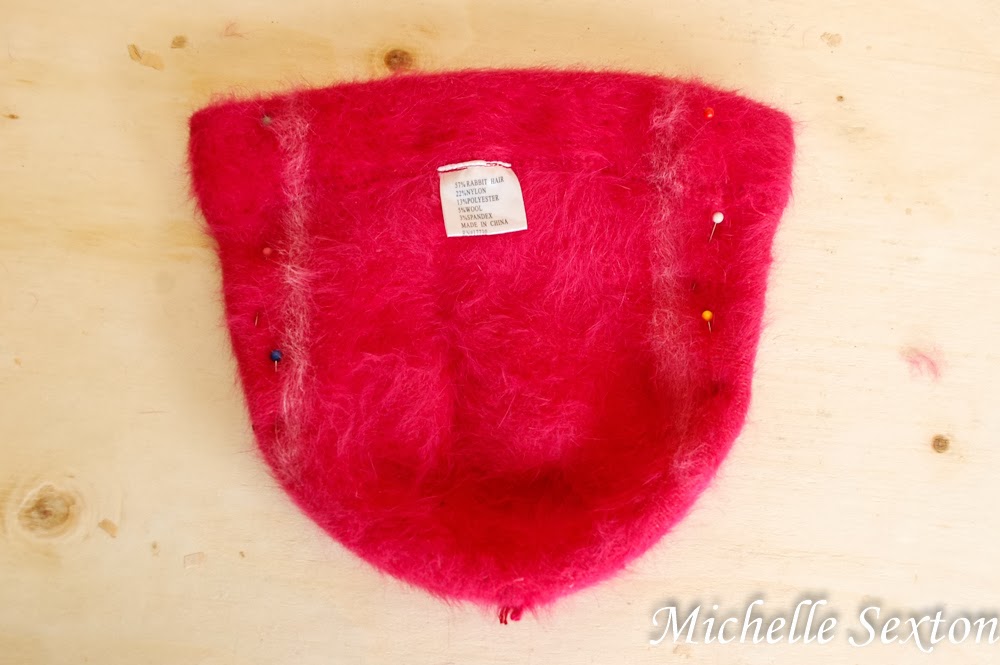
Mark an outline onto the beanie with chalk around the tablet. Pin around the chalk path. 

sew along outline

trim excess fabric

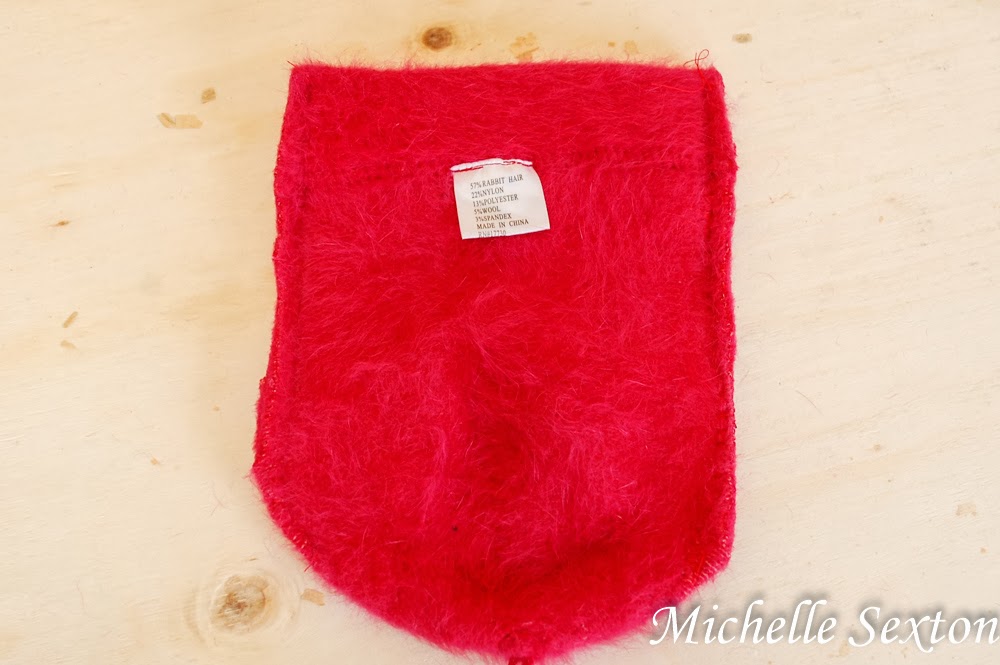
Sew along the chalk paths and cut off the excess fabric. 

add buttons and tie twine strands

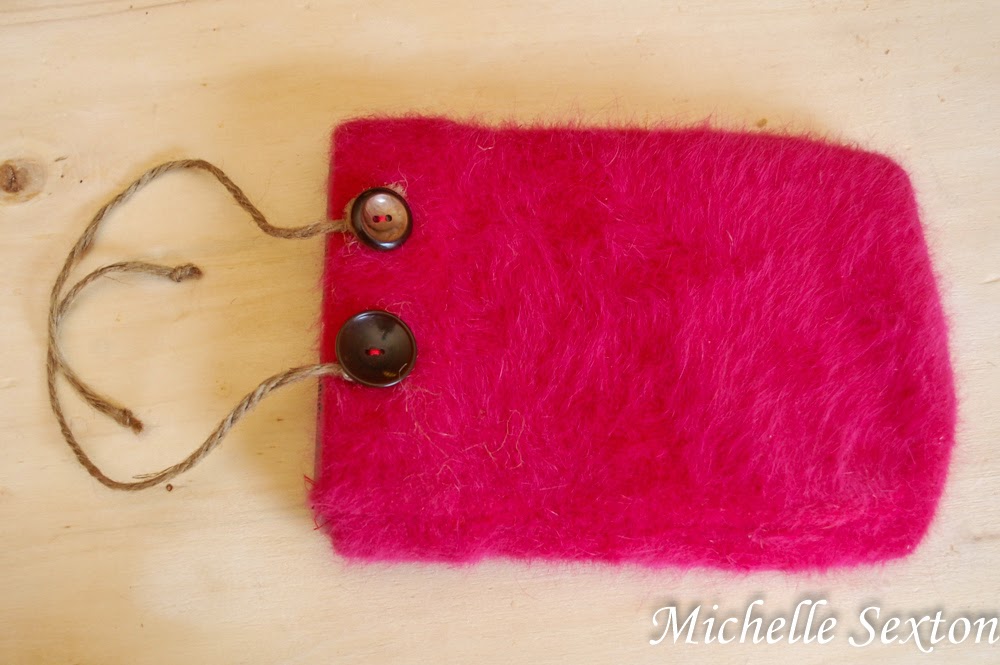
Stitch two buttons at the top of the case, on both sides of the opening. Cut two strands of twine, each approximately 6 inches long. Tie each strand between the buttons and the case on the back side. 

place cookie cutter on top of front of case and trace

trace outline of cookie cutter onto case

Lay a star-shaped cookie cutter on top of the front of the case and trace along the edges with chalk. 

stitch twine onto star outline

star outline

Make an iPad/Android case from a beanie - click through and learn how

Cut a strand of twine long enough to fit around the outline of the cookie cutter. Stitch the twine onto the outline traced onto the front of the case. (Obviously, I did not follow the exact outline of cookie cutter, but the important thing is stay as close to the corners of the outline as possible.) Finally, sew a button onto the center of the star. 

Make an iPad Case from an old beanie in 30 minutes or less - click through and learn how


Unbelievably easy, right? Quick, look at the clock. It took you less than 30 minutes to make this, didn't it? Well, if it didn't, you should definitely blame it on the kids. ;)

Tuesday, March 4, 2014

How To Make a Lightning Bolt Shirt with Transfer Paper

Greetings, my crafty-loving friends! Want to make something for your kids today? Quick and easy? How about a shirt with an iron-on design? Yes? Ok, good. I'm glad you said, yes, because I really wanted to show you what I made for my preschooler. A couple of months ago, I was watching the movie Meet The Robinsons with Mac. Have you guys seen that movie? Love that movie. While we were watching it, Mac noticed Wilbur Robinson's lightning bolt T-shirt (the son of Lewis) and asked me to make a shirt like that for him. Well, of course I had to oblige!

How to make a lightning bolt shirt with transfer paper - click through, get the free printable and learn how to make this shirt

Wilbur has the black shirt on

You will need:
- black t-shirt (Hobby Lobby sells them for about $3)
- iron
- ink jet printer (not a laser printer)

Before we begin, there's a couple of things I need to let you know about making the lightning bolt shirt. First of all, make sure to use transfer paper for dark fabrics, if you plan to iron the image onto a dark shirt. The image will not show up correctly if regular transfer paper is used. Got it? Ok, good. Next thing - this project can only be done with an ink jet printer. For real. So, if you have a laser printer, like we do, I recommend finding a friend with an ink jet printer and using theirs to print the image onto the transfer paper. Ink Jet transfer paper will not work with a laser printer. It will melt inside. So don't do it! Laser printer transfer paper is available on Amazon, BUT in order to get the image to adhere onto fabric, a super fancy and expensive ($200) heat press machine is needed. Irons will not work. Frustrating, I know. Because of this, I recommend finding a friend with an ink jet printer, like I did. (I have nice friends.)

lightning bolt printable - perfect to put on a shirt with transfer paper
Due to copyright issues, I chose to vary the lightning bolt slightly from Wilbur's shirt

To make this fun shirt, print the Lightning Bolt PDF onto a sheet of transfer paper, cut out the image, and iron it onto a clean (duh), pre-washed t-shirt. Be sure to read and follow the ironing instructions from the transfer paper package closely. Usually, the shirt needs to be washed and dried again after adhering the image onto the shirt before wearing, but you need to wait 24 hours after transferring the image before washing it. Crazy, right? Anyway, following the instructions for image transferring is important, but the results are well worth the small amount of effort it takes. 

How to make a lightning bolt shirt with transfer paper - click through and find out how and get this free printable too

And now, my friends, you have a super awesome shirt for your kids. This usually results in feelings of shock and awe from the children after they have realized that you have made this for them....all by yourself...well, maybe...
Ha ha!

Thursday, February 27, 2014

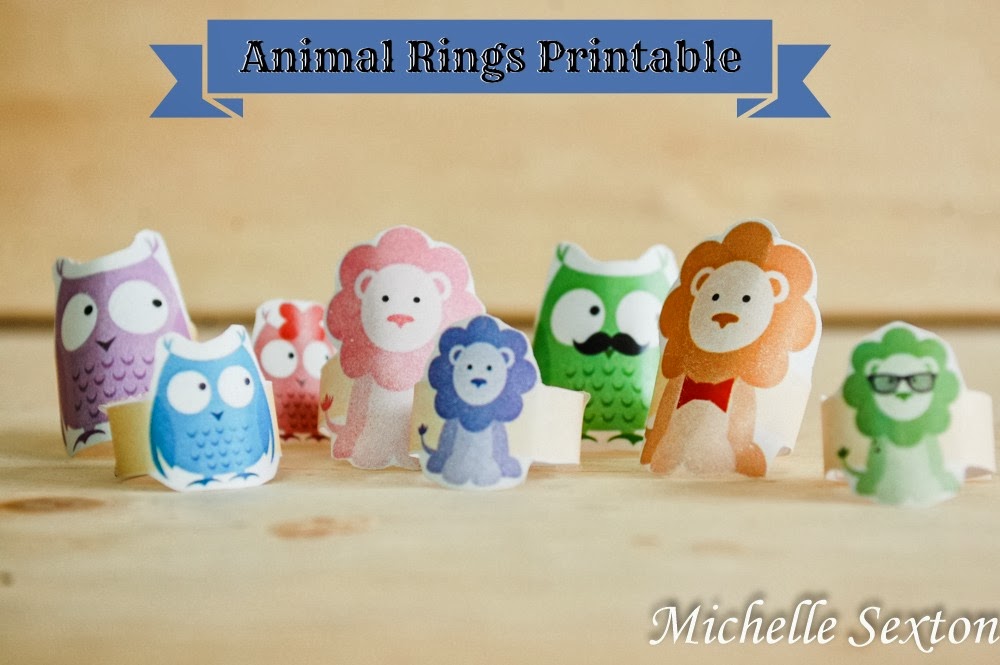
Free Paper Animal Rings Printable

Mini-confession here: I am slightly obsessed over printables, specifically kids' printable activities. Ok, not really obsessed-obsessed, but more like I-am-a-HUGE-fan-obsessed. You see, we've had a lot of sickness going on in our household over the past 3 months or so. (It's a really long story. I'll spare you the details, but we've been through lots of probiotics, Emergen-C, and other stuff. I'm pretty sure we're on the up-swing now.) Basically, what I'm saying is that we've had a rough season, as far as our health is concerned. (We're getting better, though). There have been so many days where I was sick or everybody was sick and I needed a quick activity to keep the boys entertained while I laid on the couch and blew my nose. I had days where Mac was quarantined in his room and was in need of a quiet activity to keep him entertained while he recovered from another cold. During these moments, I have realized that printable kids activities are a mom's best resource. It's been so nice to print out an activity on a sheet of paper and allow it to entertain my boys. Amazing...and oh-so-easy.

The best entertainment is free! Click through and get this free animal ring printable

So, today I bring you yet another printable kids' activity. I know...I've been making a lot of these lately, but there's just so much to like about them.  1. They're FREE.  2. The kids are enthusiastic about a new activity 3. When they're done, you can toss it in the recycling bin (easy clean up) and 4. It's EASY! Seriously, what is there not to like about printable kids' activities?

Print out these rings for awesome entertainment - Click through and get these ring printables

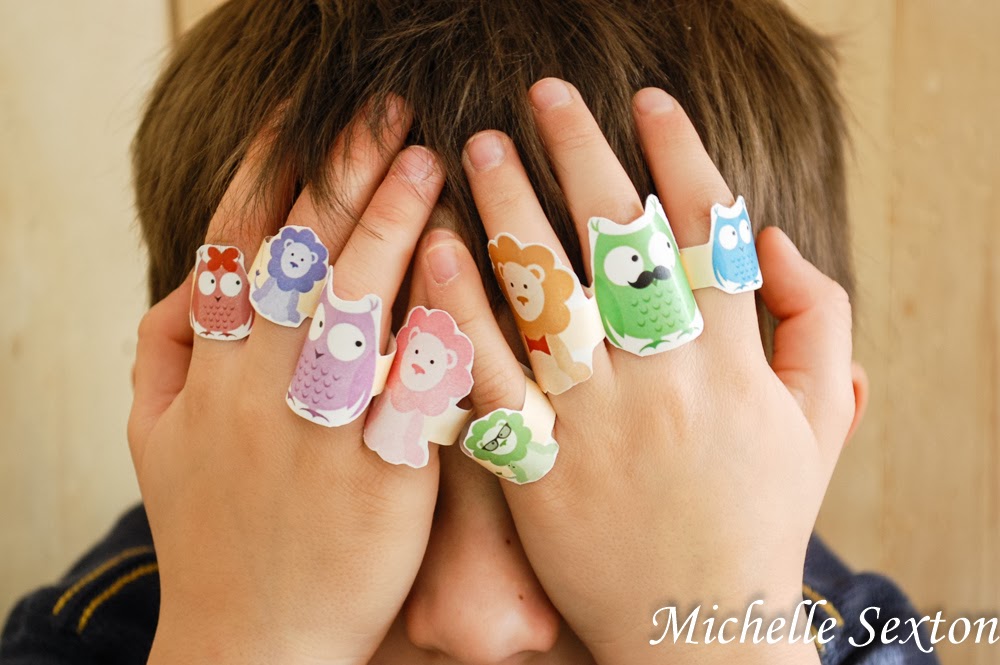
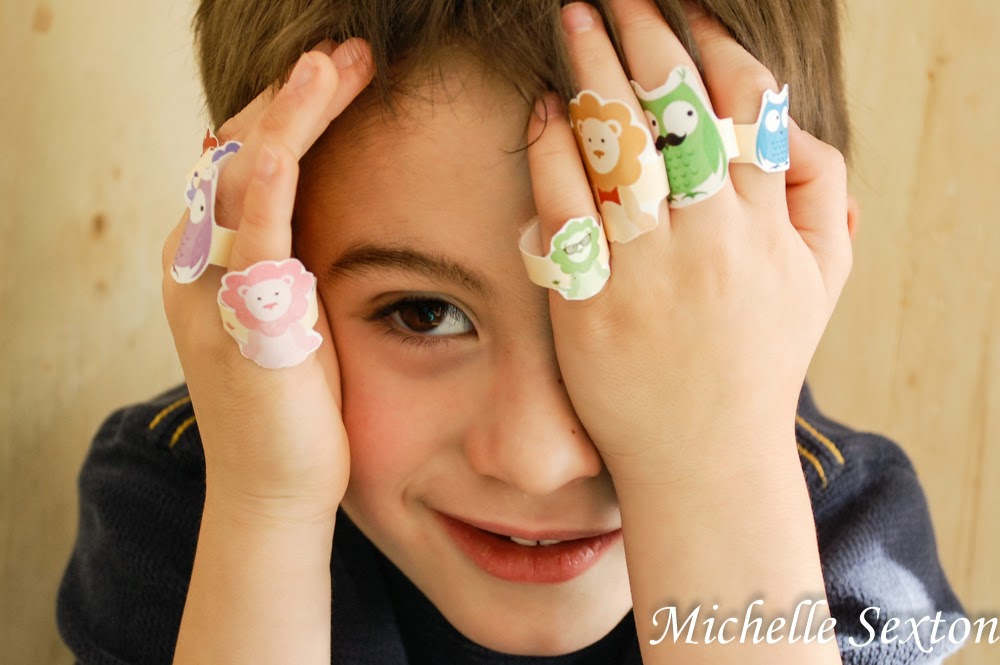
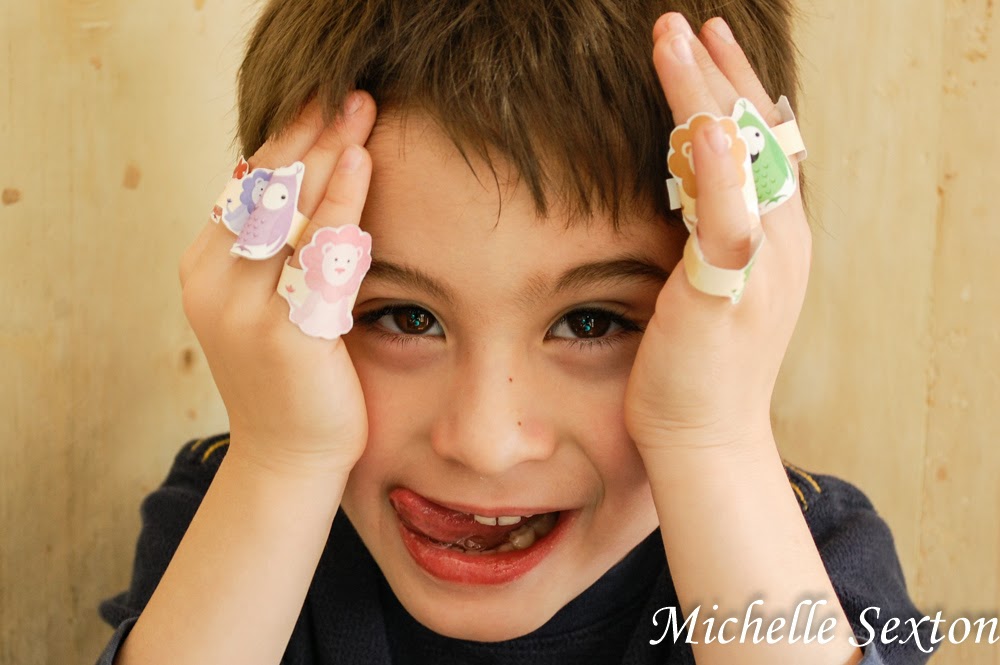
Yesterday, we printed and cut out these fun little animal rings and spent quite a while playing with them. Today, at lunch Cheese sat in his high chair and played with one of the rings while I made his lunch. (This is actually a pretty amazing accomplishment, due to the fact that he assumes he will immediately be fed once he is seated in the high chair. #foodie - oh wait...can you use hashtags on a blog? Just Kidding.) So anyway, these rings have been a big hit in our house and have been unintentionally dispersed throughout the rest of the house, because the boys have played with them continuously. If your kids are anything like mine, they will love them.

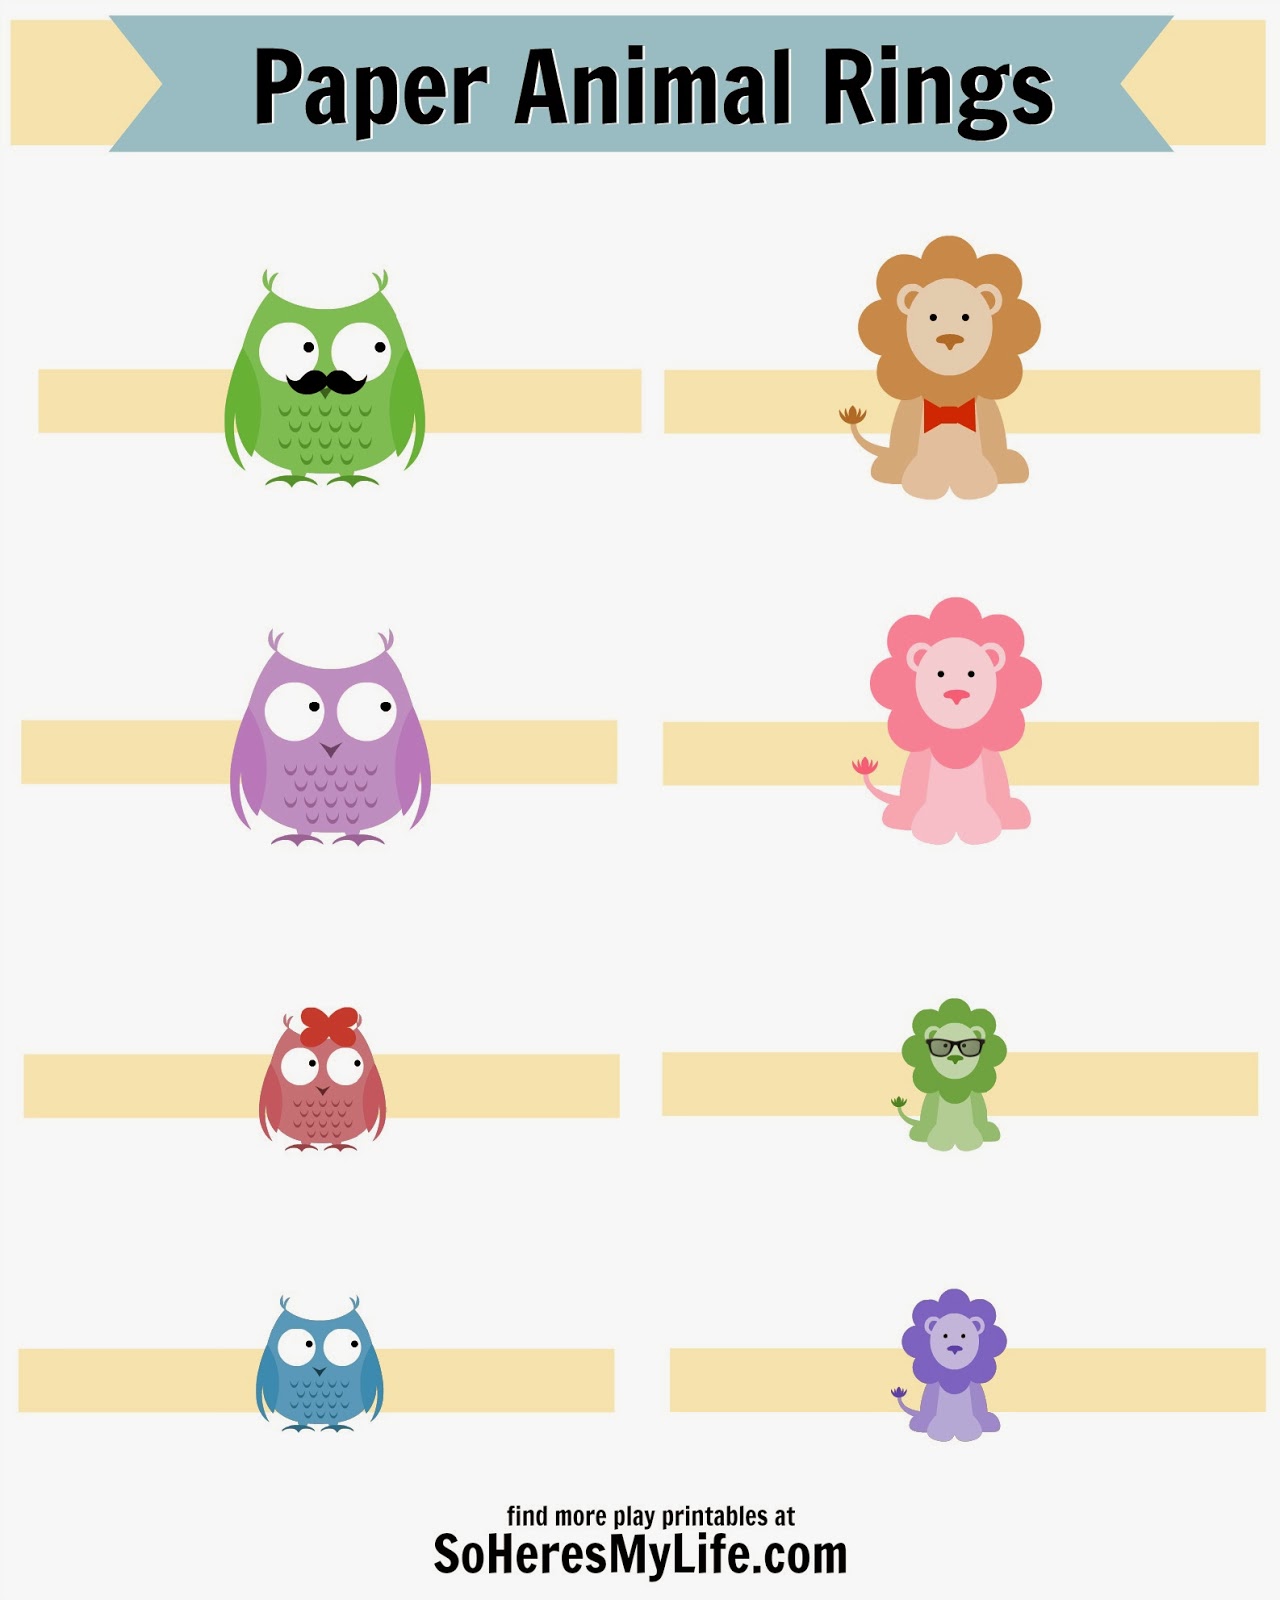
So, are you ready to print out your own set of animal rings? Here you go:

Super fun animal ring printables - click through and get them!!


I recommend printing these rings on card stock. After printing, cut the rings out and tape the ends together to make each ring.

Please keep in mind that you are always more than welcome to use these as much as you like for personal use. You are also free to feature and pin these too, but link to this page, instead of linking to the PDF. :)
upgrade their playtime with these animal rings - click through and get these free printables

Playtime is always more fun with imagination - click through and get these free printable animal rings


Interested in more printable kids' activities? Check out the Silly Shape Finger Puppets, Miniature Jack-in-the-box, Printable Roads, and the Printable Train Tracks.

Tuesday, February 25, 2014

Canadian Bacon and Egg Muffins Recipe

Recipe Alert! I have a good one for you guys today. In fact, the last time I made this everyone at the dinner table was completely silent - not because like my food poisoned them or anything, but because it was AWESOME. Oh, yes it was. All four of us were so consumed by the amazing flavor combinations of this dish, that nobody was willing to speak, not even for a moment (even Mac, which never happens, because he will do anything to get out of eating his food - usually by talking). None of us could bear the thought of sacrificing a even a moment for words. What is this recipe, you ask? Well, let me tell you, Canadian Bacon and Egg Muffins. Although, it's no much of a muffin, but maybe more like a cup. There is no bread in this recipe, we use hash browns instead...and they are awesome.

Canadian Bacon & Egg Muffins with Hash Browns Recipe - click through and get this recipe

Are you ready to make it? Here's how I did it -

Ingredients:
- 5 cups country style hash browns, thawed
- 1 1/2 cups frozen chopped spinach, thawed
- 3/4 cup part-skim ricotta cheese
- 3 large eggs, beaten
- 2 Tbsp green onions, chopped
- 6 slices uncooked Canadian-style bacon, quartered
- 1 cup of 2% shredded sharp cheddar cheese
- 2 sliced plum tomatoes, seeded

Canadian Bacon & Egg Muffins with hash browns - don't miss out on this recipe!

In a microwave safe bowl, combine thawed hash browns and green onions. Cover bowl with plastic wrap and microwave for 2 minutes or until potatoes are tender. Put in colander to drain. While potatoes are cooking, squeeze spinach dry. In a small bowl, combine ricotta cheese and eggs.

Spray a 12 muffin tin with cooking spray. Distribute potatoes evenly in the bottom of each tin (start with 1/4 cup per tin). Top with a quarter-slice of bacon, 1 heaping teaspoon of ricotta cheese mixture, 2 tablespoons of spinach, a table spoon of cheddar cheese, another bacon quarter, and another heaping teaspoon of ricotta mixture. Sprinkle tops with a few remaining shreds of cheese and 2 tablespoons of the seeded, sliced tomatoes.

Bake muffins until fully set and ricotta is cooked through, about 25-30 minutes. Cool in muffin tins for about 10 to 15 minutes before removing. Makes 12 muffins.

Serve, eat, and enjoy the silence while your family consumes this tasty meal.

Canadian Bacon & Egg Muffins with Hash Browns - get this recipe!

Can't get enough hash browns? Try these Baked Hash Brown Patties too!

I came across this recipe at Shrinking on a Budget. If you haven't checked out this site, I highly recommend it.

Thursday, February 20, 2014

Pearl Embellished Beanie

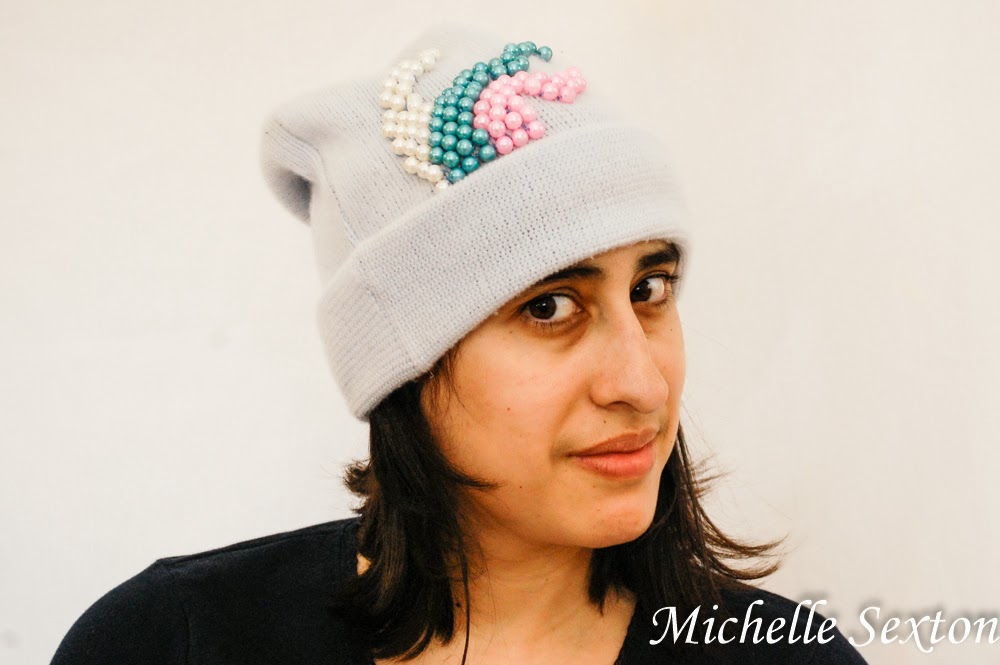
One final winter project to keep you occupied as you await Spring's arrival. I made another beanie. Ok. Actually,make this one, I embellished it. I've had this terrific, baby blue beanie in my closet for years. It was a gift from my mom several years ago and wore it often when I first received it. However, over the years I lost interest in it, mainly because it was so plain, and I've acquired so many additional fun hats. So what do you do with old clothing items that have lost their appeal? Upcycle them, of course! The beauty of this project is the fact that this can be done at your own leisure. It's the perfect activity to work on as you sit on the couch and watch a movie once the kids have gone to bed...or not, provided that your kids can abstain from interrupting you every 3 and half minutes. We have yet to achieve this status in our house. ;)
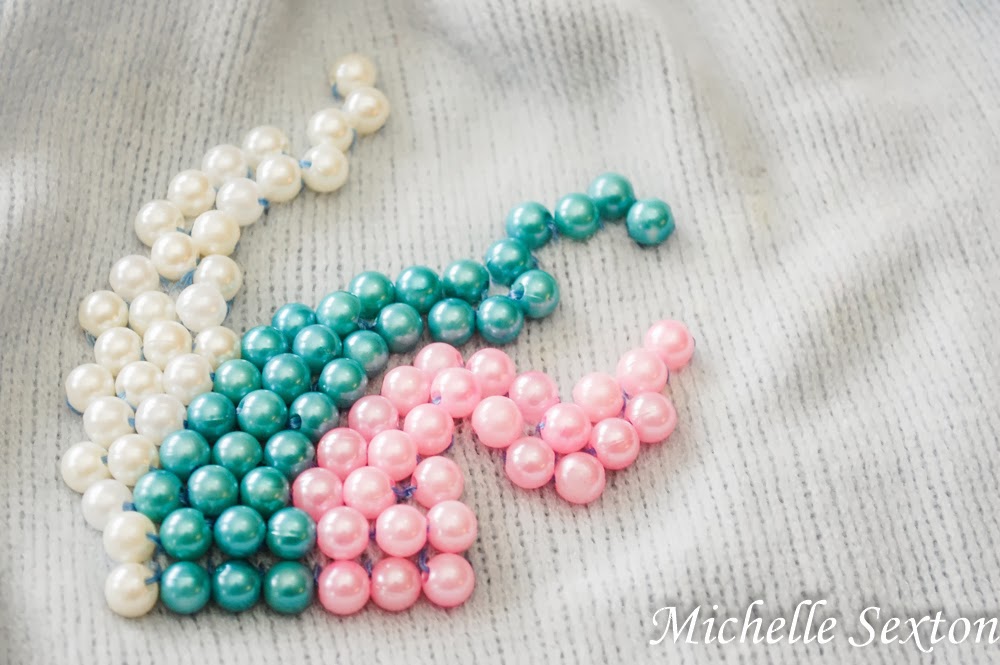
Upcycle a beanie by embellishing with beads - click through and find out more.
supplies needed

You will need:
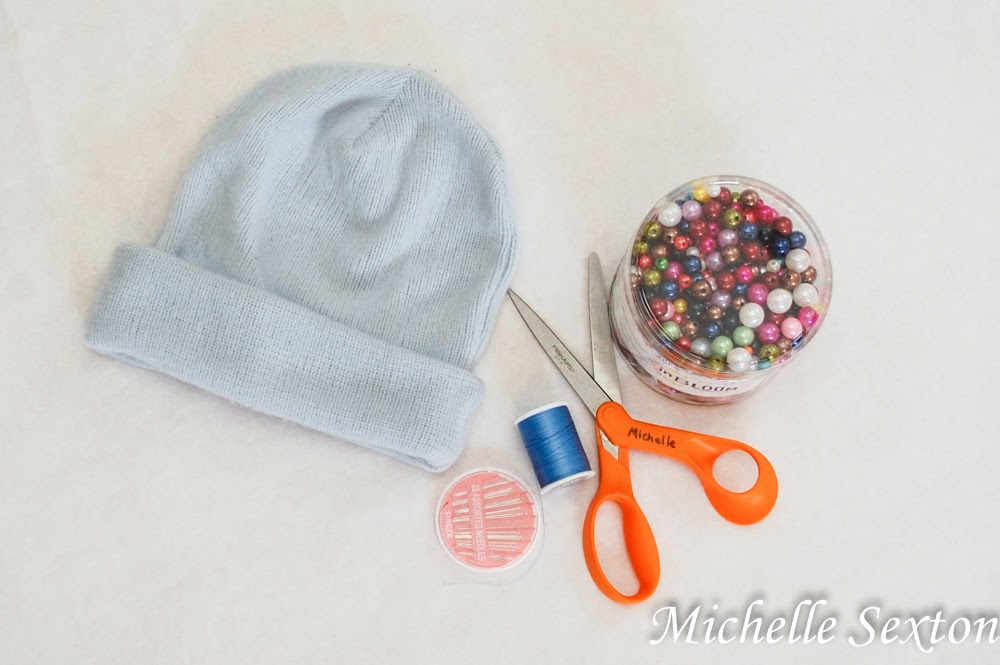
- an assortment of faux pearl beads
- a beanie
- needle
- thread
-scissors
Bam that's it! Don't you love it when there's only a couple of items needed for a project? I do.
So here's how I made this awesome beanie:

capture arrangement with cell phone
Original arrangement taken with cell phone photo to use as a reference

Arrange the beads until you find a design that you like. Take a picture of it to use as a reference guide. (I snapped a photo using my cell phone.)

A couple of recommendations for the stitching beads:
- Double thread the needle, just to keep each bead extra secure.
- Stitch each bead to the hat three times before tying it off and moving onto the next.
- Knot each individual bead to the hat separately, even if  you don't cut the thread after each bead. This will keep you bead loss to a minimum if the beads get caught on something.

stitch entire bottom row to begin

Start out by stitching the entire bottom row of beads (all three colors), just above the brim. I recommend marking each spot with chalk where each bead is to be sewn. (I didn't do this, but only because I didn't think about it until afterwards. Duh.) The bottom row will give you a foundation to work off of.

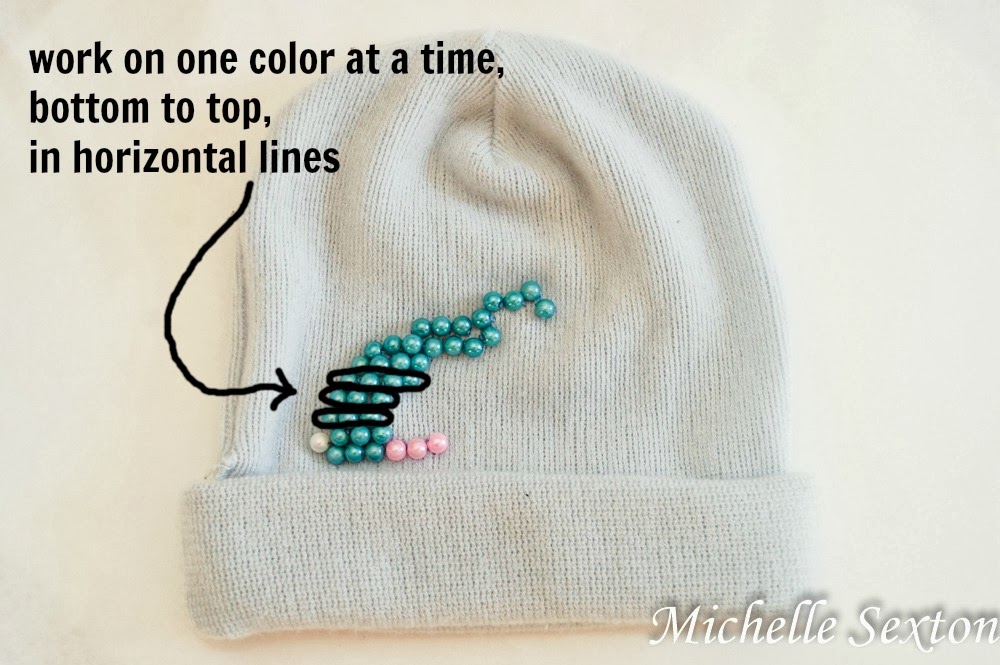
work on one color at a time, bottom to top, in horizontal rows

knot each bead individually

Once the bottom row has been completed, continue by stitching the center color (mine was blue), working your way from bottom to top, horizontal row by horizontal row, until the entire color section has been completed. Be sure to reference your "prearranged" picture every so often to keep track of the progress.

After completing the center color, continue with the next color (either side is fine). Again, work your way up to the top, completing one horizontal row at a time.

Repeat again with the final color.

Upcycle a beanie by adding beads - click through and find out more

Embellish a beanie with beads - click through and learn more

Upcycle a beanie by adding beads - click through and learn more

Simple? Definitely. The hardest part of this project was finding uninterrupted time to sit down and work on it, which rarely occurs before 7:30 PM. Life of a mom, right?


Tuesday, February 18, 2014

How to Make a Beanie from a Sweater Sleeve

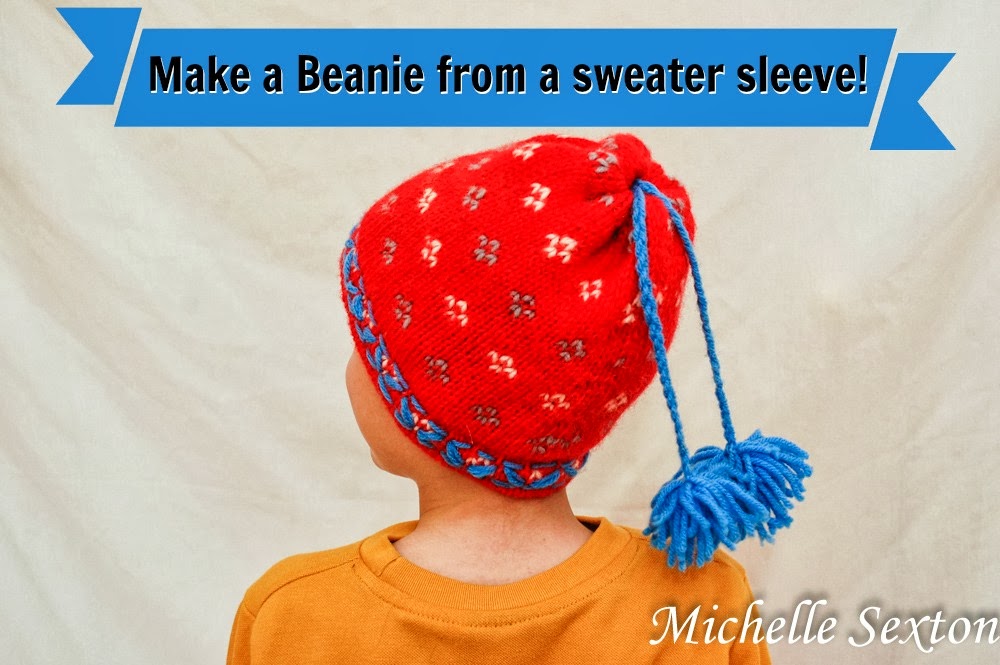
Have you had your fill of winter yet? Has Snowmageddon depleted your creative energy? Well, guess what? Here's an unexpected and easy sewing project to make for your little ones in one evening. This easy little project may just make these last days of winter a little more bearable, once you see your little ones wearing these cute little beanies on their heads.

Learn how to make a beanie from a sweater sleeve with only a minimal amount of sewing! Click through and find out how.

Make this easy beanie with only a minimal amount of sewing - click through and find out how.

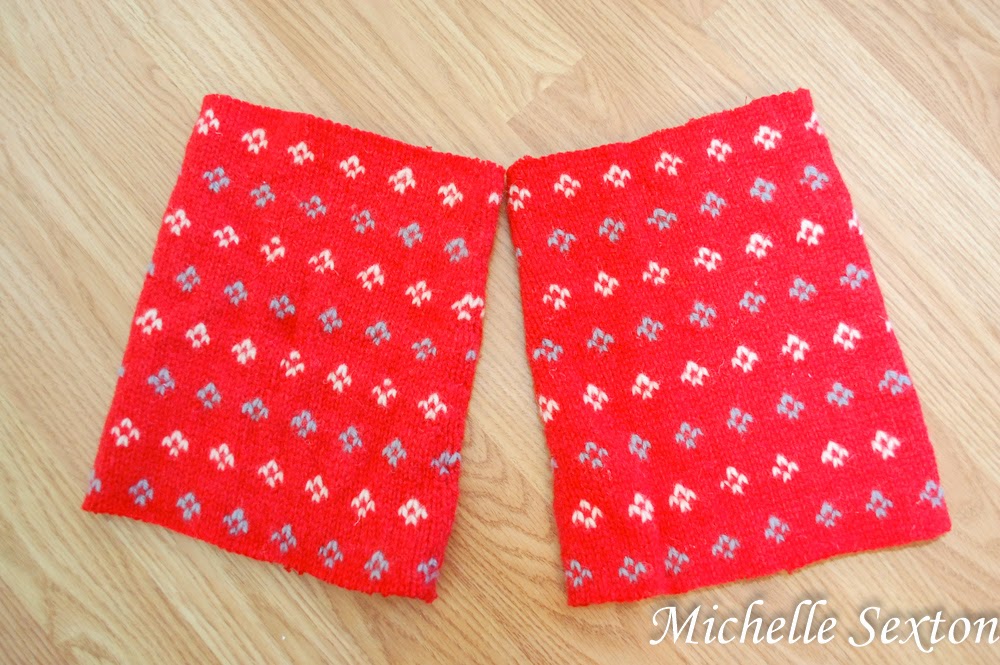
These beanies were made with the leftover material from an upcycled sweater project that I shared a couple of weeks ago. The sweater originally had gigantic baggy sleeves that proclaimed, "I'm so outdated!" They just had to go. So, I cut them off and made a cute pair of boot cuffs, and still had a bit of leftover sleeve material. Instead of tossing them, I thought, "Why not make hats for the boys?"

so many uses for one sweater!

Here's the original sweater. It's a hand-knit wool sweater and a bit on the heavy side. This project is totally doable with the heavy wool sweater, but would probably work out even better on a medium-weight sweater. You'll need need at least 12 inches of a sleeve to work with (per hat).

Here's how I made these cute little beanies:

start out with two sweater sleeves

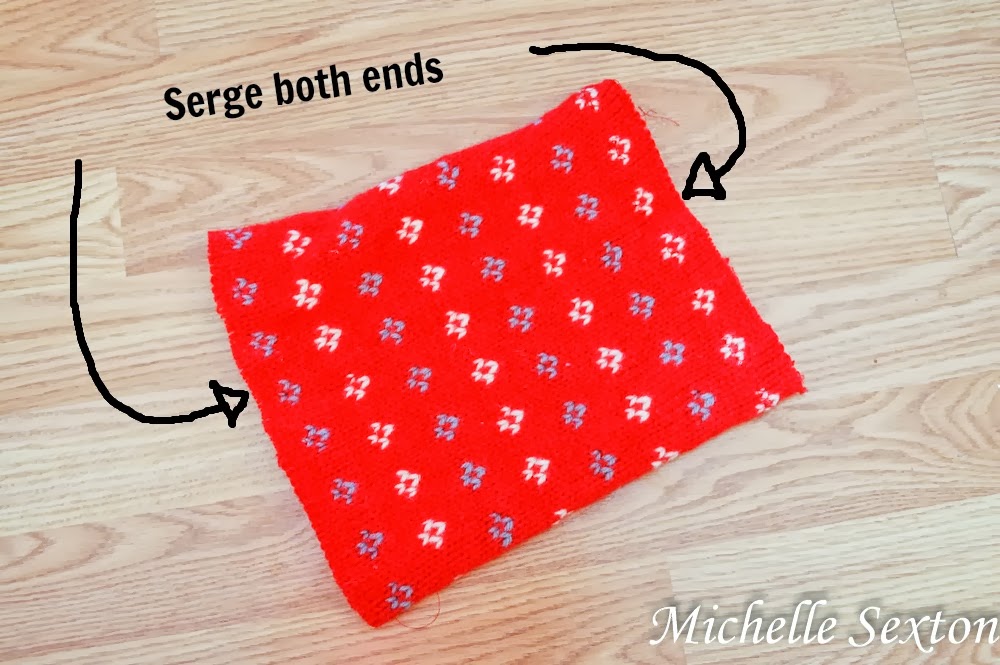
Start out by serging each trimmed end of the sleeve to prevent the sweater from unraveling as you work on it.

serge both ends of the sweater

pin the ends

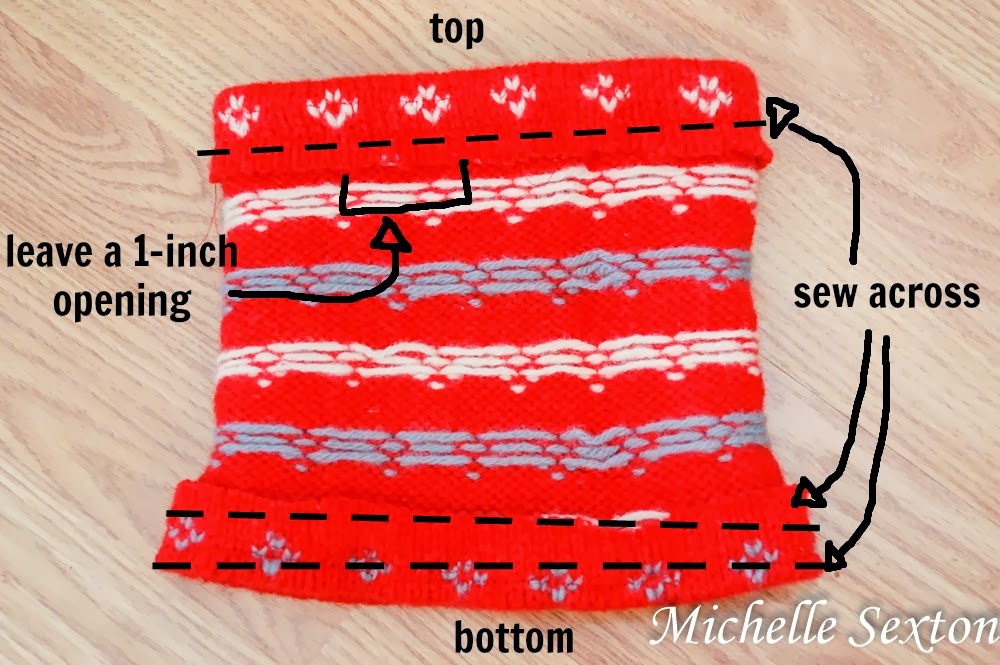
Turn the sleeve inside out, fold one end, and pin it. (This is the top portion of the hat. So, if the sleeve has a smaller end, it would be ideal to use the smaller end here.) Side note: the photo shows both ends pinned, but you can pin each end and work on them one at a time.

sew across each opening

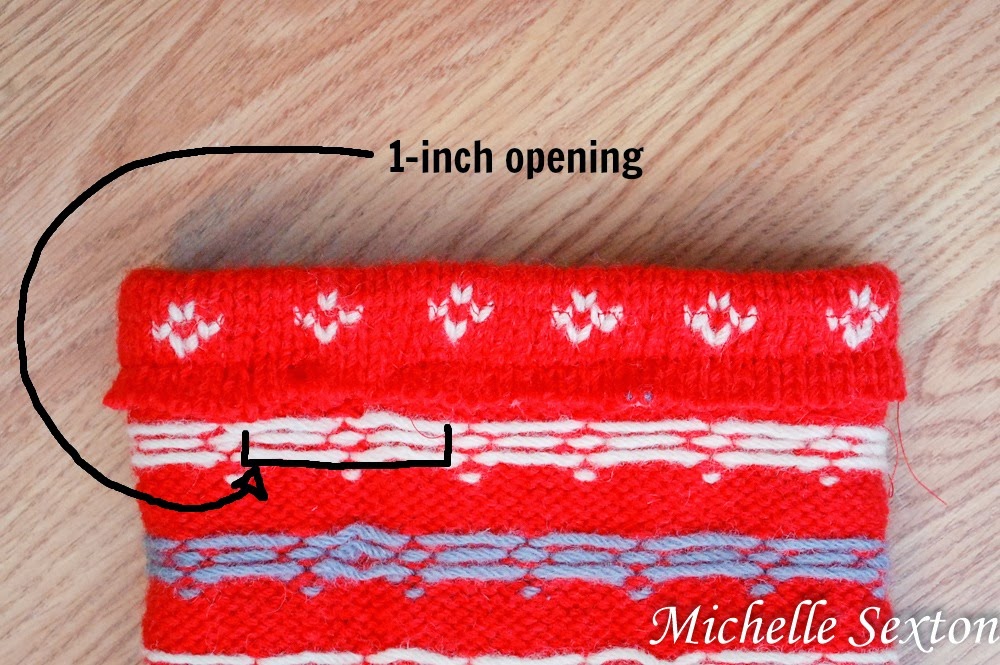
leave a 1 inch opening

Sew a line about 1 inch above the fold of the sleeve, leaving a 1 inch opening between the starting and ending points. Be sure to run the sewing machine forward and backward a couple of times to prevent the stitch from unraveling (at the starting and ending points), especially since the ends are not connected. (I used a serged stitch here, but a straight stitch would be fine too.)

While the sleeve is still inside out, fold the opposite end of the sleeve over, pin, and sew two separate lines over the folded portion.  Make one about 1/4 inch above the fold and one about 1 inch above the fold to create a faux brim. This time, make sure to connect the beginning and ending points.

Guess what? That's all the sewing needed! For. Real. Gasp!

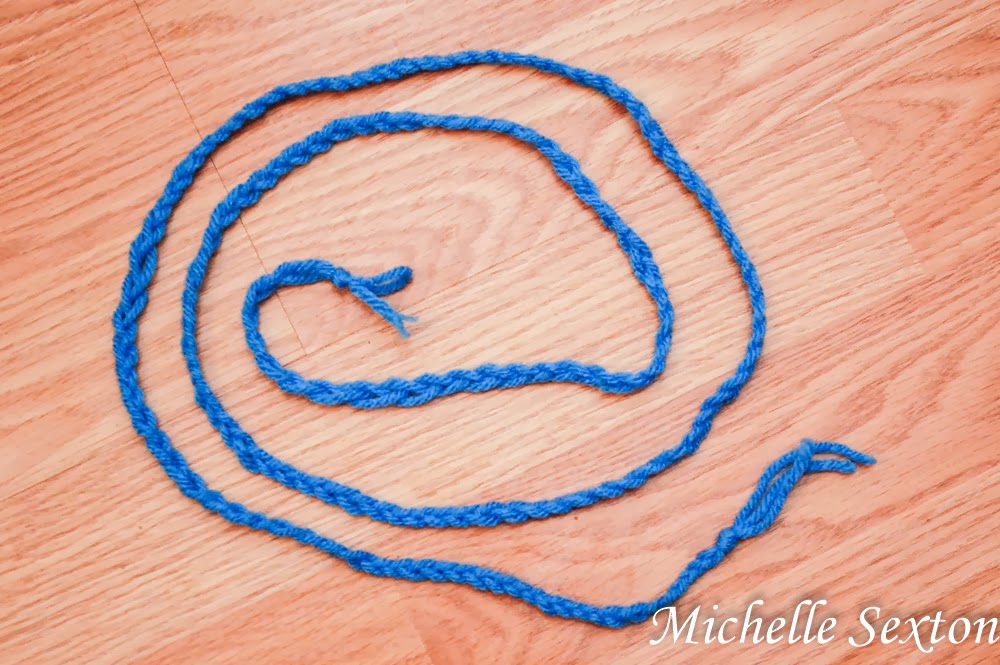
braid 3 strands of yarn together

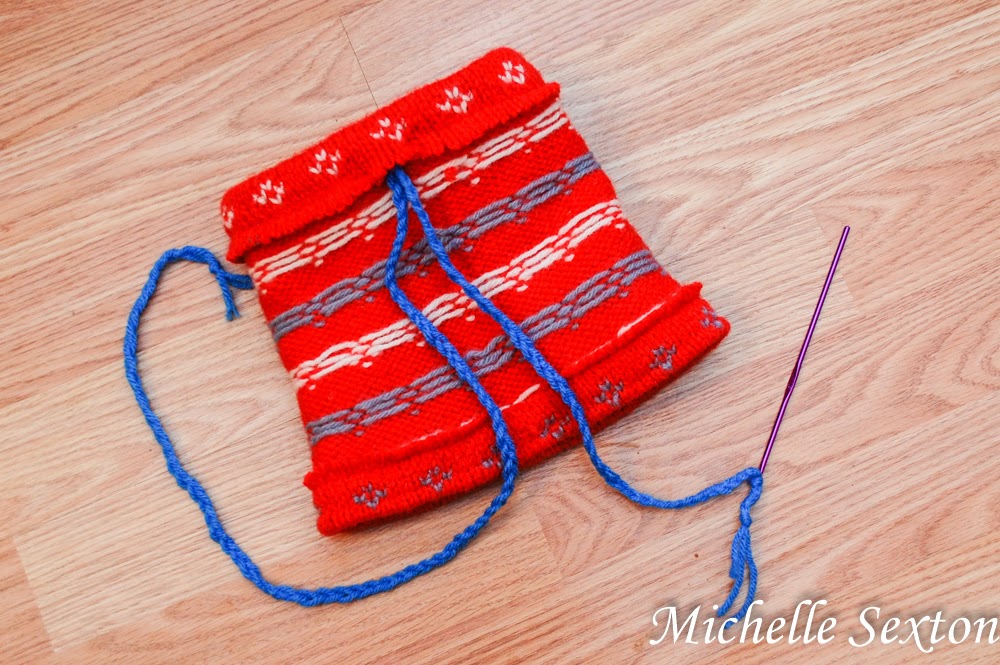
Set aside the sleeve/hat. Braid three strands of yarn into approximately the length of 2 feet.

thread yarn through the top opening

use a crochet hook to thread yarn through top opening

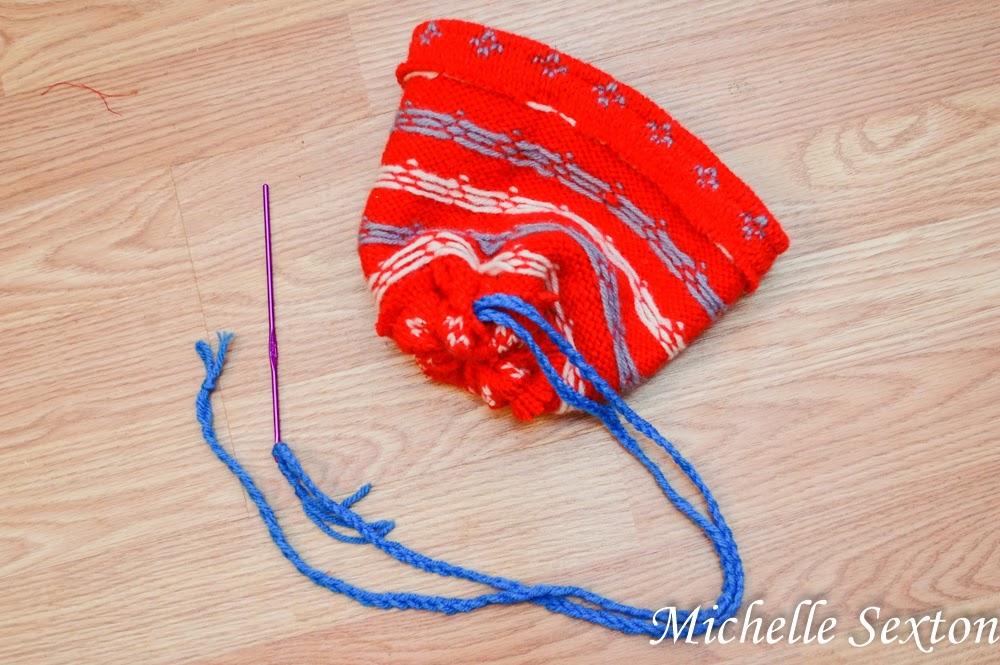
Tie one end of the braided yarn onto a small crochet needle.  Thread the yarn through the top opening of the hat (the end with the 1 inch opening) and out the other end to create a "drawstring".

pull tight and tie a square knot

turn hat right side out and pull yarn strands through

Pull the yarn tight and tie square knot. Turn the hat right side out and pull drawstrings through the small opening at the top of the hat.

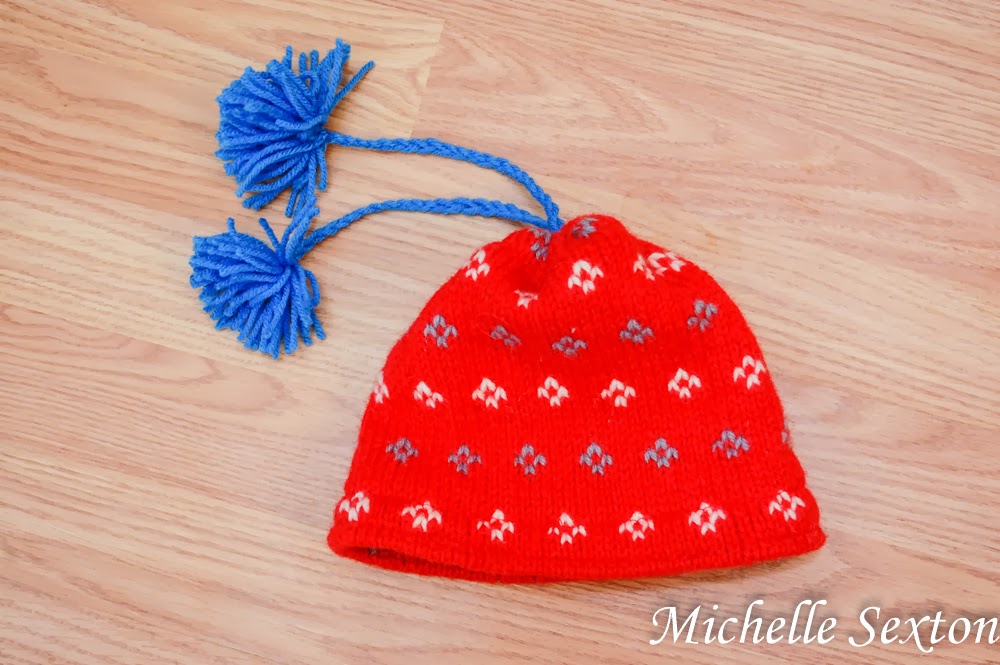
trim ends and add pom poms

Trim the ends of the drawstrings, leaving approximately 8 inches (or more if you like), and tie off the ends. Make two pom poms and attach them to each end of the drawstring.

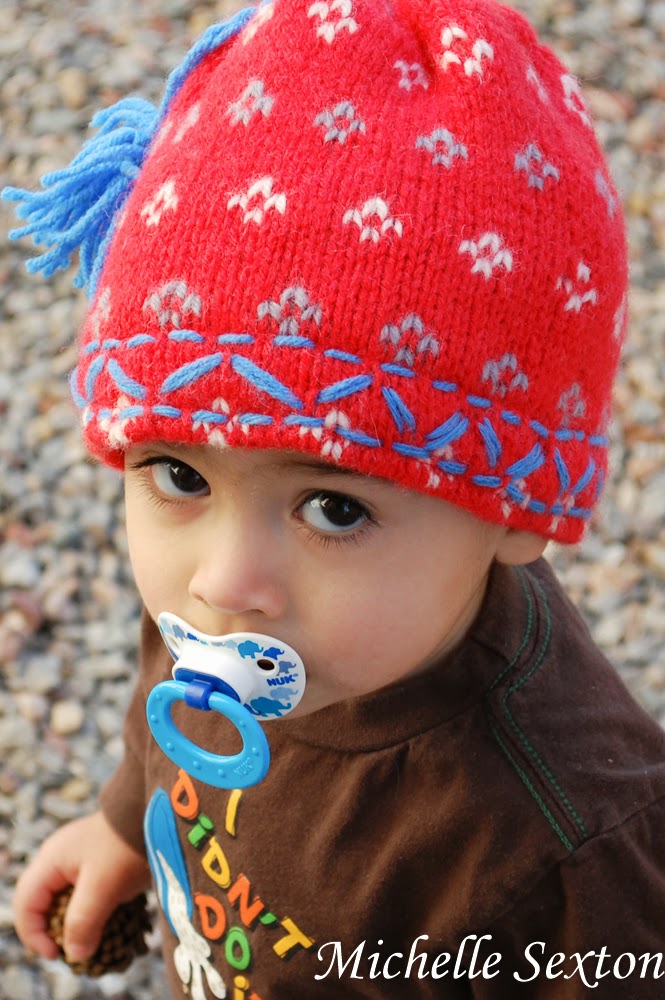
embroider a pattern on the brim

Double threaded a plastic needle with yarn, then "embroider" a cute pattern onto the "brim" of the hat.

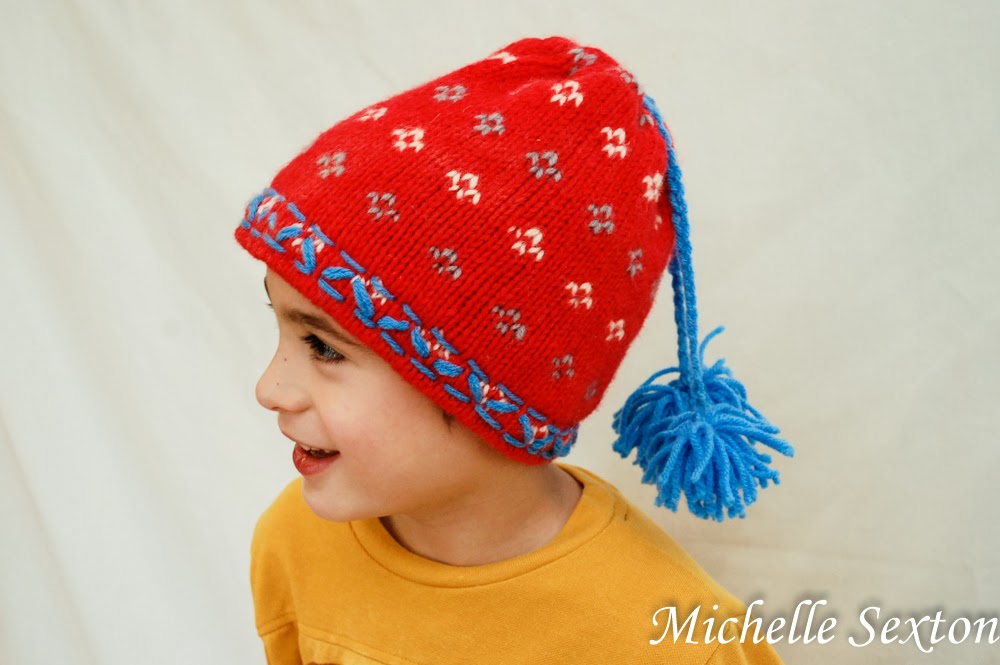
Make a beanie from a sweater sleeve with a minimal amount of sewing - click through and learn how

Easy way to convert a sweater sleeve into a beanie - click through and learn how

Wa-La! That's it! Easy-Peasy. Who would have ever thought to make a hat out of a sweater sleeve??
:)